This article is about "how to replace a line in file using ansible and seeing various other examples of ansible replace module". Ansible facilitates us with a dedicated module named as replace The working principle of this module is more like find and replace in your favourite editor and it also supports regular expressions.
There is one major difference between Ansible replace and Line in file.
The Ansible REPLACE module will replace all the instances of a matching string in a file, while Line in file module replaces a single instance,
If you are looking for changing a single instance of your match string consider using lineinfile module. Refer this Ansible Lineinfile examples for more information
Shortly put, Ansible REPLACE is to globally replace all the matching lines in a file with the String you have provided, on other hand LINEINFILE is to replace a matching string in a Single line Mostly First or Last appearance
In this post, we are going to see various examples of ansible replace module framed as playbooks and we have also given the execution outputs of the same.
Ansible Replace module - A Quick Summary
Ansible Replace module
- Used to replace ALL instances of a matching String in a file ( Can be used to modify a Single Instance if you are sure that the destination file have only one matching string)
- More like Find All and Replace All
- Backup Option is available Before modifying the file
- Support Regular Expressions to Find a String
- Supports replacing before and after a Matching String/line
- Supports Replacing between two matching Strings or lines or two expressions using before and after at the same time.
- Back References (Backrefs) are supported
- Fail if the file is not available
- Support for Validating the changes
Ansible replace in Action
In this chapter, we are going to take a quick overview of replace module and how it works and how it can be used for your requirements, it can be considered as more of an elevator pitch. In this we will cover the basic but indispensable key elements of ansible replace module
You can find more examples of ansible replace in the next chapter.
For now. Lets march on.
A quick introduction to Regular Expressions and Why it is necessary
If you are any of Dev or Ops person. I bet you might have come across these term called Regular expressions.
as per Wikipedia Regular Expression is
A regular expression, regex or regexp (sometimes called a rational expression) is a sequence of characters that define a search pattern. Usually this pattern is used by string searching algorithms for "find" or "find and replace" operations on strings, or for input validation. It is a technique that developed in theoretical computer science and formal language theory.
Whenever you want to Search something programmatically, There is 90% of chances that you might need a Simple to Complex regular expressions.
Some of the Simple Regular Expressions and their purposes are given below.
click to expand
| Regular Expression | Test String | Match/No Match | Explanation |
| ^ServerName | ServerName www.example.com | Match | ^ represents the start of a line and ServerName is a literal String to search |
| ^ServerName$ | ServerName www.example.com | No Match | Here $ represents end of a line. As per the regex, the line should immediately end of a String ServerName which is not true in Test String. |
| ^ServerName.* | ServerName www.example.com | Match | Here .* is the newly added expression, The . (period/dot) matches any character/number and * matches Zero or more of the preceding expression. Means anything after ServerName ( but in the same line) |
The reason why we are insisting on the regular expression is. A Good Regular Expression can get you the String what you are searching for. It is a must that we know HOW TO SEARCH before searching for something, It is true if we are searching for A word or a string or a line or something in life 🙂
Regular Expression is the tool when ansible replace is your workshop.
Now the question is where will go and learn and test regular expressions. Is there any better way than wandering around and failing multiple times to get a perfect regex expression.
yes, there is.
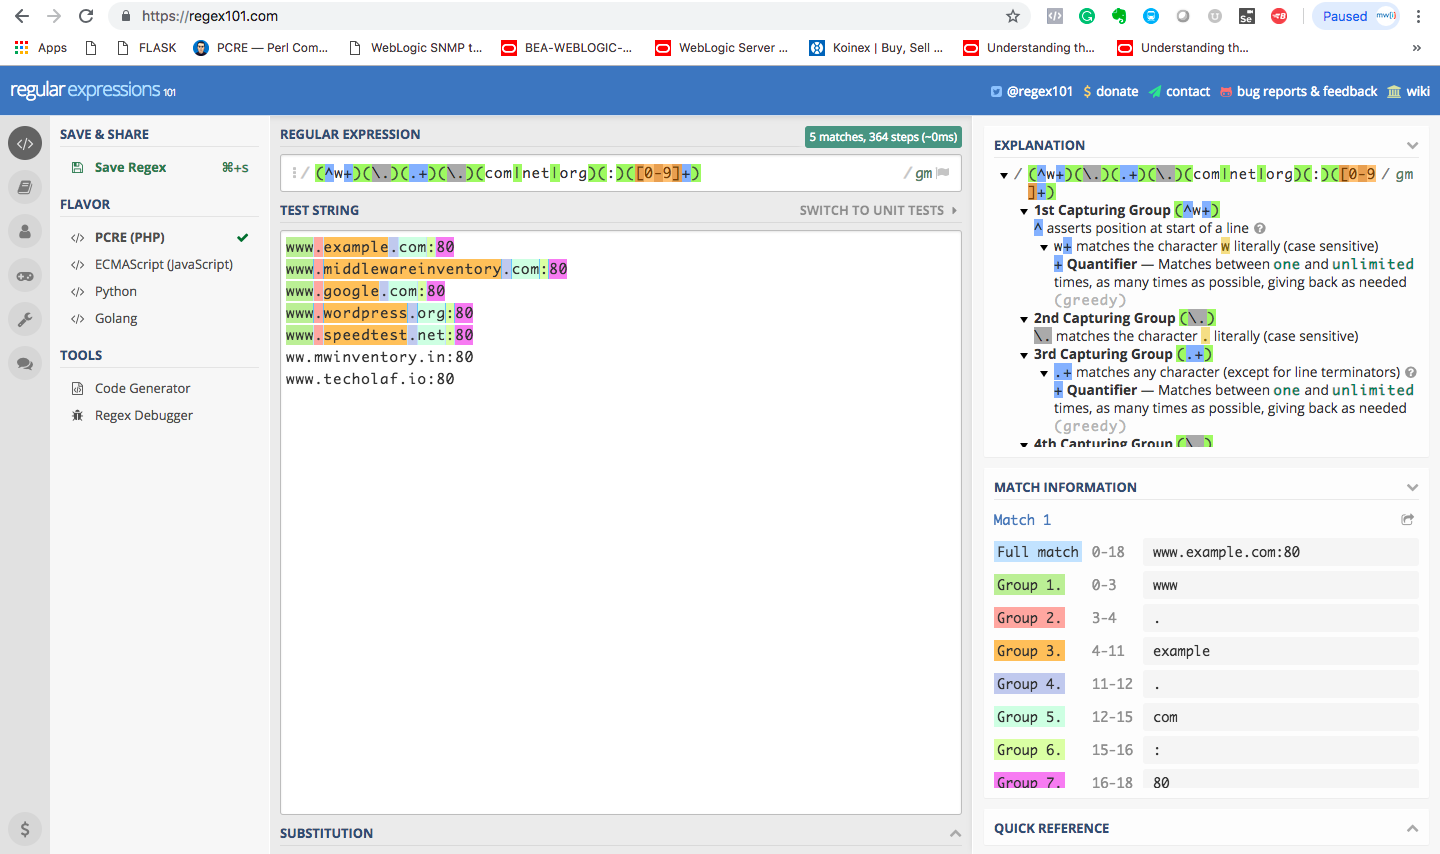
Write and Test your Regular Expressions on the Go
Meet REGEX 101 A website to write and test a regular expression like a PRO but at free of cost
Regex 101 have been my life saviour for years now. If you are not already aware, go ahead and try it now. You would blame yourself for not knowing this so far.
A Simple Screenshot that explains all. You can see everything, what you are looking for.
Back to the track.
Sample Playbook with replace module to replace a line in file
This is the playbook we are going to use and add more features and changes as we proceed. This is to change the domain name of the Apache Virtual host from old domain to a new domain.
---
  - name: Replace line in file examples
    hosts: web
    tasks:
    - name: "Replace line in file examples"
      become: yes
      become_user: root
      replace:
        path: /etc/httpd/conf/httpd.conf
        regexp: '(^ServerName\s)(.*)$'
        replace: '\1www.newdomain.com'
        backup: yes
Explanation of playbook
path: A file name in which we are going to find and replace
regexp: the regular expression to search the string you want
In our case,
() - Grouping of Regular Expression and to create backreferences, which will make it easy to perform backreference while replacing.
^ - Matches the Start of a Line
ServerName - Matches a Literal String
\s - Matches a whitespace
.* - matches one or more of any character/numeral ( not new line)
$ - matches the end of line
replace: A string, with which you want to replace the matched String
In our case,
\1 - backreference indicator and represents the first group we have matched. in our case, it is the result of (^ServerName\s)
backup: To tell ansible to backup the file before making any changes.
Validating the Changes before committing
Replace module bundled with a cool feature with that you can actually validate the changes before committing the changes onto the file.
Consider the same example we have given above which is changing the domain name. Let us see how can we validate it before making the changes in to /etc/httpd/conf file.
If you are not aware, Ansible would not directly work with the destination file. It will clone it and keep the file in ansible_temp directory once the changes are completed it will copy the file over and replace the destination file with this working copy.
With that said, Now you know, how it is possible to validate your changes before it actually goes into your destination file.
This is the same playbook with validate parameter added
---
  - name: Replace line in file examples
    hosts: web
    tasks:
    - name: "Replace line in file apache conf"
      become: yes
      become_user: root
      replace:
        path: /etc/httpd/conf/httpd.conf
        regexp: '(^ServerName\s)(.*)$'
        replace: '\1www.newdomain.com'
        backup: yes
        validate: apachectl -f %s -t
Here %s represents the temp or working copy of the destination file
Let us make some mistake intentionally to examine how this validate is working. In order to do that, I am changing a Single line from the preceding playbook
# Final String is "ServerName www.newdomain.com"
replace: '\1www.newdomain.com'
to
# Final String is "www.newdomain.com"
replace: 'www.newdomain.com'
In the replace field, we are taking the reference indicator out. which will remove the String ServerName from the config file and ansible is supposed to throw an error and the playbook will fail if the validate command is returning a NON ZERO return code.
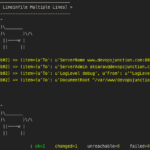
$ ansible-playbook AnsibleWorkSpace/replace-ex1.yml -i ansible_hosts

PLAY [Replace line in file examples] ********************************************************************************************************

TASK [Gathering Facts] **********************************************************************************************************************
ok: [mwiweb02]

TASK [Replace line in file apache conf] ********************************************************************************************************
fatal: [mwiweb02]: FAILED! => {"changed": false, "msg": "failed to validate:
rc:1 error:AH00526: Syntax error on line 95 of
/home/vagrant/.ansible/tmp/ansible-tmp-1549278281.07-220158736541166/tmp6LJx9x:\n
Invalid command 'www.newdomain.com', perhaps misspelled or defined by a module not included
in the server configuration\n"}
        to retry, use: – limit @/apps/vagrant/webinfra/AnsibleWorkSpace/replace-ex1.retry

PLAY RECAP **********************************************************************************************************************************
mwiweb02                   : ok=1    changed=0    unreachable=0    failed=1
You can see the temp file name with the validation failure note /home/vagrant/.ansible/tmp/ansible-tmp-1549278281.07-220158736541166/tmp6LJx9x
Ansible Replace Examples
- Replace all the Instances of a Matching String in a file
- Replacing string AFTER the Matching Expression till the End Of File
- Start Replacing BEFORE the Matching Expression up to the Beginning of File
- Replacing the String Between matching Expressions (or) Using BEFORE and AFTER together in ansible replace
Setting the Context
Before going to the examples, we need some common file which we can use for all the upcoming examples. So I have taken the famous FOX and GRAPE story and placed it as a web page in default doc root/var/www/html of apache web server.
Now here is how it looks like at the browser
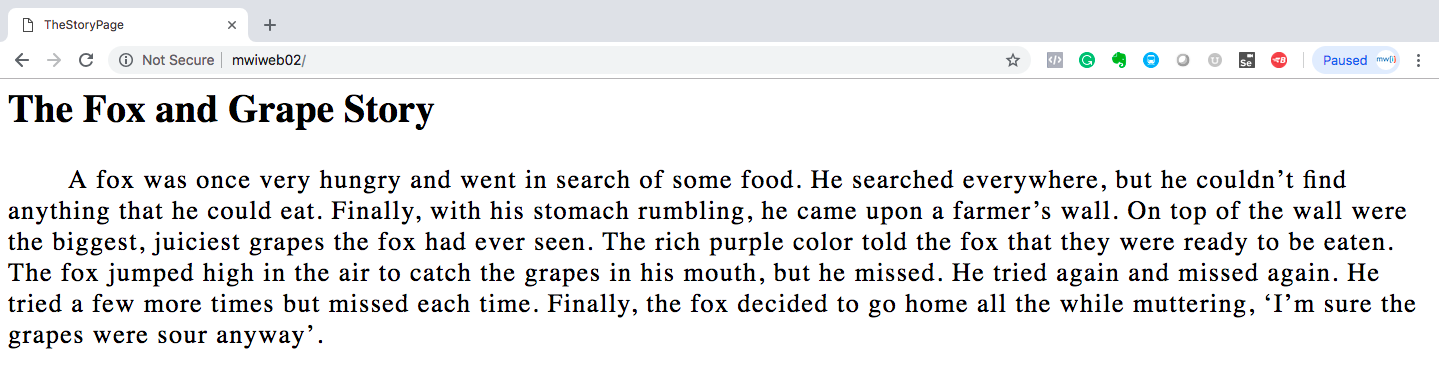
The Html page - Click to expand
<html>
<head>
<title>TheStoryPage</title>
</head>
<body style="
    font-family: serif;
    font-size: 26px;
">

<h2> The Fox and Grape Story </h2>
<p style="
    text-indent: 60px;
    letter-spacing: 1.5px;
    font-size: 26px;
">

A fox was once very hungry and went in search of some food. He searched everywhere, but he couldn’t find anything that he could eat. Finally, with his stomach rumbling, he came upon a farmer’s wall. On top of the wall were the biggest, juiciest grapes the fox had ever seen. The rich purple color told the fox that they were ready to be eaten. The fox jumped high in the air to catch the grapes in his mouth, but he missed. He tried again and missed again. He tried a few more times but missed each time. Finally, the fox decided to go home all the while muttering, ‘I’m sure the grapes were sour anyway’.
</p>


</body>
</html>
As we have set the plot lets begin the play.
Replace all the Instances of a Matching String in a file
we are going to take the same FOX and GRAPE Story html page for this example and let us replace all the instances of the word "fox" with "raccoon"
Come, let us create a new Story. The Racoon and Grape !.
Let us see how to do the same with ansible replace module. If you are following along, you know that I am using the apache web server and the story is inside the html page at /var/www/html/index.html
The Playbook
In the following playbook, we have used the Handlers to restart the apache upon the replace task completion. It is more like a function.
You can relate it like this, When Handlers is a function definition, notify is a function invocation or function call.
---
  - name: Replace line in file examples
    hosts: web

    handlers:
      - name: restart apache
        become: yes
        become_user: root
        service: name=httpd state=restarted

    tasks:
    - name: "Replace line in file examples"
      become: yes
      become_user: root
      replace:
        path: /var/www/html/index.html
        regexp: '[F|f]ox'
        replace: 'racoon'
        backup: yes
      notify: restart apache
In the regexp section, we have used [F|f]ox which is to match both Fox and the fox. The usual case sensitive stuff.
The Execution Output
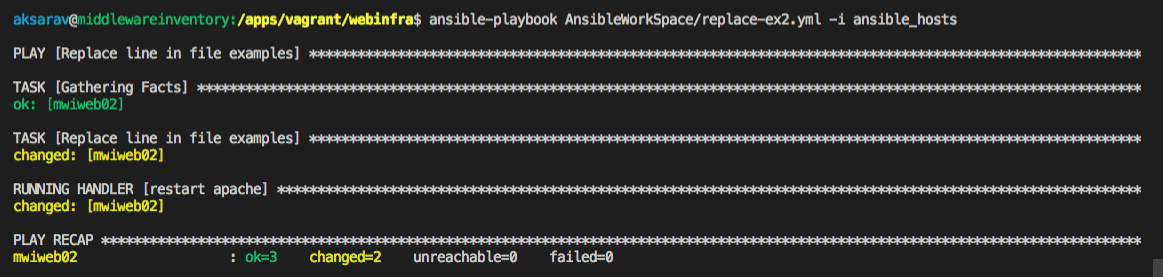
The HTML Page result after the Replacements
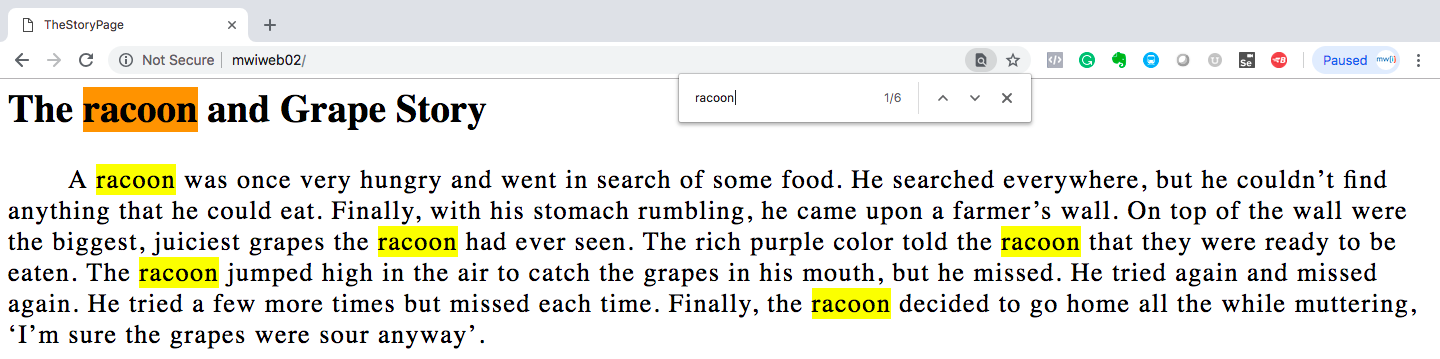
From the preceding Snapshot of the web page. you can understand how the ansible replace module is working. It finds all and replaces them all, as simple as that.
Before proceeding to the next example. Let me roll back my changes and make the racoon story as a Fox Story. A Quick Reset. I can do it either with replacing module as well (racoon to fox) or in the host, I can take the backed up file and copy it over the current.
Replacing string AFTER the Matching Expression till the End Of File
We need a new plan or a requirement, As this is a little tricky but the most usual requirement.
We are going to rewrite the story once again and going to name the fox as fofo. The following Snapshot could help you understand the same, I hope.
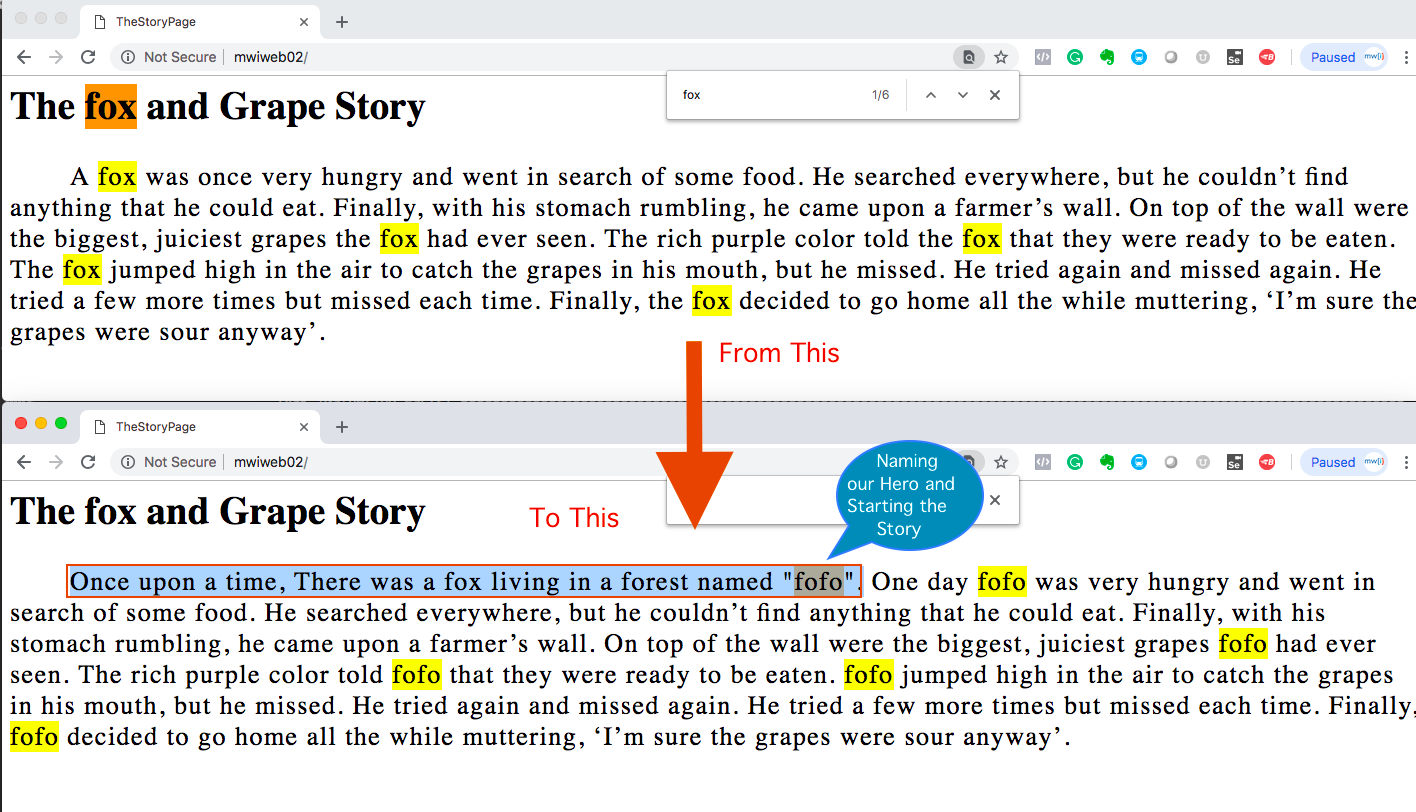
As you can see we are going to do two things to get the expected story at the bottom
- Adding a new Hero introduction lines at the start of story (Highlighted in Blue background)
- Replace all the presence of fox with fofo
- While doing this, we have to leave the title untouched. It should remain having a fox not fofo.
- Should replace "The fofo" with "fofo" so it sounds grammatically correct.
Complex, is not it? Not if we split it into small tasks, after all thats what ansible suggests us to do.
Here is the Playbook to accomplish the same
---
  - name: Replace line in file examples
    hosts: web

    handlers:
      - name: restart apache
        become: yes
        become_user: root
        service: name=httpd state=restarted

    tasks:

    - name: "Replacing all fox with fofo - Leaving the title untouched"
      become: yes
      become_user: root
      replace:
        path: /var/www/html/index.html
        regexp: 'fox'
        replace: 'fofo'
        after: "The fox and Grape Story"
        backup: yes

    - name: "Naming our Hero and introduction line"
      become: yes
      become_user: root
      replace:
        path: /var/www/html/index.html
        regexp: 'A fofo was once'
        replace: 'Once upon a time, There was a fox living in a forest named "fofo". One day fofo was'
        backup: yes

    - name: "Grammatical correction - The fofo to fofo"
      become: yes
      become_user: root
      replace:
        path: /var/www/html/index.html
        regexp: '[T|t]he fofo'
        replace: 'fofo'
        backup: yes
      notify: restart apache
In the preceding playbook, You can see we have left the title unchanged with the help of after parameter in the replace module ( highlighted in yellow font colour)
One more reset back to the Normal Fox and Grape Story before the further example.
Start Replacing BEFORE the Matching Expression up to the Beginning of File
For this example also we need a new requirement and here is what I have come up with.
We are going to change the Headline of the Story and add some color formatting to it. The following diagram would help you understand our requirement
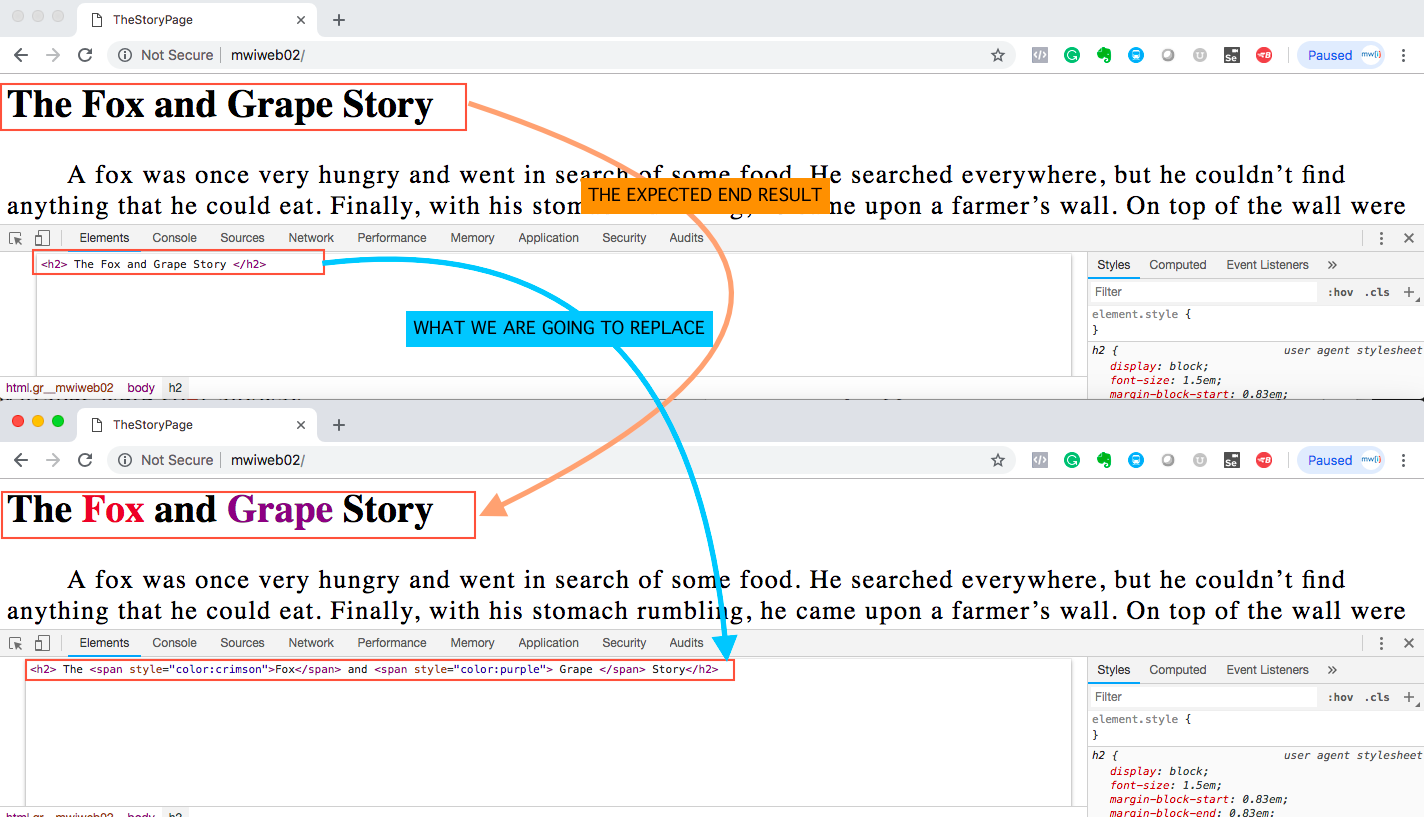
We are basically going to replace the <h2> tag and add some <span> elements to it to change the color of the words Fox and Grape
But our Search String remains just the word Fox and Grape
Here is the playbook to accomplish the same and we are going to use before in this example ( Just to change the color of the words Fox and Grape only in the headline, Not in the Story)
The Playbook
---
  - name: Replace line in file examples
    hosts: web

    handlers:
      - name: restart apache
        become: yes
        become_user: root
        service: name=httpd state=restarted

    tasks:

    - name: "Replacing the Fox with Formatting only in headline before closing of H2"
      become: yes
      become_user: root
      replace:
        path: /var/www/html/index.html
        regexp: '[F|f]ox'
        replace: '<span style="color:crimson">Fox</span>'
        before: "</h2>"
        backup: yes

    - name: "Replacing the Grape with Formatting only in headline before closing of H2"
      become: yes
      become_user: root
      replace:
        path: /var/www/html/index.html
        regexp: '[G|g]rape'
        replace: '<span style="color:purple"> Grape </span>'
        before: "</h2>"
        backup: yes
      notify: restart apache
You can see the before parameter is having the closing element of the H2 tag. In this way we are Restricting the change to happen only in the headline.
Anyways for our next example, we are going to need all of the Fox and Grape be replaced with the color formatting.
To do this, You just have to remove the before parameter from the Playbook. It will replace all the instance across the HTML page. I will let you do it, so you will get some exposure. Your end result should be like the following.
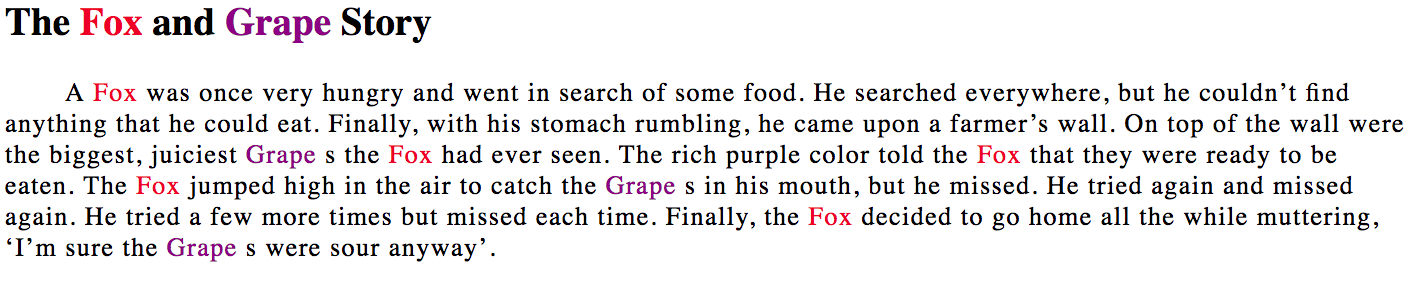
In the preceding Snapshot, you can see all the instances of the word Fox and Grape has been replaced with Color formatting
Replacing the String Between matching Expressions (or) Using BEFORE and AFTER together in ansible replace
As the title of this example states, we are going to use Before and After Together in the same replace task to achieve replacing between two matching expressions.
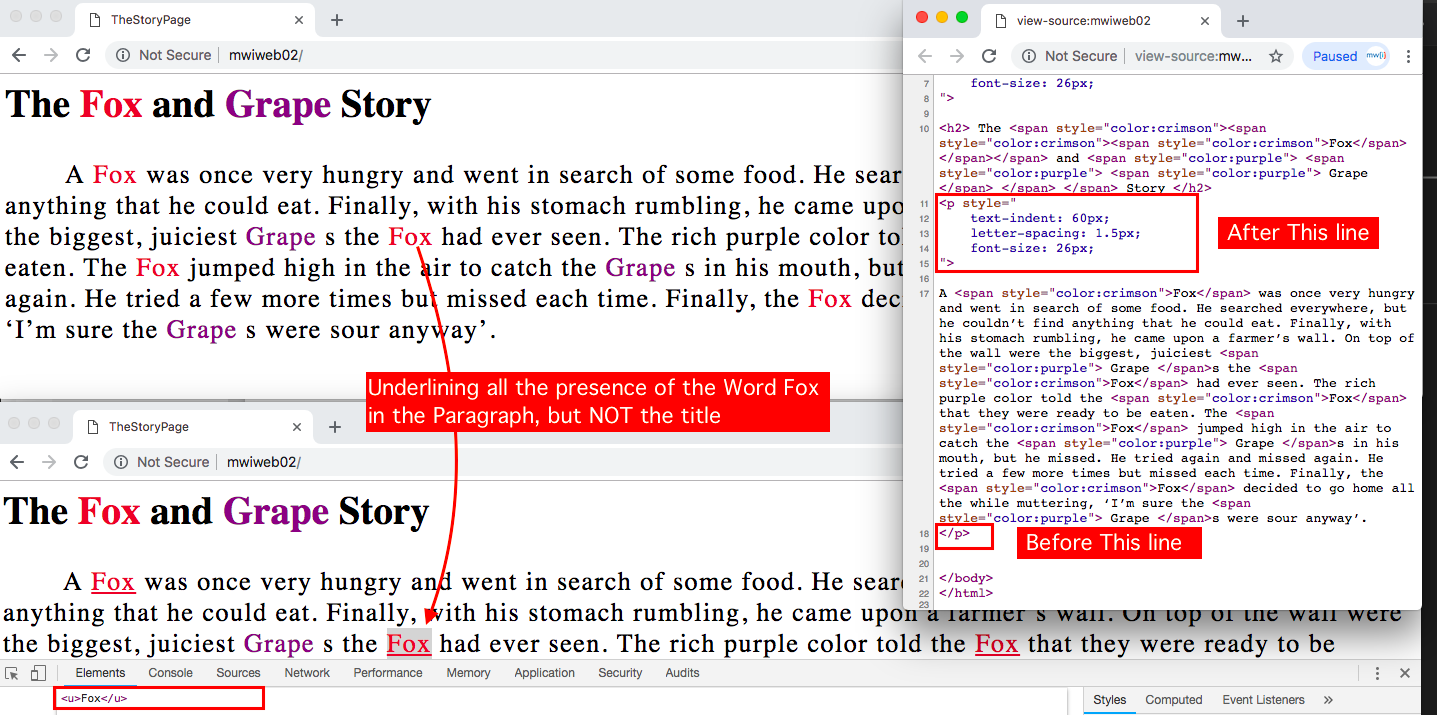
Let us set some requirement first, The Requirement for this example is to underline the word Fox only in the Story but not in the Headline.
So we are going to set the opening of <p> tag as our start line(after) and the closing tag of </p>(before) as our end line
The preceding illustration could help you understand it even better
The Playbook
---
  - name: Replace line in file examples
    hosts: web

    handlers:
      - name: restart apache
        become: yes
        become_user: root
        service: name=httpd state=restarted

    tasks:
    - name: "Replacing the Fox in the Story with Underline formatting"
      become: yes
      become_user: root
      replace:
        path: /var/www/html/index.html
        regexp: '[F|f]ox'
        replace: '<u>Fox</u>'
        # Matches the Start of P tag
        after: '<p\s[.|\w|=|\"|\r|\n|\s|\-|:|;]*>'
        # Matches the End of P tag
        before: '</p>'
        backup: yes
      notify: restart apache
Hope you would find this article helpful. Feel free to contact me for help and support over the comments section.
Rate this article [ratings]
Cheers,
Sarav AK

Follow me on Linkedin My Profile Follow DevopsJunction onFacebook orTwitter For more practical videos and tutorials. Subscribe to our channel
Signup for Exclusive "Subscriber-only" Content