In this article, we will discuss how to use Ansible to automate CloudFlare DNS management.
Ansible has modules for almost everything and it includes Cloudflare the popular CDN and DNS provider
Since Cloudflare is part of the community.general collection of ansible - it is likely you would have it installed along with your Ansible installation
If not you can install the community.general module using the following command
ansible-galaxy collection install community.general
To check what modules are installed as part of the community general collection you can use the following command
ansible-doc -l -t module community.general
Having validated that your ansible has the Cloudflare module present you can move on to creating a Cloudflare API token
Creating CloudFlare API Token for Ansible
Ansible's Cloudflare module uses the Cloudflare API under the hood. For Authentication, it relies on the API key or API token
We are going to see how to create an API token in Cloudflare and use that token in the Ansible playbook
To create an API token. you can follow these steps on the Cloudflare dashboard
-
- Go to the MyProfile section of your account
- On the left navigation, you would find API tokens option
- Click on Create Token
- Upon clicking the Create Token, you would find pre-defined templates that you can choose from
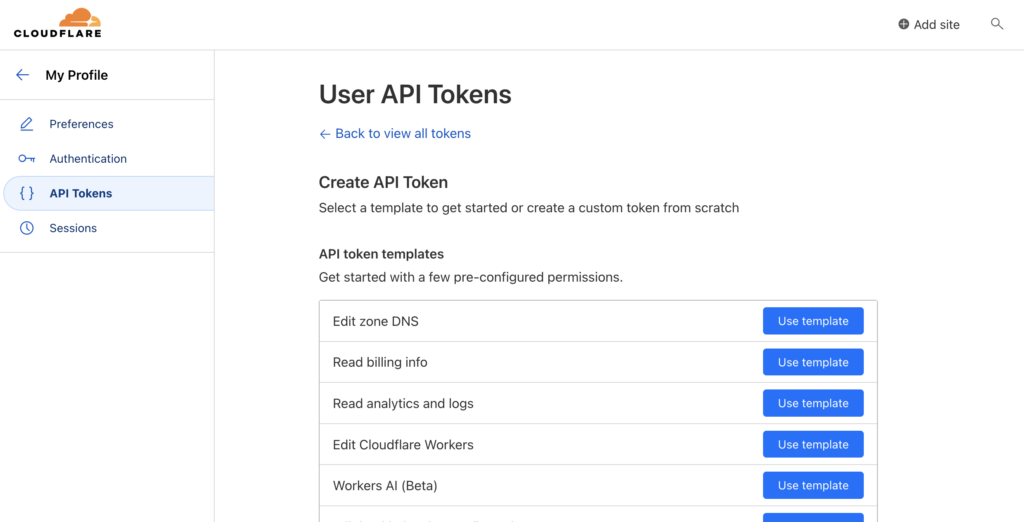
- You can click on use template button on the
Edit Zone DNS - You will see a wizard to select the domain ( zone resource) and IP filtering and TTL for the token.
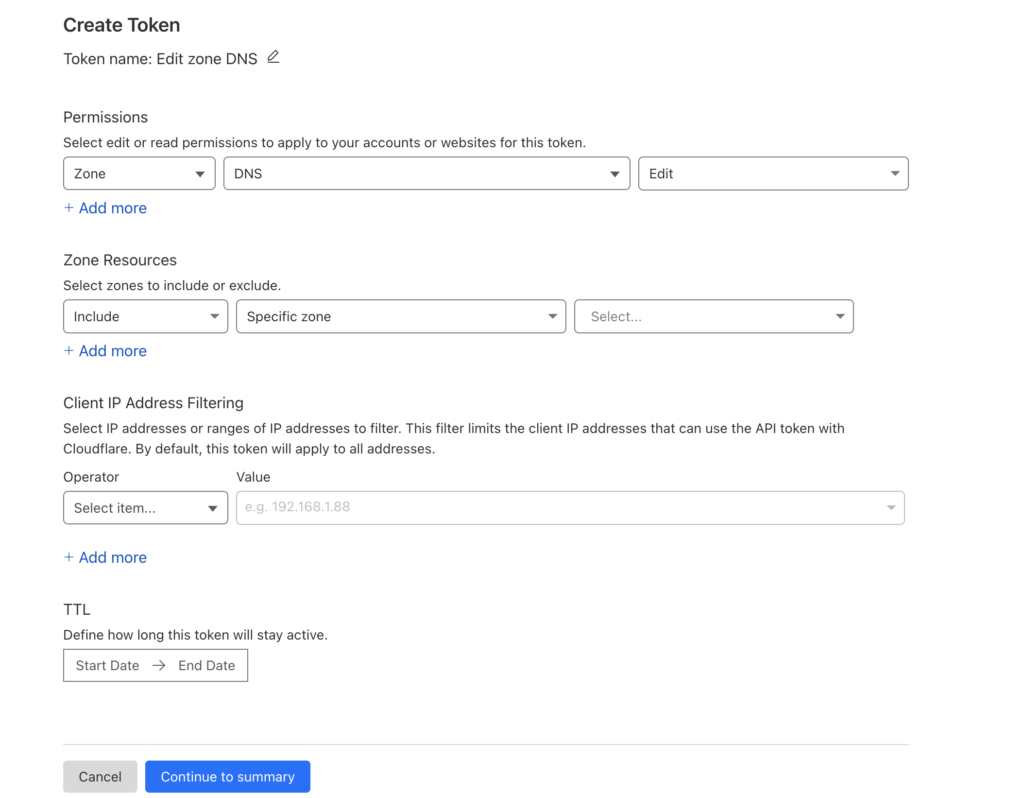
- Once you have completed entering the data. continue to summary and click on Create Token
- You will see the token now, copy it and secure it for future usage


Using Cloudflare API token in Ansible and Creating DNS Entries
I have created this playbook to help me add/update multiple CNAME records at a time, This reduces the manual errors and effort and is much faster than manual creation
- name: CloudFlare DNS update
  hosts: localhost
  tasks:
  - name: Add/Update DNS entry into signeasy.com DNS Zone
    community.general.cloudflare_dns:
      zone: signeasy.com
      type: CNAME
      name: "{{item.name}}"
      value: "{{item.value}}"
      proxied: false
      api_token: xxxxxxxxxxxxxxxxxxxxxxxxxxxxxxx
      state: present
    with_items:
      - { name: "app.gritfy.com", value: "d-xxxxxx.execute-api.us-east-1.amazonaws.com" }
      - { name: "api.gritfy.com", value: "d-xxxxx.execute-api.us-east-1.amazonaws.com" }
      - { name: "public.grify.com", value: "d-xxxxxx.execute-api.us-east-1.amazonaws.com" }
You can see we are using the module community.general.cloudflare_dns for this task lets decode the arguments of this module
- zone - Domain name
- type - Type of Record CNAME, A, MX, TXT etc
- name - Key for the record - full domain name that you want the users to see api.gritfy.com
- value - Where it points to, If it is A record it would be IP for CNAME it is another domain name, In our case it is API Gateway domain name
- proxied - If you are using CloudFlare manually you would be using this proxy pass - this instructs whether to enable proxy_pass or not
- api_token - the API token you created in the last step at Cloudflare
- state - present to create, absent to delete - Since we need to create, we must use present
- with_items: Syntax for passing the list of iterables to the task, In our example, you can see we are passing multiple entries of
nameandvalueto the task which is referred as jinja2 syntax{{item.name}}and{{item.value}}
This Cloudflare module offers many more options, but this could serve as a quick example and get you started.
Hope this helps
Cheers
Sarav AK

Follow me on Linkedin My Profile Follow DevopsJunction onFacebook orTwitter For more practical videos and tutorials. Subscribe to our channel
Signup for Exclusive "Subscriber-only" Content