In this article, we are going to see how to create a Linux Virtual machine and provision it using the Terraform remote execution strategy.
We are going to be using SSH method to connect to the Virtual machine and provision it on the go by executing some startup Shell script.
We would also be discussing how to copy a file to the Linux machine during the creation and use it for provisioning.

This would give you an idea of how to install software packages or products during the server creation and get it ready.
In this article, we will be using some Shell commands and Shell scripts as our provisioner. Our next article is on the making with Ansible playbook.
Stay connected and Let's jump right into the objective.
If you have used GCP, you know that google cloud (gcp) gcloud CLI is indispensable for administration and management.
So I presume that you have gcloud already installed and your profile is set up. If not, please read the article on how to set up gcloud before proceeding further.
For those of you wondering what to do by having a google-key.json file.
You can read this article on how to init gcloud with JSON
Connecting to GCP with Gcloud
Let's create a fresh google cloud project
$ gcloud projects create devopsjunction
Create in progress for [https://cloudresourcemanager.googleapis.com/v1/projects/devopsjunction].
Waiting for [operations/cp.8362603842155049958] to finish...done.
Enabling service [cloudapis.googleapis.com] on project [devopsjunction]...
Operation "operations/acf.p2-187067084280-818341eb-70b2-47c1-8ad2-253a172c23e1" finished successfully.
Set the project
$ gcloud config set project devopsjunction
Create a service account
$ gcloud iam service-accounts create dj-serviceaccount – description="service account for terraform" – display-name="terraform_service_account"
To verify if the service account has been created successfully. use the following command to list the service-accounts in the current project.
$ gcloud iam service-accounts list
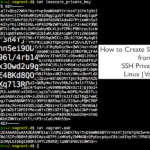
Next step is to create google key JSON file for this service account and this would help in connecting the terraform with Google Cloud.
$ gcloud iam service-accounts keys create ~/google-key.json – iam-account [email protected]

created key [a3ac3ab7eaf76d0355bcd12b1060100a47753043] of type [json] as [/Users/sarav/google-key.json] for [[email protected]]
As you can see in the preceding snippet, it would create a new key file named google-key.json
this JSON file is going to help us authenticate with Google cloud and enable us to integrate any automation tools like Terraform, Ansible to the GCP.
Enabling Compute Engine API
Before we proceed to create a Virtual machine. we must do some prerequisite
We need to enable Compute Engine API by visiting the APIs in Google Cloud console
Google Cloud has lot of APIs and they help us in managing and automating the GCP infrastructure.
For compute Engine.
you can use this URL and replace the project ID field with your valid project ID. it would directly take you there
https://console.developers.google.com/apis/library/compute.googleapis.com?project=<your project id>
It may ask you to set the billing account. (or) choose the billing account
Creating Terraform configuration files
Once all done with Gcloud. Our next task is to create the terraform configuration files.
Our terraform manifest is going to create few resources for us, I have listed them here.
- google_compute_firewall | firewall - this is to allow port 22 for SSH to the public ( set it to single IP for security purposes)
- google_compute_firewall | webserverrule - this is to create a firewall rule to allow port 80 and 443 required by NGINX
- google_compute_address | static - this is to reserve Static External IP for the VM we are about to create
- google_compute_instance | dev - this is where we are creating a virtual machine
These are all terraform resources, to know more about each of them you can use the terraform registry.
Here is the main terraform configuration file with the aforementioned resources.
Copy the following content and save in the name of main.tf
provider "google" {
  project = var.project
  region  = var.region
}

resource "google_compute_firewall" "firewall" {
  name    = "gritfy-firewall-externalssh"
  network = "default"

  allow {
    protocol = "tcp"
    ports    = ["22"]
  }

  source_ranges = ["0.0.0.0/0"] # Not So Secure. Limit the Source Range
  target_tags   = ["externalssh"]
}

resource "google_compute_firewall" "webserverrule" {
  name    = "gritfy-webserver"
  network = "default"

  allow {
    protocol = "tcp"
    ports    = ["80","443"]
  }

  source_ranges = ["0.0.0.0/0"] # Not So Secure. Limit the Source Range
  target_tags   = ["webserver"]
}

# We create a public IP address for our google compute instance to utilize
resource "google_compute_address" "static" {
  name = "vm-public-address"
  project = var.project
  region = var.region
  depends_on = [ google_compute_firewall.firewall ]
}


resource "google_compute_instance" "dev" {
  name         = "devserver"
  machine_type = "f1-micro"
  zone         = "${var.region}-a"
  tags         = ["externalssh","webserver"]

  boot_disk {
    initialize_params {
      image = "centos-cloud/centos-7"
    }
  }

  network_interface {
    network = "default"

    access_config {
      nat_ip = google_compute_address.static.address
    }
  }

  provisioner "remote-exec" {
    connection {
      host        = google_compute_address.static.address
      type        = "ssh"
      user        = var.user
      timeout     = "500s"
      private_key = file(var.privatekeypath)
    }

    inline = [
      "sudo yum -y install epel-release",
      "sudo yum -y install nginx",
      "sudo nginx -v",
    ]
  }

  # Ensure firewall rule is provisioned before server, so that SSH doesn't fail.
  depends_on = [ google_compute_firewall.firewall, google_compute_firewall.webserverrule ]

  service_account {
    email  = var.email
    scopes = ["compute-ro"]
  }

  metadata = {
    ssh-keys = "${var.user}:${file(var.publickeypath)}"
  }
}
In terraform variable declaration is necessary and all the variables must be declared.
Copy the following content and save in the name of variables.tf
variable "region" {
    type = string
    default = "us-central"
}
variable "project" {
    type = string
}

variable "user" {
    type = string
}

variable "email" {
    type = string
}
variable "privatekeypath" {
    type = string
    default = "~/.ssh/id_rsa"
}

variable "publickeypath" {
    type = string
    default = "~/.ssh/id_rsa.pub"
}
while this variable declaration can be done in the main.tf file itself. It is always a good practice to maintain a dedicated file, matching their purpose.
- Variable declaration - variables.tf
- Output specification - outputs.tf
- Provider related configuration - providers.tf
- Providers and their version dependencies - versions.tf
There is a one more file we need to create. that is terraform.tfvars file
This is to give values to the variables we have declared in the variables.tf file
project = "devopsjunction"
region = "us-central1"
user = "middlewareinvetory_gmail_com" # this should match the username set by the OS Login
email = "[email protected]"
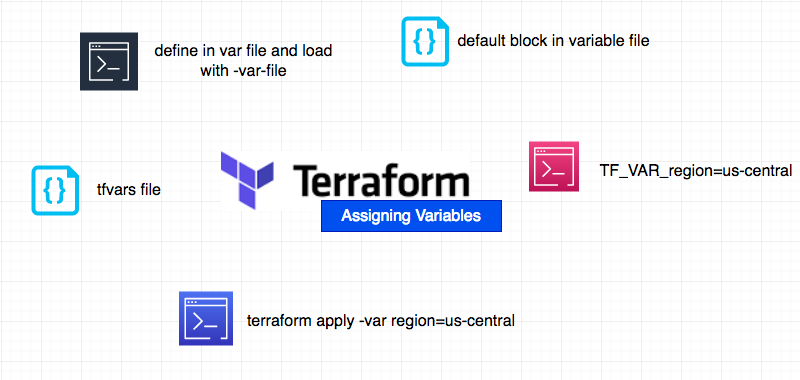
You might notice that we are not defining values for all the variables ,we have declared in the variables.tf file.
It is because some of these variables have their default values configured in the variables.tf file itself using the default block.
In fact, there are more ways to assign values to variable. as shown in the following picture
back to the topic, Now we have created all the Terraform configuration files required for us to create our Google compute engine - Virtual machine.
Decoding the Terraform manifest file main.tf
Before we proceed to create the Infrastrcuture, I must explain what is configured and what should be the expected result.
Let us review each block in the main.tf file
provider block - Start the gcp environment
this is to initialize the provider google by mentioning our project name and the region. we already did that in tfvars file
provider "google" {
  project = var.project
  region  = var.region
}
compute firewall block - Allow SSH and HTTP[S] connections
we are creating two firewall rules here.
- The Former is to allow SSH incoming connections from anyone/public.
- The Latter is to allow HTTP/HTTPS requests from anyone/public
This is done by setting the source_ranges to any CIDR range 0.0.0.0/0
you should consider using very specific IP range for security reasons.
If you want to allow only your computer not others. you can set your public IP as a value for the source_ranges like this 142.78.29.12/32
You can find your public IP using this URL https://checkip.amazonaws.com
the /32 is to specify a single IP in a CIDR range. so only your public IP would be considered
resource "google_compute_firewall" "firewall" {
  name    = "gritfy-firewall-externalssh"
  network = "default"

  allow {
    protocol = "tcp"
    ports    = ["22"]
  }

  source_ranges = ["0.0.0.0/0"] # Not So Secure. Limit the Source Range
  target_tags   = ["externalssh"]
}

resource "google_compute_firewall" "webserverrule" {
  name    = "gritfy-webserver"
  network = "default"

  allow {
    protocol = "tcp"
    ports    = ["80","443"]
  }

  source_ranges = ["0.0.0.0/0"] # Not So Secure. Limit the Source Range
  target_tags   = ["webserver"]
}
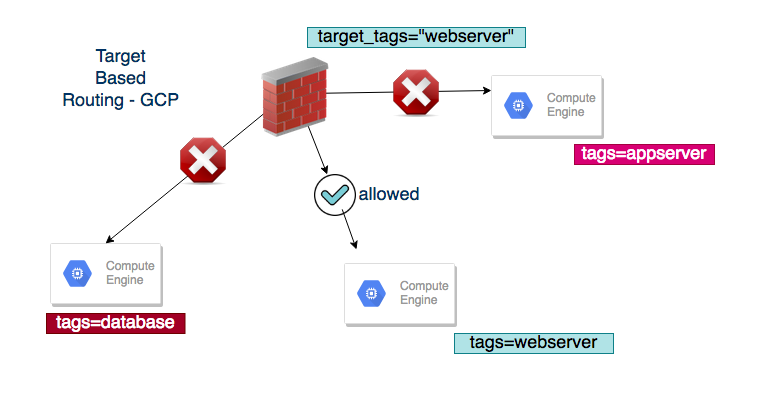
You might create multiple Virtual machines but how do you set this rule only for this instance or set of instances.
target_tags
Google provide a feature known as target_tags which helps us to map the VM to the firewall rule.
this rule would apply for the virtual machines which has the same tag as mentioned in the target_tags
Hope the following image illustrate this right.
compute address block - Reserving public IP
In this block, we are reserving a public IP for our instance.
Though, this is not necessary and GCP would auto assign some public IP automatically. we need this address for our provisioning.
this IP address would be used for establishing a SSH connection and to run the provisioning scripts like Ansible playbooks , Shell scripts etc.
resource "google_compute_address" "static" {
  name = "vm-public-address"
  project = var.project
  region = var.region
  depends_on = [ google_compute_firewall.firewall ]
}
compute instance block - Creating VM and provision with Shell commands
So far we were creating supporting resources like firewall and public IP for our instance/vm.
This is a showstopper where we create the actual instance and configure it.
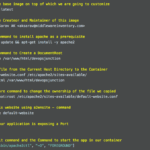
Since there are lot of components in this block. I will paste the block and add comments inline.
Please follow along and ask if you have any questions over the comments section
resource "google_compute_instance" "dev" {
  name         = "devserver" # name of the server
  machine_type = "f1-micro" # machine type refer google machine types
  zone         = "${var.region}-a" # `a` zone of the selected region in our case us-central-1a
  tags         = ["externalssh","webserver"] # selecting the vm instances with tags

  # to create a startup disk with an Image/ISO.
  # here we are choosing the CentOS7 image
  boot_disk {
    initialize_params {
      image = "centos-cloud/centos-7"
    }
  }

  # We can create our own network or use the default one like we did here
  network_interface {
    network = "default"

    # assigning the reserved public IP to this instance
    access_config {
      nat_ip = google_compute_address.static.address
    }
  }

  # This is copy the the SSH public Key to enable the SSH Key based authentication
  metadata = {
    ssh-keys = "${var.user}:${file(var.publickeypath)}"
  }

  # to connect to the instance after the creation and execute few commands for provisioning
  # here you can execute a custom Shell script or Ansible playbook
  provisioner "remote-exec" {
    connection {
      host        = google_compute_address.static.address
      type        = "ssh"
      # username of the instance would vary for each account refer the OS Login in GCP documentation
      user        = var.user
      timeout     = "500s"
      # private_key being used to connect to the VM. ( the public key was copied earlier using metadata )
      private_key = file(var.privatekeypath)
    }

    # Commands to be executed as the instance gets ready.
    # installing nginx
    inline = [
      "sudo yum -y install epel-release",
      "sudo yum -y install nginx",
      "sudo nginx -v",
    ]
  }

  # Ensure firewall rule is provisioned before server, so that SSH doesn't fail.
  depends_on = [ google_compute_firewall.firewall, google_compute_firewall.webserverrule ]

  # Defining what service account should be used for creating the VM
  service_account {
    email  = var.email
    scopes = ["compute-ro"]
  }


}
So, Now we have all files ready and in place for us to be able to create our infrastructure.
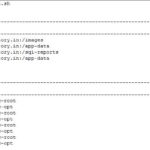
here is the tree structure of my directory. with all three necessary files.
.
├── main.tf
├── terraform.tfvars
└── variables.tf
Before we go ahead and terraform plan and terraform apply it.
Let us check one more version of this same setup.
Creating VM and provision with Shell script - Remote Exec
So far we have seen how to create virtual machine in Google Cloud with terraform and run some inline Shell commands during startup.
What if you want to execute a shell script instead of some inline commands
These are the steps we should do to make it happen.
- Copy the shell script to the instance
- Execute the script
So we are going to use file and remote-exec provisioners of Terraform to achieve this.
the file provisioner's job is to copy the shell script file to the newly created VM.
remote-exec set the script as executable and start it up using inline shell commands.
Here is the modified terraform configuration file with these provisioners
provisioner "file" {

   # source file name on the local machine where you execute terraform plan and apply
   source      = "startupscript.sh"

   # destination is the file location on the newly created instance
   destination = "/tmp/startupscript.sh"

   connection {
     host        = google_compute_address.static.address
     type        = "ssh"
     # username of the instance would vary for each account refer the OS Login in GCP documentation
     user        = var.user
     timeout     = "500s"
     # private_key being used to connect to the VM. ( the public key was copied earlier using metadata )
     private_key = file(var.privatekeypath)
   }

   # Commands to be executed as the instance gets ready.
   # installing nginx
   inline = [
     "chmod a+x /tmp/startupscript.sh",
     "sed -i -e 's/\r$//' /tmp/startupscript.sh",
     "sudo /tmp/startupscript.sh"
   ]
 }


 # to connect to the instance after the creation and execute few commands for provisioning
 # here you can execute a custom Shell script or Ansible playbook
 provisioner "remote-exec" {
   connection {
     host        = google_compute_address.static.address
     type        = "ssh"
     # username of the instance would vary for each account refer the OS Login in GCP documentation
     user        = var.user
     timeout     = "500s"
     # private_key being used to connect to the VM. ( the public key was copied earlier using metadata )
     private_key = file(var.privatekeypath)
   }

   # Commands to be executed as the instance gets ready.
   # set execution permission and start the script
   inline = [
     "chmod a+x /tmp/startupscript.sh",
     "sed -i -e 's/\r$//' /tmp/startupscript.sh",
     "sudo /tmp/startupscript.sh"
   ]
 }
as a prerequisite, we should make sure that the source location and the script names are valid
In our example, we are going to keep the script file on the same directory where our terraform configuration files are present
here is the tree structure of my directory. ( new script file added )
.
├── main.tf
├── startupscript.sh
├── terraform.tfvars
└── variables.tf
How to download this terraform project from Github.
I have created a Github repo for this code and committed two branches
https://github.com/AKSarav/gcp-vm-remote-execution.git
The First approach of having inline commands and remote execution can be cloned from the inline branch
git clone -b inline https://github.com/AKSarav/gcp-vm-remote-execution.git
The second approach with Shell script can be downloaded/cloned using the ShellScript branch
git clone -b ShellScript https://github.com/AKSarav/gcp-vm-remote-execution.git