Elastic Cache Redis is one of the most used AWS managed services so no implementation and backup and maintenance hassles but at times you might need to some monitoring or auditing.
Let's suppose you want to list all the connections to the REDIS cache to find out which applications are using a particular Elastic Cache Redis Cluster.
In this article, we are going to cover how to List connections and their info in any Elastic Cache Redis instance.
There are two recommended ways to connect to Redis server - Elastic Cache
- redis-cli - Command line interface
- RedisInsight - Graphical interface
In this example we are going to use redis-cli as our requirement is simple. we will try to cover RedisInsight in another article with more details.
We are also going to see one more way to list the connections using VPC flow Logs
Get the connection URL of ElasticCache
As you might already know Elastic Cache Redis comes with node architecture with one primary node and one or more replica nodes.
Redis in Elastic Cache comes in two types of Engine
- Standard Redis Engine
- Clustered Redis Engine
you can find if it is clustered or standard by the mode displayed on the dashboard or by the connection URL itself
Cluster Redis would have a string cluster in it
gritfy-service-cluster.qpiqep.clustercfg.use1.cache.amazonaws.com:6379
Standard Redis would not have a cluster string
gritfy-broker.qpiqep.ng.0001.use1.cache.amazonaws.com:6379
the default port would be 6379
Once you have obtained the endpoint information you can connect to it using redis-cli ( I presume you have installed redis-cli already)
Validate if the network is open and Endpoint is listening
Now you know the Endpoint of your redis elastic cache cluster.
If you are waiting for your redis-cli to be downloaded, you can validate if the network is open and the endpoint is listening using any of the following tools
- telnet
- nc - netcat
- nmap
this is to validate, Network connection and security group are permissive.
telnet <redis-elasticcache-endpoint>:6379
or you can use
nc -w 3 -v <redis-elasticcache-endpoint> 6379
At an advanced level if you want to check if there is a firewall block you can use nmap
nmap -Pn -p 6379 <redis-elasticcache-endpoint>
This can help you in your troubleshooting as well.
Having validated the network is good and you are able to establish a connection.
Let's use redis-cli now and connect to elastic cache
Connect using redis-cli - Listing the Connections
once you have installed the redis-cli you can simply type the following command and be able to connect to it
the process is the same for both clustered Redis or a standard one as long as you are using the right endpoint.
redis-cli -h gritfy-service-cluster.qpiqep.clustercfg.use1.cache.amazonaws.com -p 6379
By default elasti cache does not have any security attached like logging in for the same reason it would be available in your local VPC
So if you are trying to connect from within VPC using VPN or from another server. you would be able to connect easily.
Once you are connected.
you can issue the command CLIENT LIST
It would show the list of clients connected right now to the Redis elastic cache.
the result would also container the private IP of the originating machines which would be helpful for you to find out which Function/EC2 instance or application is connecting to this
here is the sample output
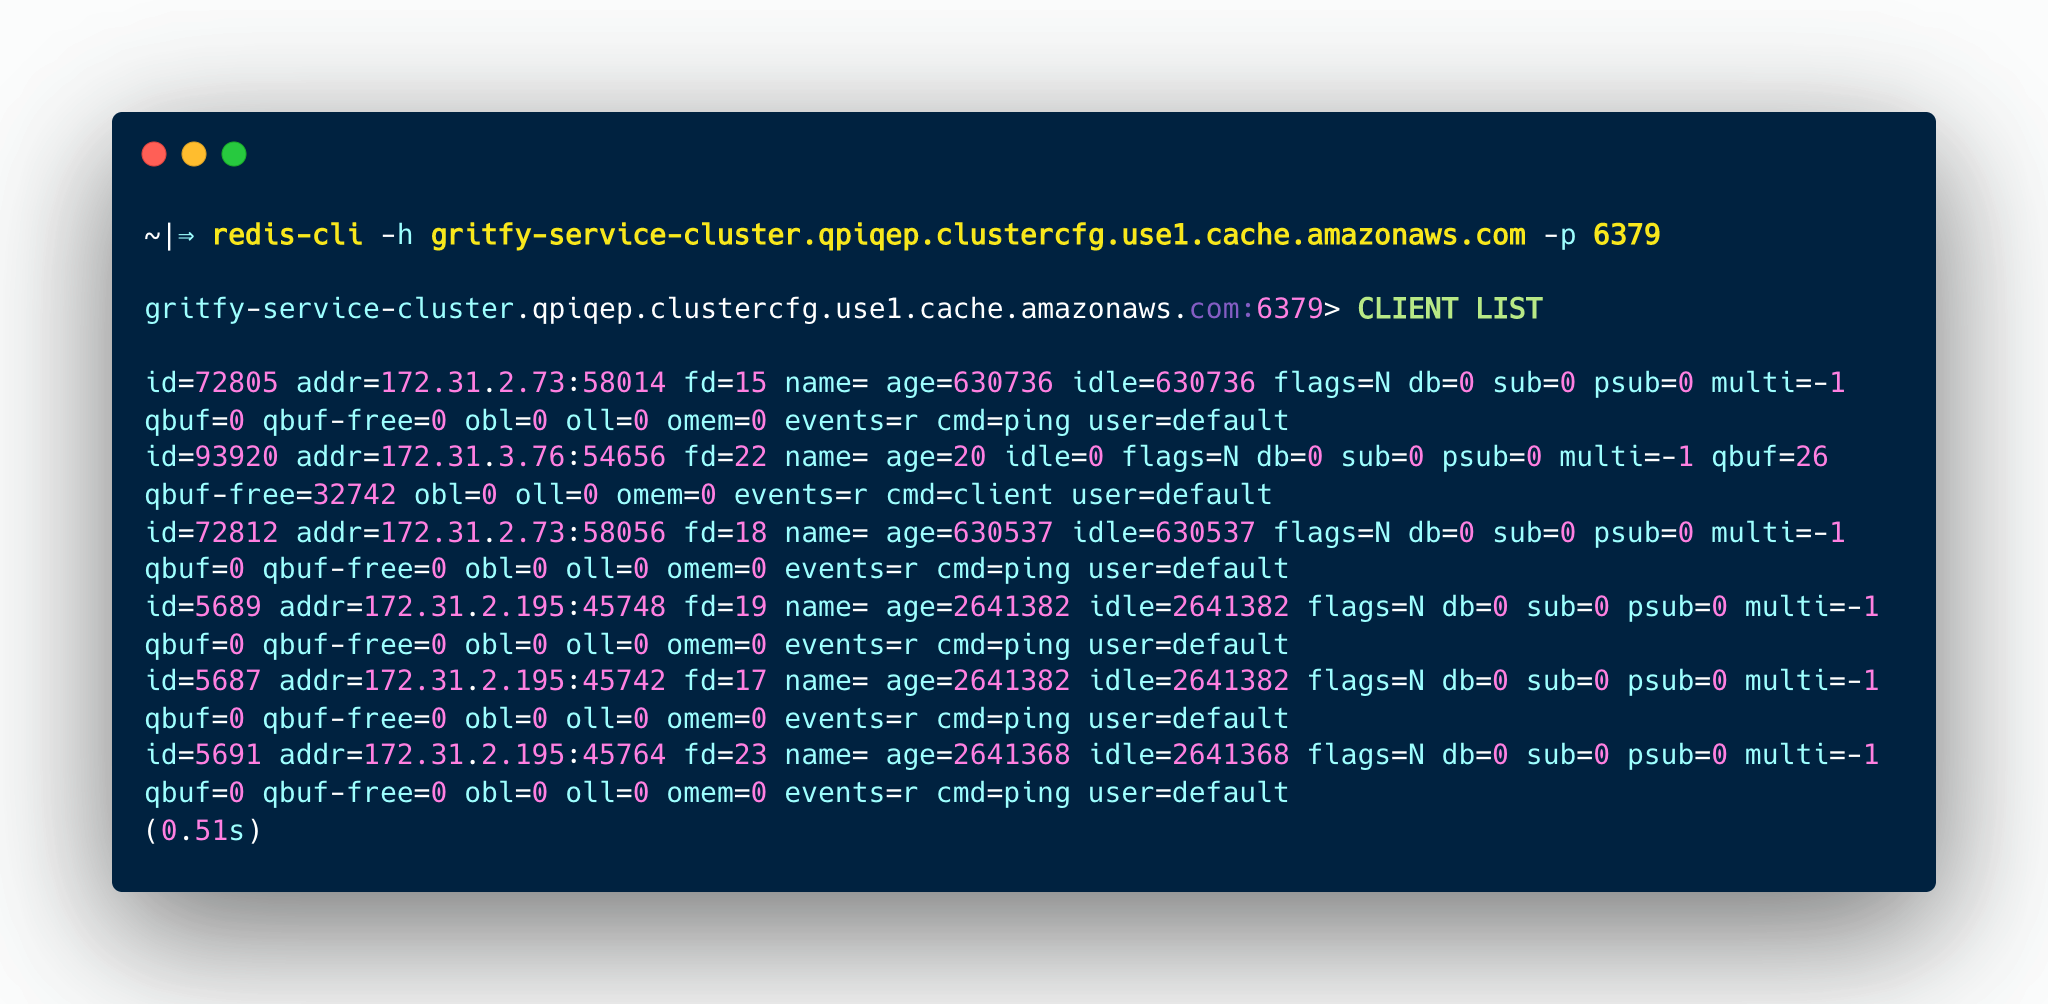
For the CLIENT LIST command you would get list of connections with detailed information such as addr, age etc.
You can save the output of this command to a temp file and get the list of connections grouped by IP address (host) using the following awk command
cat redis-connection-list.txt|awk '{print $2}'|awk -F'=' '{print $2}'|awk -F':' '{print $1}'|awk 'NR>1{arr[$1]++}END{for (a in arr) print a, arr[a]}'|sort -k2 -nr
The output of this command would be something like this,
Server IP and Total Number of Connections
172.31.1.72 40
172.31.1.71 40
172.31.1.39 40
172.31.1.24 40
172.31.1.129 28
172.31.1.116 24
172.31.1.21 17
172.31.2.12 13
Using AWS VPC Logs and Athena to List of Connections and Stats
AWS VPC logs are really helpful when it comes to Auditing and troubleshooting to find out the network connection statistics.
It can be used in our case as well to find the list of connections made to the Elastic Cache
unlike the redis-cli approach you can see the historical connection information from the VPC FLOW logs.
If you have not enabled it yet. Please go ahead and enable it and you would thank me later
Follow this article to know how to enable VPC Flow logs with S3 backed storage
Once the VPC flow logs are enabled there are multiple ways to read the logs.
- Directly opening the Log file in S3
- Using Cloud Watch
- Querying VPC flow logs using the power of SQL using
Athena
Amazon Athena is an interactive query service that makes it easy to analyze data in Amazon S3 using standard SQL
There are dedicated articles that talk about how you can get your VPC flow logs as a table into Athena but I want to give you a quick query I always use
CREATE EXTERNAL TABLE IF NOT EXISTS vpc_flow_logs (
  version int,
  account string,
  interfaceid string,
  sourceaddress string,
  destinationaddress string,
  sourceport int,
  destinationport int,
  protocol int,
  numpackets int,
  numbytes bigint,
  starttime int,
  endtime int,
  action string,
  logstatus string,
  vpcid string,
  subnetid string,
  instanceid string,
  tcpflags int,
  type string,
  pktsrcaddr string,
  pktdstaddr string,
  region string,
  azid string,
  sublocationtype string,
  sublocationid string,
  pktsrcawsservice string,
  pktdstawsservice string,
  flowdirection string,
  trafficpath string
)
PARTITIONED BY (`date` date)
ROW FORMAT DELIMITED
FIELDS TERMINATED BY ' '
LOCATION 's3://vpcflowlogs-gritfy/vpc-1c29ca4a/AWSLogs/784590120991/vpcflowlogs/us-east-1/'
TBLPROPERTIES ("skip.header.line.count"="1");
You need to replace your S3 Location on the second last line of this SQL script
LOCATION 'your VPC Logs S3 URL'
You might see another way with formatted date and time out there. but I prefer to keep vpc flow logs in EPOCH time itself ( which is the default)
By default, if you execute this command your table would be created under sampledb of Athena. or you can choose to create a new DB and run it.
Now to the Querying.
Here is the query that you can use to get the connected clients information between a date and time range.
SELECT   sourceaddress,
         Count(sourceaddress) AS total
FROM     "sampledb"."vpc_flow_logs"
WHERE    destinationaddress = '<elastic cache ip>'
AND      destinationport = 6379
AND      starttime BETWEEN '<start_datetime_epoch>' AND '<end_datetime_epoch>'
GROUP BY sourceaddress
So how do you calculate the epoch time of the normal human time?
Head to this website EPOCH Converter and you can get it done
My favourite part is to be able to see the epoch times of different times like 2 weeks ago , 1 days ago , 3 months ago etc
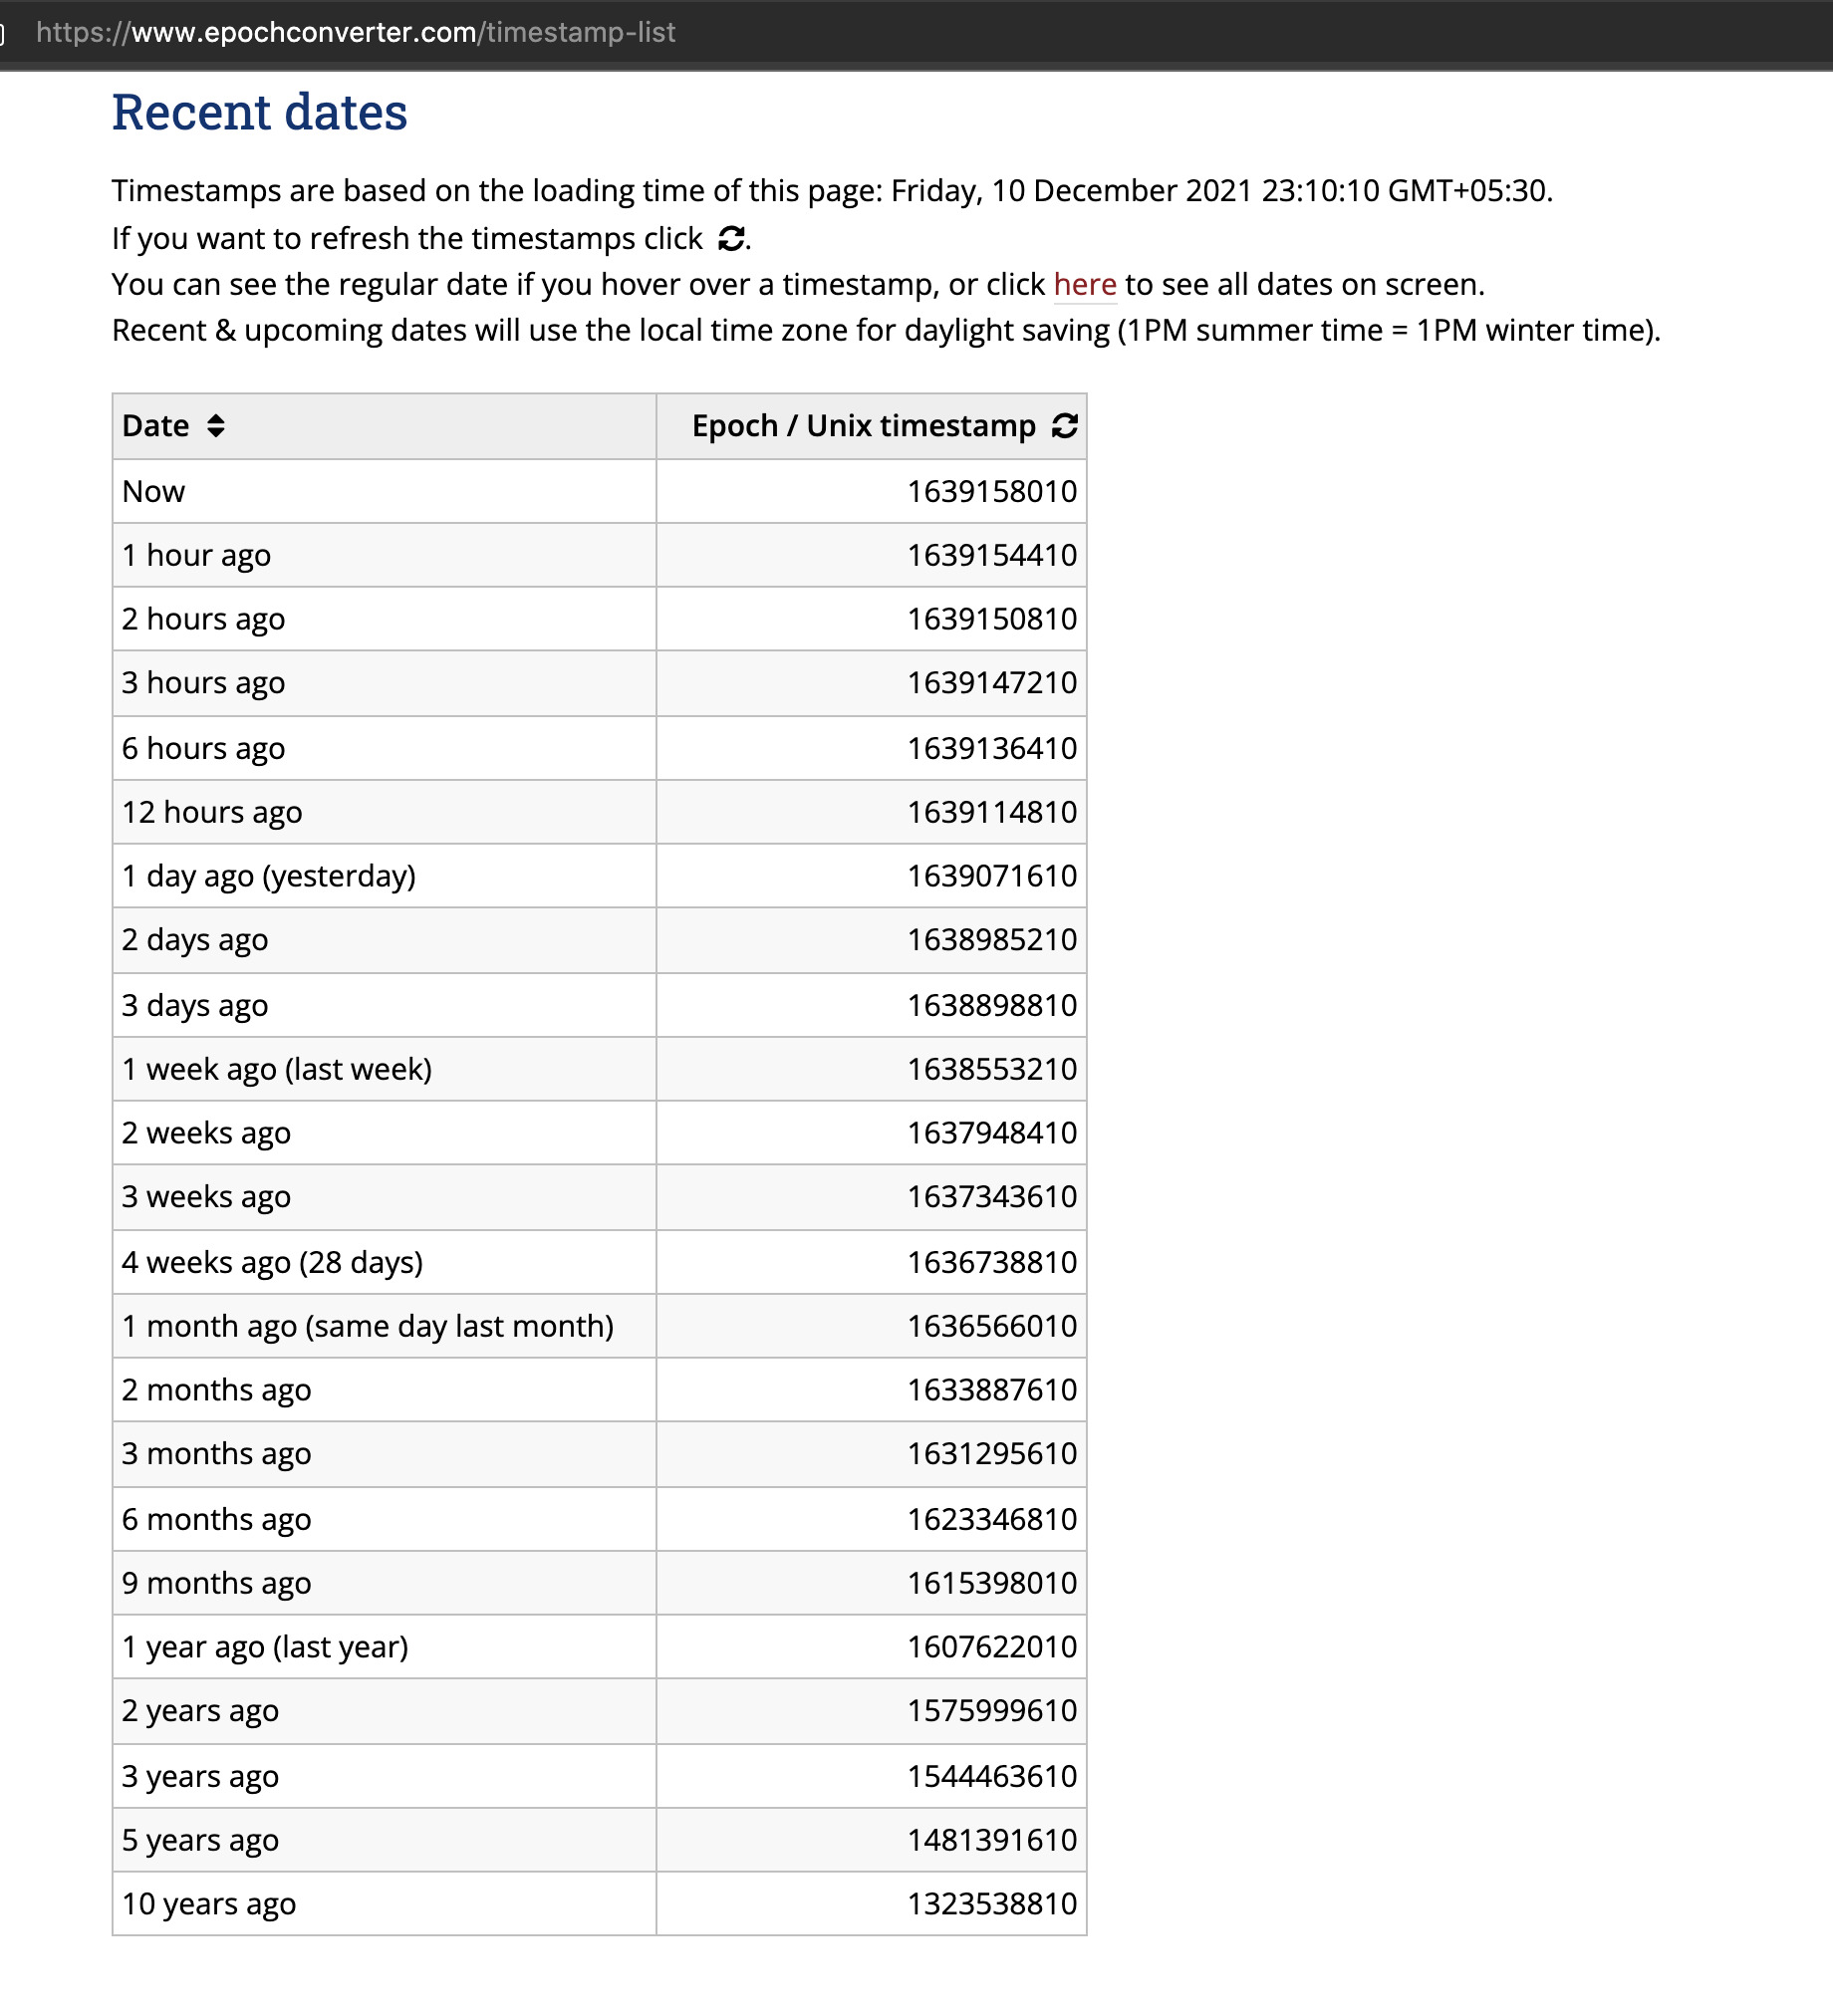
Let's suppose I want to see all connected clients and their count last 3 months of time I just have to replace
the start_time_epoch with 3 months ago EPOCH value and end_time_epoch to the current time in EPOCH

Conclusion
In this article, we have learnt two different ways to list the connections or clients of AWS Elastic Cache Redis.
- redis-cli
- AWS VPC flow logs.
we have also learnt a few more things as a by-product from this article
- Enabling AWS VPC flow logs
- Creating a table in Athena with VPC flow logs data from S3
- Querying Athena VPC flow logs
- EPOCH time
- An SQL Query to list the connections for a specific period
Hope this article was helpful to you if you have any questions. please feel free to ask in the comments section.
Cheers
Sarav AK

Follow me on Linkedin My Profile Follow DevopsJunction onFacebook orTwitter For more practical videos and tutorials. Subscribe to our channel
Signup for Exclusive "Subscriber-only" Content