Security is always a big thing. Protecting your data is very crucial when there are lot of people out waiting for a chance to exploit.
In Enterprise Infrastructure. We have various levels of security as follows
- Internet Firewall and Gateway
- Load balancer Restrictions and Constraints
- Inbound and OutBound Proxy Servers
- Dual Factor or Multi-Factor Authentication ( RSA / Duo / Google Auth)
- Fingerprint or Iris Scanner and what not.
besides designing your application with no vulnerabilities and data leaks. A Good Enterprise has to protect their infrastructure as well, with those aforementioned methodologies.
in this post, we are going to take up one of the key element of Enterprise Security which is Securing the SSH to the Servers
Why SSH Security is Important?
Whether it be an On-Prem or Cloud Server. Securing and monitoring your SSH is indispensable. Because SSH is directly connecting you to the server (Often with Special Privileges). A Single Mistake or a Chance would leave your enterprise Security and Confidential Data at Risk.
What if your employee with Special Privileges (root) has set a basic password for his SSH and Some middle man has guessed it right.
Besides having Strong Password policies and implementing Key-based authentication. Most companies would solve this problem by adding one more level of security, often called as Multi-factor or Two-factor authentication.
What is Two-factor Authentication (or) Multi-Factor Authentication
If you are working in IT infra. There are chances you might have heard this term
These were the First Two-factor authentication devices I was aware of. We can call it as a Classic Two Factor Authentication Device.
There would be a 6 digit random number designed to change every 30 seconds or so I suppose. To login to the Secured networks and Servers, we had to enter this Pin number or Code displayed on the device.
This is a hardware-based Two-factor authentication device. There were other few hardware and Software-based two factor or multi-factor authentication devices as per my knowledge
While all these being an Enterprise level advanced Two-factor authentication systems.
 There are also opensource two-factor authentication systems available. While there are few products available in this slab.
Google Authenticator is a widely used Software-based Multi-Factor Authentication solution. It is same as RSA token working with Time-based One-time passcode strategy.
While this is freely available and comes from the Trusted company. Most of the web applications, servers, enterprises are using this to provide additional security to the user.
By this time you might have figured out this article is going to use Google Authenticator as Multi-Factor authentication provider.
With no further ado. Let us go to our objective.
In this post, we are going to choose some secure approach of using a Single Server as our Gateway or Jump Server from where you can log in to the other servers in your infrastructure.
How to setup Two Factor Authentication for SSH in AWS EC2 - AWS MFA Setup
- Install EPEL Repo
- Install Google Authenticator on EC2 Instance
- Configure EC2 SSH to use Google Authentication module
- Setup Google Authenticator module
- Configure Auth methods in SSHd config file
- Configure Google Authenticator in Mobile & EC2
- Download and Install the GoogleAuthenticator in mobile
- Run Google Authenticator on EC2 and Get QR code
- Scan the Shown QR code in your Google Authenticator App
- Complete the Google Authenticator Setup in EC2
- Restart SSH Services on the EC2 instance
- Login to the server and validate
- Video GUIDE of how to perform these steps
Step1: Install EPEL Repo on the EC2 instance
Google Authenticator is part of the EPEL repo and you should install the EPEL repo in your EC2 instance.
In my case, I am using Amazon EC2 Instance (OS) and I can download my EPEL 7 and install like this
sudo yum install -y https://dl.fedoraproject.org/pub/epel/epel-release-latest-7.noarch.rpm
Step2: Install Google Authenticator on the EC2 instance
The following command would install the Google Authenticator. The package name may vary if your Operating system is different so you can perform a quick search using yum search google to find the right package name
sudo yum install google-authenticator.x86_64 -y
Step3: Configure EC2 SSH to use Google Authentication module
In this step, we are going to perform some file modifications and editing to install google authentication and to setup MFA in this EC2 instance.
Step3a: Update the sshd PAM and install Google authenticator module
sudo vi /etc/pam.d/sshd
Add the following to the bottom of the file to use Google Authenticator. If there are service accounts or users who should be able to log in without MFA, add nullok at the end of the following statement. This will mean that users who don’t run Google Authenticator initialization won’t be asked for a second authentication.
auth required pam_google_authenticator.so or
auth required pam_google_authenticator.so nullok
Comment out the password requirement as we want to use only the key-based authentication.
#auth substack password-auth
Don't forget to Save the file.
Step3b: Update the sshd configuration
In this step we are going to tell sshd that we have one more level of multifactor authentication for the user to login along with the Keybased auth.
This step is to make sshd daemon to prompt the user for the Verification Code.
Edit the file as root
sudo vi /etc/ssh/sshd_config
Comment out the line which says ChallengeResponseAuthentication ‘no’ and uncomment the line which says ‘yes’.
ChallengeResponseAuthentication yes
#ChallengeResponseAuthentication no
Finally, we need to let sshd daemon know that it should ask the user for an SSH key and a verification code
AuthenticationMethods publickey,keyboard-interactive
Save the file.
Step4: Configure Google Authenticator
It has two phases or two levels of configuration.
Step4a) Install Google Authenticator
First task has to be done at your mobile where you need to download the Google Authenticator App from play store or App store
Once you have downloaded keep it ready and come back to the server to perform the next task.
Step 4b) Run Google Authenticator on EC2 and Get QR code
Once you have the Google Authenticator installed in your mobile you are ready to perform the second phase of this configuration.
the second phase should be performed at the ec2 server.
Note:
This step has to be executed as the user to whom you want to set the MFA or Multi factor authentication.
ec2-userorrootorubuntuor even as your personal userid which you have created in this EC2 instance.
run the following command as the user of your choice in my case it is ec2-user
google-authenticator
After the first question, it would show you the QR code and the Secret Key
Step 4c) Scan the Shown QR code in your Google Authenticator App
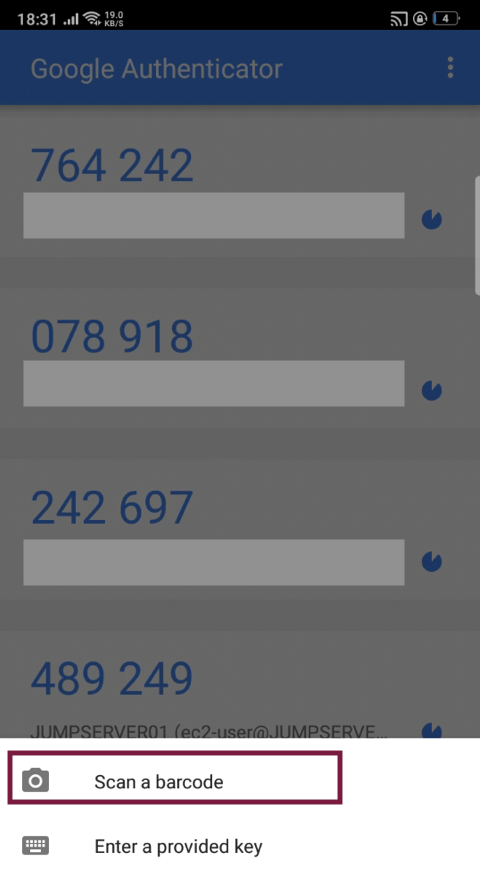
Now take your mobile and go to Google Authenticator App and click on the plus sign on the bottom right corner
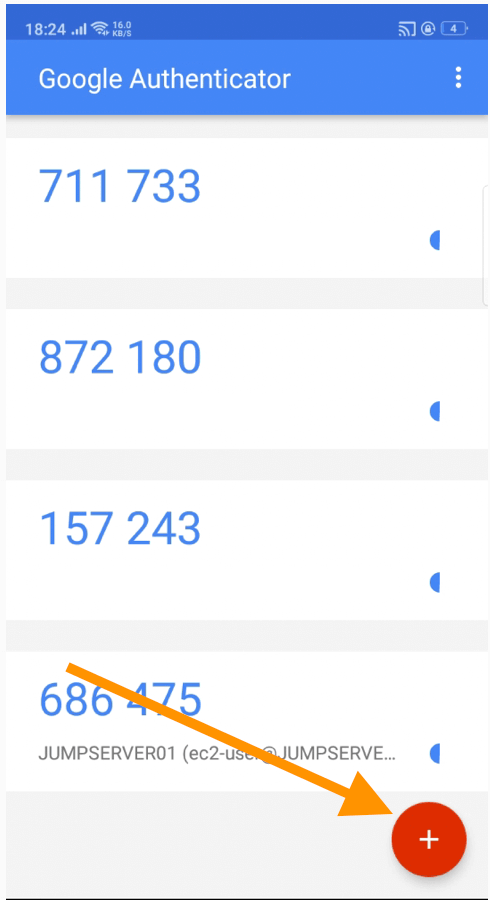
Click on the Scan a barcode option
Scan the barcode
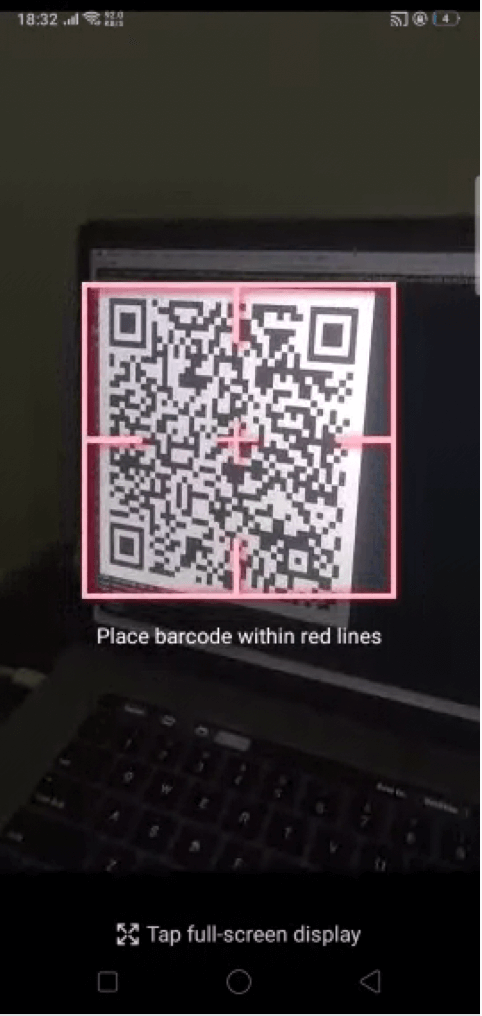
Once it has been added come back to your terminal
Step 4d) Complete the Google Authenticator Setup in EC2
Once you have crossed the QR code section, You would be prompted 4 more questions
Here are my answers. (Refer the following snippet)
[ec2-user@ip-172-31-83-181 ~]# google-authenticator

Do you want authentication tokens to be time-based (y/n) y

******* THERE WOULD BE A QR CODE DISPLAYED HERE ****


Your new secret key is: 2IAROUZWA6ZRSRRR89ZLYNZUC2A
Your verification code is 601376
Your emergency scratch codes are:
  85535499
  25397636
  98473698
  70322035
  60012461

Do you want me to update your "/root/.google_authenticator" file? (y/n) y

Do you want to disallow multiple uses of the same authentication
token? This restricts you to one login about every 30s, but it increases
your chances to notice or even prevent man-in-the-middle attacks (y/n) y

By default, a new token is generated every 30 seconds by the mobile app.
In order to compensate for possible time-skew between the client and the server,
we allow an extra token before and after the current time. This allows for a
time skew of up to 30 seconds between authentication server and client. If you
experience problems with poor time synchronization, you can increase the window
from its default size of 3 permitted codes (one previous code, the current
code, the next code) to 17 permitted codes (the 8 previous codes, the current
code, and the 8 next codes). This will permit for a time skew of up to 4 minutes
between client and server.
Do you want to do so? (y/n) n

If the computer that you are logging into isn't hardened against brute-force
login attempts, you can enable rate-limiting for the authentication module.
By default, this limits attackers to no more than 3 login attempts every 30s.
Do you want to enable rate-limiting? (y/n) y
That's it. You have successfully set up Google Authenticator with AWS EC2 instance
Step5: Restart SSH services on the EC2 server
Now as the last step in our endeavour, we need to restart the sshd service as root
sudo service sshd restart
Step6: SSH to validate the AWS MFA setup.
Now use the same way you used to login to the EC2 instance.
If everything was done perfectly. you would be prompted for a verification code
➜ ~ ssh -i ~/Downloads/mykeypair.pem ec2-user@3.95.13.122
Verification code:
Video Guide - VLOG

Conclusion
In this post, we have successfully learnt how to setup AWS MFA and enable MFA (Multi-factor authentication) for SSH in aws ec2 server using Google Authenticator.
Hope it helps.
If you like this article share it among your peers.

Follow me on Linkedin My Profile Follow DevopsJunction onFacebook orTwitter For more practical videos and tutorials. Subscribe to our channel
Signup for Exclusive "Subscriber-only" Content