Introduction:
In this post, we are going to see how to use docker httpd image and extend it to suit our needs and run the Apache web server as a Docker container.
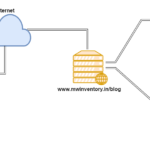
We are also going to implement a docker reverse proxy as an additional example
Since we have targeted this post for Docker and Apache Installation and Configuration. We did not cover the fundamentals and basic components about Reverse Proxy but you can read, what is reverse proxy and how it is being configured in Traditional Apache Webserver in this link
I presume now you have understood what is Reverse Proxy and How it is working and configured in Traditonal and Normal Apache HTTPD Server environment.
Now let us move forward to the Docker Apache Image Creation and Reverse Proxy setup.
Steps Index:
- Choose the HTTPD Image from DockerHub (or) Optionally Download the image to Local
- Write Dockerfile and Use the Standard HTTPD image then Expand and Customize it.
- Create a Local httpd.conf file and Enable the modules you need
- Build and Create an Image using the Dockerfile
- Create Configuration and HTML files to feed the Container
- Create a WorkSpace
- Create two Directories named
sitesandhtmlfilesto have conf and html files respectively - Create Virtual Host configuration file
*.confundersitesdirectory - Create Html files under
htmlfilesdirectory
- Start the Container from your Apache HTTPD Docker Image with Necassary Volumes and Port forwarding.
- Access the URL and Validate the Reverse Proxy
Step1: Choose the HTTPD Image from DockerHub (Download the Image)
Let us choose the Official Apache HTTPD Latest image and also download it to local using docker pull CLI command
in your master server where you are running the Docker Container Engine (CE) use the docker pull command like this
docker pull httpd:latest
In fact, you do not have to explicitely mention the word latest here. If you just mention httpd the latest image would be picked up.
Note*: You can make sure the image is downloaded or not using the docker images CLI command
Step2: Dockerfile to Create a Customized HTTPD Image
Now there might be a question, Why can't we use the httpd image as it is ?
The Answer is, The downloaded standard httpd image would have very minimal number of modules enabled. In order to implement reverse proxy we need to enable few modules like mod_proxy, mod_slotmem_shm, mod_watchdog etc.
Also, we need to enable the Support for our customized Virtual Host file and HTML files in the Container before we create it, Later during the startup time we can supply these (conf,html) files to the container
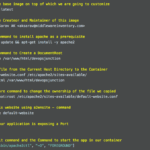
Here is the Docker file with self-descriptive comments for each line.
# The Base Image used to create this Image
FROM httpd:latest

# Just my name who wrote this file
MAINTAINER SaravAK ([email protected])

# to Copy a file named httpd.conf from present working directory to the /usr/local/apache2/conf inside the container
# I have taken the Standard httpd.conf file and enabled the necassary modules and adding Support for an additional Directory
COPY httpd.conf /usr/local/apache2/conf/httpd.conf

# This is the Additional Directory where we are going to keep our Virtualhost configuraiton files
# You can use the image to create N number of different virtual hosts
RUN mkdir -p /usr/local/apache2/conf/sites/

# To tell docker to expose this port
EXPOSE 80

# The Base command, This command should be used to start the container
# Remember, A Container is a Process.As long as the base process (started by base cmd) is live the Container will be ALIVE.
CMD ["httpd", "-D", "FOREGROUND"]
Step2a: Take the Standard httpd.conf file for apache2 and enable the modules you need
I have downloaded the standard httpd.conf file and enabled the necassary modules like mod_proxy, mod_ssl etc.
Download the httpd.conf file from here.
Copy the Content from the aforementioned link and create a file named httpd.conf in the same Directory where the Dockerfile is located.
If you look at our customized httpd.conf we have also added a Directive named IncludeOptional to add a directory of configuration where our Virtual Host conf files can be placed.
Any *.conf files placed in this directory would be considered by Apache HTTPD
IncludeOptional conf/sites/*.conf
If you scroll back and look at our Dockerfile once again you can see that we are creating this directory
RUN
mkdir -p /usr/local/apache2/conf/sites/
So this sites directory is our Dedicated configuration files location where we can place our Virtual Host conf files
Step3: Build and Create an Image from the Dockerfile
In the Same Directory where our Dockerfile and httpd.conf file is present. Execute the following command
docker build -t httpd-proxyenabled .
Now the Image is ready and available in your Local Images Repository and the image name is httpd-proxyenabled
Step4: Create the Configuration files and Directories( Virtual Host and Html files)
Now we are going to create our Virtual Host (A WebSite) configuration file and it will be loaded into the container when it is being started.
It is not recommended to Share a Single file between Container and the Local Server. You always can share a Directory as a volume between a Container and a Host.
So we are going to create two new directories to keep our HTML and Conf files respectively and we are going to mount these directories as a Volume inside the container.
We will see how to do that in a minute.
Step 4a: Create a WorkSpace
Now choose some directory in your local system ( Mac/Windows) where Docker Container Engine is running and Let us call it as a workspace in my case it is /apps/docker/apacheconf
Step 4b: Create two Directories to place html and conf files
Create two Directories under the workspace to keep the virtualhost conf and html files.
mkdir -p /apps/docker/apacheconf/sites
mkdir -p /apps/docker/apacheconf/htmlfiles
Step 4c: Create Virtual Host configuration file under sites directory
Now go inside the sites directory and Create a Virtualhost configuration file ( A WebSite). If you have a Virtualhost file of your choice please use that or if you are following along, Please copy the following content and Save it as techolaf.conf
 <VirtualHost *:80>

	ServerName techolaf.com
	ServerAlias www.techolaf.com

	ServerAdmin [email protected]
	DocumentRoot /usr/local/apache2/techolaf

	<Directory "/usr/local/apache2/techolaf">
		Order allow,deny
		AllowOverride All
		Allow from all
		Require all granted
	</Directory>

    #Load the SSL module that is needed to terminate SSL on Apache
    LoadModule ssl_module modules/mod_ssl.so

    #This directive toggles the usage of the SSL/TLS Protocol Engine for proxy. Without this you cannot use HTTPS URL as your Origin Server
    SSLProxyEngine on

    # To prevent SSL Offloading
    # Set the X-Forwarded-Proto to be https for your Origin Server to understand that this request is made over HTTPS #https://httpd.apache.org/docs/2.2/mod/mod_headers.html#requestheader.
    RequestHeader set X-Forwarded-Proto “https”
    RequestHeader set X-Forwarded-Port “443”

    ErrorLog logs/techolaf-error.log
    CustomLog logs/techolaf-access.log combined

    # The ProxyPass directive specifies the mapping of incoming requests to the backend server (or a cluster of servers known as a Balancer group).
    # It proxies the requests only with matching URI “/blog”

    ProxyPass /mwi https://www.middlewareinventory.com

    #To ensure that and Location: headers generated from the backend are modified to point to the reverse proxy, instead of back to itself, #the ProxyPassReverse directive is most often required:

    ProxyPassReverse /mwi https://www.middlewareinventory.com

</VirtualHost>
Step 4d: Create the html file under htmlfiles directory
Save the following content into a file named index.html under the htmlfiles directory
<html>
<head>
<title>TechOlaf Home Page</title>
</head>
<body>
<h2> Welcome to TechOlaf </h2>
</body>
</html>
Step5: Start the docker httpd Container with Volumes and Port Forwarding
Volumes - is a Docker terminology, It helps you Mount the local file system [directory] inside the container as a volume
PortForwarding - Forward the Container Port to host
docker container run \
--publish 90:80 \
-d – name apacheserver \
-v /apps/docker/apacheconf/sites:/usr/local/apache2/conf/sites \
-v /apps/docker/apacheconf/htmlfiles:/usr/local/apache2/techolaf \
httpd-proxyenabled
Here
--publish : to forward the container port 80 to Mac/Windows host's port 90
-d : to run the container in background, Detached mode
--name: Name the container as apache server
-v : The Volume Mapping. Mounting the Host's /apps/docker/apacheconf/sites as /usr/local/apache2/conf/sites inside the container
Now you can understand, that the directories we have created in local workspace are mounted inside the container and being used
In fact the Html and the configuration files we have placed in sites and htmlfiles directory on the local are now being used by the container and our website techolaf.com is ready
Note*: Before validating the Site. You need to be aware the ServerName specified in the configuration file is techolaf.com and Apache would look for this name on the Address bar when you try to reach the website.
In enterprise these things are managed with internal DNS servers. For testing you can use your /etc/hosts file
Make an entry in your /etc/hosts file like shown below
127.0.0.1 www.techolaf.com
Now you are all set!.
Step6: Validate the Reverse Proxy
I hope you have your DNS records corrected.
With that assumption, let us go and hit the url
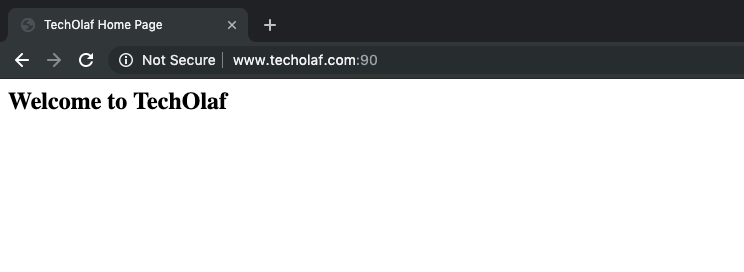
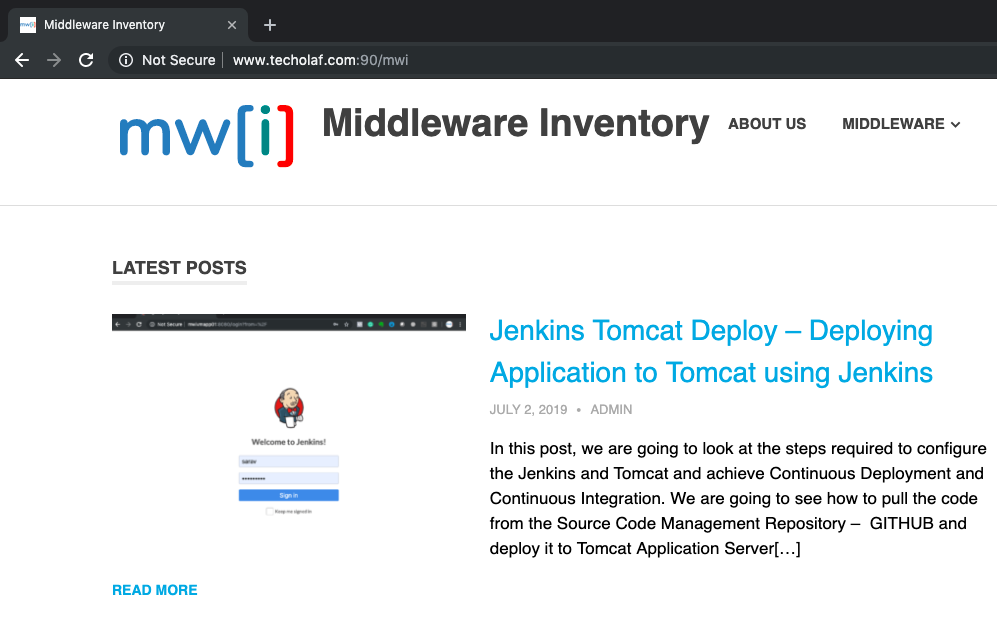
http://www.techolaf.com:90/ and http://www.techolaf.com:90/mwi
The Configured and Desired result is when you try with no URI (or) the Home URL you should get the welcome html page you have created and when you are using the URI
mwiit should load the content of ourwww.middlewareinventory.comwebsite home page.
The Home Page [ Welcome html ]
The Reverse proxy Page with URI
Mission Accomplished!
I know there are lot of steps in here. But if you follow along you can get it done very easily.
Try it and let me know if you get any issues and feel free to comment for any help or support
Rate this article [ratings]
Cheers,
Sarav AK

Follow me on Linkedin My Profile Follow DevopsJunction onFacebook orTwitter For more practical videos and tutorials. Subscribe to our channel
Signup for Exclusive "Subscriber-only" Content