In this post, we are going to look at the steps required to configure the Jenkins and Tomcat and achieve Continuous Deployment and Continuous Integration. Jenkins Tomcat Deploy
We are going to see how to pull the code from the Source Code Management Repository - GITHUB and deploy it to Tomcat Application Server ( Servlet Container). Inclusive of all the configuration required in Jenkins and Tomcat end.
Our Ultimate Subjective is Jenkins Tomcat Integration and How to Deploy Application to Tomcat Using Jenkins. Jenkins Tomcat Deployment.
Let's Proceed.
Prerequisites
- Some Basic Knowledge on Jenkins and Tomcat
- Working Setup of Jenkins and Tomcat
- Administration Privileges on Jenkins and Tomcat
Note*: I have taken Tomcat Version7 for this article and if you would like to follow along choose tomcat7+ version.
Tomcat Configuration
We presume that you have downloaded and started the tomcat server with no issues. Now we will advance to the next level which is making Tomcat ready to receive deployments and enabling TEXT based and GUI based management interface.
All the tomcat application servers come with the manager application by default. If you look at the webapps directory of your downloaded tomcat server. You can see it.
At the first time, you may not be able to access it cause the manager application needs some security elements to be configured prior to being accessed.
Environment Configuration
Let us taken my tomcat7 setup as an example and I will paste the steps what I did to make it working.
I have installed my Tomcat7 in CENTOS server at /apps/tomcat/tomcat7 directory and this is my CATALINA_HOME Now you need to find your CATALINA_HOME before continuing with the next steps.
Update Roles and User credentials - Configuring Tomcat Security
Got to $CATALINA_HOME/conf directory and look for tomcat-users.xml file.
Open the file in your favourite editor like VI or nano and add the following lines right before the last line
  <user username="tomcatmanager" password="password" roles="manager-gui"/>
  <user username="deployer" password="password" roles="manager-script"/>
Here we are creating two usernames named tomcatmanager and deployer. here the deployer account would be used to deploy the WAR file over http.
manager-gui based tomcatmanager user would be used to manage the manager web application at http://<HostName>:8080/manager
Note*: If you are using Tomcat8+ version, Steps to enable manager application might be different. Refer the product version specific documentation if you get stuck.
Now we are ready with the Tomcat Servlet Container aka Application server and it is ready to be connected from Jenkins.
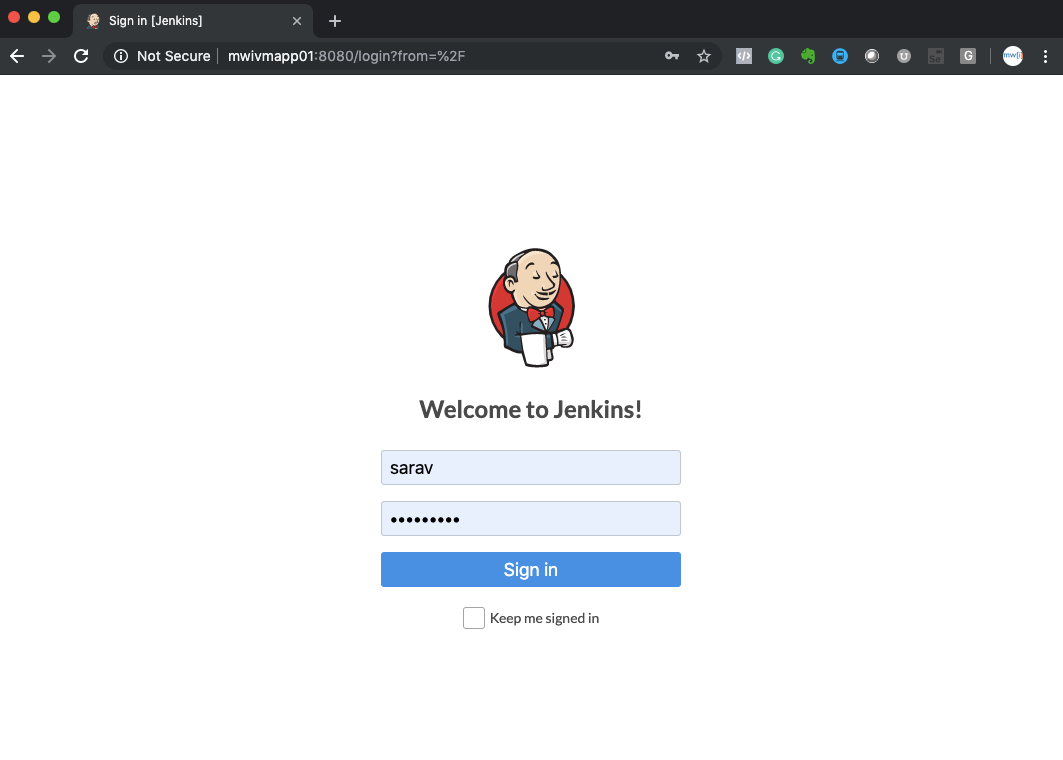
Jenkins Configuration
I presume that you have a Running Jenkins Server and a Administration Access
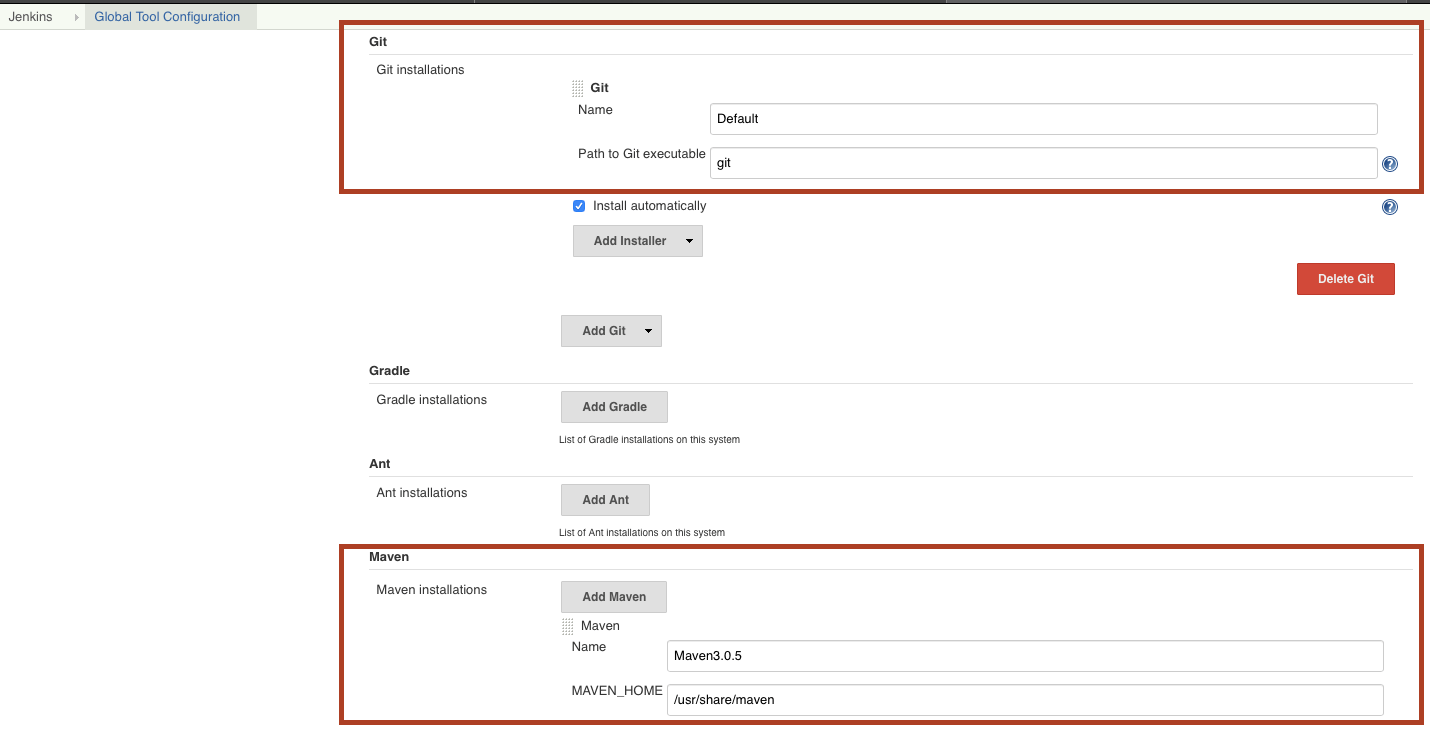
Step1: Make Sure you have Git and Maven installed
In Jenkins UI, Goto Manage Jenkins -> Global Tool Configuration Section of Jenkins
Note*: If you are not able to see a Manage Jenkins Option, You need to consult with your Administrator. It might be due to insufficient privileges.
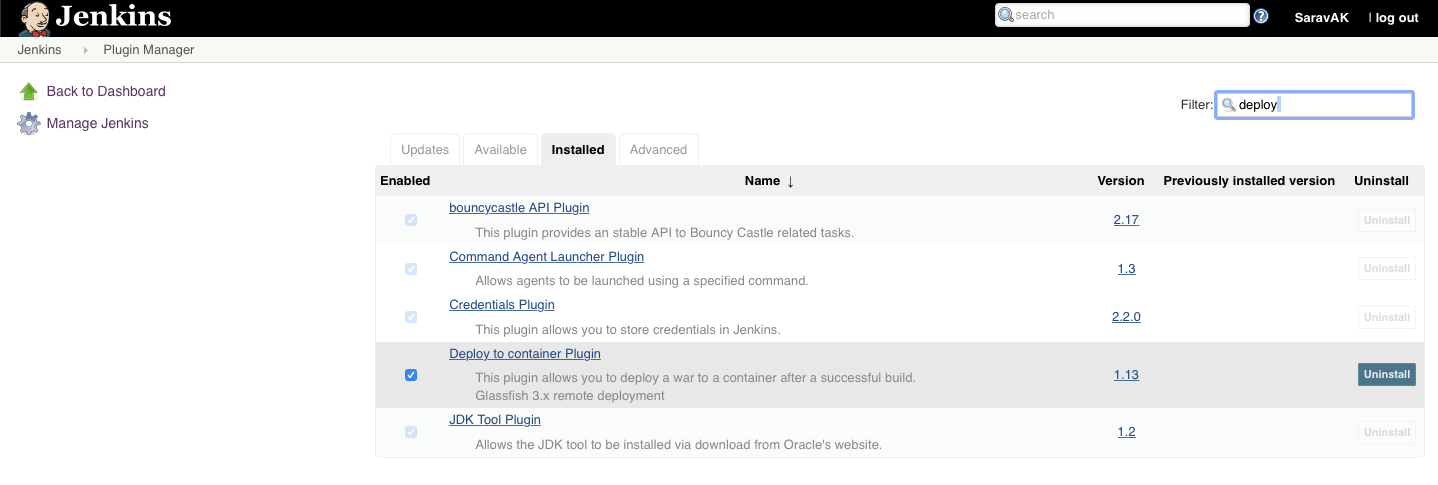
Step2: Install Deploy to Container Plugin.
Manage Jenkins -> Manage Plugins -> Available -> Deploy to Container Plugin
Note:* For the Next step we have selected a Maven Job as our Choice. you can also create a Free Style Project and use Gradle or Ant as your build tool .
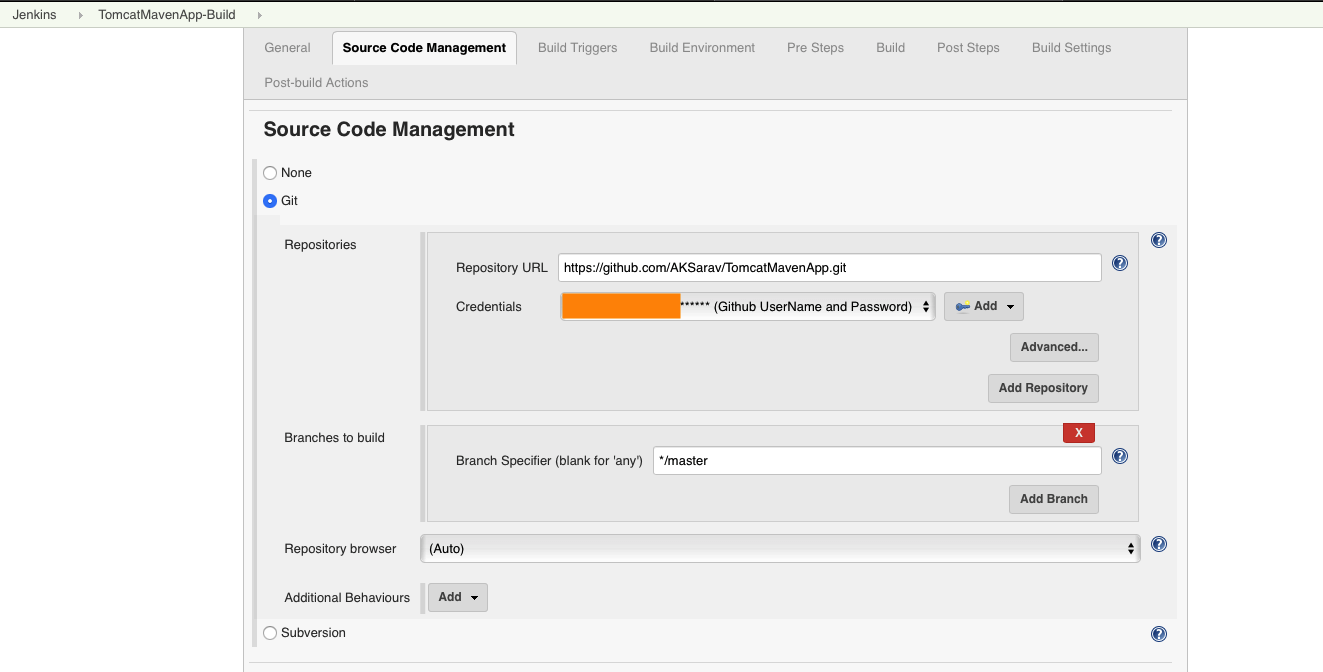
Step3: Create and Configure a Maven Job with Source Code Management (Github)
New Item -> Maven Project
In the Configuration Section, Under Source Code Management Fill your Github/BeanStalk/Gitlab Repository URL
For testing you can use one of our Sample Application Named Tomcat Maven App from our Github public Repository.
Click on Add button displayed near the Credentials drop-down and enter the username and password of your SCM Repo and Once it is saved. It would be available on the Dropdown for you to select.
Once you have selected the valid Credentials to wait for few seconds. If you see any error message in RED colour which means your connection to the SCM repository is unsuccessful. Check the URL or the credentials and retry.
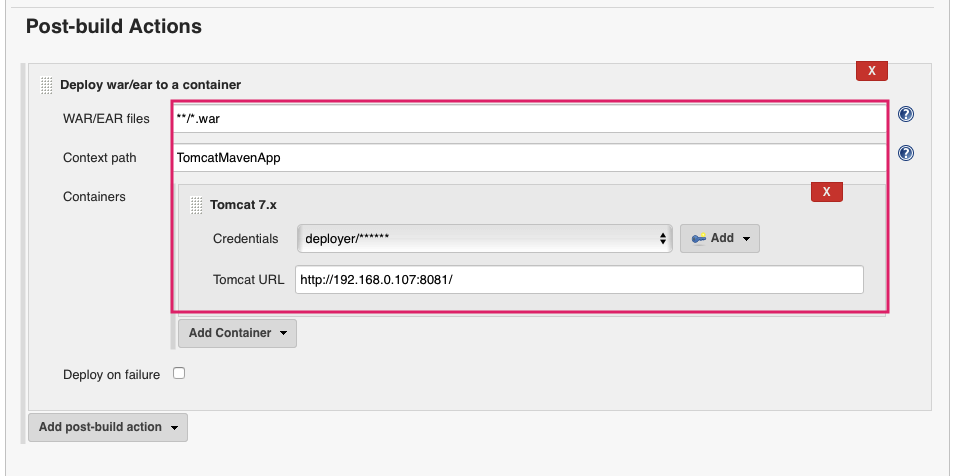
Step4: Configure the Post-build Action and Specify the Tomcat Server Details
Drag to the bottom and Go to the Post-build Actions section
Click on Add post-build action button
On the available options click on the Deploy war/ear to container
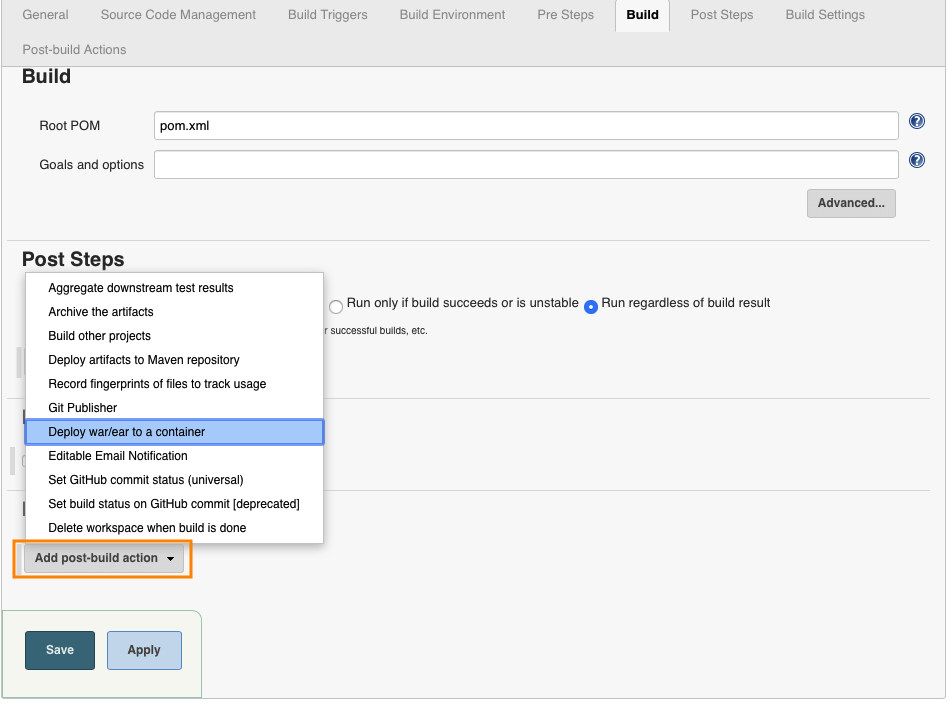
Fill the required parameters for the plugin. Use the following Screen Shot as the reference
Choose the Context Path in which the application should be installed. It would rename the WAR file before deploying to the server and thereby the application context root would be changed.
Tomcat URL http://[Tomcat Server Host]:[Primary http port]/
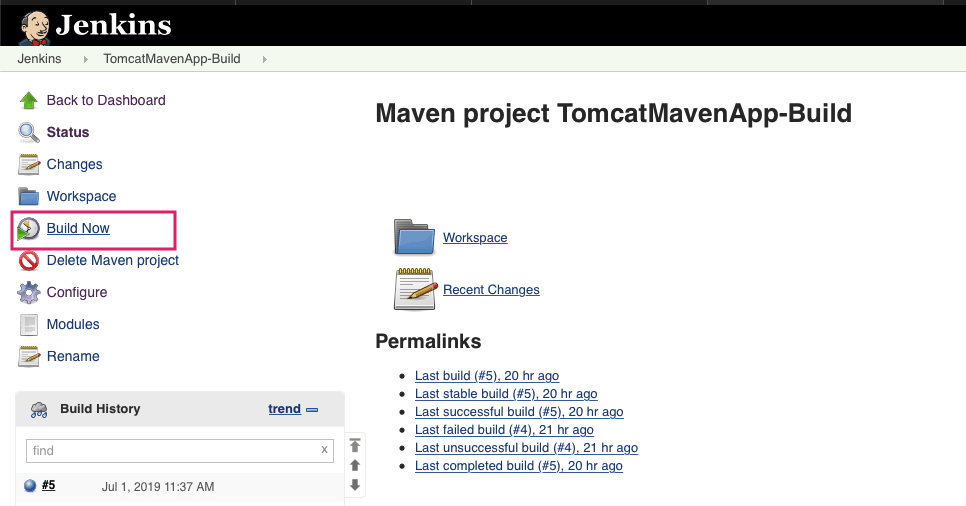
Build Jenkins Job
Execute the Job you have created by clicking on the Build Now button
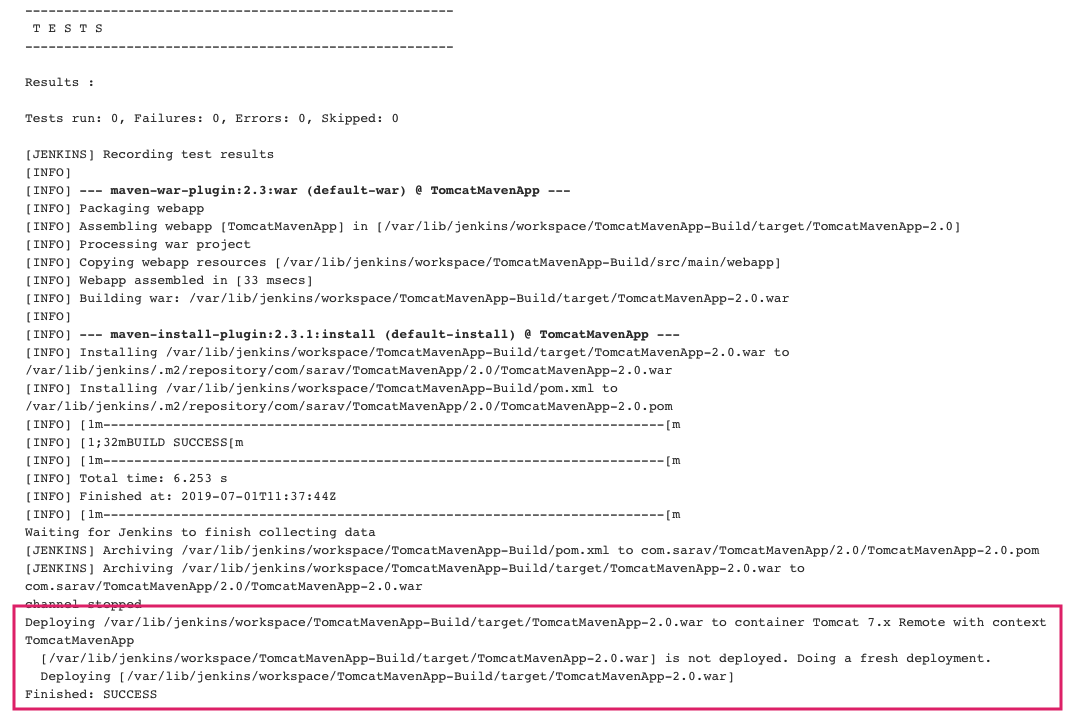
Console Output after the Successful build.
At the last line you can see that the WAR file has been generated and deployed on the remote server.
in our case, http://192.168.0.107:8081/
Testing the Application
As the deployment is completed and the Jenkins Job ran Successfully without issues. ( Or So I presume)
Let us test our application.
In my case, the URL should be as follows
http://192.168.0.107:8081/TomcatMavenApp
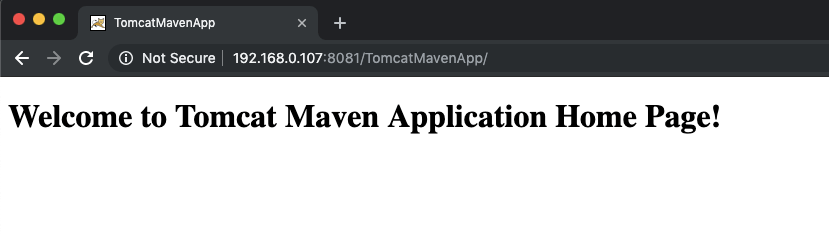
That's all. You have successfully configured Tomcat with Jenkins Continuous Deployment .
Hope It Helps
Thanks,
Sarav AK

Follow me on Linkedin My Profile Follow DevopsJunction onFacebook orTwitter For more practical videos and tutorials. Subscribe to our channel
Signup for Exclusive "Subscriber-only" Content