Overview
Oracle WebLogic Server is a scalable, enterprise-ready Java Platform, Enterprise Edition 7 (Java EE 7) application server. Oracle WebLogic Server is the industry's best application server for building and deploying enterprise Java EE applications with support for new features for lowering the cost of operations, improving performance, enhancing scalability and supporting the Oracle Applications portfolio.
Prerequisite
The following items are required to complete the procedures in this post:
Weblogic Domain with at least one serving Managed Node (JVM)
Test-sample.EAR or any .ear, .war or .jar file for deployment.
Procedure
Deploying the EAR File into the WebLogic Domain
- Start the WebLogic Administration Server by executing ./startWebLogic.sh
- Access Administration console by browsing https://localhost:7002/console
- Domain credentials are mandatory while deployed through WebLogic Server Administration Console
- Enter the domain user name and password, and then click Log In.
- The Oracle WebLogic Server Administration Console home page is displayed.
- On Left-Top corner, click on Lock & Edit button in Change Centre.
- Expand Environments and review if managed Node is available unders Serverss.
- Click on Deployments from the Domain Structure tree.
- The Summary of Deployments page is displayed.
- Click the Install button.
- The Install Application Assistant screen is displayed.
- Enter or locate the path to the EAR file.
- Select the Test-sample.ear file, and click Next.
- Select Install this deployment as an application and click Next
- You may see another radio button as Install Application as Library, but you can ignore this for now.
- Select the Deployment Targets, select the managed Node for which application will be installed.
- Retain the page defaults in optional settings, and click Finish.
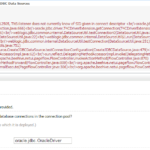
- The EAR file is deployed and confirmation message that the deployment was successful is displayed in the Summary of Deployments page, which can take several minutes.
- The Summary of Deployments page is displayed.
- Save the configurations displayed after deployment.
- Click Activate the changes in change centre.
- On installed application click Start and select Servicing all requests to ensure that all requests are served by the managed Node.
Now you have deployed an application and targeted it to a JVM, which will serve the purpose of installed application!.