Ansible Dynamic inventory is a wonderful feature to efficiently manage the entire infrastructure, In an ideal world the list of hosts we have in our infrastructure would not be static, the number of hosts would increase or decrease based on the new instance provisioning and server decommissioning.
In this variable and Dynamic infrastructure setup, you cannot keep updating (or) removing the servers into the ansible host group or inventory file, to solve this problem Ansible has this Dynamic inventory concept where you could use some scripts as your inventory source rather defining a static ansible_hosts inventory file with a specific list of hosts.
While Ansible Dynamic inventory is used with various providers like vagrant, openstack, cobbler, aws etc. we are going to choose the most popular AWS cloud provider for this post.

Prerequisites
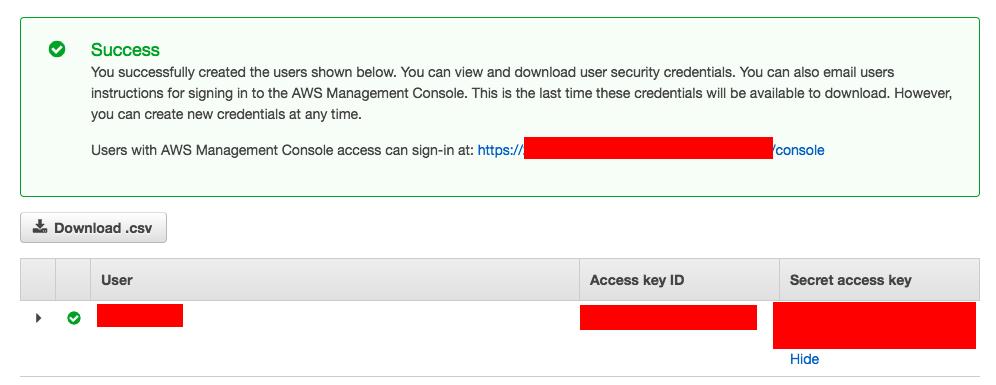
In order to connect to the AWS infrastructure to fetch any data, you must be having the AWS programming access API Key and Secret
Which would be created when you are creating an account in AWS IAM and you might also need the Python boto package as well to execute this ansible aws dynamic inventory script.
If you are already having all of this then you are Good to skip. otherwise, please visit these following links to know further how to get these things done.
- How to setup Boto python for Ansible AWS usage
- How to setup programmatic Access for AWS - Key and Secret
Ansible Dynamic Inventory for AWS - Download
you might have already understood that the ansible dynamic inventory for AWS is a script. It is in fact written in python using the boto module which is one of our prerequisites.
You can download the Ansible dynamic inventory for aws script from here
the script file name would be ec2.py
How to use the Ansible dynamic inventory script ( ec2.py )
You can use this script in one of two ways. The easiest is to use Ansible’s -i command-line option and specify the path to the script after marking it executable:
ansible -i ec2.py -u ubuntu us-east-1d -m ping
The second option is to copy the script to /etc/ansible/hosts and chmod +x it. You must also copy the ec2.ini file to /etc/ansible/ec2.ini. Then you can run ansible as you would normally.
in this post, we are going to see the first way of using it with ansible -i command line.
As we have mentioned in earlier in our prerequisites, To make a successful API call to AWS, you must configure Boto (the Python interface to AWS). You can do this in several ways available, but the simplest is by exporting two environment variables like follows.
export AWS_ACCESS_KEY_ID='AK123'
export AWS_SECRET_ACCESS_KEY='abc123'
How to create and use Access and Secret key is covered in detail on the links given on the prerequisites section.
Testing the downloaded ec2.py script
I presume that you have all the prerequisites covered and having the AWS Keys in your environment variable as well.
Consider that, Now we are all set to test the downloaded dynamic inventory script ec2.py
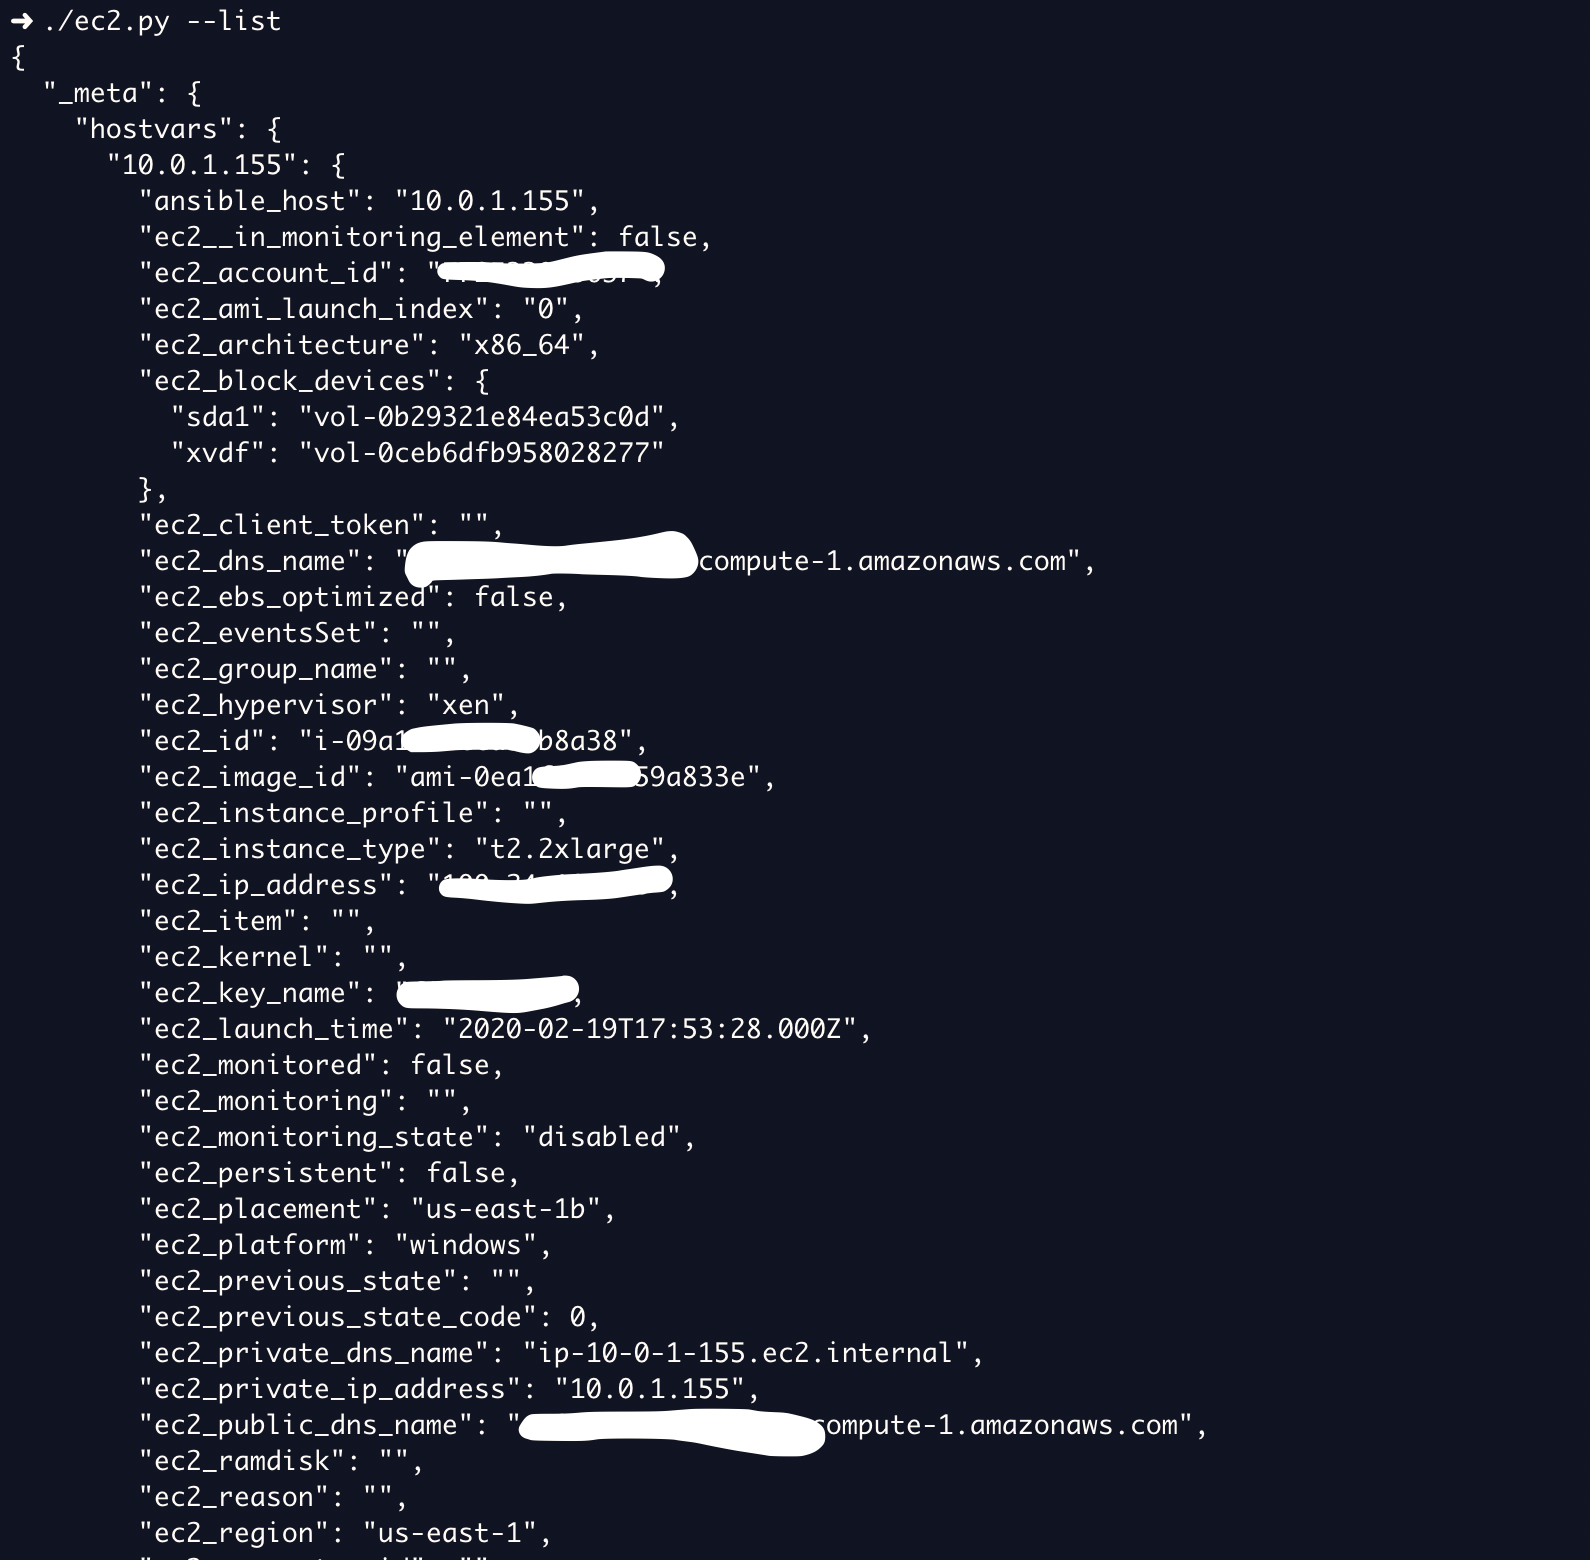
in your terminal simply type ec2.py – list
you should see a JSON result something like this and it would be very lengthy with various different groups.
Note*: Dynamic inventory brings all the instances across all the regions in your AWS account, so no need to specify the region
Understanding the output and Customizing it with ec2.ini
The resulted JSON data would contain very detailed information of every single instance we have on the AWS, By default it only considers the running instances stopped instances are ignored.
If you look at the result closely, you can see the instances are already grouped (ansible host group) based on the following elements
- Region
- tag value & Name
- Operating System
- VPC
- AMI image id
- Security group
- instance ID etc..
It comes batteries included you just have to use the right group name when you are using this as a dynamic inventory with Ansible.
Sometimes we would like to customize this result where you could use the ec2.ini file which comes with ec2.py
Note*: The
ec2.pyandec2.inifile both has to be kept on the same directory if you want the ec2.py to consider the customization you have made on theec2.inifile
For Example: By default, the public ip would be the host identifier here and that's the IP being used across all the host grouping in this dynamic inventory. For Some reason, if you want the dynamic inventory to display the private_ip you have to edit the ec2.ini file that you have downloaded along with the ec2.py file.
If not done already download ec2.ini
How to use Dynamic inventory host groups with Ansible
Before using these host groups in complex playbooks, Its always recommended to test the connectivity using ansible ping ad hoc command
In my case, I have a tag named OS in my instances with the right OS distribution name like ubuntu, centos, linux etc. I have grouped it this way so that I can use the right username while connecting to the host group,
For instance, If I want to connect to the Linux server i should use ec2-user as my remote user name, for ubuntu the username is ubuntu like that.
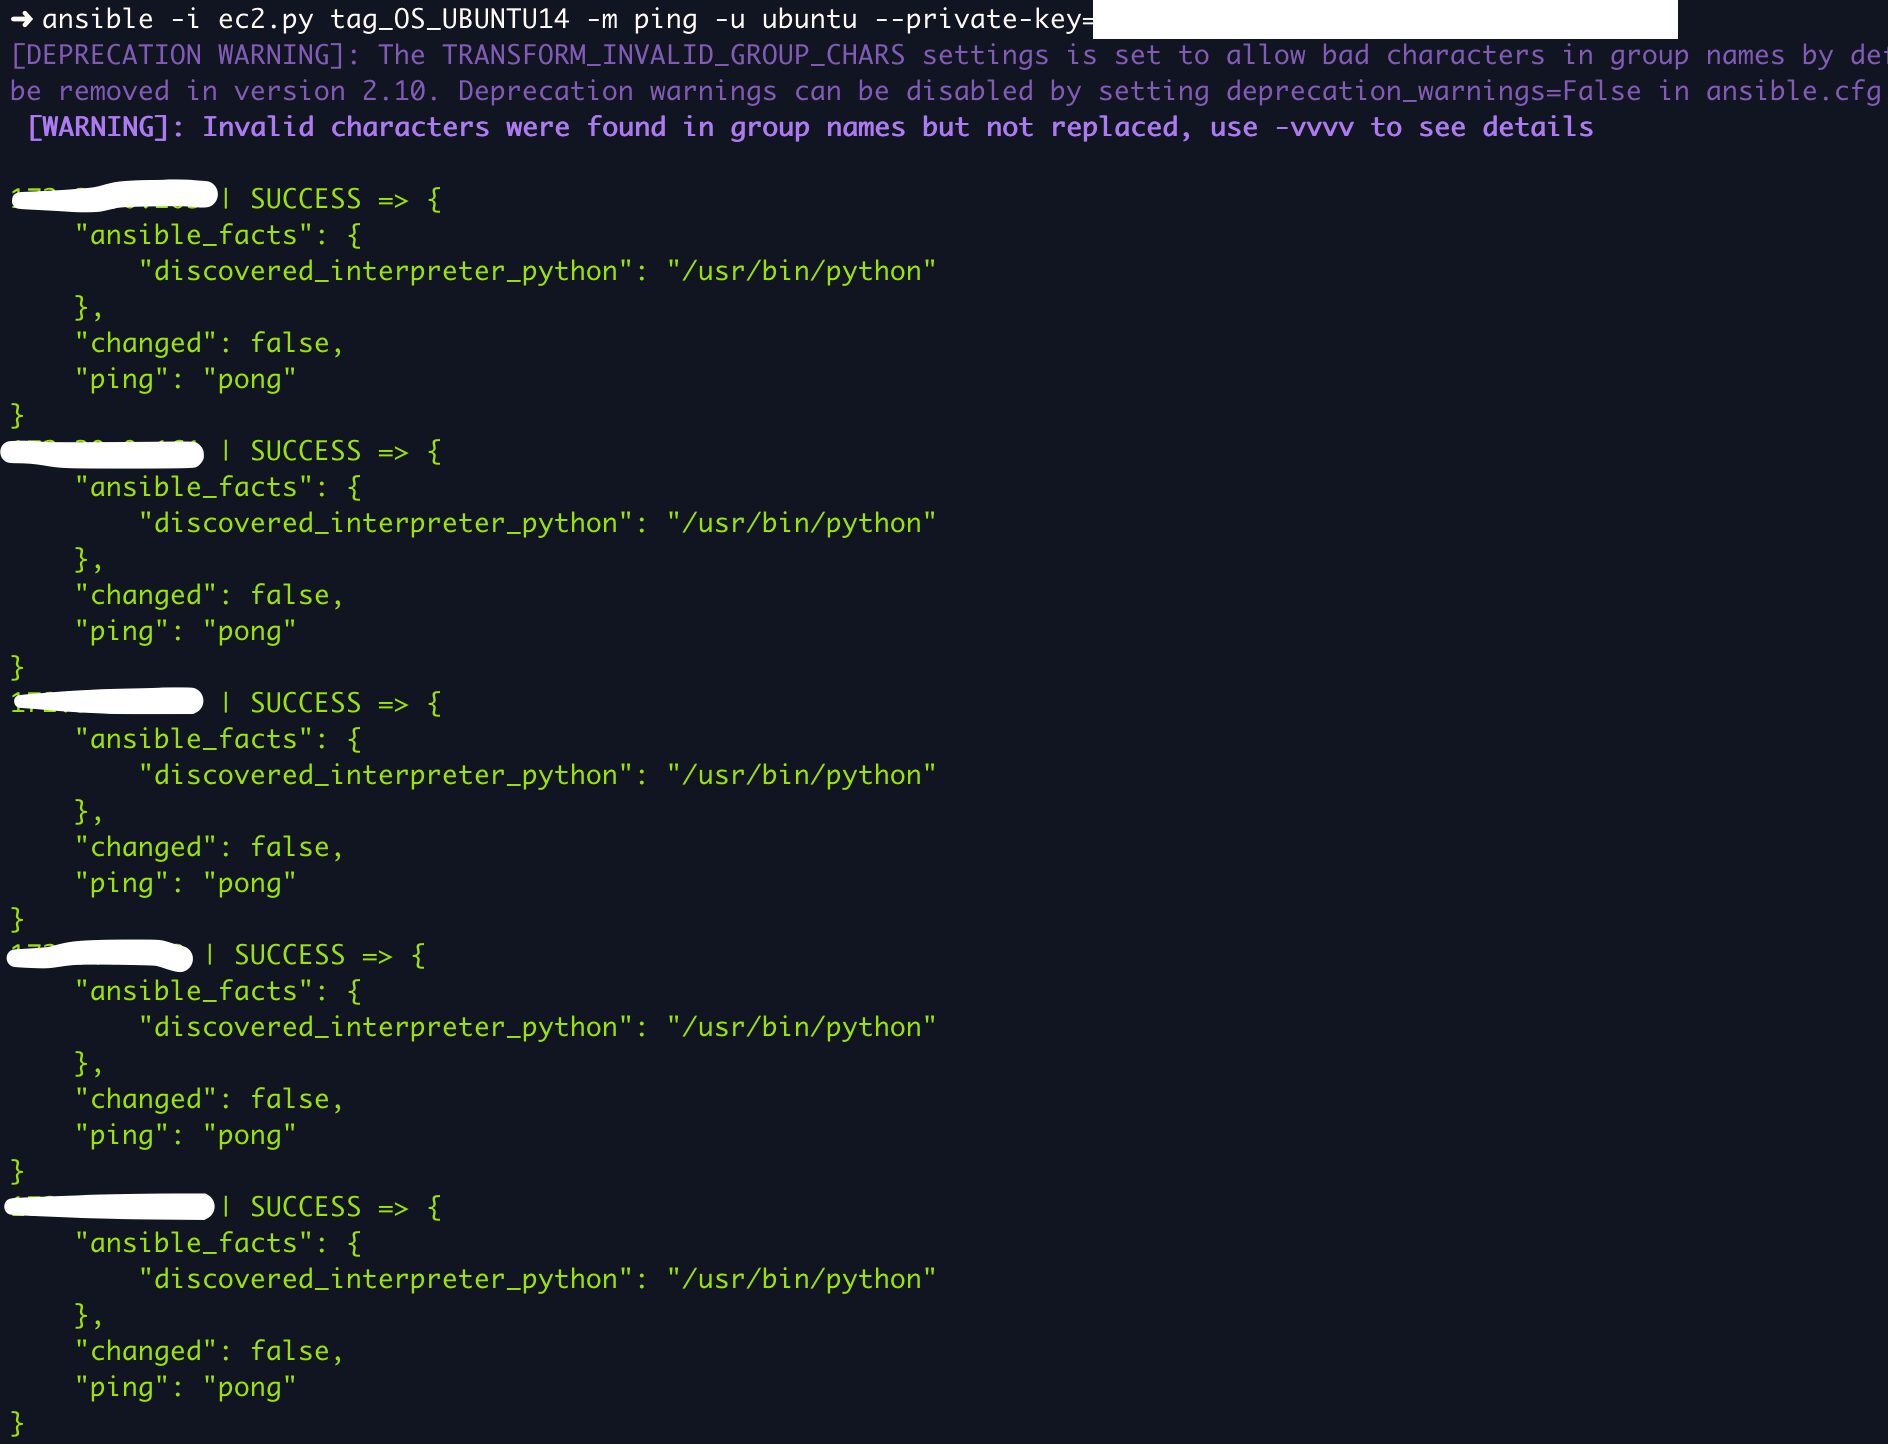
Here is the Ansible ad hoc ping command I am going to execute against tag_OS_UBUNTU14
ansible -i ec2.py tag_OS_UBUNTU14 -m ping -u ubuntu – private-key=<keyfilename.pem>
here is the another Ansible AD HOC command you can execute to get the disk space stats from all the server beneath the ubuntu host group
ansible -i ec2.py tag_OS_UBUNTU14 -m shell -a "df -k" -u ubuntu – private-key=<keyfilename.pem>
There are various ad hoc command one-liners you might want to try Ansible ad hoc commands cheat sheet
Example playbook with Dynamic host group to upgrade openssl
Here is the playbook example to run against the tag_OS_UBUNTU14 host group and to upgrade the openssl
---
 - name: Ansible apt module examples
   hosts: tag_OS_UBUNTU14
   become: true
   tasks:
    - name: Ansible Update Cache and upgrade openssl
      apt:
        name: openssl
        state: latest
        update_cache: yes
we are defining the host group name in the hosts attribute of the playbook as usual.
This is the command I could use to run this playbook
ansible-playbook playbookname.yml -i ec2.py -u ubuntu – private-key=<keyfilename.pem>
Conclusion
In this post, we have used only one host group and a Simple playbook and an ad-hoc command example as we want to talk only about the Dynamic inventory setup. You can try setting this up in your environment and use those host groups or hosts for various tasks and automation.
Hope this article helps you to understand how to use the Ansible Dynamic inventory of AWS . If you have any comments or questions feel free to write a comment
Cheers
Sarav AK

Follow me on Linkedin My Profile Follow DevopsJunction onFacebook orTwitter For more practical videos and tutorials. Subscribe to our channel
Signup for Exclusive "Subscriber-only" Content