In this post, we are going to see how to Design and Develop a Simple NodeJS web application and Deploy the NodeJS web application to Docker and How to create Docker Images and start the container from the images and How to manage the docker container and publish your images to docker hub etc.
Docker Node JS Example Web Application.
NodeJS is a JavaScript runtime environment, widely used and popular for its asynchronous request handling. It is one of the latest and futuristic technologies being used in modern web development.
Docker is a container management system, It helps us to create, manage and administrate containers in an easy and efficient way.
Shortly put, This post is all about Docker NodeJS.
To know more about what is container and containerisation, Refer this link
The Index
This is the summary of topics we are going to see in this article.
- What we are going to build - Docker NodeJS Website
- Installing Docker and NodeJS
- Node JS Configuration and Setup
- Create a package.json file
- Create the Application's Primary JavaScript file
- Create HTML pages for your website
- Test Our Website Locally Before Packing it as Container
- Docker Configuration and Setup
- Create a Dockerfile
- Creating Image from Dockerfile
- Create and Start the Container from the Image we have created
- Validate the web application Running inside Container.
- Publish your Image to the DockerHUB (optional)
- Commands to Manager your Container ( Additional)
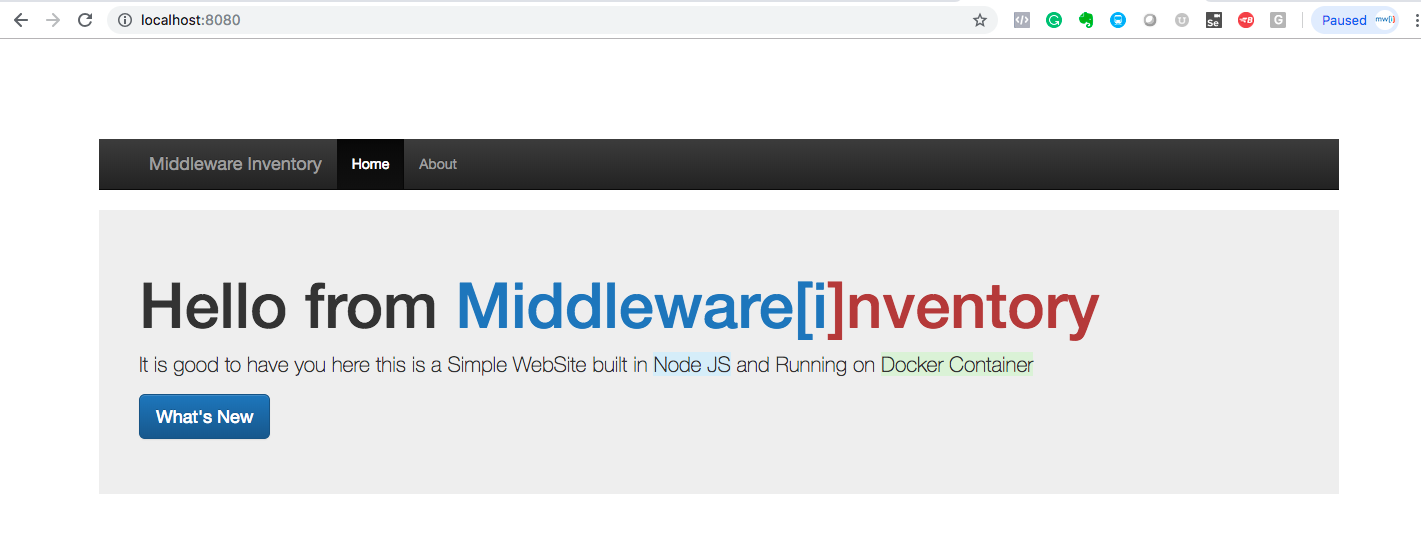
What we are going to build - Docker NodeJS Example Web App
This is the demo or sample Docker NodeJS example website we are going to build.
Before proceeding to the steps of design and development of Node JS website and Docker Image. Let us see how is our desired result is going to be
Installing Docker and NodeJS
In order to follow this article, It is good to have the following environment set at your host machine or this is the technology stack being used in this article.
Note*: This is not inside the container. This is a Host machine ( Local Environment) where you have Docker installed (or) going to install.
Machine: Mac/Windows
Docker Installation: Docker CE
aksarav@middlewareinventory:/tmp$ docker version
Client:
 Version:           18.06.1-ce
 API version:       1.38
 Go version:        go1.10.3
 Git commit:        e68fc7a
 Built:             Tue Aug 21 17:21:31 2018
 OS/Arch:           darwin/amd64
 Experimental:      false

Server:
 Engine:
  Version:          18.06.1-ce
  API version:      1.38 (minimum version 1.12)
  Go version:       go1.10.3
  Git commit:       e68fc7a
  Built:            Tue Aug 21 17:29:02 2018
  OS/Arch:          linux/amd64
  Experimental:     true
Package Manager: NPM
aksarav@middlewareinventory:/tmp$ npm version
{ dockernodejsapp: '1.0.0',
  npm: '6.4.1',
  ares: '1.15.0',
  cldr: '33.1',
  http_parser: '2.8.0',
  icu: '62.1',
  modules: '64',
  napi: '3',
  nghttp2: '1.34.0',
  node: '10.15.0',
  openssl: '1.1.0j',
  tz: '2018e',
  unicode: '11.0',
  uv: '1.23.2',
  v8: '6.8.275.32-node.45',
  zlib: '1.2.11' }
Server Framework: NodeJS
aksarav@middlewareinventory:/tmp$ node – version
v10.15.0
IDE: Visual Studio Code in my case.
NodeJS Configuration and Setup
In this segment, we are going to see the Node JS specific configuration steps like how to create a Node JS website from the scratch
We are going to use an EXPRESS web application framework of Node js to build websites as it can easily render the HTML pages and do everything we need for modern website development.
Note*: Before performing the following steps, you must create a workspace (or) project directory anywhere in your file system. In my case, workspace or Project Root is
/apps/docker/DockerNodeJSProject
Step1: Create a package.json file
package.json file generally resides in the project root directory and it contains the METADATA and all the project specific information and dependencies of your project.
Inside the project root directory create a new file named package.json with the following Contents
{
  "dependencies": {
    "express": "*"
  },
  "scripts": {
    "start": "node app.js"
  },
  "name": "dockernodejsproject",
  "version": "1.0.0",
  "main": "app.js",
  "devDependencies": {},
  "author": "SaravAK",
  "license": "MIT",
  "description": "Sample NodeJS Project with Expres FrameWork and Running in Docker Container"
}
You can change the Author name and License and the project name according to your need.
If you notice, there is a property/key named main holding the "app.js" as the value. This is our index file or the primary JavaScript file where we are going to create our web application specific configuration.
Step2: Create the Application's Primary JavaScript file (app.js)
This is the primary JavaScript file for our web application. which is the core file for the NODE to set up our web application
This file would be having all the site-specific information like the HTML page to render or the HTML code to display along with the server-specific information like the port number and listen-address etc.
Now in the project root, create a new file named app.js and paste the following content.
const express = require('express');
const app = express();
const path = require('path');

// this will accept all the calls to root URL http://localhost:8080/
// It will render the index.html available in the Project root directory as a Response
app.get('/', (req,res) => {
  res.sendFile(path.join(__dirname+'/index.html'));
  //__dirname : It will resolve to your project folder.
});

// this will accept all the calls to the URL http://localhost:8080/about
// It will render the about.html available in the Project root directory as a Response
app.get('/about', (req,res) => {
    res.sendFile(path.join(__dirname+'/about.html'));
    //__dirname : It will resolve to your project folder.
  });

app.listen(8080, () => {
    console.log('Listening on port 8080');
});
This is a simple code with pretty much information in the comments on what each module is doing. So we are now having two listeners
- Listener "/" – Home Page - It renders index.html page
- Listener "/about" – About Us Page - It renders about.html page
Step3: Place the HTML files required for our Project
As we have already defined the HTML file names in the JavaScript file. Now it is a time to place the files in the project root directory
The index.html page
<!DOCTYPE html>
<head>
    <title>Sample Home Page </title>
    <script src="https://ajax.googleapis.com/ajax/libs/jquery/1.11.2/jquery.min.js"></script>
    <link rel="stylesheet" href="https://maxcdn.bootstrapcdn.com/bootstrap/3.3.1/css/bootstrap.min.css">
    <link rel="stylesheet" href="https://maxcdn.bootstrapcdn.com/bootstrap/3.3.1/css/bootstrap-theme.min.css">
    <script src="https://maxcdn.bootstrapcdn.com/bootstrap/3.3.1/js/bootstrap.min.js"></script>
  </head>
  <body>
    <div style="margin:100px;">
      <nav class="navbar navbar-inverse navbar-static-top">
    <div class="container">
      <a class="navbar-brand" href="/">Middleware Inventory</a>
      <ul class="nav navbar-nav">
        <li class="active">
          <a href="/">Home</a>
        </li>
        <li>
          <a href="/about">About</a>
        </li>
      </ul>
    </div>
  </nav>
      <div class="jumbotron"  style="padding:40px;">
        <h1>Hello from  <span class="text-primary">Middleware[i</span><span class="text-danger">]nventory</span></h1>
        <p>It is good to have you here this is a Simple WebSite built in <span class="bg-info">Node JS</span> and Running on <span class="bg-success">Docker Container</span></p>
        <p><a class="btn btn-primary btn-lg" href="#" role="button">What's New</a></p>
      </div>
    </div>
  </body>
</html>
The about.html page
<!DOCTYPE html>
<head>
    <title>About Us Page</title>
    <script src="https://ajax.googleapis.com/ajax/libs/jquery/1.11.2/jquery.min.js"></script>
    <link rel="stylesheet" href="https://maxcdn.bootstrapcdn.com/bootstrap/3.3.1/css/bootstrap.min.css">
    <link rel="stylesheet" href="https://maxcdn.bootstrapcdn.com/bootstrap/3.3.1/css/bootstrap-theme.min.css">
    <script src="https://maxcdn.bootstrapcdn.com/bootstrap/3.3.1/js/bootstrap.min.js"></script>
  </head>
  <body>
    <div style="margin:100px;">
      <nav class="navbar navbar-inverse navbar-static-top">
    <div class="container">
      <a class="navbar-brand" href="/">Middleware Inventory</a>
      <ul class="nav navbar-nav">
        <li>
          <a href="/">Home</a>
        </li>
        <li class="active">
          <a href="/about">About</a>
        </li>
      </ul>
    </div>
  </nav>
      <div class="jumbotron"  style="padding:40px;">
        <h1>About Us</h1>
        <strong><p> An Inventory of Information - Middleware | Devops | Infrastructure Automation and much more</p></strong>
        <p><a class="btn btn-primary btn-lg" href="#" role="button">Click here to Join us</a></p>
      </div>
    </div>
  </body>
</html>
Test our Web Application Locally Before Packing as Container
In order to start the web application we have designed, we need to have the dependencies Installed. In our case, we have only one dependency which is express framework
Step 1: Install the dependencies
By executing a Simple command you can install all the project dependencies you require for your web application to work well.
npm install
Step 2: Start your Web Application
With a Single command, your Web Application is ready to test.
aksarav@middlewareinventory:/apps/docker/DockerNodeJSProject$ npm start

> dockernodejsproject@1.0.0 start /apps/docker/DockerNodeJSProject
> node app.js

Listening on port 8080
Now go to your browser and access http://localhost:8080 and make sure you see somthing like this
Docker Configuration and Setup
In this segment, we are going to containerize our application we have created. In other words, we are going to create an Image which can be used by anyone to create a container and to achieve the same result as we did.
Step 1: Creating a Dockerfile
This is a Simply a manifest on how your image should be created. Docker uses this manifest or configuration file to create the image.
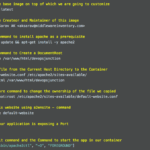
In the project root directory create a new file named Dockerfile and place the following content.
# Choose the Image which has Node installed already
FROM node:alpine

# COPY all the files from Current Directory into the Container
COPY ./ ./

# Install the Project Dependencies like Express Framework
RUN npm install

# Tell that this image is going to Open a Port
EXPOSE 8080

# Default Command to launch the Application
CMD ["npm", "start"]
If you can read the comments in the file you can easily understand what each line is intended to do.
Note*: As per Docker Syntax, Dockerfile is the rigteous name of Manifest file with D capital with no file extension, If you are thinking that there is a mistake. No there is Not.
Step 2: Build a docker nodejs Image using the Dockerfile
Using the Dockerfile we have created. Let us create an Image.
Note*: Before Creating the Image, Please be aware, It is a good practice that you name your images with your docker username in a prefix, It would enable you to share your work(images) with other people easily in future with the help of docker hub which we will see later in this article.
Having said that it is always recommended to name your images after your docker username. I am going to do the same and my docker username is saravak
$ docker build -t saravak/dockernodejs .
Sending build context to Docker daemon  1.921MB
Step 1/5 : FROM node:alpine
 – -> 5206c0dd451a
Step 2/5 : COPY ./ ./
 – -> Using cache
 – -> 3a9ad7b01c24
Step 3/5 : RUN npm install
 – -> Running in f8a975dbc0fd
npm WARN dockernodejsproject@1.0.0 No repository field.

audited 121 packages in 2.39s
found 0 vulnerabilities

Removing intermediate container f8a975dbc0fd
 – -> 1c5c849fffc3
Step 4/5 : EXPOSE 8080
 – -> Running in 38fb8a4f741a
Removing intermediate container 38fb8a4f741a
 – -> a598183cf805
Step 5/5 : CMD ["npm", "start"]
 – -> Running in 9e4cdd605018
Removing intermediate container 9e4cdd605018
 – -> 33b591fa48f4
Successfully built 33b591fa48f4
Successfully tagged saravak/dockernodejs:latest
In the preceding snippet, you can see we have successfully created an image and named it as saravak/dockernodejs
The command we used to build the Image from the Dockerfile is
docker build -t saravak/dockernodejs .
here the PERIOD/DOT at the end is intentional and it represents the current directory. With this command issued, Docker looks for a Dockerfile in the current directory and create the image out of it
To validate if your image has created and to know the list of images available in your system locally. use the following command.
docker images
Step 3: Start the Container from the Image we have created
The Image we have created in Step2 is ready to be started and it can now become a Fully Qualified and Operational Container.
The following Command would create and start the Container from the image we have created
docker container run -it -p 8081:8080 -d --name nodejsdocker saravak/dockernodejs
Here
-it - This flag sets the container in Interactive mode and allocate a Dedicated TTY id for later SSHing
-d - This flag sets the container to run in the background.
-p 8081:8080 - Port Forwarding Between Host and the Container. Right to the colon is a container and Left to the colon is Host. 8081 is the Host and 8080 is the container Port.
nodejsdocker - Name of the container we are starting ( Replacement of Container ID)
saravak/dockernodejs - The name of the image from which we are going to create a Container
Step 4: Validate the Web Application Running inside the Container
Having started the Container with Port Forwarding to the host machine on Port 8081. I shold be able to access the website from the Host machine (mac/windows) at http://localhost:8081
If everything is done correctly, We should be able to see our desired website which we have tested locally.
Yay. That's all. It is that simple to develop a WebSite in Node JS and running it on the Docker Container.
Thanks to Evloution of IT.
Step 5: Publish your Docker NodeJS image to Docker Hub
Since we are now done with our validation and Objective. Now Let us See some advancements or best practices like sharing our image with the rest of the world using Docker Hub.
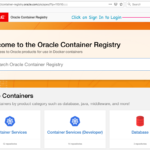
What is Docker Hub
Docker Hub is Image repository where various Application and OS images from various Companies and Individuals are published. You can publish your image as well for free and people who are in a Pursuit a Similar infrastructure like what you have already built they can simply download the image and Start the Container or tweak it to suit their needs.
Uploading/publishing your images into Docker Hub can be done with
With that said, Now you can simply publish your images into docker hub.
There is no much changes are required in the image naming convention as your image already has your docker id in it.
All we have to do is executing two commands.
$ docker login
Login with your Docker ID to push and pull images from Docker Hub. If you don't have a Docker ID, head over to https://hub.docker.com to create one.
Username: saravak
Password:
Login Succeeded

$ docker push saravak/dockernodejs
The push refers to repository [docker.io/saravak/dockernodejs]
5d688400f121: Pushed
34c43f30441f: Pushed
aa1470e47a6e: Mounted from library/node
6606650e9143: Mounted from library/node
df64d3292fd6: Mounted from library/node
latest: digest: sha256:192979f9245fc986c821f81eea3ef5823b4dd4209e7801eb04a35a919c09cd17 size: 1368
Now anywhere in the world, you can download this image from the Docker Hub using the docker pull command like this
docker pull saravak/dockernodejs
Or you can create a container from this image directly using the container run command without even having to pull ( It will be taken care by Docker CE automatically )
docker container run -it -p 8080:8080 -d --name nodejsdocker saravak/dockernodejs
Commands to Manage your Docker NodeJS Container ( Additional Section )
In this segment, we have documented a few Quick Commands which might help you to manage your container efficiently
SSH into your container ( Not actually SSH )
The Docker container is not a Virtual Machine so you can SSH into It. It is a Process created from the image(snapshot). Though you cannot SSH into the Container Docker provides a way to get into the container
It is called Interactive Terminal. If you scroll up a bit you can see we have started our container by mentioning the flags
As this feature is enabled in our container. Now we can easily Login to our Container and Do all the Code Changes, Configuration updates
docker container exec -it nodejsdocker "/bin/sh"
Once you are into the Container you can manage it just like you do manage your Linux Virtual Machine. You have to Remember that the command supported would vary based on the base OS you have selected while creating the Image. In our case it is ALPINE
Docker Commands Cheat Sheet
# How to start and stop the container

docker stop <containername/id>  # to stop the container which is running in background mode
docker container start <containername/id> # to start the already stopped container

# monitoring the Container

docker container list # list the containers created
docker container ls -a  #to list the containers including not running containers
docker ps    #to list the running container
docker info #docker engine status including container running/paused/stopped containers list
docker container stats <containername/id> #prints the CPU and MEM usage data of the container name
docker container stats #prints the CPU and MEM usage of all running containers
docker container top <containername/id> #executes the top command in the container specified, fails if the specified container is not running

# How to remove/delete the container

docker container rm <containername/id> # Remove the Container

# How to remove/delete the image

docker container rmi <imagename/imageid> # Remove the image
# How to view the logs of the running container

docker container logs <containername/id> # to view the logs of the container
Hope this helps.
If you like it share it with your friends and bookmark our page
Cheers,
Sarav AK

Follow me on Linkedin My Profile Follow DevopsJunction onFacebook orTwitter For more practical videos and tutorials. Subscribe to our channel
Signup for Exclusive "Subscriber-only" Content