In this article, we are going to see how to deploy the SpringBoot application to Kubernetes using Jenkins. The platform we are choosing is IBM Cloud.
We are going to see SpringBoot Kubernetes Example setup on IBM Cloud using Jenkins Pipeline.
We will be creating Docker images, setting up Kubernetes, creating Jenkins pipeline, doing slack integration everything from the scratch
Learning objectives
In this tutorial, we will:
- Set up a Jenkins environment on Kubernetes
- Configure a CI/CD Jenkins pipeline
- Build Docker images using Jenkins
- Push Docker images to a Docker registry
- Deploy Docker images to a Kubernetes environment
- Integrate Slack and Jenkins
- Integrate GitHub and Jenkins using GitHub webhooks
Prerequisites
- Create a free IBM Cloud Account
- Install the IBM Cloud CLI
- Download and install Docker
- Create a Docker Hub Account
- Install the Kubernetes CLI(kubectl)
- Install a Git Client
- Create a GitHub Account
- Create a Slack Account
Steps
Follow these steps to set up and run this tutorial.
- Create a Kubernetes Cluster on IBM Cloud
- Build a Modified Jenkins Image
- Deploy a Modified Jenkins Image to Kubernetes
- Set up Jenkins Environment
- Create the First Jenkins Pipeline
- Integrate Jenkins and Slack
- Integrate Jenkins and GitHub
- Test the First Jenkins Pipeline.
1. Create a Kubernetes Cloud on IBM Cloud
- Create an IBM Cloud account (if you don’t have one!!) and login into the same with your credentials.
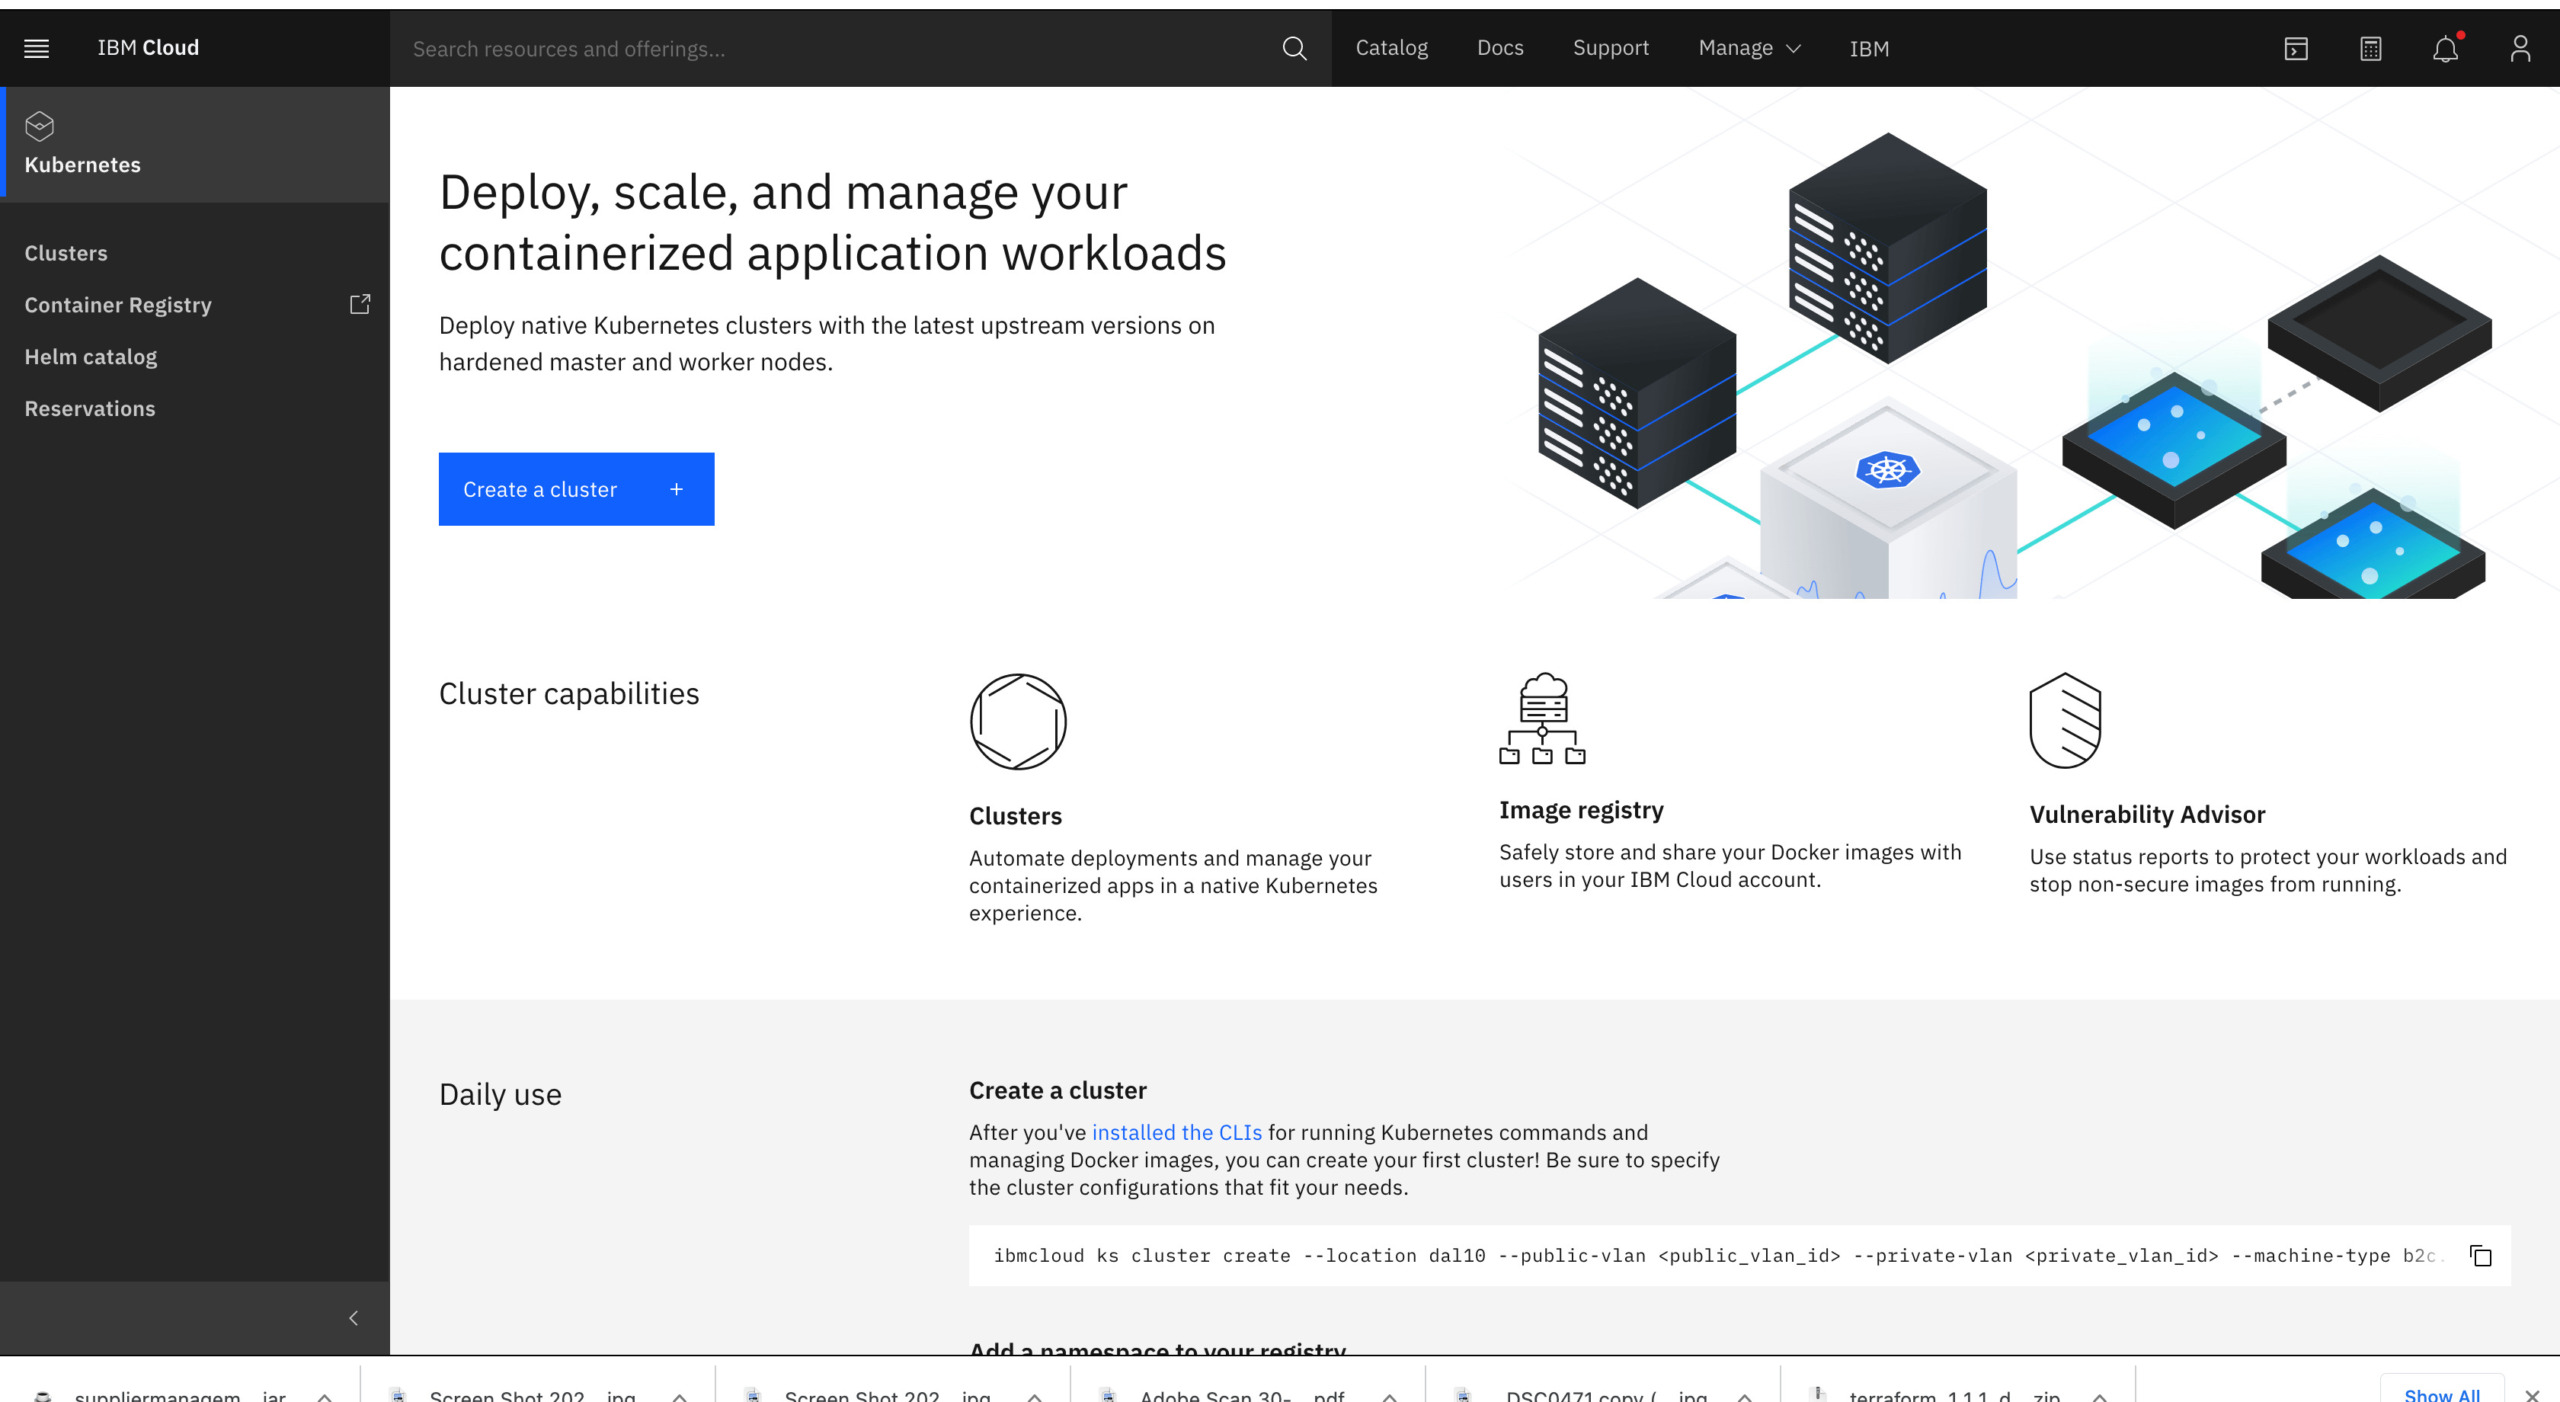
- Select
Kubernetesoption from the left panel and click on the ‘Create Cluster’ option

- Next, select the plan as ‘Free’ and give a proper name for the cluster and click on the ‘Create’ button.
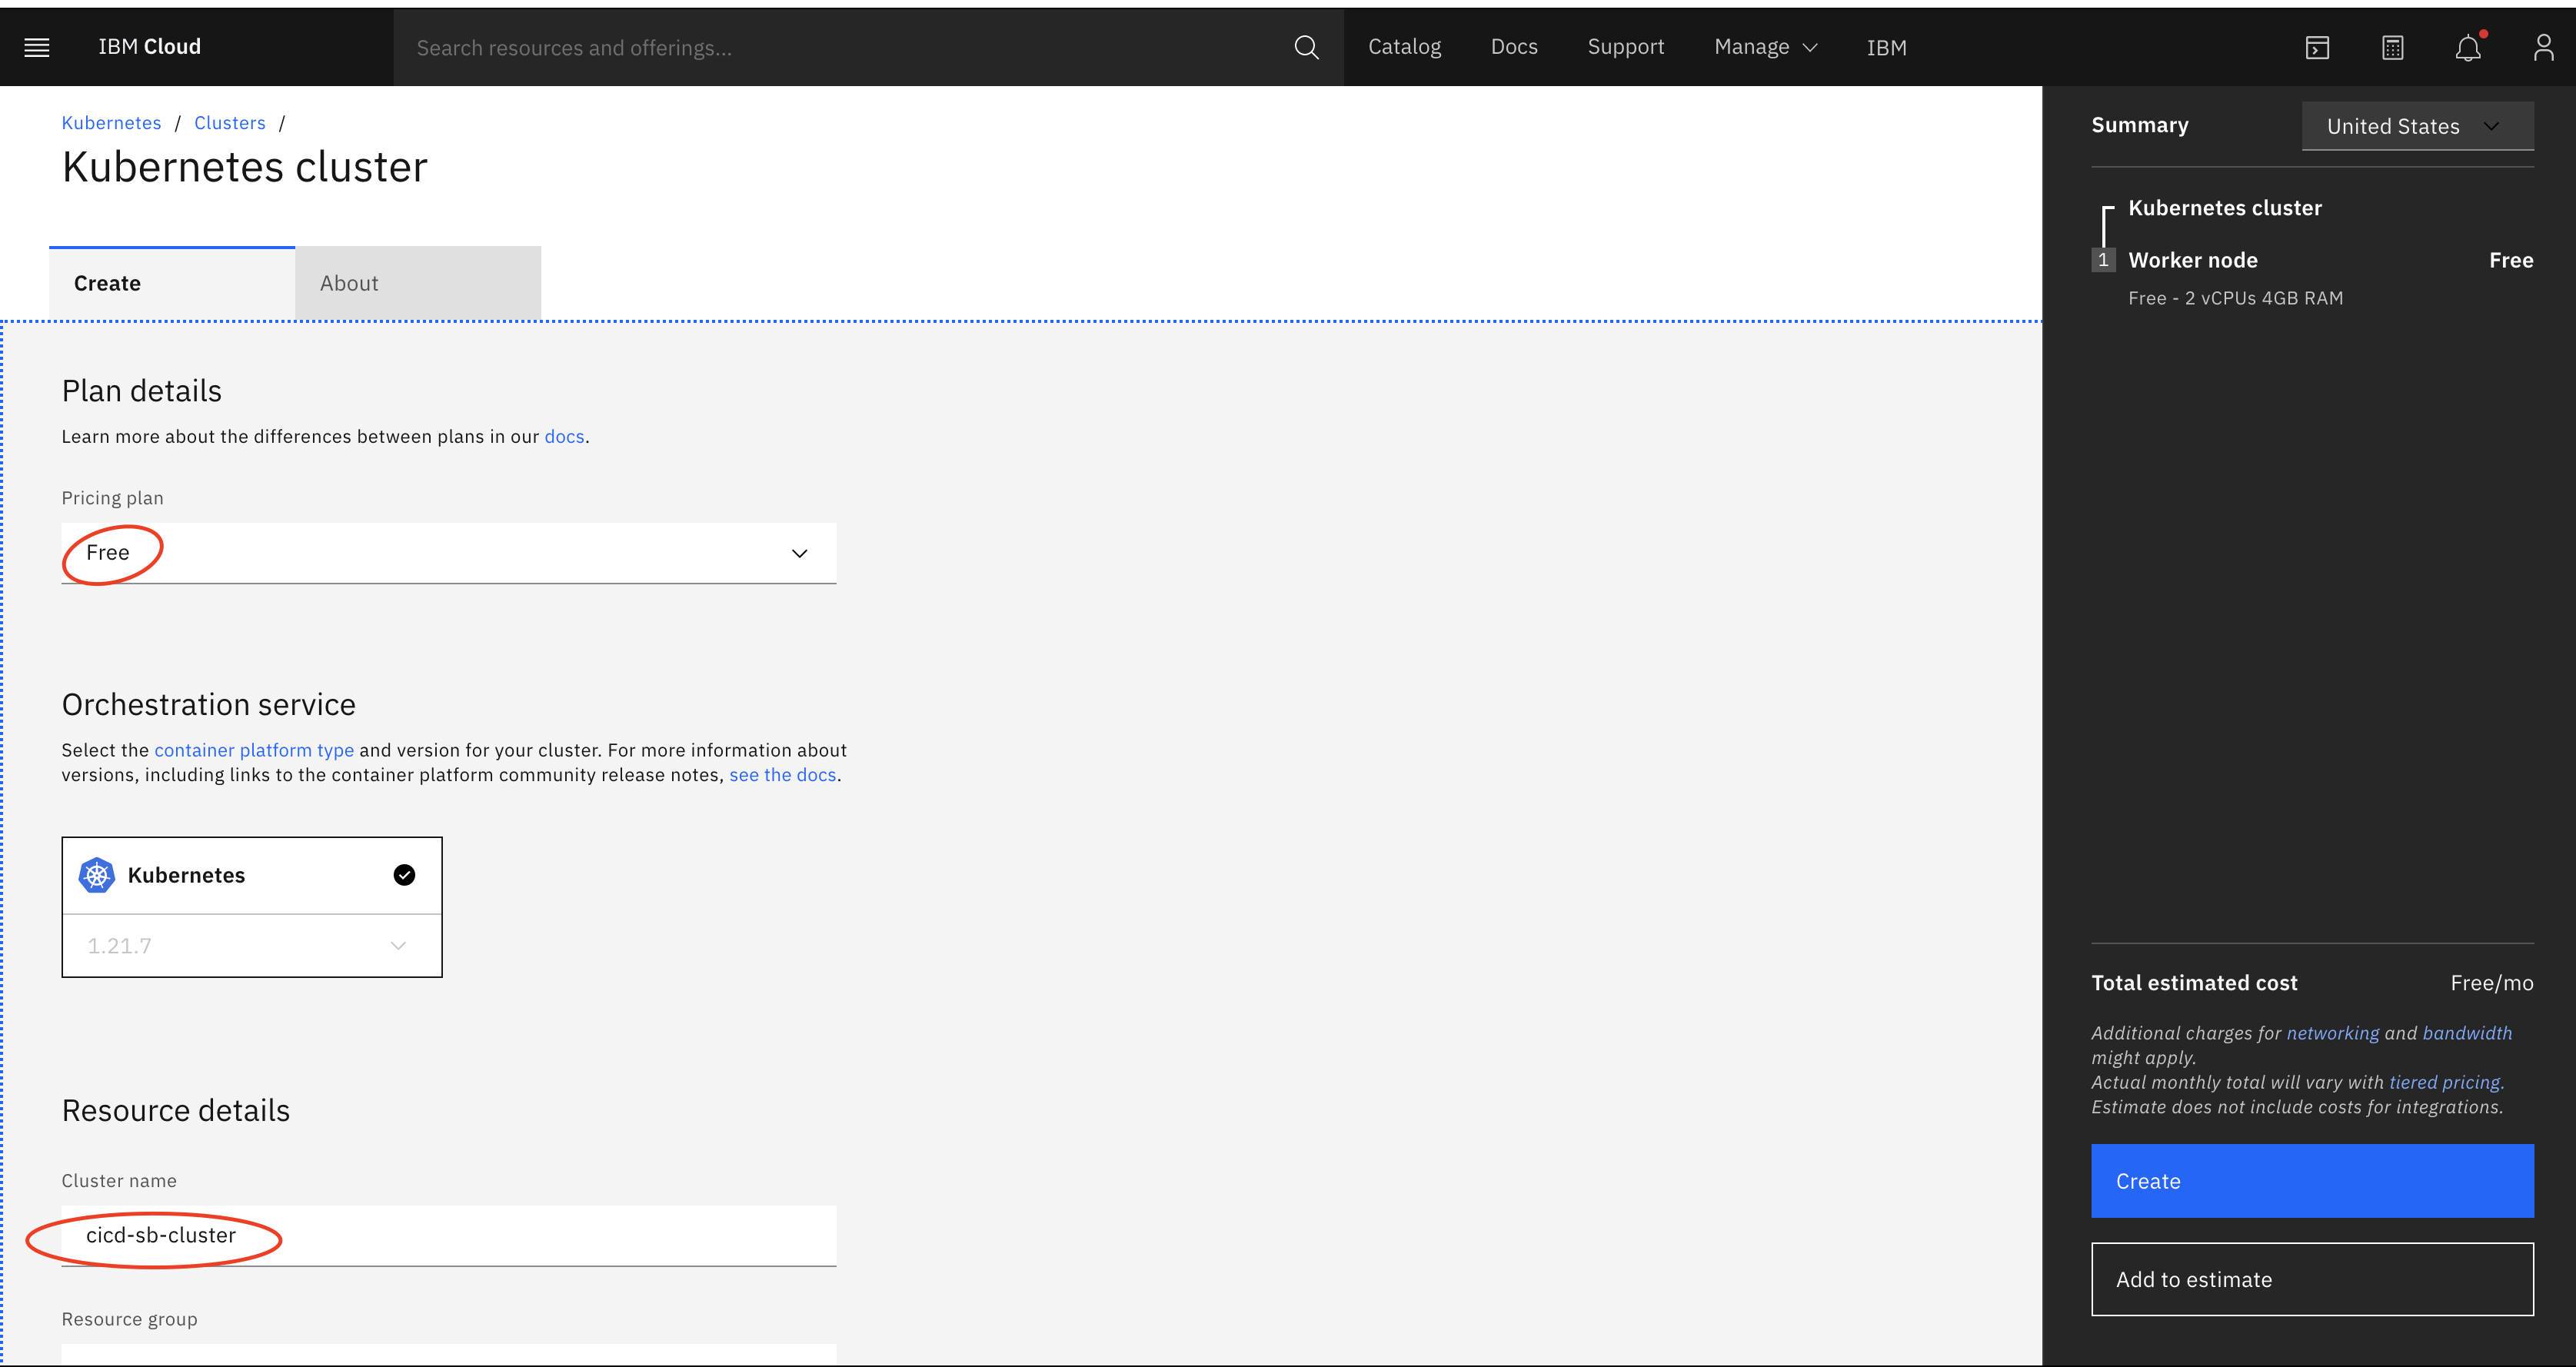
This will take about 30-40 mins to create the k8 cluster and to get the k8 dashboard up and ready.
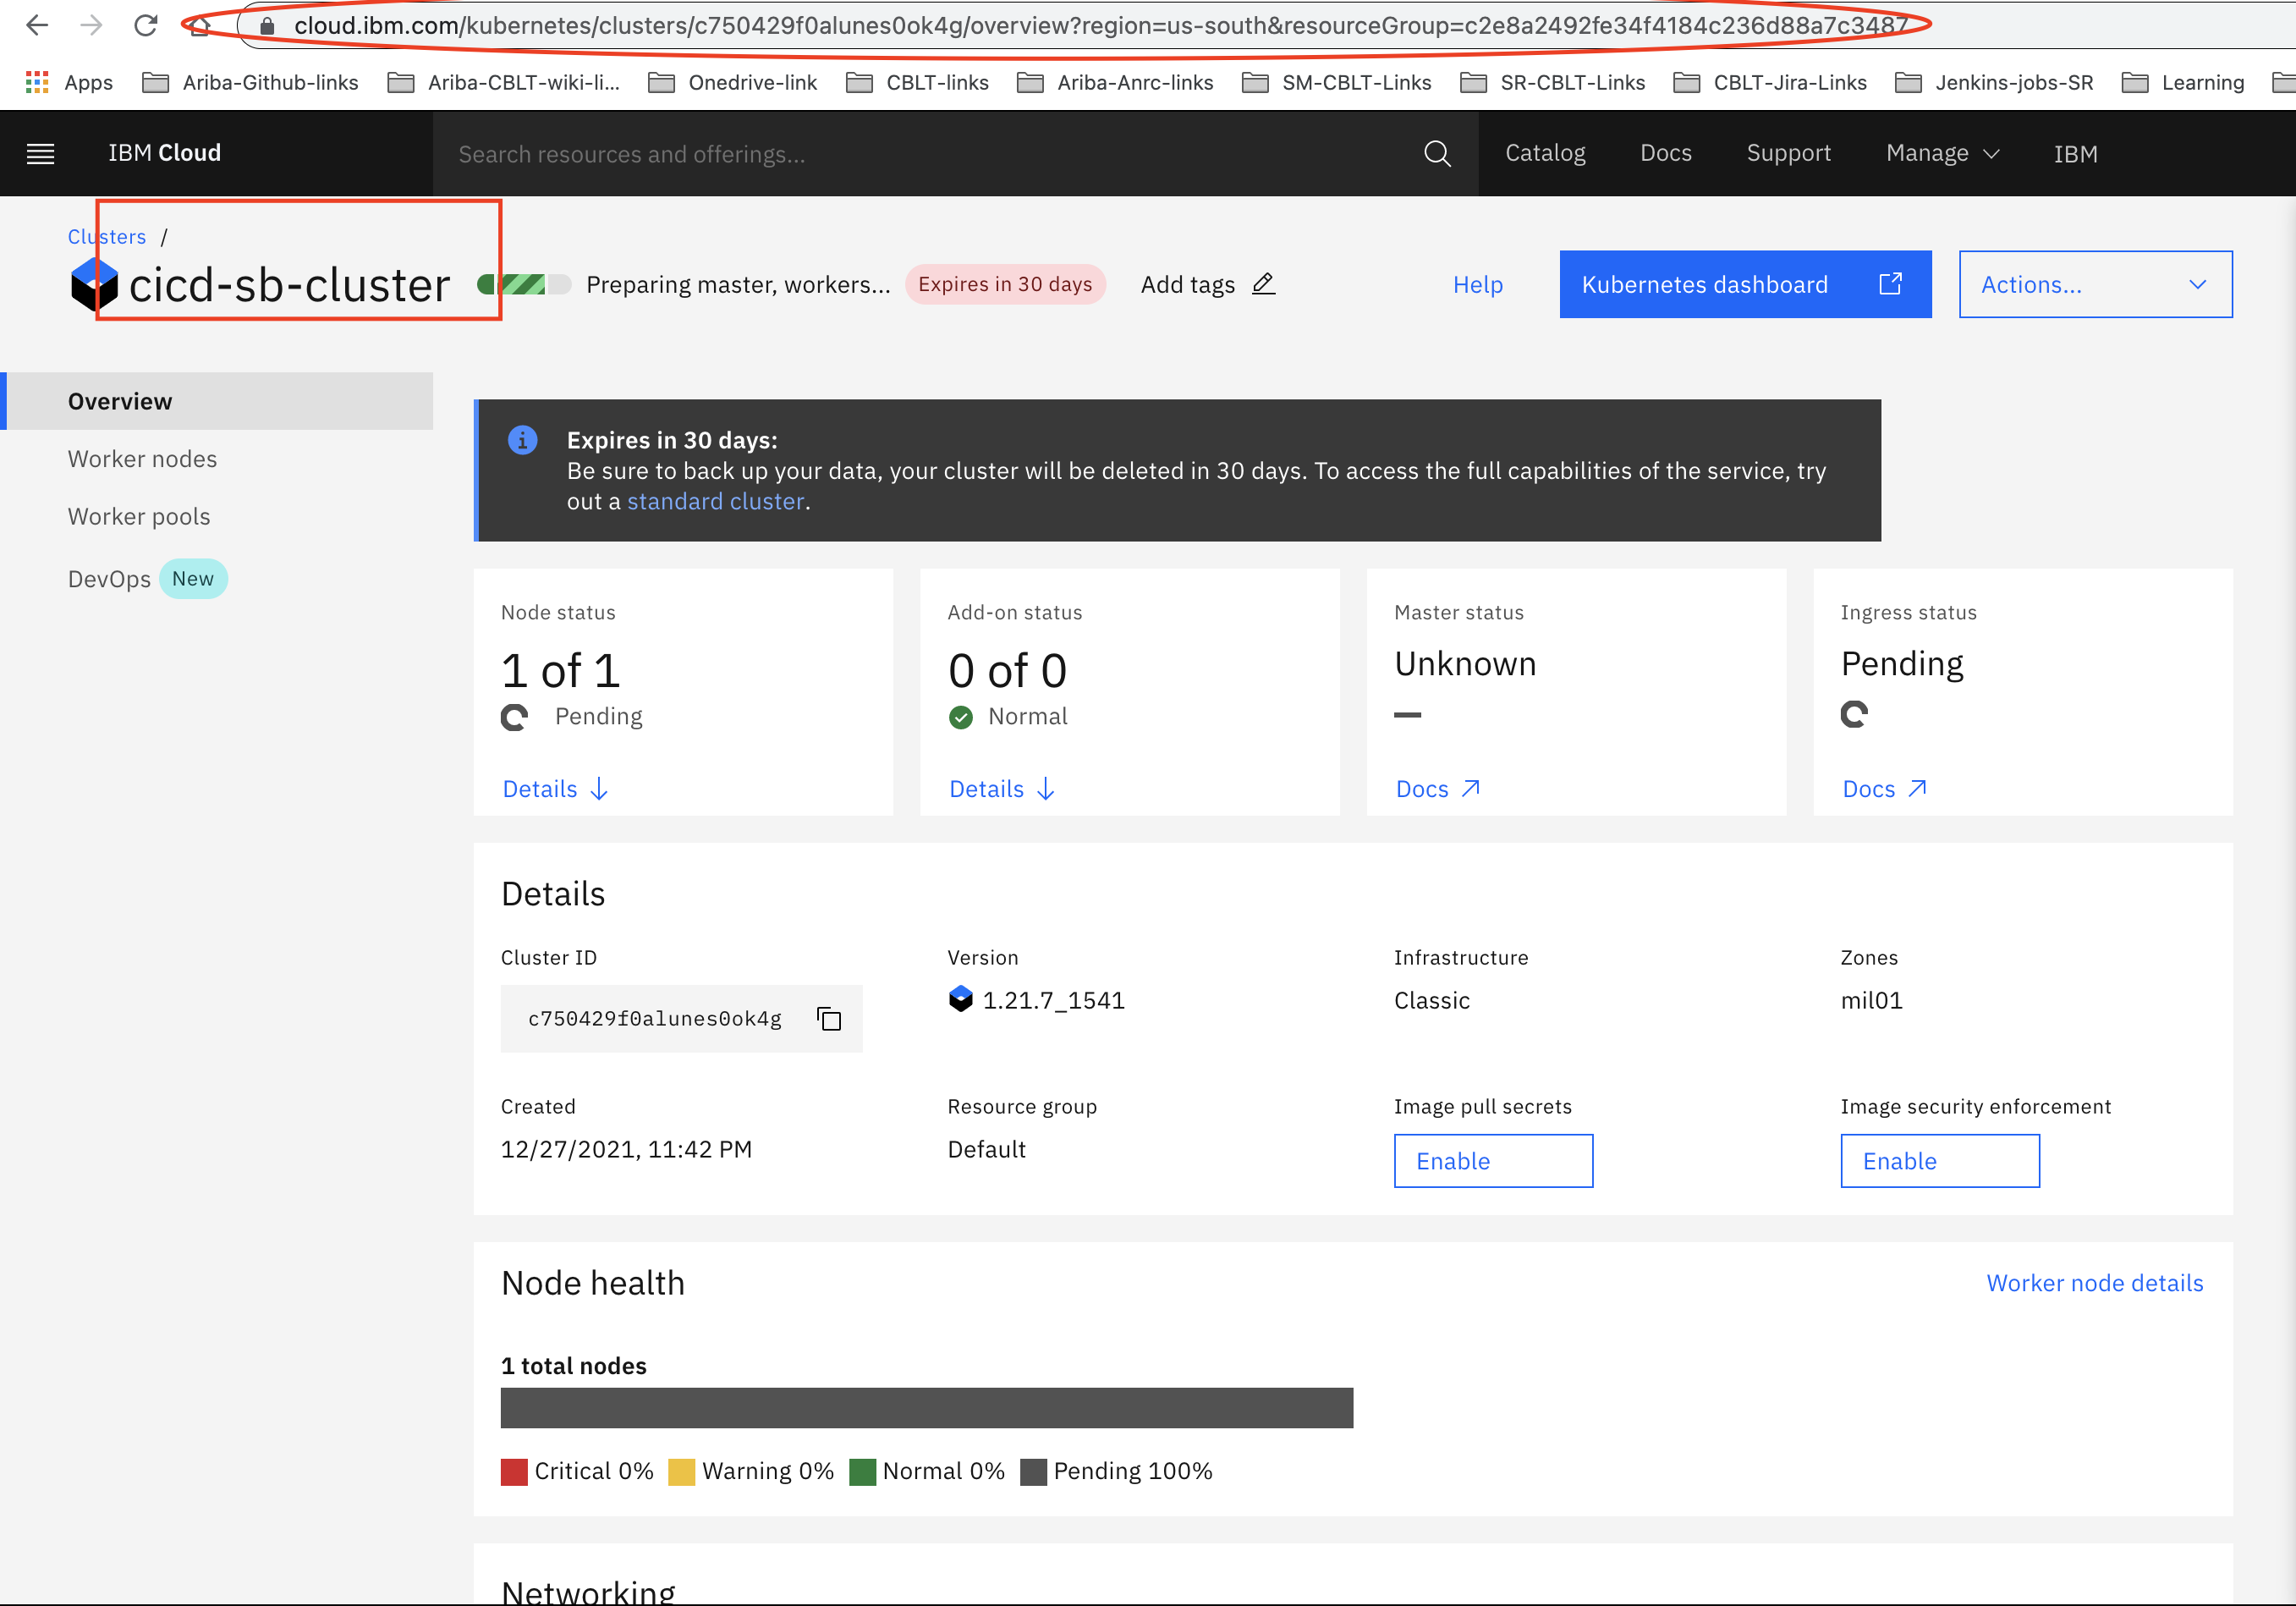
Make a note of the URL (refer to above image), we need resource group and region details for future use.
Once our node status is ‘normal’ , we should be able to conclude that Kubernetes successfully created node clusters.
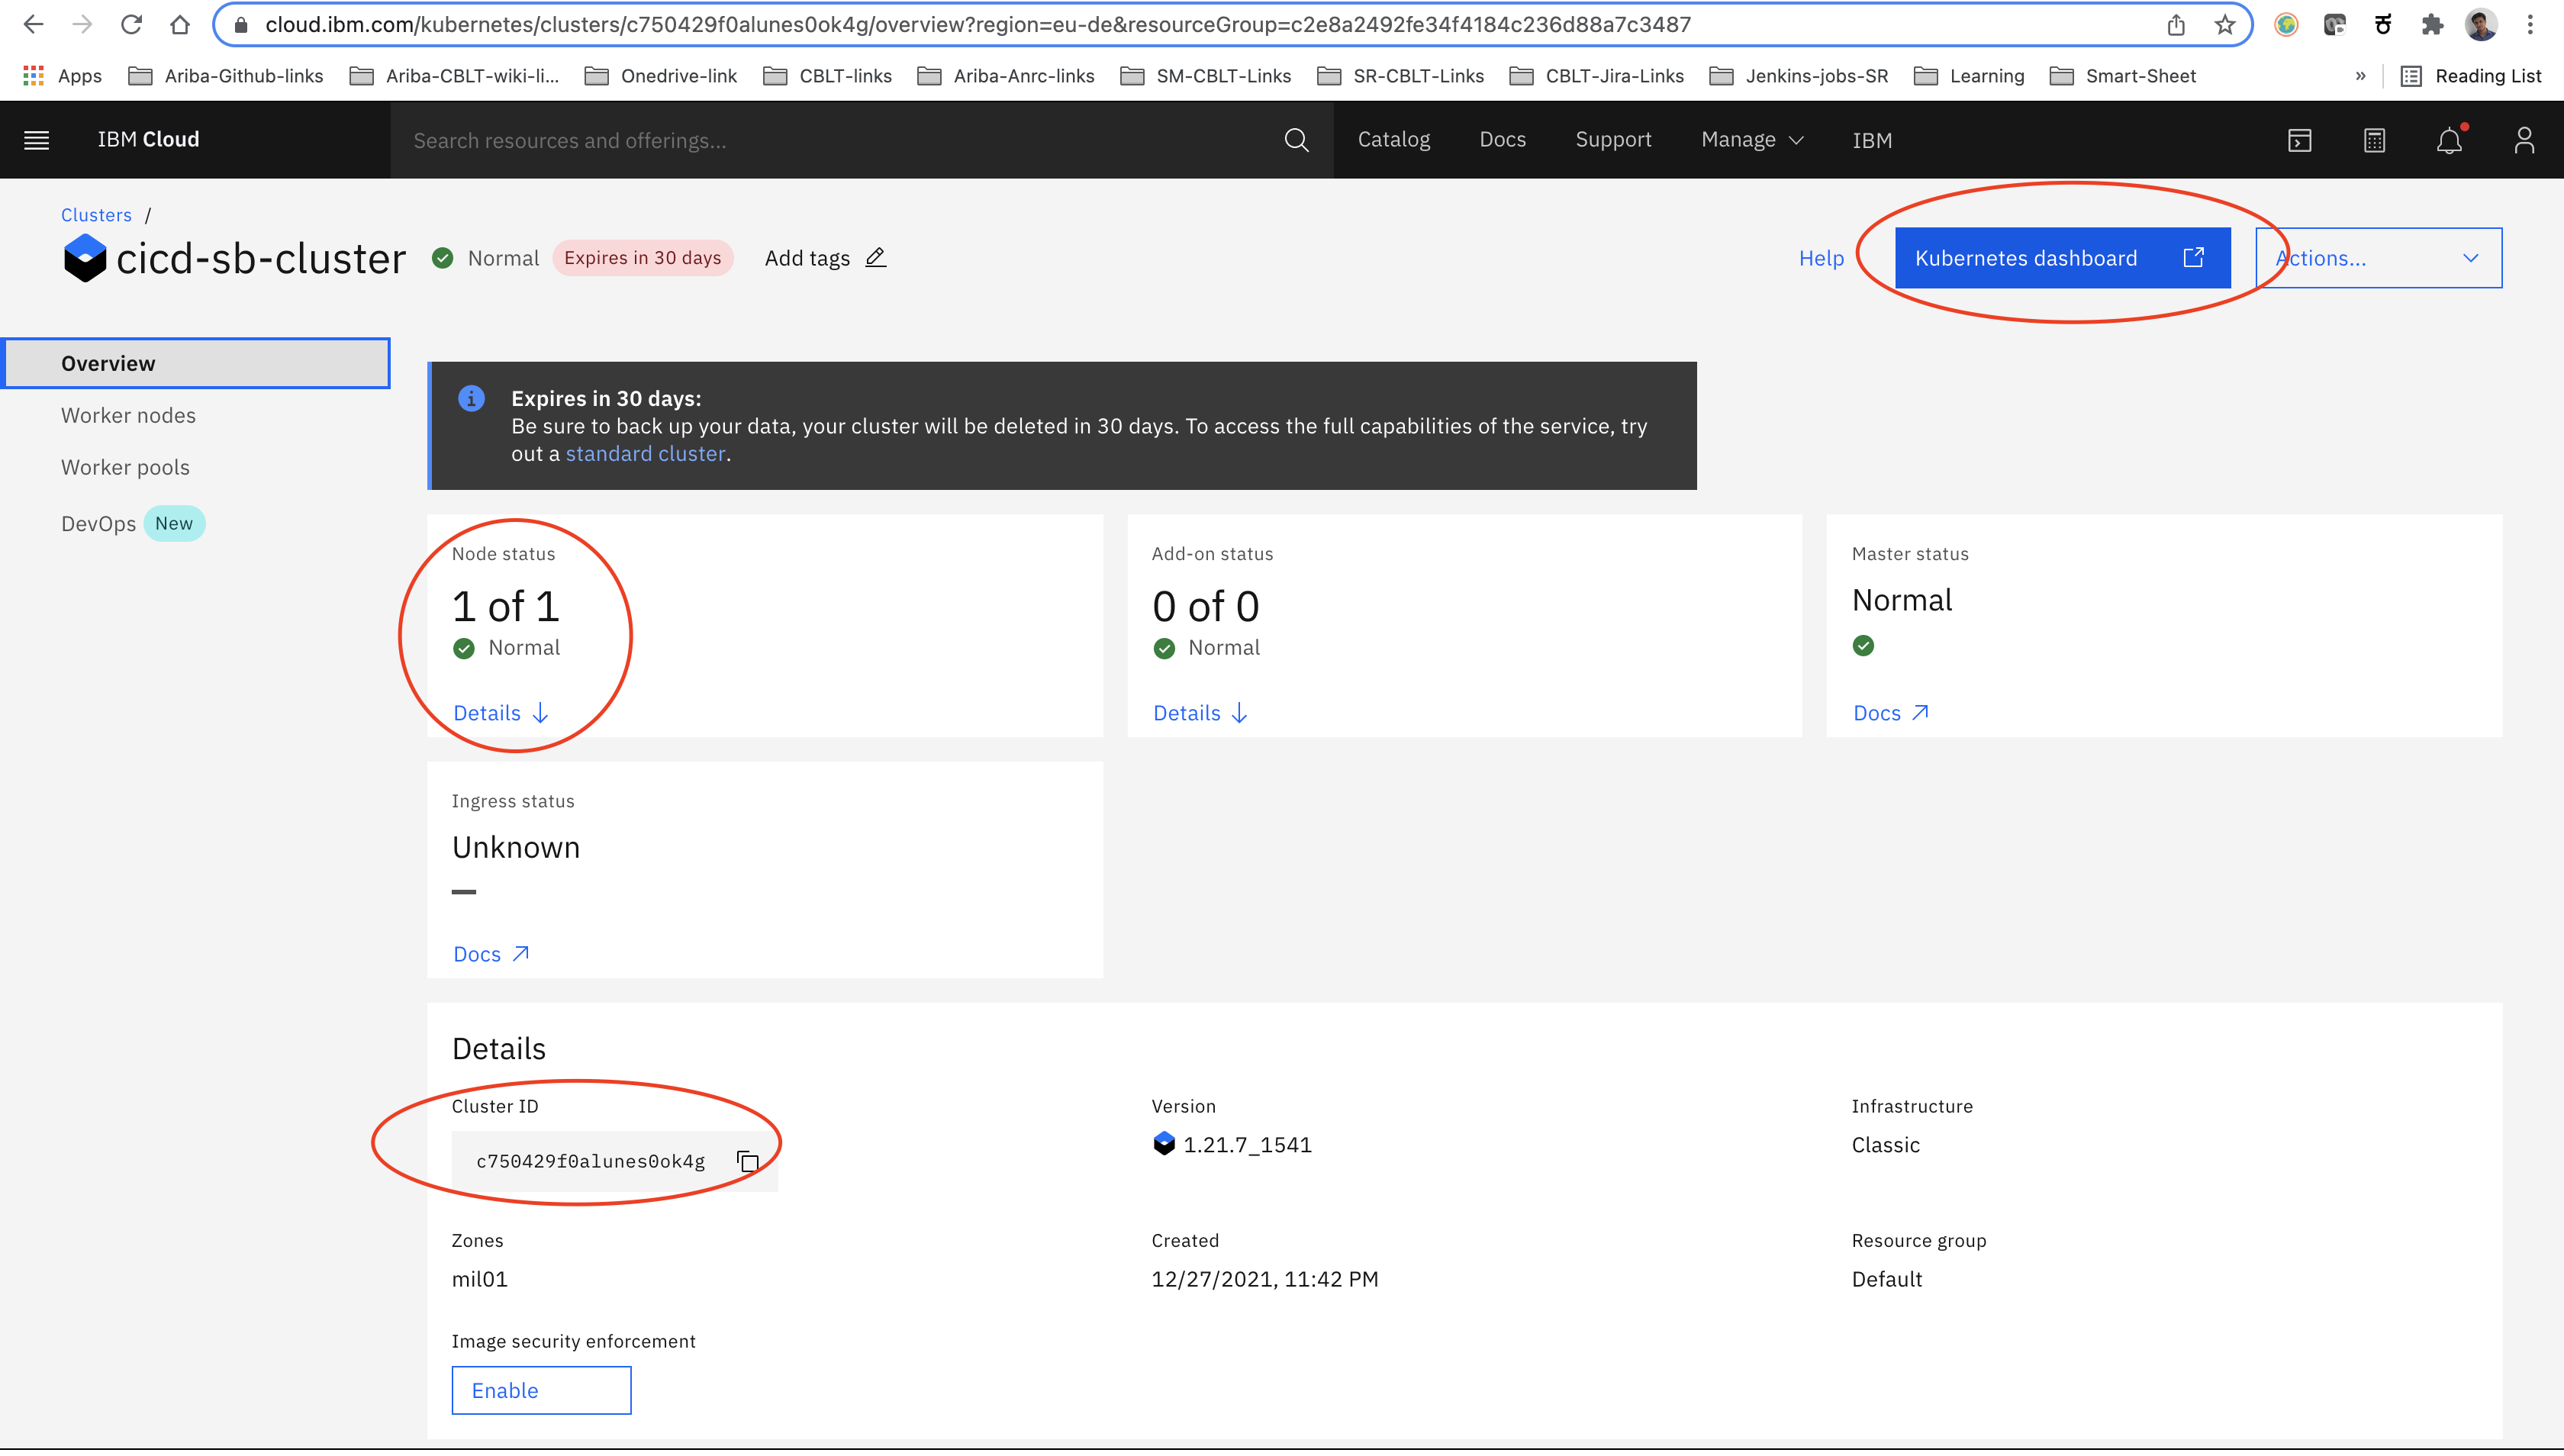
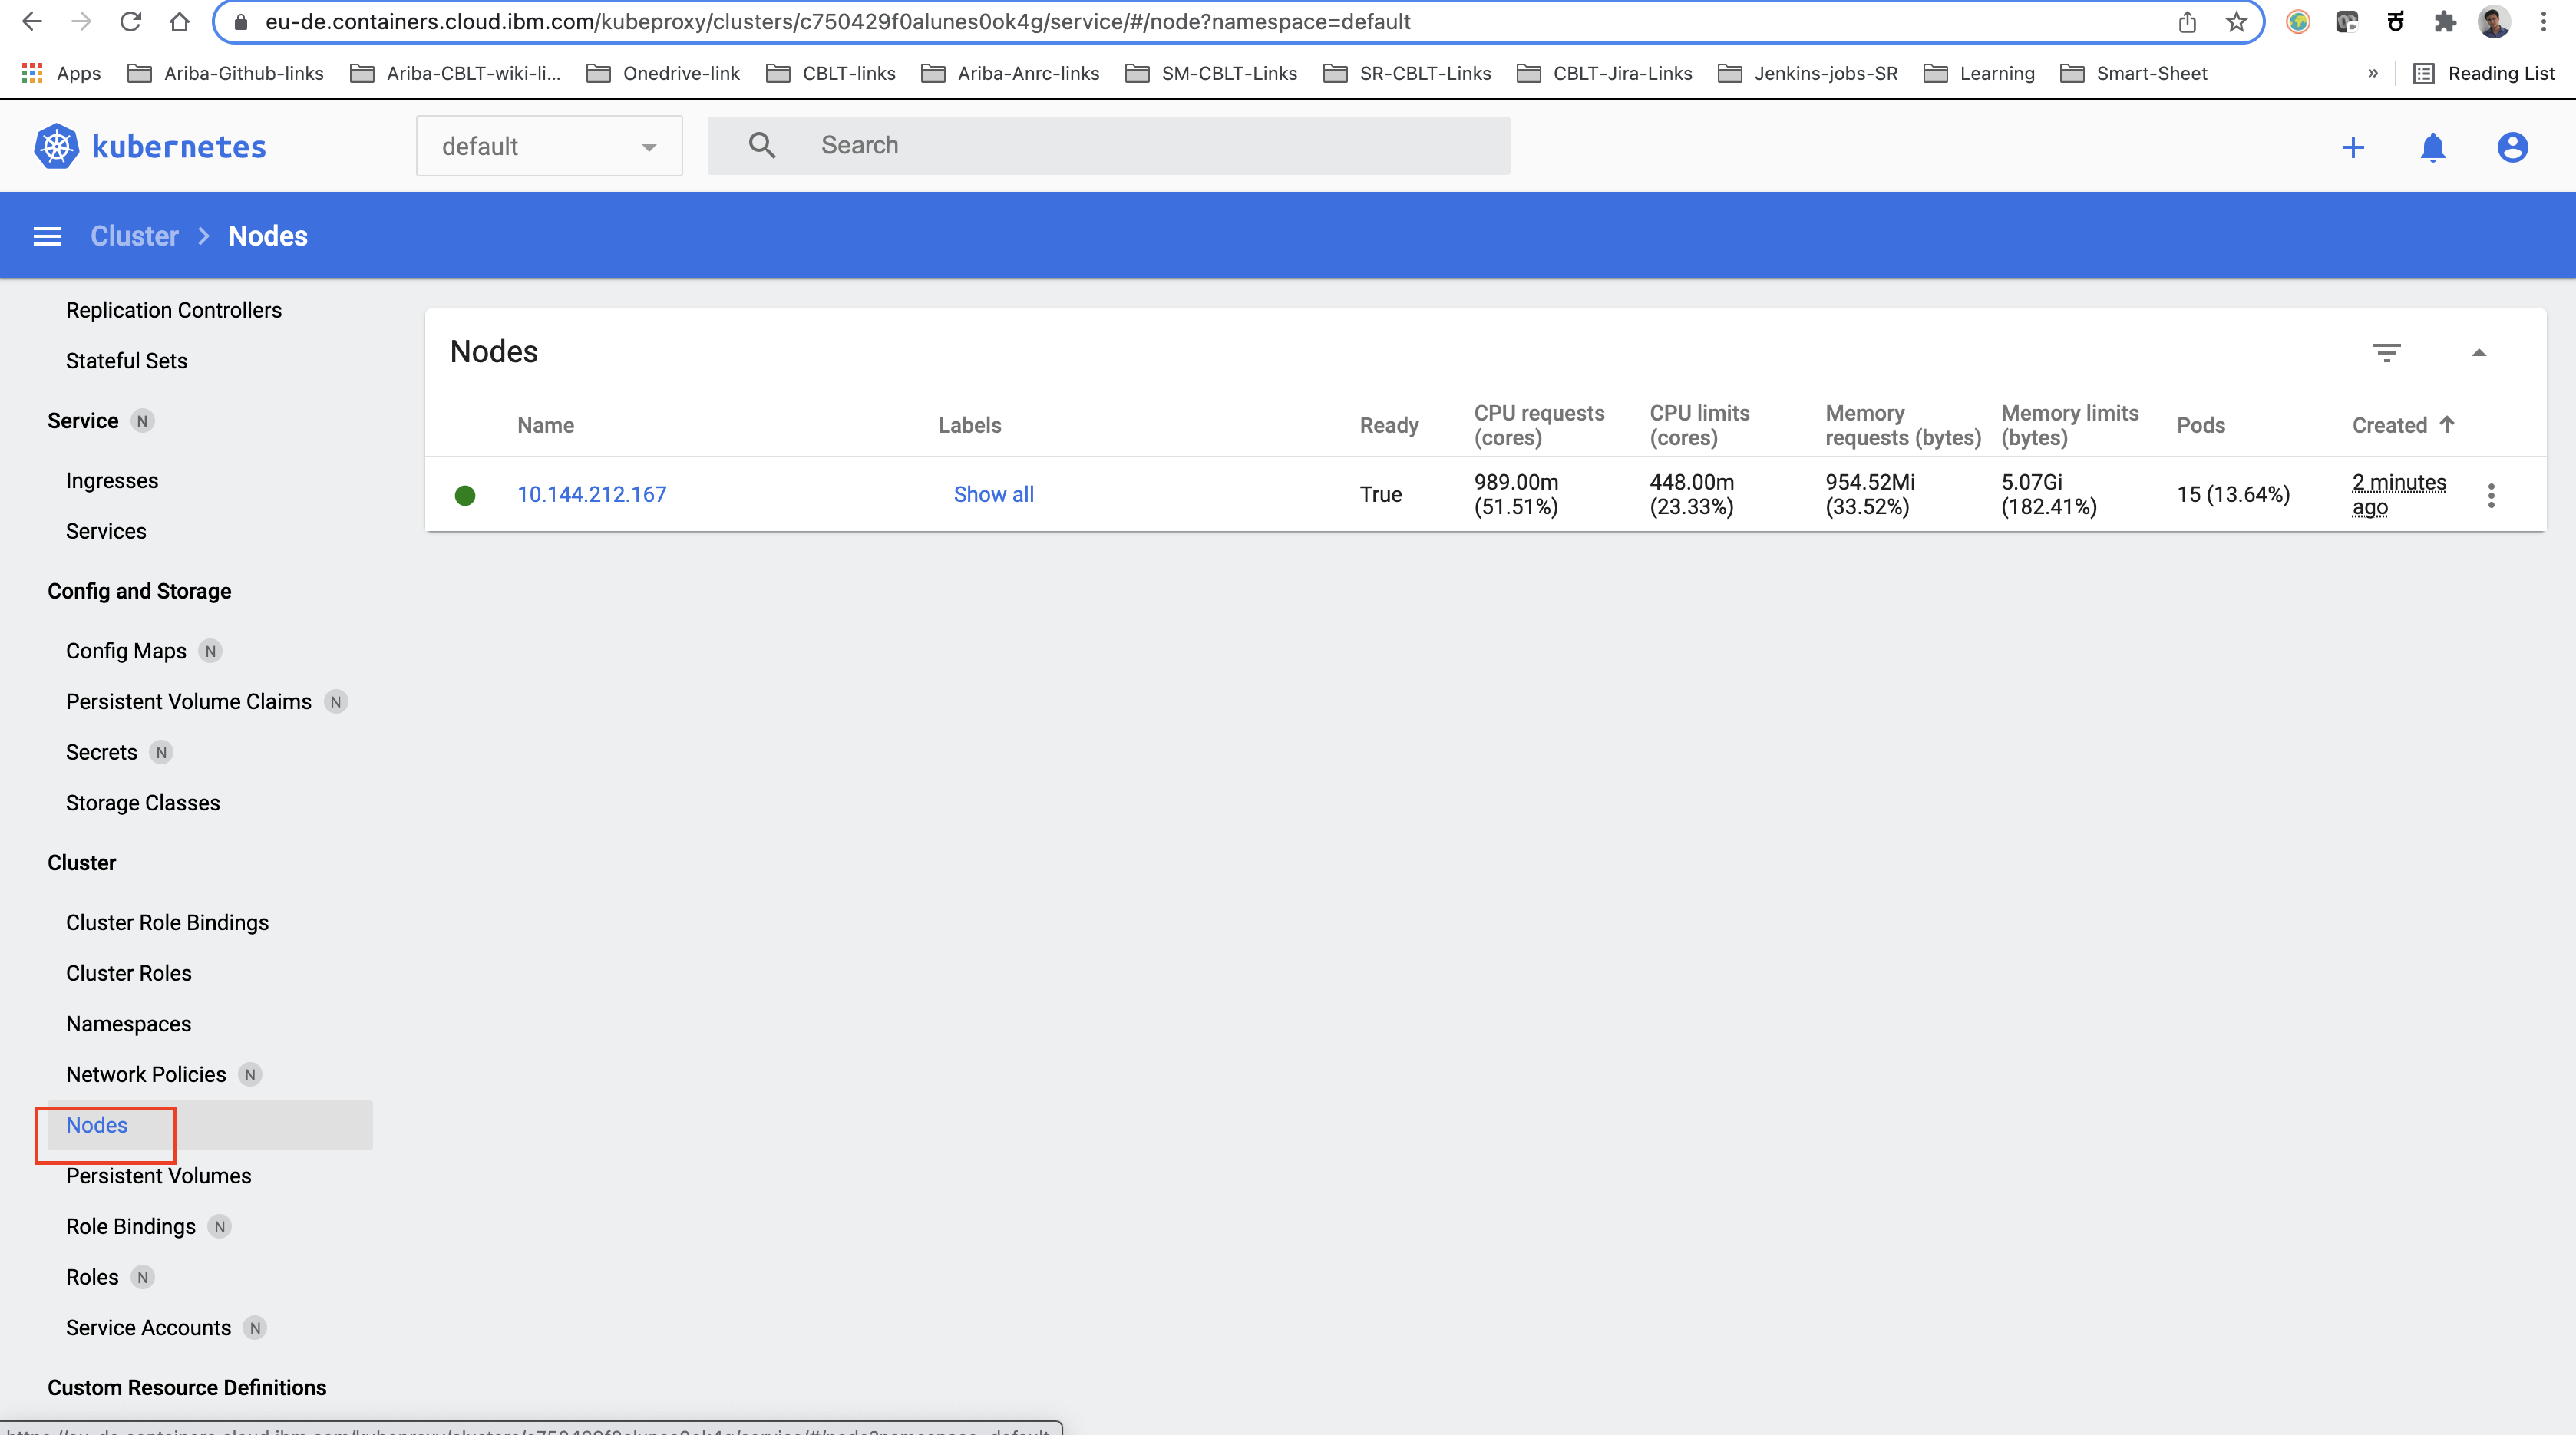
Once our cluster creation completes, we should be able to access the Kubernetes dashboard and we should be able to see created nodes details in the same.
2. Build a Modified Jenkins Image
Previously, Jenkins was designed to run on physical machines without any containerization technology. As containerization become more popular, Jenkins adapted its solution to the new containerized world. Unfortunately, Jenkins requires Docker to build Docker images. However, a containerized version of Jenkins does not contain Docker and Docker CLI by default. For this reason, a new Docker image that contains Docker CLI and other tools must be created by using a Jenkins image as a base image.
- Create a new directory with some meaningful name ‘ci-cd-k8-pipeline’
$ mkdir ci-cd-k8-pipeline
$ cd ci-cd-k8-pipeline
- Create one more directory specific to jenkins.
$ mkdir modified-jenkins-image
- Next, inside the ‘modified-jenkins-image’ directory create Dockerfile with below content
FROM jenkins/jenkins:lts

USER root

ENV DOCKERVERSION=18.03.1-ce

RUN curl -fsSLO <https://download.docker.com/linux/static/stable/x86_64/docker-${DOCKERVERSION}.tgz> \\
  && tar xzvf docker-${DOCKERVERSION}.tgz – strip 1 \\
                 -C /usr/local/bin docker/docker \\
  && rm docker-${DOCKERVERSION}.tgz

RUN curl -LO <https://storage.googleapis.com/kubernetes-release/release/$>(curl -s <https://storage.googleapis.com/kubernetes-release/release/stable.txt>)/bin/linux/amd64/kubectl \\
	&& chmod +x ./kubectl \\
	&& mv ./kubectl /usr/local/bin/kubectl
- Build docker image for jenkins
$ docker build -t tapan2609/modified-jenkins:latest .
In the above command, replace ‘tapan2609’ with your docker hub username.
You should see below similar logs, once docker image starts building
[+] Building 5.7s (8/8) FINISHED
 => [internal] load build definition from Dockerfile                                                                                                                                                                                     0.0s
 => => transferring dockerfile: 596B                                                                                                                                                                                                     0.0s
 => [internal] load .dockerignore                                                                                                                                                                                                        0.0s
 => => transferring context: 2B                                                                                                                                                                                                          0.0s
 => [internal] load metadata for docker.io/jenkins/jenkins:lts                                                                                                                                                                           5.6s
 => [auth] jenkins/jenkins:pull token for registry-1.docker.io                                                                                                                                                                           0.0s
 => [1/3] FROM docker.io/jenkins/jenkins:lts@sha256:c1d02293a08ba69483992f541935f7639fb10c6c322785bdabaf7fa94cd5e732                                                                                                                     0.0s
 => => resolve docker.io/jenkins/jenkins:lts@sha256:c1d02293a08ba69483992f541935f7639fb10c6c322785bdabaf7fa94cd5e732                                                                                                                     0.0s
 => CACHED [2/3] RUN curl -fsSLO <https://download.docker.com/linux/static/stable/x86_64/docker-18.03.1-ce.tgz>   && tar xzvf docker-18.03.1-ce.tgz – strip 1                  -C /usr/local/bin docker/docker   && rm docker-18.03.1-ce.  0.0s
 => CACHED [3/3] RUN curl -LO <https://storage.googleapis.com/kubernetes-release/release/$>(curl -s <https://storage.googleapis.com/kubernetes-release/release/stable.txt>)/bin/linux/amd64/kubectl  && chmod +x ./kubectl  && mv ./kubectl  0.0s
 => exporting to image                                                                                                                                                                                                                   0.0s
 => => exporting layers                                                                                                                                                                                                                  0.0s
 => => writing image sha256:0ac83a3d36d09a94356facfc42be180b4633482ed67cf5c12c9c162c43975922                                                                                                                                             0.0s
 => => naming to docker.io/tapan2609/modified-jenkins:latest
Congratulations! Now your modified Jenkins image is successfully built.
3. Deploy a Modified Jenkins Image to Kubernetes
The modified Jenkins image is in the local environment now and Kubernetes cannot access the local images. This is where Docker Hub comes into the picture. Docker Hub is a cloud-based repository in which Docker users and partners create, test, store, and distribute container images. A modified Jenkins image is needed to push to the Docker Hub or other container registries like IBM Cloud Container Registry. By default, Docker uses Docker Hub.
- First, login into docker hub using below command
$ docker login

username : tapan2609
password : ********

Authenticating with existing credentials...
Login Succeeded

Logging in with your password grants your terminal complete access to your account.
For better security, log in with a limited-privilege personal access token. Learn more at <https://docs.docker.com/go/access-tokens/>
- Next, push the modified Jenkins image to Docker Hub with docker push command
$ docker push tapan2609/modified-jenkins:latest
The pushed image can now be seen via Docker Hub and Kubernetes can now access the image conveniently.
- Next, create ‘jenkins-deployment.yaml’ file under ‘modified-jenkins-image’ directory with below contents
apiVersion: apps/v1
kind: Deployment
metadata:
  name: jenkins
  labels:
    app: jenkins
spec:
  replicas: 1
  selector:
    matchLabels:
      app: jenkins
  template:
    metadata:
      labels:
        app: jenkins
    spec:
      volumes:
      - name: dind-storage
        emptyDir: {}
      containers:
      - name: jenkins
        image: tapan2609/modified-jenkins:latest
        ports:
        - containerPort: 8080
        - containerPort: 50000
        env:
        - name: DOCKER_HOST
          value: tcp://localhost:2375
      - name: dind
        image: docker:18.05-dind
        securityContext:
          privileged: true
        volumeMounts:
        - name: dind-storage
          mountPath: /var/lib/docker
Find 'tapan2609/modified-jenkins:latest' and replace the Docker Hub username, pushed image's name, and version.
The deployment file is now ready to deploy modified Jenkins to Kubernetes.
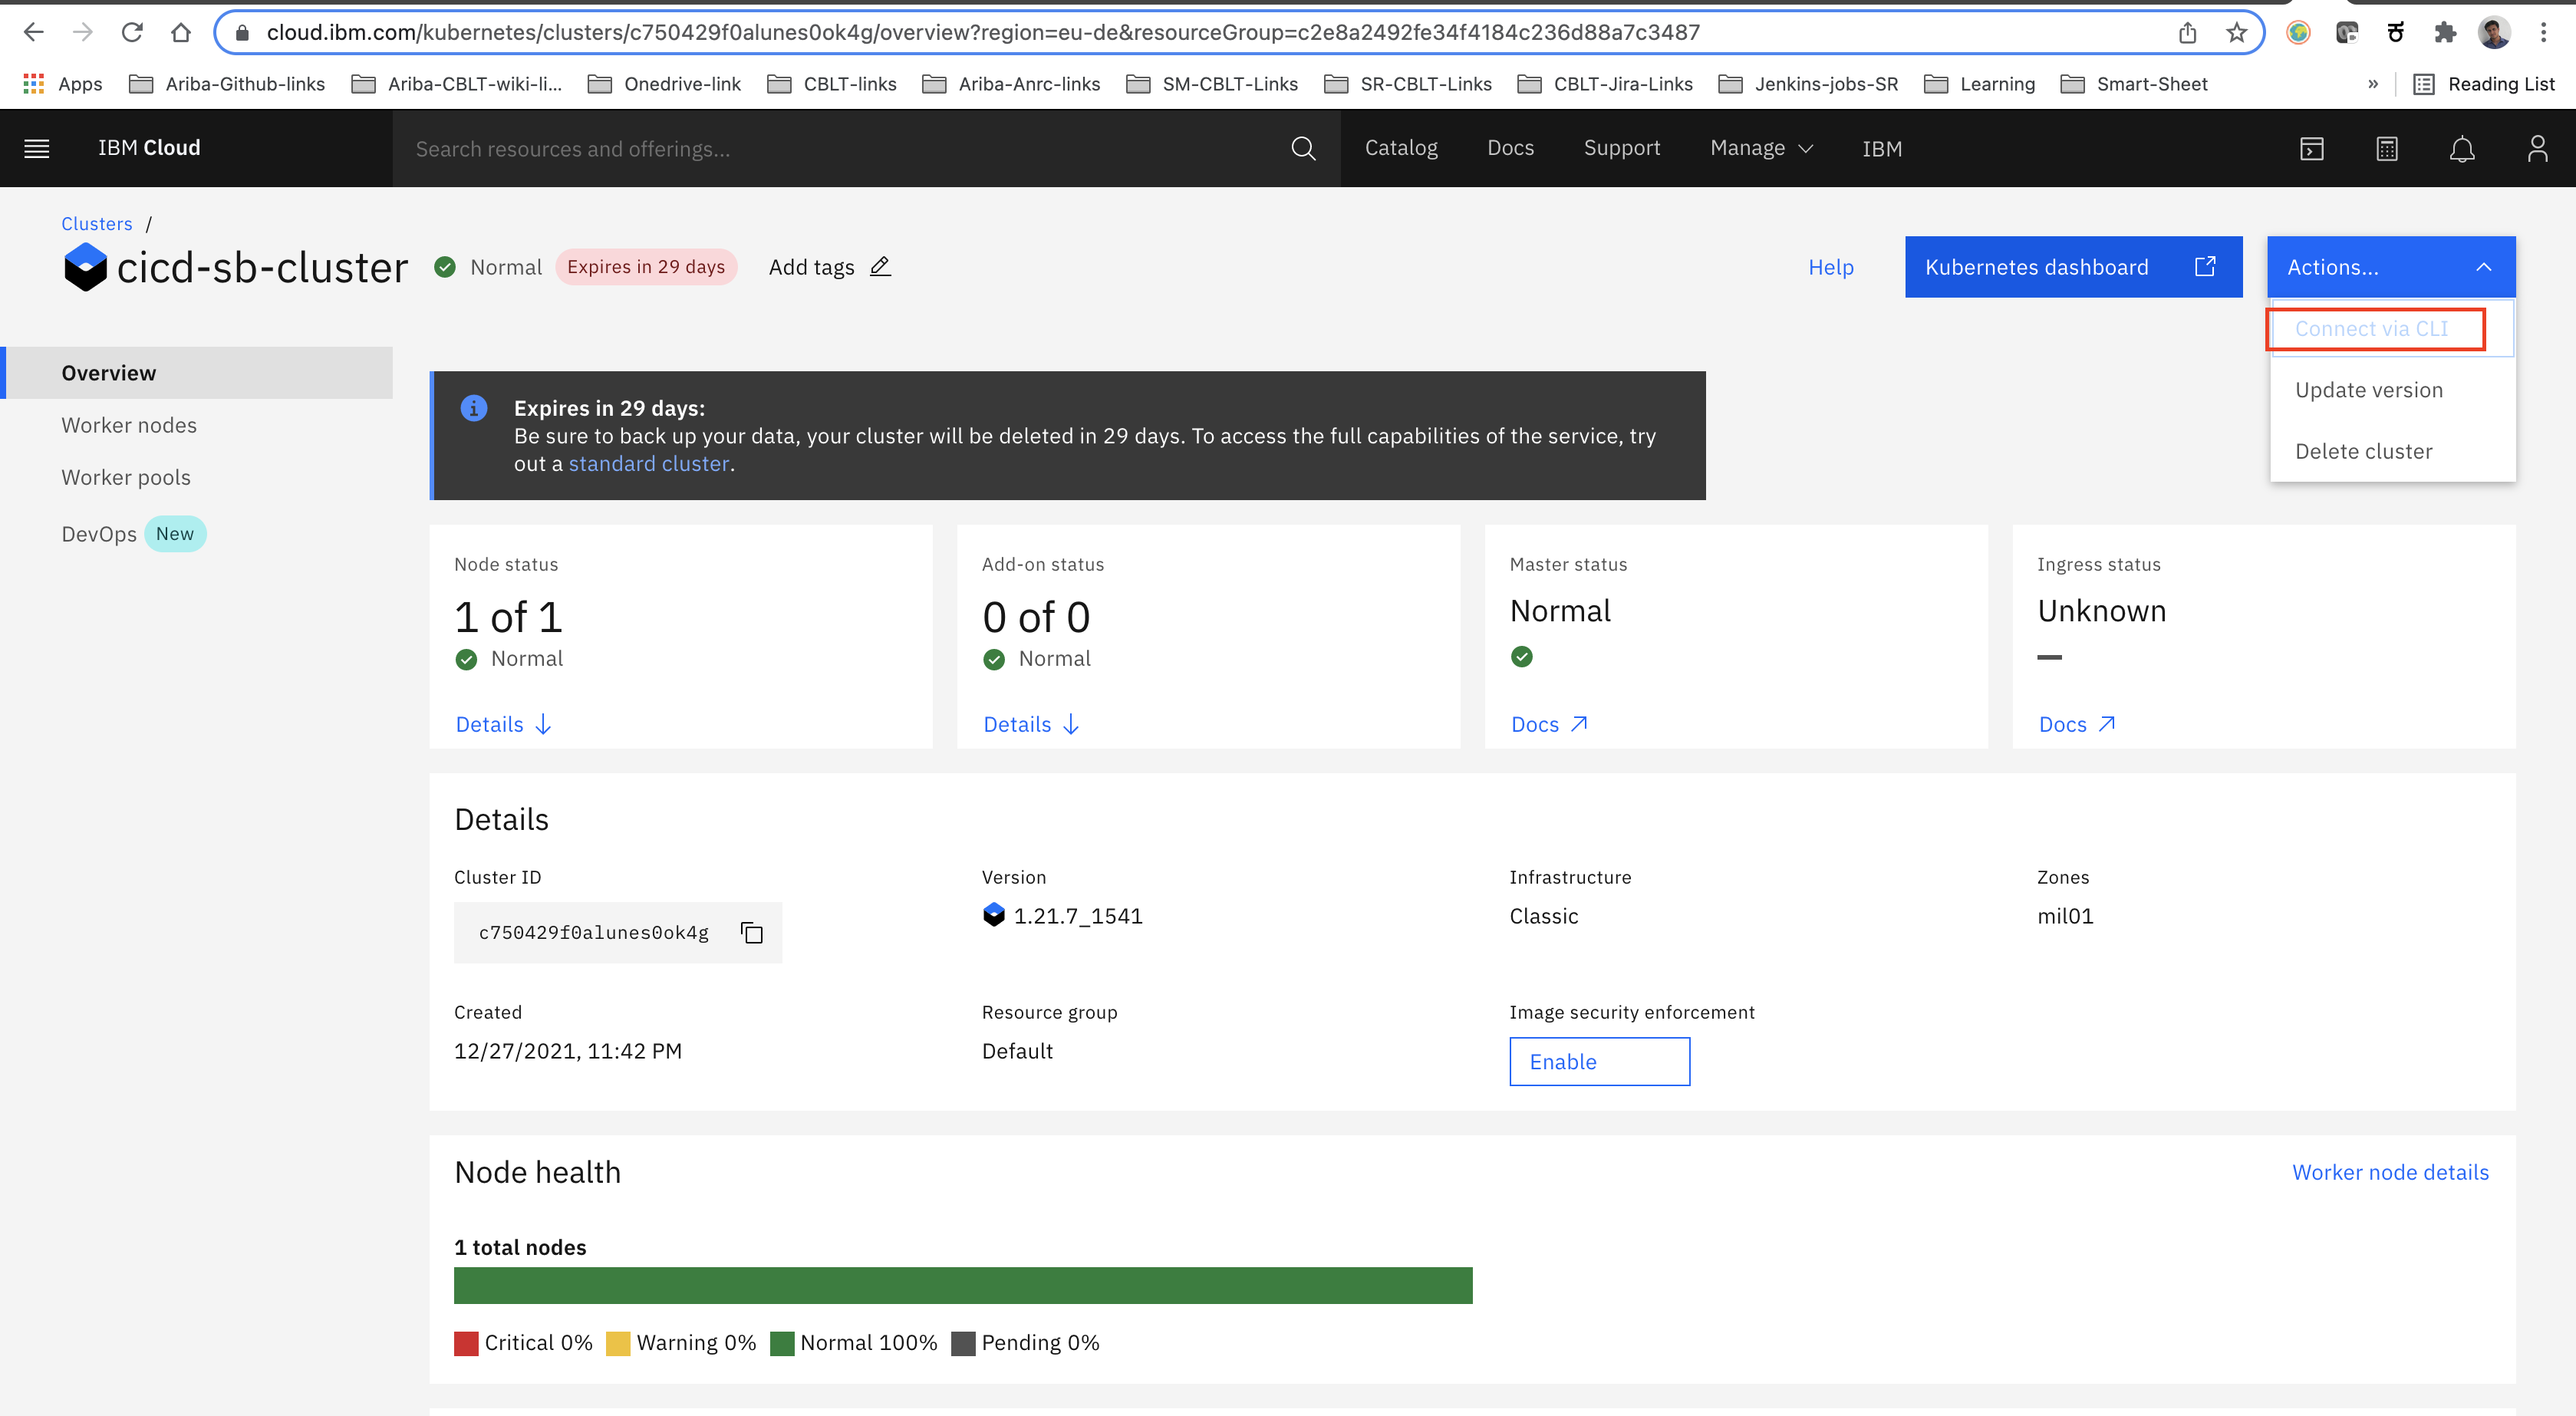
- Now, open the Kubernetes cluster dashboard which we created in step 1 and navigate to the
'Actions'in right top and select ‘connect to cli’ option and run the commands to gain access to the Kubernetes cluster via the terminal.
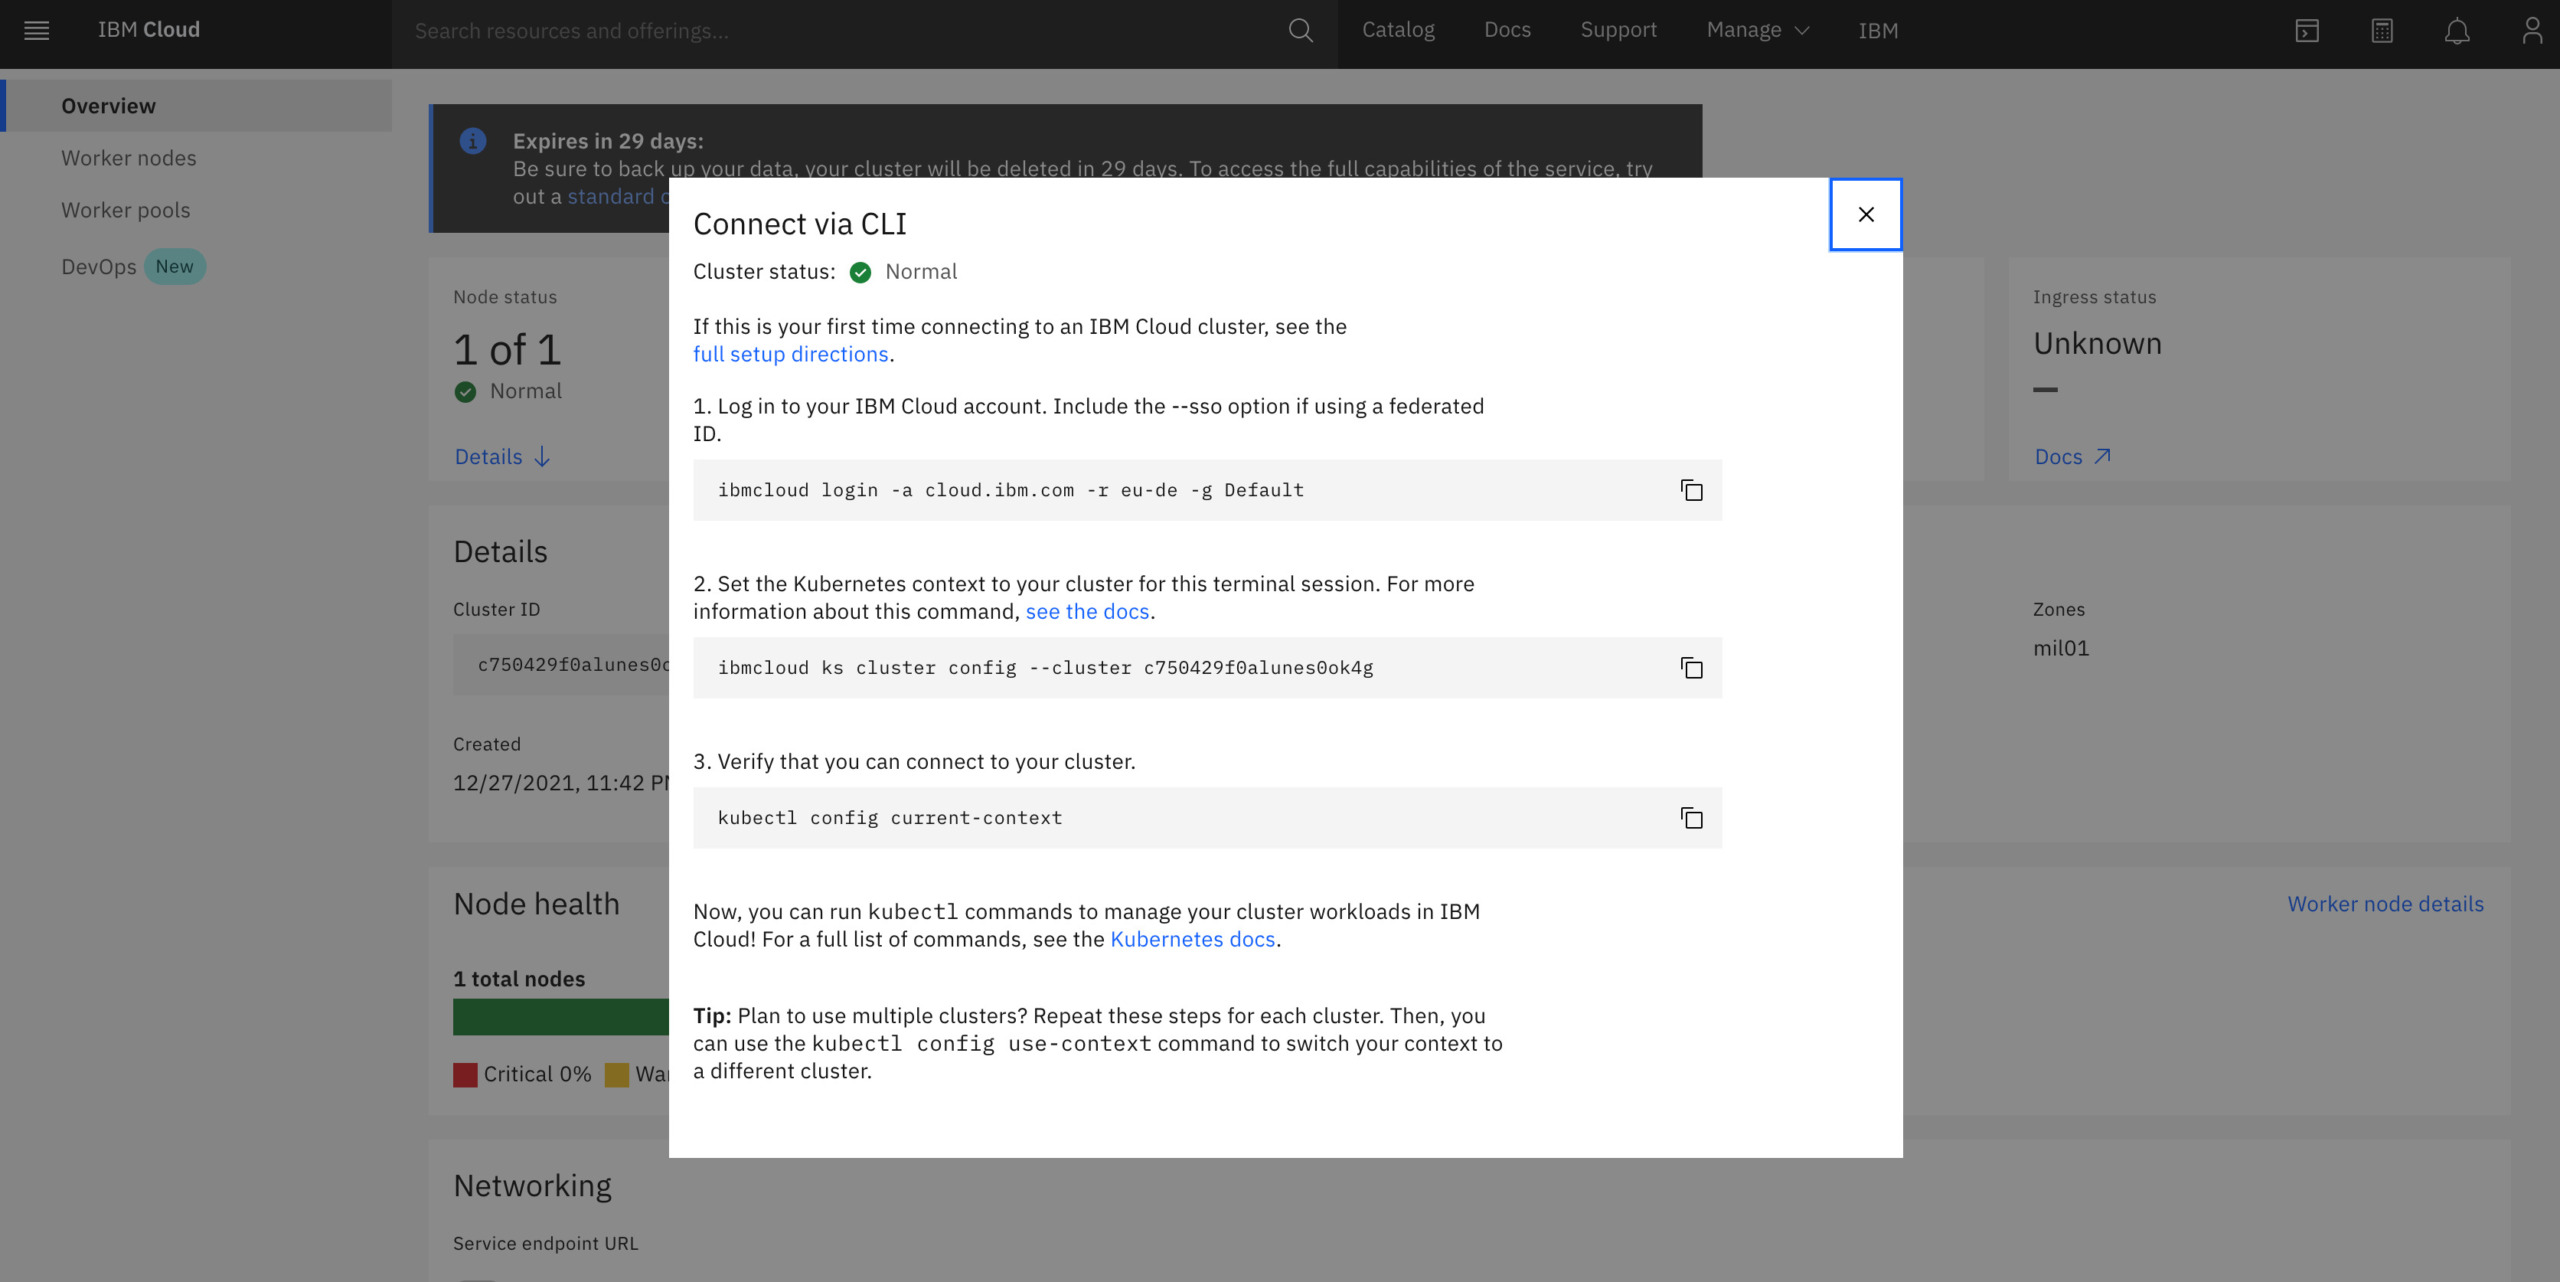
Execute the below set of commands to gain access to the k8s cluster
Log in to your IBM Cloud account.
$ ibmcloud login -a cloud.ibm.com -r eu-de -g Default
you should see the output of the above command similar to below
API endpoint: <https://cloud.ibm.com>

Get a one-time code from <https://identity-3.ap-south.iam.cloud.ibm.com/identity/passcode> to proceed.
email > ********** (give your IBM cloud login email ID)
password > ******** (give your IBM cloud login password)
Authenticating...
OK

Targeted account IBM (590f58d2bfa44fcfb28a666cd1c02275)

Targeted resource group Default

Targeted region eu-de


API endpoint:      <https://cloud.ibm.com>
Region:            eu-de
User:              ********
Account:           IBM (590f58d2bfa*********)
Resource group:    Default
CF API endpoint:
Org:
Space:
Set the Kubernetes context to your cluster for this terminal session
$ ibmcloud ks cluster config – cluster c750429f0alunes0ok4g
you should see the output of the above command similar to below
Note: Here
c750429f0alunes0ok4gis your k8 cluster-id, this you can get from IBM cloud k8 dashboard. (Replace accordingly)
OK
The configuration for c750429f0alunes0ok4g was downloaded successfully.

Added context for c750429f0alunes0ok4g to the current kubeconfig file.
You can now execute 'kubectl' commands against your cluster. For example, run 'kubectl get nodes'.
If you are accessing the cluster for the first time, 'kubectl' commands might fail for a few seconds while RBAC synchronizes.
3. Verify that you can connect to your cluster.
$ kubectl config current-context
you should see the output of above command similar to below
cicd-sb-cluster/c750429f0alunes0ok4g
Now, you can run kubectl commands to manage your cluster workloads in IBM Cloud!
- Create
Jenkins-service.yamlfile with below contents under ‘modified-Jenkins-image’ directory.
apiVersion: v1
kind: Service
metadata:
  name: jenkins-service
spec:
  type: NodePort
  selector:
    app: jenkins
  ports:
  - name: web-interface
    protocol: TCP
    nodePort: 30100
    port: 8080
    targetPort: 8080
  - name: remote-java-api
    protocol: TCP
    nodePort: 30200
    port: 50000
    targetPort: 50000
- Make sure that the directory is
'modified-jenkins-image'and run the following commands to deploy the modified Jenkins to Kubernetes:
$ kubectl apply -f jenkins-deployment.yaml
$ kubectl apply -f jenkins-service.yaml
the output of the above commands should be similar to below
deployment.apps/jenkins created
service/jenkins-service created
- Now run the following command to make sure that Jenkins is deployed and has a running status. The deployment process may take a couple of minutes.
$ kubectl get deployment,pod,service
the output of the above command should be similar to below
NAME                      READY   UP-TO-DATE   AVAILABLE   AGE
deployment.apps/jenkins   1/1     1            1           2m30s

NAME                           READY   STATUS    RESTARTS   AGE
pod/jenkins-676f9c9747-vh2j8   2/2     Running   0          2m29s

NAME                      TYPE        CLUSTER-IP     EXTERNAL-IP   PORT(S)                          AGE
service/jenkins-service   NodePort    172.21.80.56   <none>        8080:30100/TCP,50000:30200/TCP   101s
service/kubernetes        ClusterIP   172.21.0.1     <none>        443/TCP                          12h
- Run the following commands to retrieve the external IP of your worker node to gain access to the Jenkins dashboard:
$ export EXTERNAL_IP=$(kubectl get nodes -o jsonpath='{.items[0].status.addresses[?(@.type=="ExternalIP")].address }')$ export NODE_PORT=30100$ export NODE_PORT=30100
$ export NODE_PORT=30100
$ echo $EXTERNAL_IP:$NODE_PORT
the output of the above echo command should be external-ip appended with port
169.51.203.3:30100
Note: This is the address where you can access your Jenkins server which is deployed in the k8 cluster.
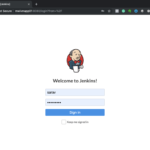
Try to access the above URL and you should be able to see Jenkins getting started page.
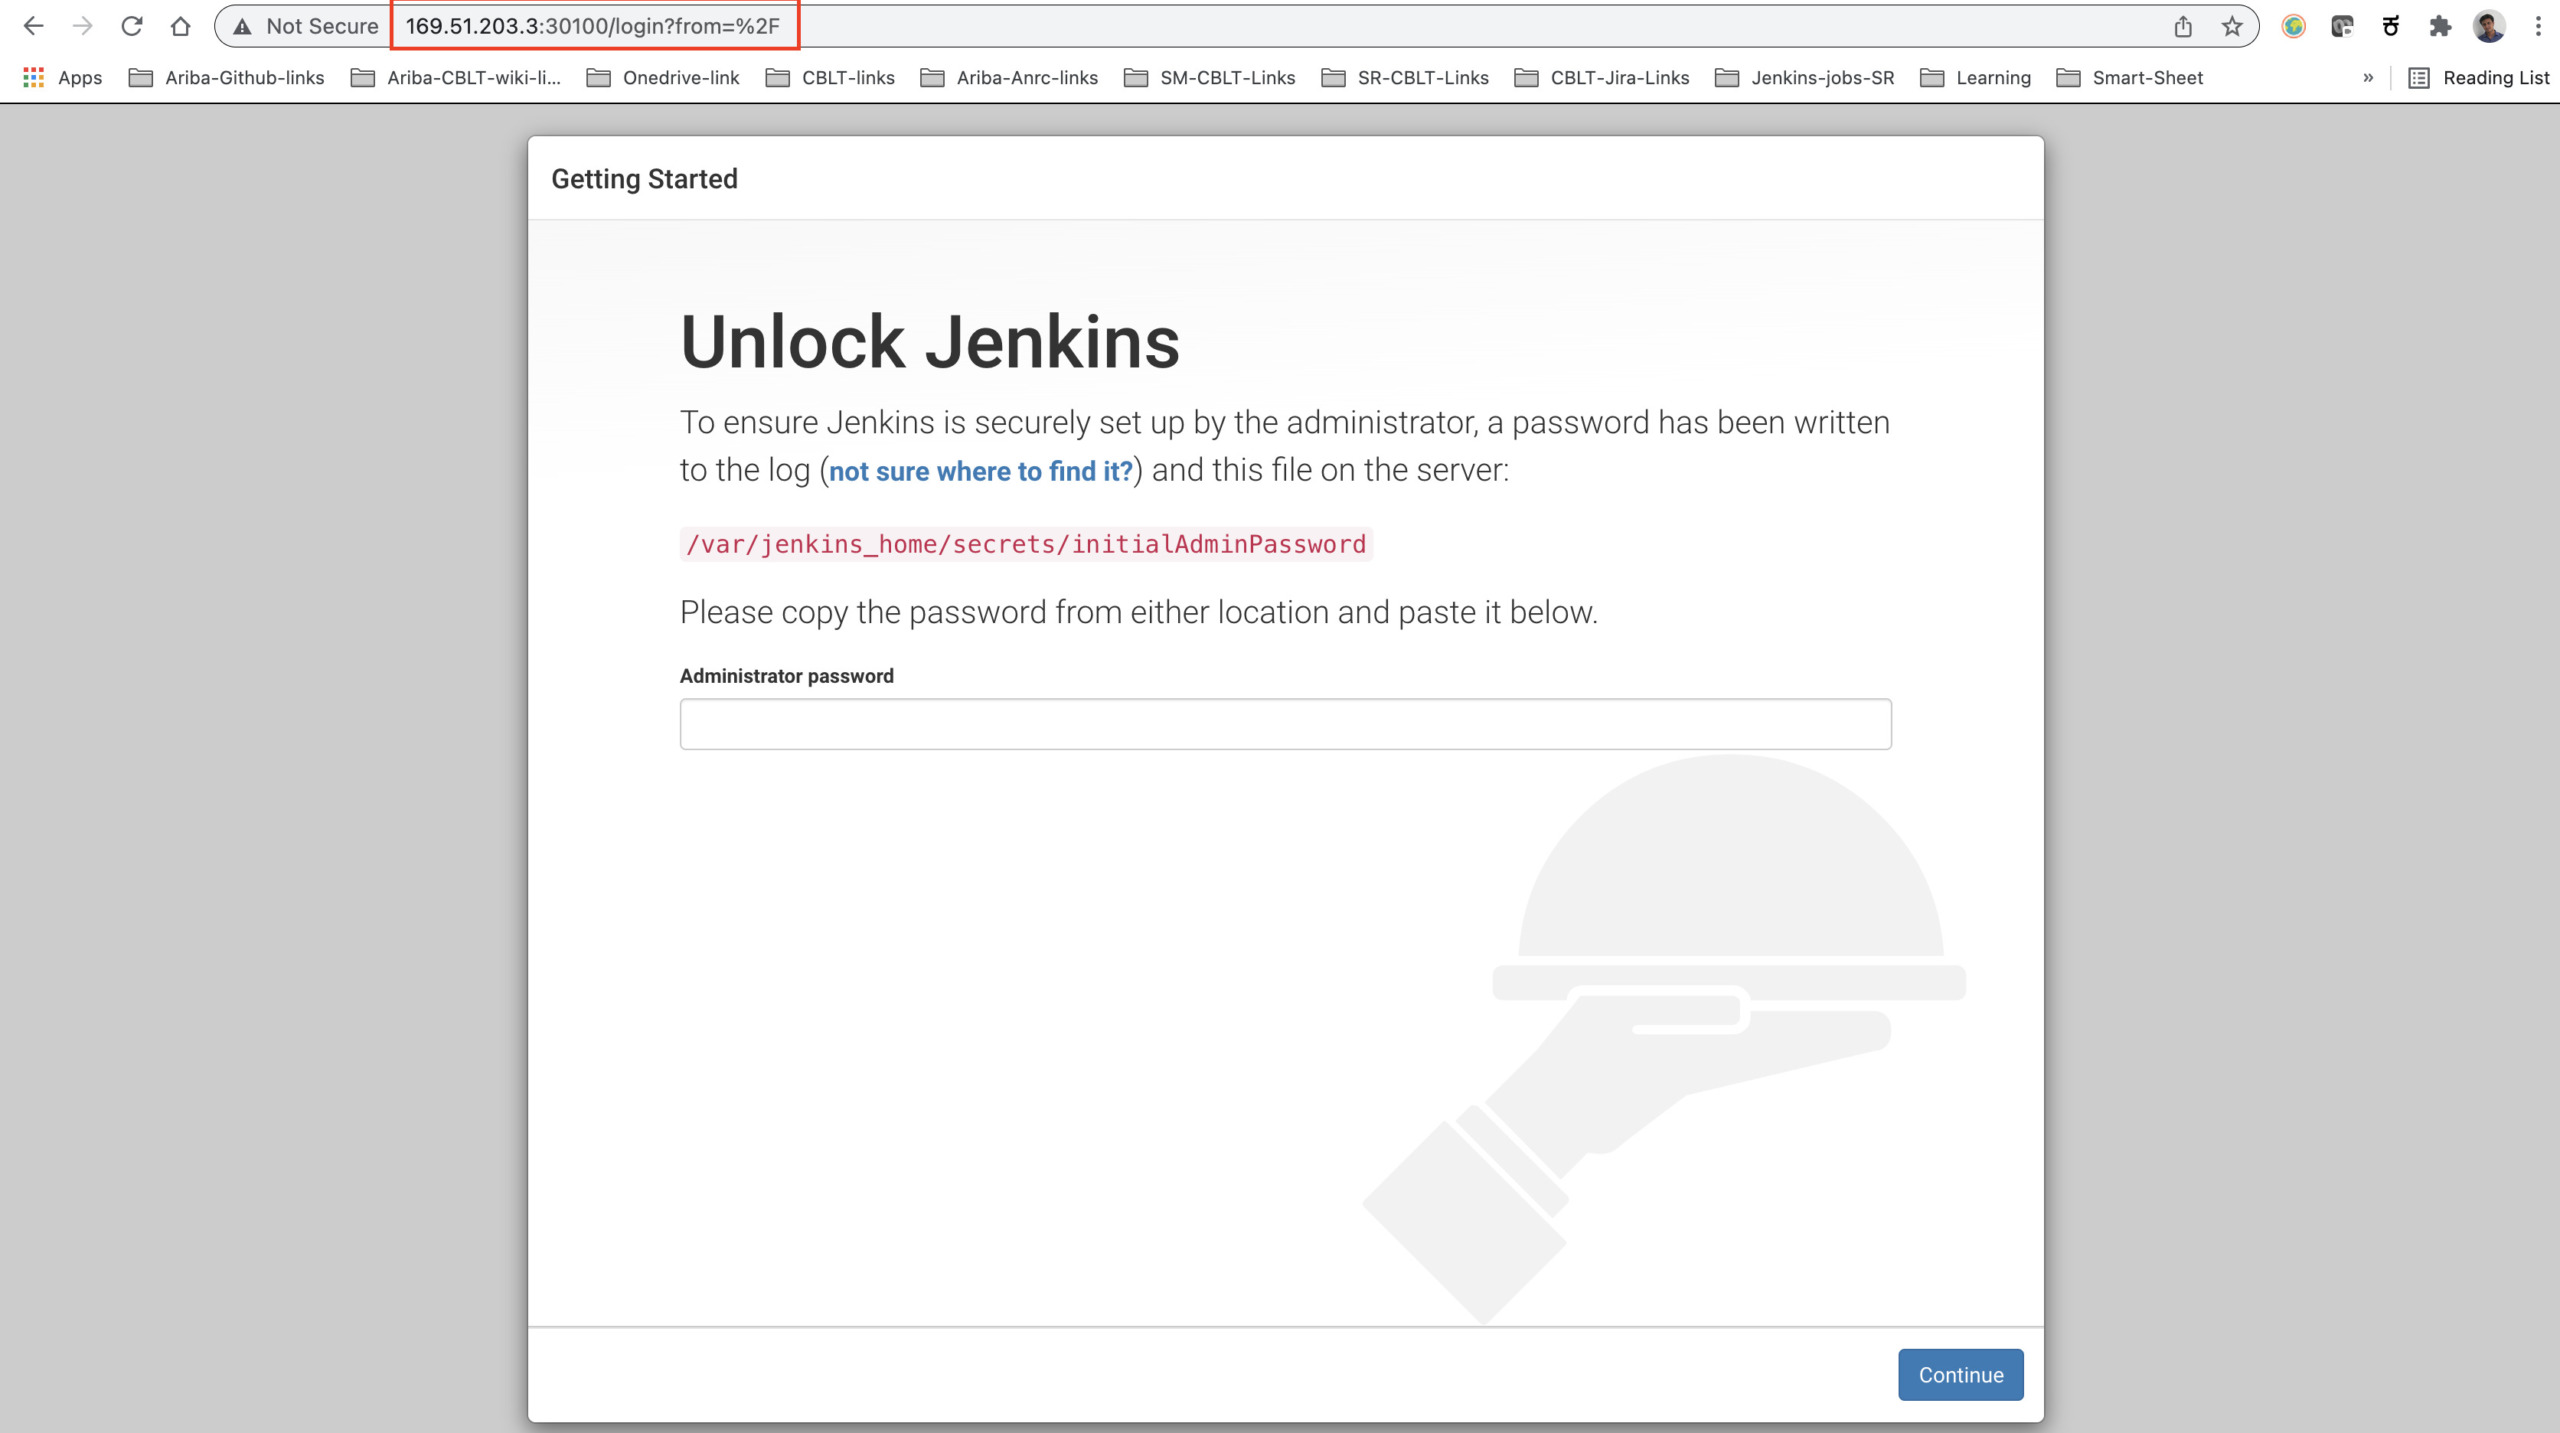
4. Set up Jenkins Environment
Now it’s time to set up your Jenkins environment. Jenkins assigns the initial admin password, which can be found by logging into the Jenkins container.
- Run the following command to obtain the logs of the Jenkins container:
$ kubectl logs $(kubectl get pods – selector=app=jenkins -o=jsonpath='{.items[0].metadata.name}') jenkins
Note: The initial admin password can be found between the rows of asterisks.
you should see output similar to below
Running from: /usr/share/jenkins/jenkins.war
webroot: EnvVars.masterEnvVars.get("JENKINS_HOME")
2021-12-28 06:49:55.452+0000 [id=1]	INFO	org.eclipse.jetty.util.log.Log#initialized: Logging initialized @1273ms to org.eclipse.jetty.util.log.JavaUtilLog
2021-12-28 06:49:55.632+0000 [id=1]	INFO	winstone.Logger#logInternal: Beginning extraction from war file
2021-12-28 06:49:57.238+0000 [id=1]	WARNING	o.e.j.s.handler.ContextHandler#setContextPath: Empty contextPath
2021-12-28 06:49:57.556+0000 [id=1]	INFO	org.eclipse.jetty.server.Server#doStart: jetty-9.4.43.v20210629; built: 2021-06-30T11:07:22.254Z; git: 526006ecfa3af7f1a27ef3a288e2bef7ea9dd7e8; jvm 11.0.13+8
2021-12-28 06:49:58.692+0000 [id=1]	INFO	o.e.j.w.StandardDescriptorProcessor#visitServlet: NO JSP Support for /, did not find org.eclipse.jetty.jsp.JettyJspServlet
2021-12-28 06:49:58.805+0000 [id=1]	INFO	o.e.j.s.s.DefaultSessionIdManager#doStart: DefaultSessionIdManager workerName=node0
2021-12-28 06:49:58.805+0000 [id=1]	INFO	o.e.j.s.s.DefaultSessionIdManager#doStart: No SessionScavenger set, using defaults
2021-12-28 06:49:58.809+0000 [id=1]	INFO	o.e.j.server.session.HouseKeeper#startScavenging: node0 Scavenging every 660000ms
2021-12-28 06:49:59.677+0000 [id=1]	INFO	hudson.WebAppMain#contextInitialized: Jenkins home directory: /var/jenkins_home found at: EnvVars.masterEnvVars.get("JENKINS_HOME")
2021-12-28 06:50:00.014+0000 [id=1]	INFO	o.e.j.s.handler.ContextHandler#doStart: Started w.@216914{Jenkins v2.319.1,/,file:///var/jenkins_home/war/,AVAILABLE}{/var/jenkins_home/war}
2021-12-28 06:50:00.078+0000 [id=1]	INFO	o.e.j.server.AbstractConnector#doStart: Started ServerConnector@72cf2de5{HTTP/1.1, (http/1.1)}{0.0.0.0:8080}
2021-12-28 06:50:00.079+0000 [id=1]	INFO	org.eclipse.jetty.server.Server#doStart: Started @5903ms
2021-12-28 06:50:00.089+0000 [id=23]	INFO	winstone.Logger#logInternal: Winstone Servlet Engine running: controlPort=disabled
2021-12-28 06:50:01.084+0000 [id=29]	INFO	jenkins.InitReactorRunner$1#onAttained: Started initialization
2021-12-28 06:50:01.375+0000 [id=29]	INFO	jenkins.InitReactorRunner$1#onAttained: Listed all plugins
WARNING: An illegal reflective access operation has occurred
WARNING: Illegal reflective access by com.google.inject.internal.cglib.core.$ReflectUtils$2 (file:/var/jenkins_home/war/WEB-INF/lib/guice-4.0.jar) to method java.lang.ClassLoader.defineClass(java.lang.String,byte[],int,int,java.security.ProtectionDomain)
WARNING: Please consider reporting this to the maintainers of com.google.inject.internal.cglib.core.$ReflectUtils$2
WARNING: Use – illegal-access=warn to enable warnings of further illegal reflective access operations
WARNING: All illegal access operations will be denied in a future release
2021-12-28 06:50:05.165+0000 [id=29]	INFO	jenkins.InitReactorRunner$1#onAttained: Prepared all plugins
2021-12-28 06:50:05.183+0000 [id=28]	INFO	jenkins.InitReactorRunner$1#onAttained: Started all plugins
2021-12-28 06:50:05.237+0000 [id=29]	INFO	jenkins.InitReactorRunner$1#onAttained: Augmented all extensions
2021-12-28 06:50:07.598+0000 [id=29]	INFO	jenkins.InitReactorRunner$1#onAttained: System config loaded
2021-12-28 06:50:07.599+0000 [id=29]	INFO	jenkins.InitReactorRunner$1#onAttained: System config adapted
2021-12-28 06:50:07.599+0000 [id=29]	INFO	jenkins.InitReactorRunner$1#onAttained: Loaded all jobs
2021-12-28 06:50:07.600+0000 [id=28]	INFO	jenkins.InitReactorRunner$1#onAttained: Configuration for all jobs updated
2021-12-28 06:50:08.425+0000 [id=42]	INFO	hudson.model.AsyncPeriodicWork#lambda$doRun$1: Started Download metadata
2021-12-28 06:50:08.444+0000 [id=42]	INFO	hudson.util.Retrier#start: Attempt #1 to do the action check updates server
2021-12-28 06:50:08.817+0000 [id=28]	INFO	jenkins.install.SetupWizard#init:

*************************************************************
*************************************************************
*************************************************************

Jenkins initial setup is required. An admin user has been created and a password generated.
Please use the following password to proceed to installation:

2390194edc0341b5821915fa36864c3c (this is your jenkins initial admin password)

This may also be found at: /var/jenkins_home/secrets/initialAdminPassword

*************************************************************
*************************************************************
*************************************************************

2021-12-28 06:50:52.249+0000 [id=29]	INFO	jenkins.InitReactorRunner$1#onAttained: Completed initialization
2021-12-28 06:50:52.292+0000 [id=22]	INFO	hudson.WebAppMain$3#run: Jenkins is fully up and running
2021-12-28 06:50:52.847+0000 [id=42]	INFO	h.m.DownloadService$Downloadable#load: Obtained the updated data file for hudson.tasks.Maven.MavenInstaller
2021-12-28 06:50:52.848+0000 [id=42]	INFO	hudson.util.Retrier#start: Performed the action check updates server successfully at the attempt #1
2021-12-28 06:50:52.852+0000 [id=42]	INFO	hudson.model.AsyncPeriodicWork#lambda$doRun$1: Finished Download metadata. 44,425 ms
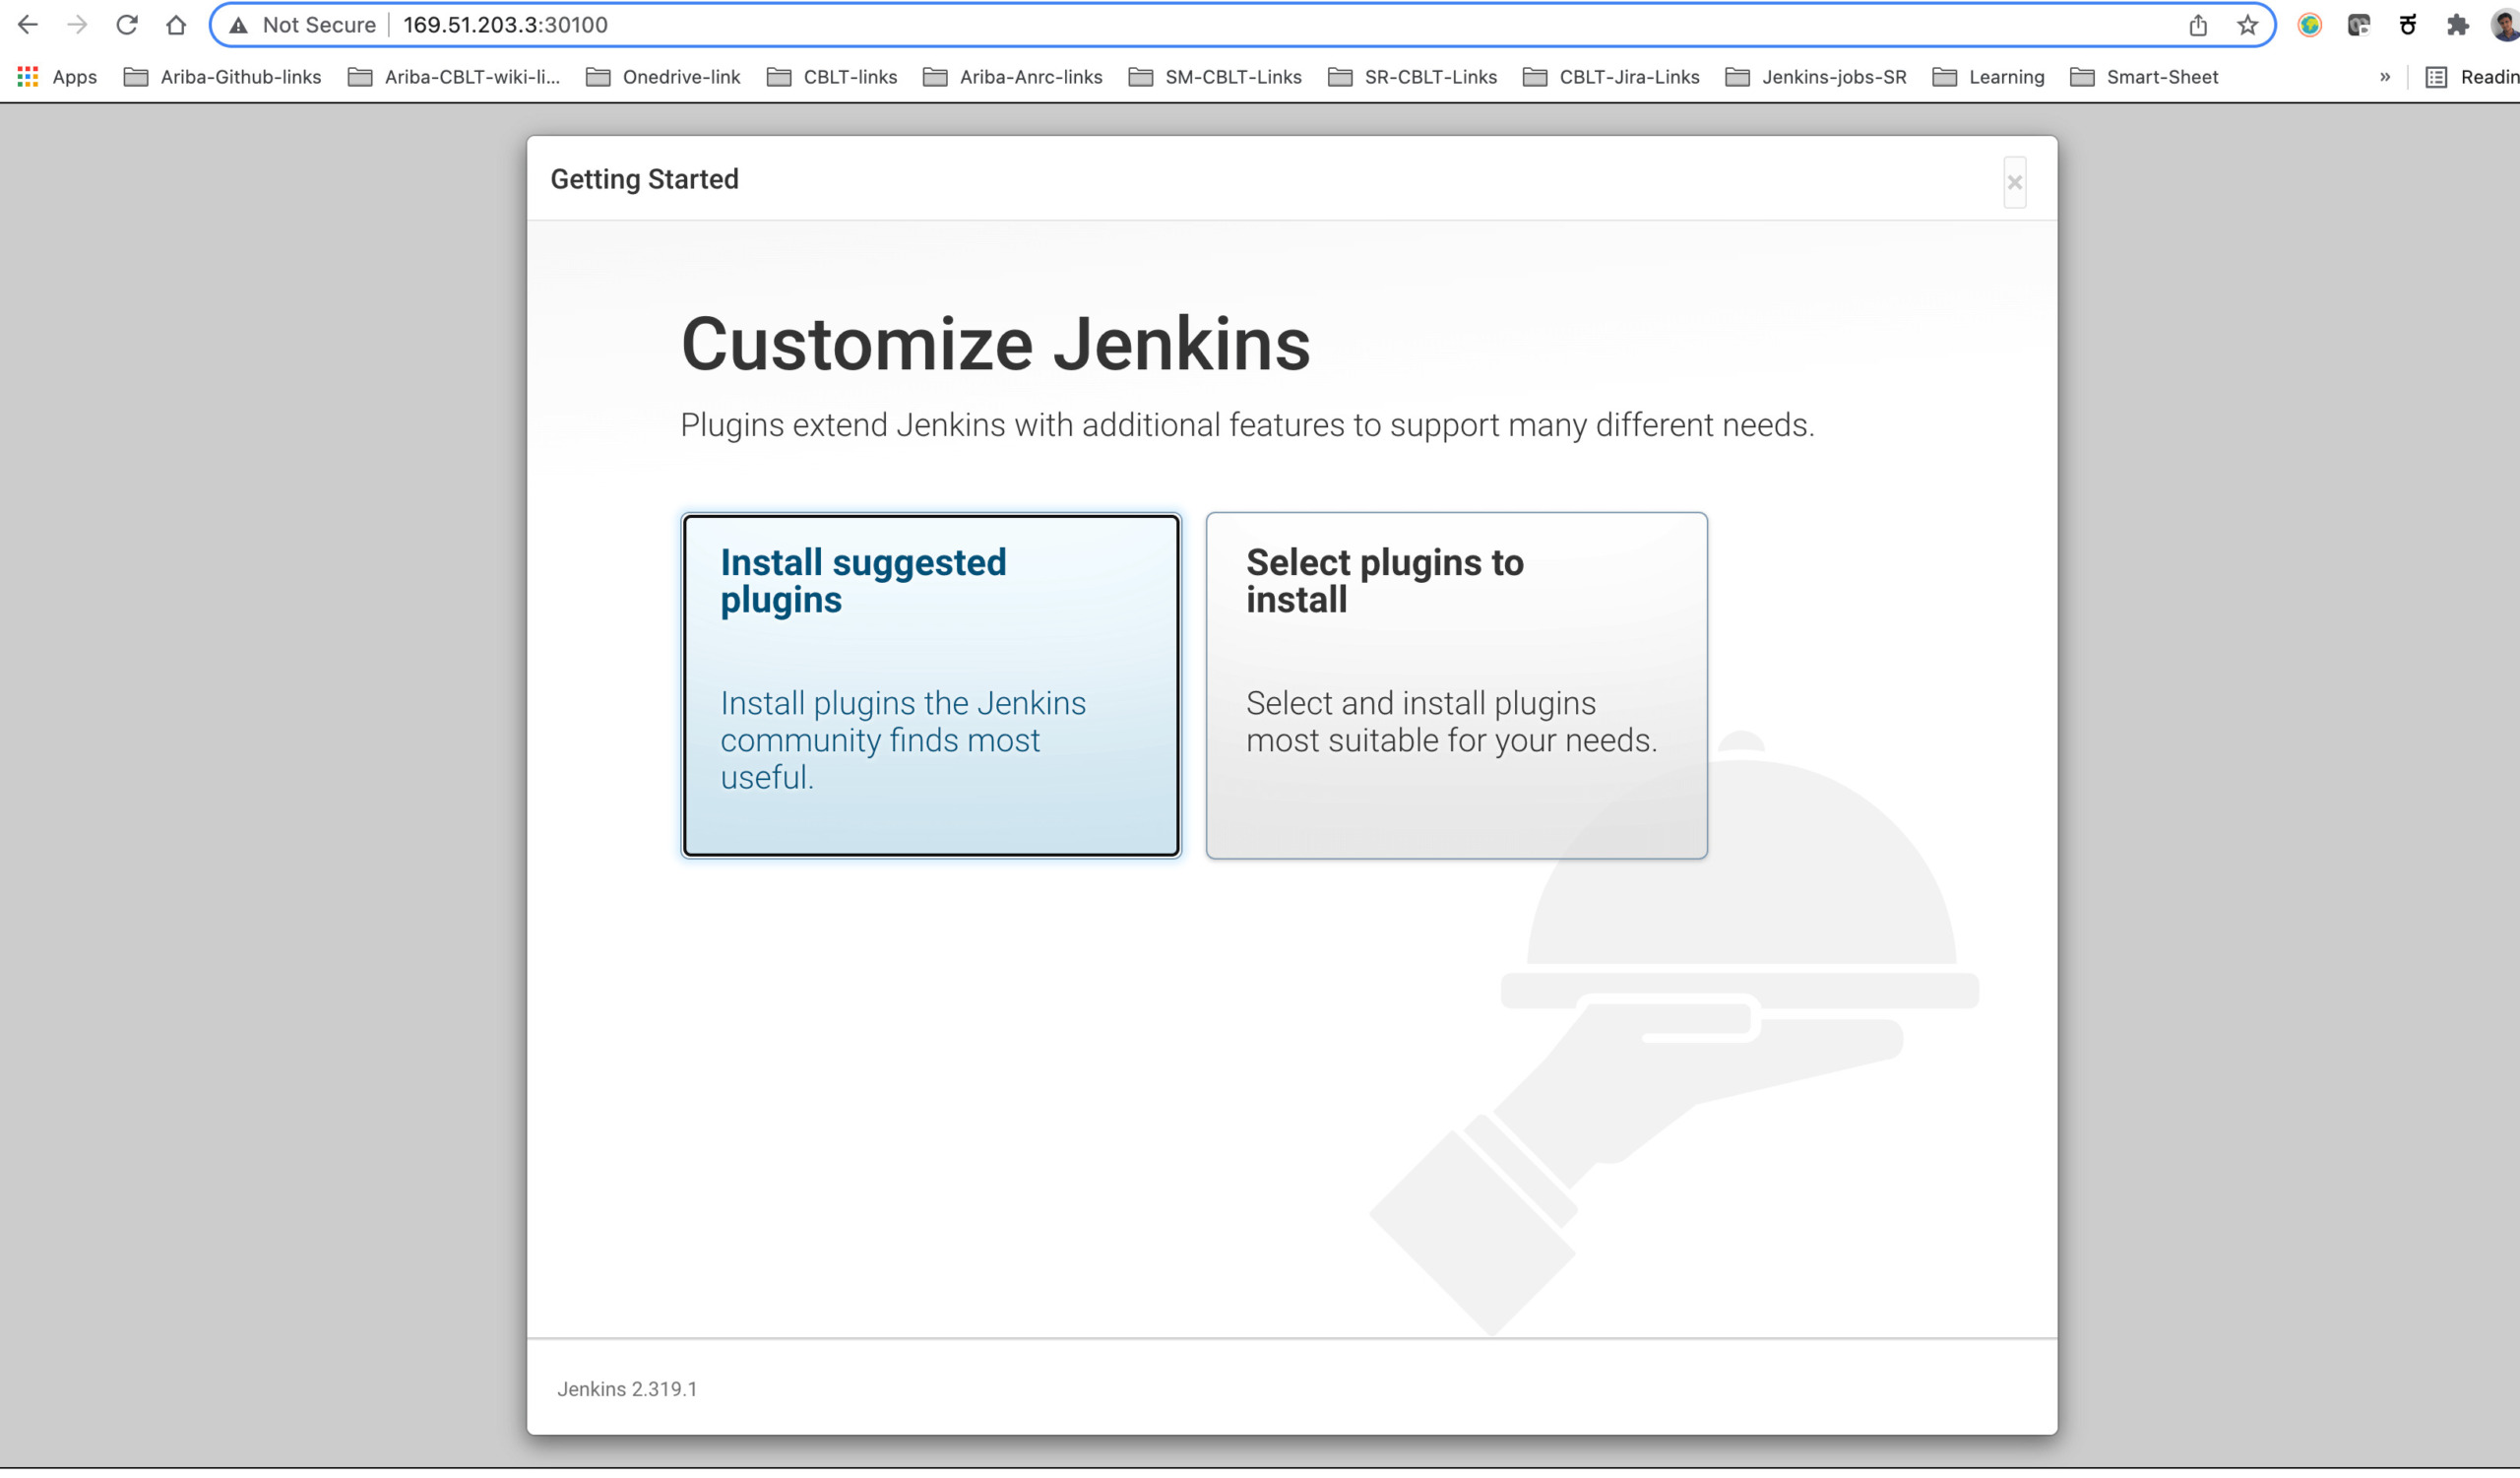
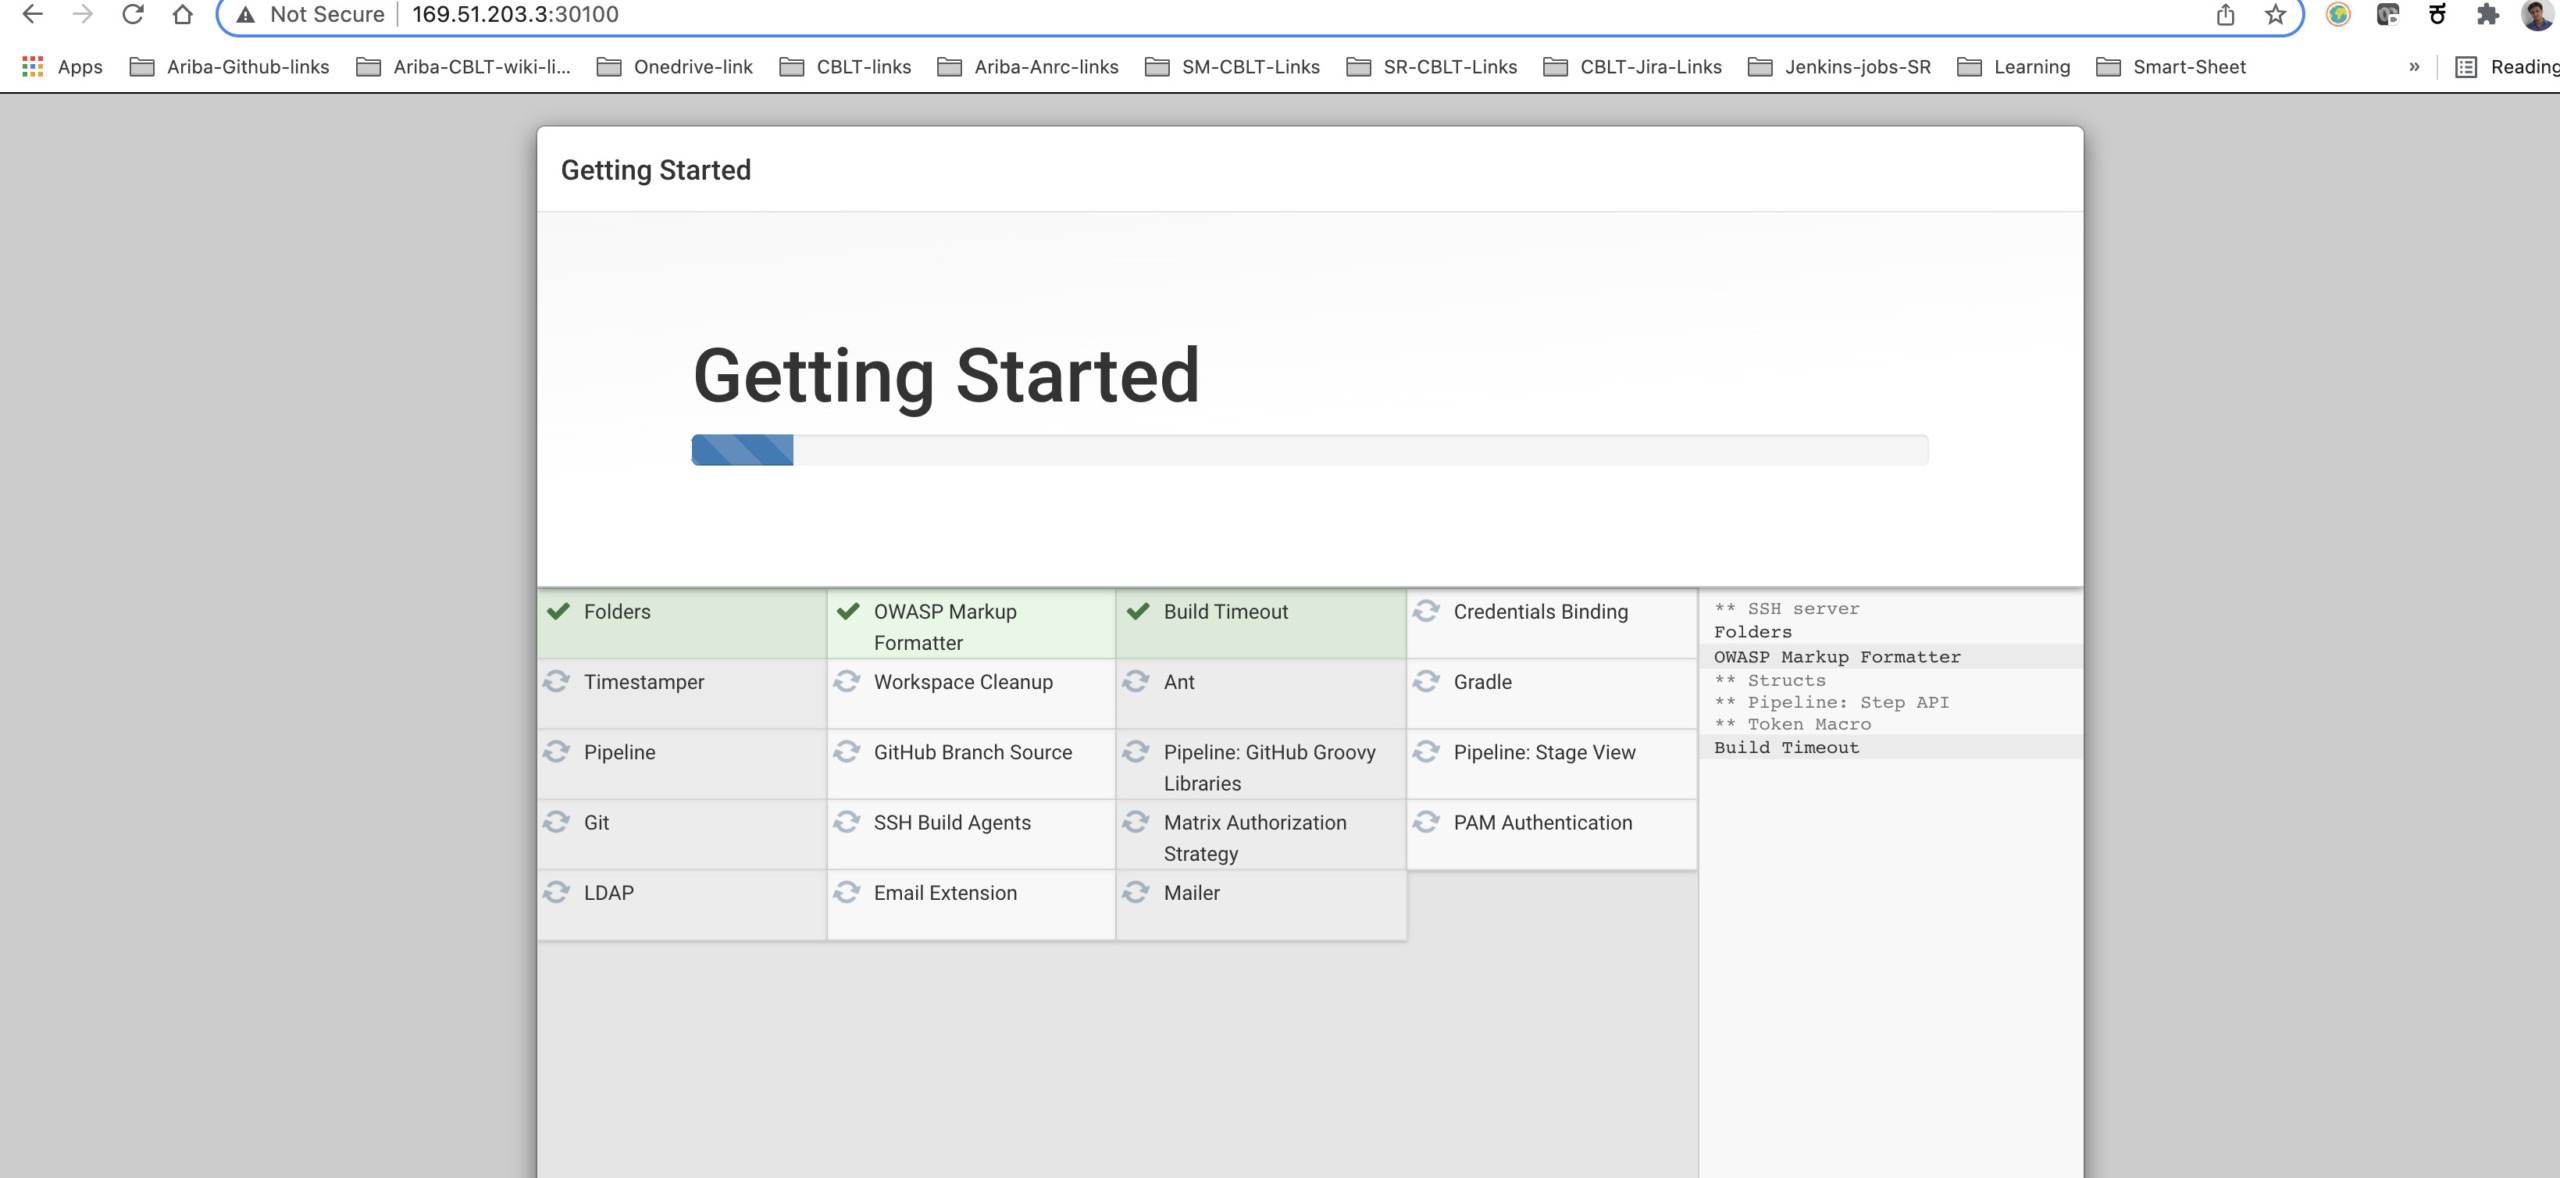
Now select the 'Install suggested plugins' option.
Create first admin user in Jenkins
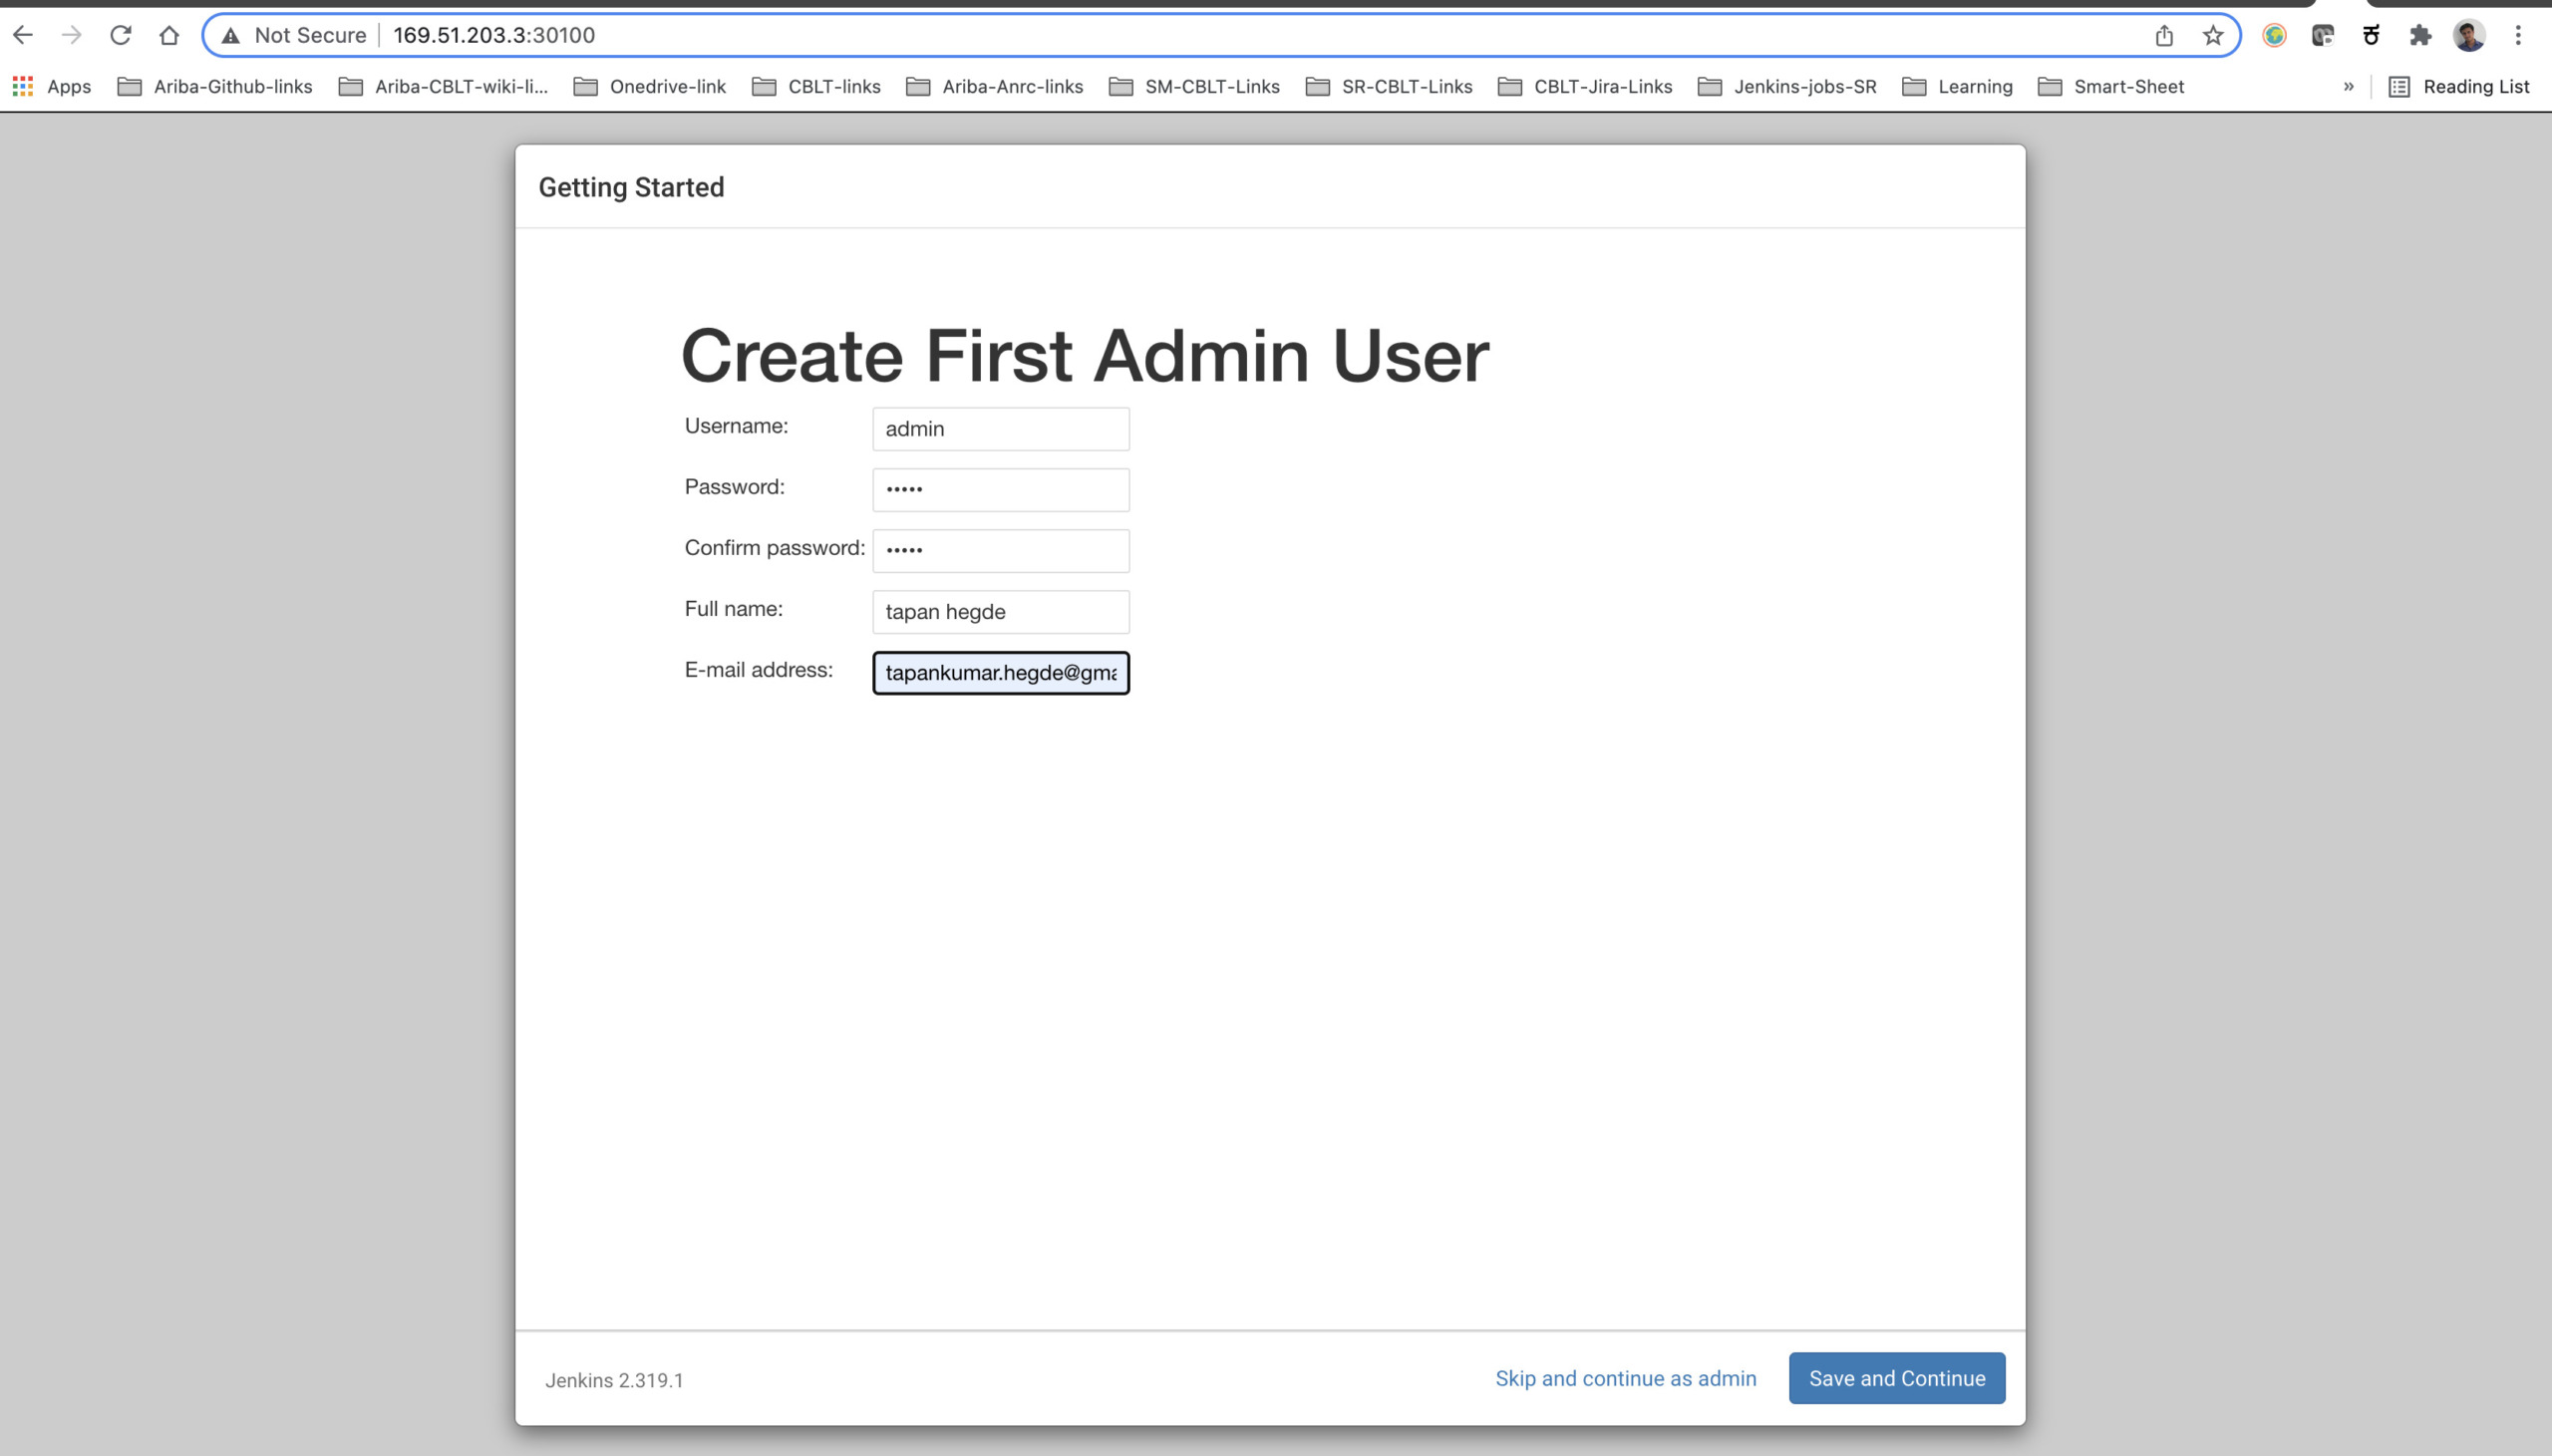
Click on ‘save and continue’ and your Jenkins server is ready to use!!

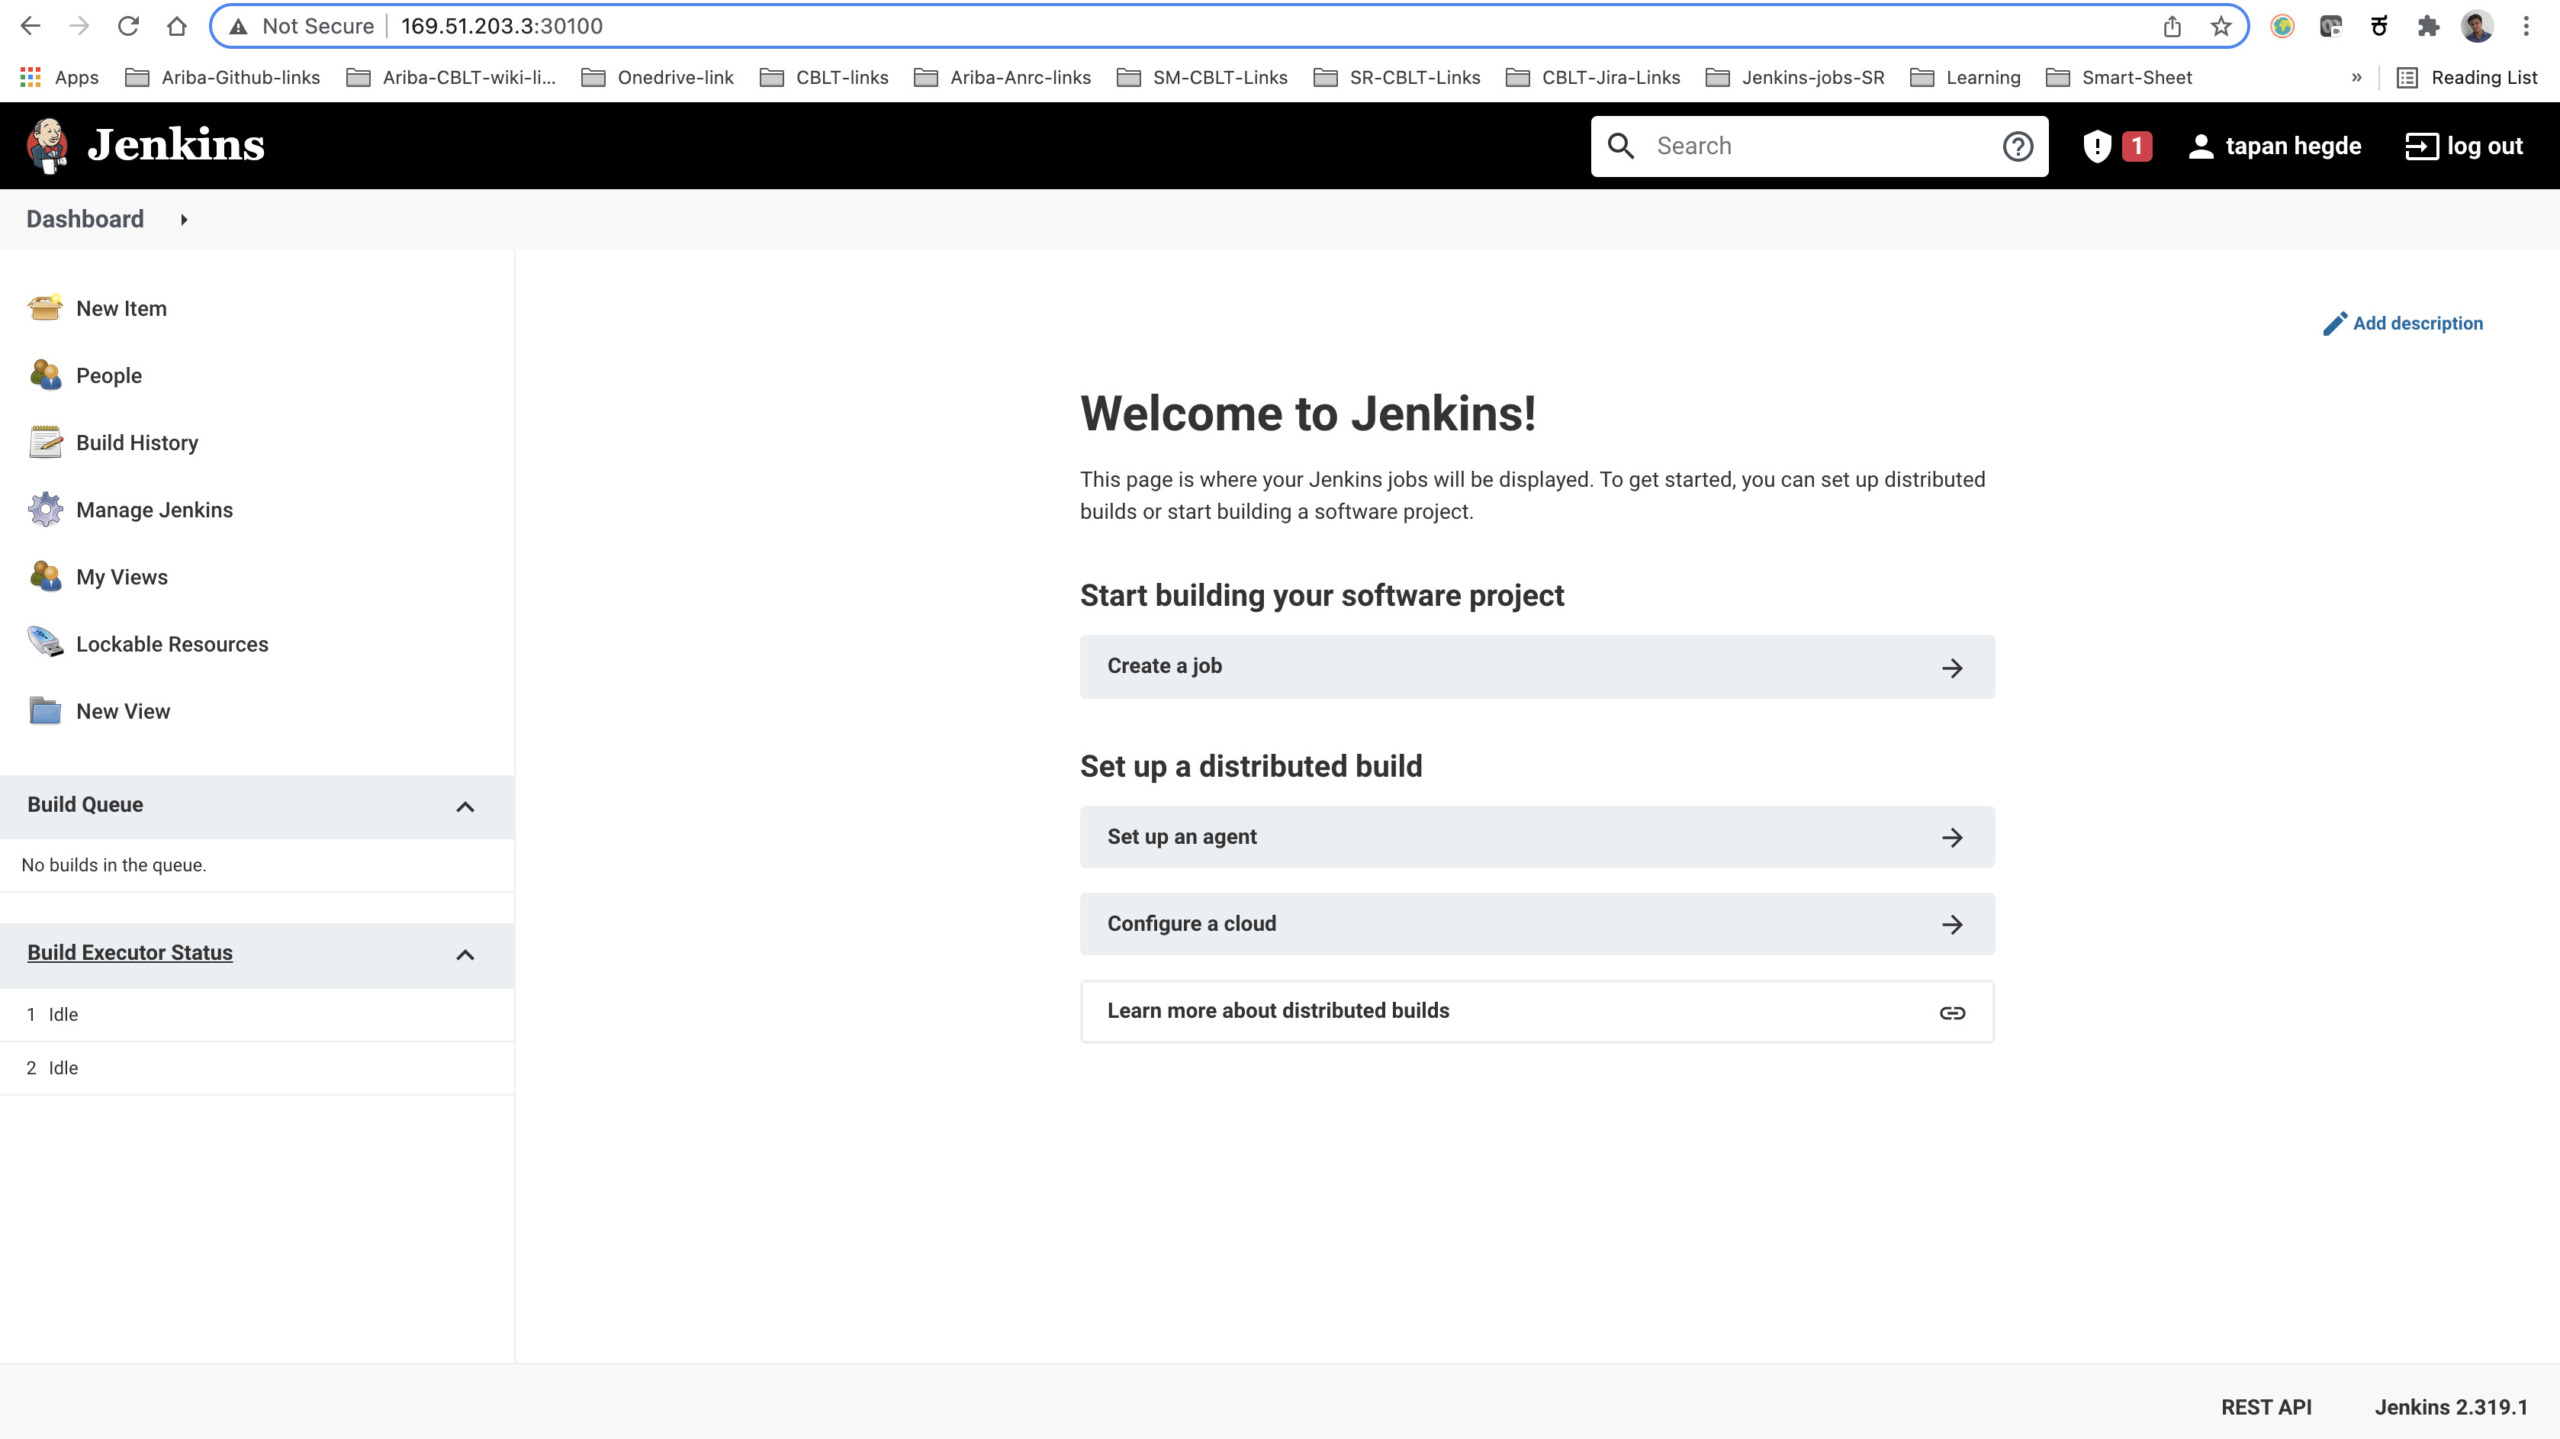
Congratulations!!!.. You have successfully deployed and configured Jenkins in the Kubernetes cluster.
Wait there!!..story is not yet over. It has just begun.. !!! 😁😁😁😁😁😁😁
With Jenkins ready for use, the following credentials are needed for Jenkins to fulfil a duty conveniently and to run properly:
'GitHub'credentials to gain access to source code'DockerHub'credentials to push a built image to Docker Hub'Kubeconfig'file to gain access to a Kubernetes cluster
'GitHub' and 'DockerHub' credentials are a type of 'Username with password'. But 'Kubeconfig' the credential is a type of 'Secret file'
- Next, download the kubeconfig file for your cluster
$ ibmcloud ks cluster config – cluster c750429f0alunes0ok4g
while configuring Kubernetes cli, you should have already executed the above command. Now we need to go to the Kubeconfig directory of the Kubernetes cluster (the Kubeconfig environment variable should be set before running this command):
Remember, before executing the command to get into kubeconfig directory, you should set the ‘KUBECONFIG’ environment variable. To do that follow the below steps
$ export KUBECONFIG=/Users/$USER/.bluemix/plugins/container-service/clusters/cicd-sb-cluster-c750429f0alunes0ok4g/kube-config-aaa00-cicd-sb-cluster.yml
the path should be similar to
/Users/$USER/.bluemix/plugins/container-service/clusters/<your cluster name with cluster ID>/<your cluster .yml file>
Now get into kubeconfig directory using the below command
$ cd $(echo $KUBECONFIG | awk '{split($0,a,"kube-config"); print a[1];}') && ls
the output of the above command should be similar to below
(base) C02Z34YFLVDQ:cicd-sb-cluster-c750429f0alunes0ok4g c5281159$ cd $(echo $KUBECONFIG | awk '{split($0,a,"kube-config"); print a[1];}') && ls -ltr
total 48
-rw-r--r –  1 c5281159  staff  4760 Dec 28 12:12 ca.pem
-rw-r--r –  1 c5281159  staff  3597 Dec 28 12:12 kube-config.yaml
-rw-r--r –  1 c5281159  staff  4760 Dec 28 12:12 ca-aaa00-cicd-sb-cluster.pem
-rw-r--r –  1 c5281159  staff  3597 Dec 28 12:12 kube-config-aaa00-cicd-sb-cluster.yml
Mainly there should be two files in the directory.
'<PEM-FILE>.pem'the file that stands for Privacy-Enhanced Mail and is a file format for storing and sending cryptographic keys, certificates, and other data.'<KUBE-CONFIG>.yml'the file is used to configure access to a cluster and sometimes is called a kubeconfig file, which is a generic way of referring to configuration files.
Both files should be in the same directory. In Jenkins, there is no option to keep these two files in the same directory. For this reason, the '<PEM-FILE>.pem' file should be embedded into the '<KUBE-CONFIG>.yml'file. To do this, copy both files into the desktop directory. The copying process is not mandatory but is done to preserve the original files.
Now run this command in the directory that contains the '<PEM-FILE>.pem' file and the '<KUBE-CONFIG>.yml' file.
$ for file in ./*; do cp $file /Users/$USER/Desktop; done;
- If you’d like, the destination directory can be changed by editing
'/Users/$USER/Desktop'.
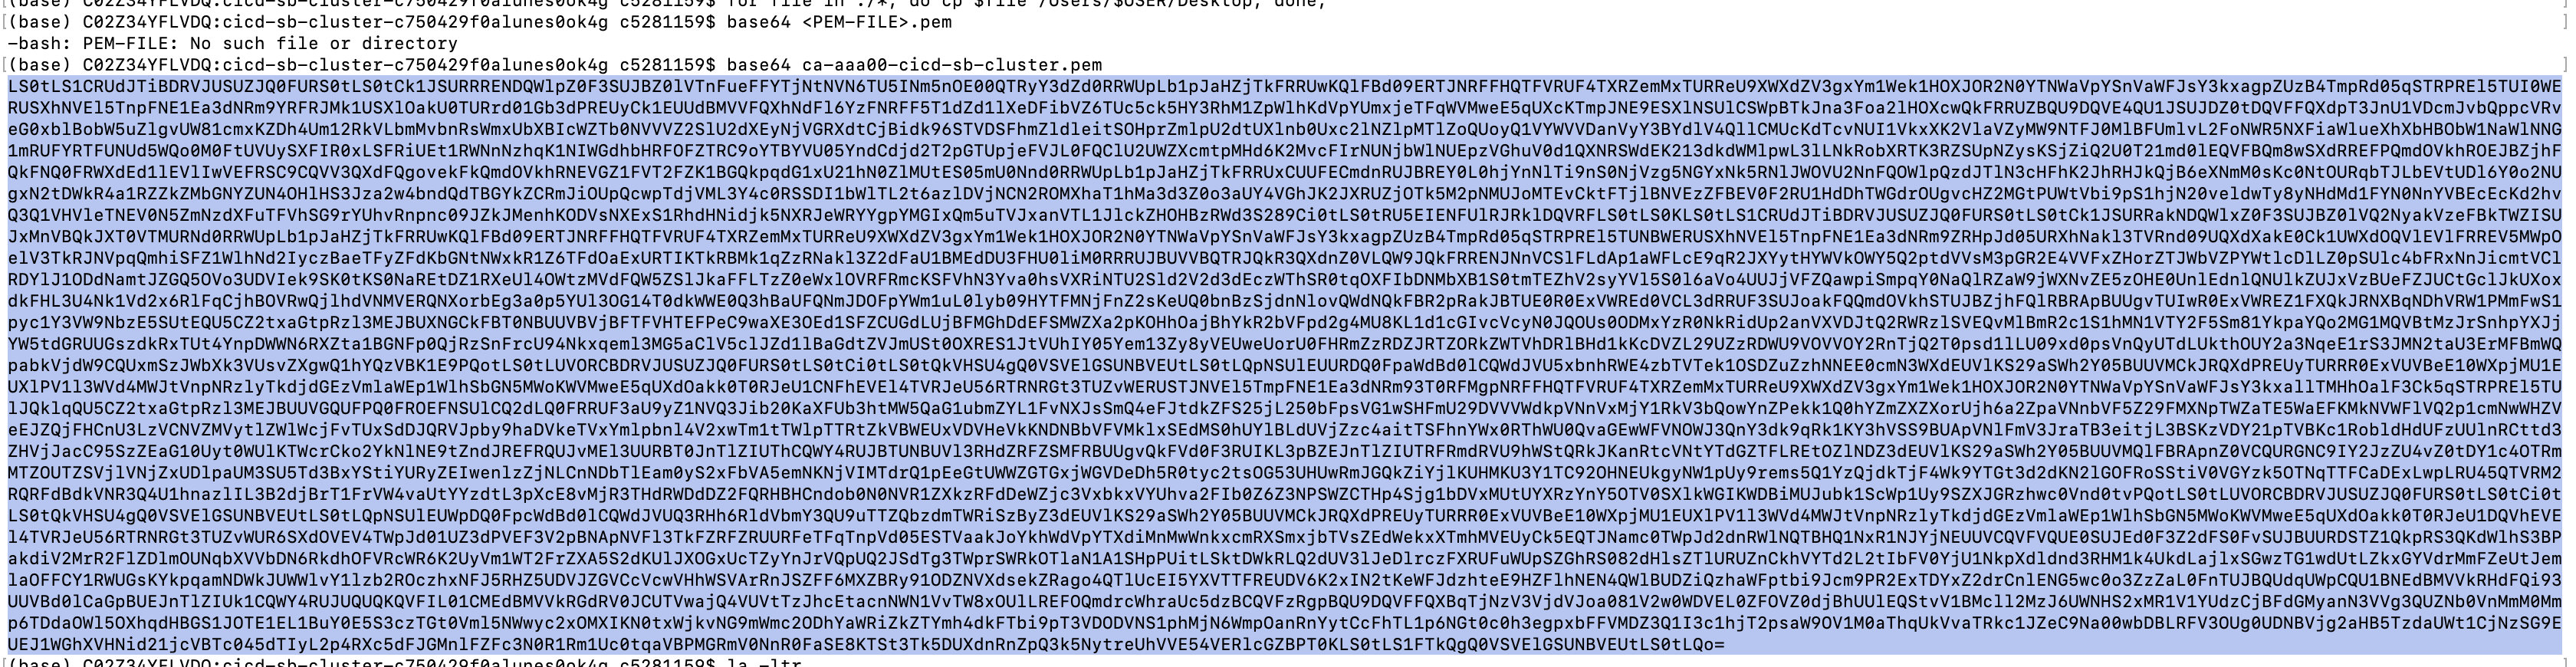
Next, go to the desktop directory via the terminal. Encode the '<PEM-FILE>.pem' file as base64:
$ base64 <PEM-FILE>.pem
Copy the result and open the '<KUBE-CONFIG>.yml' file with a code editor. Find 'certificate-authority: <PEM-FILE>.pem' and change it to 'certificate-authority-data: <BASE64-RESULT>'.
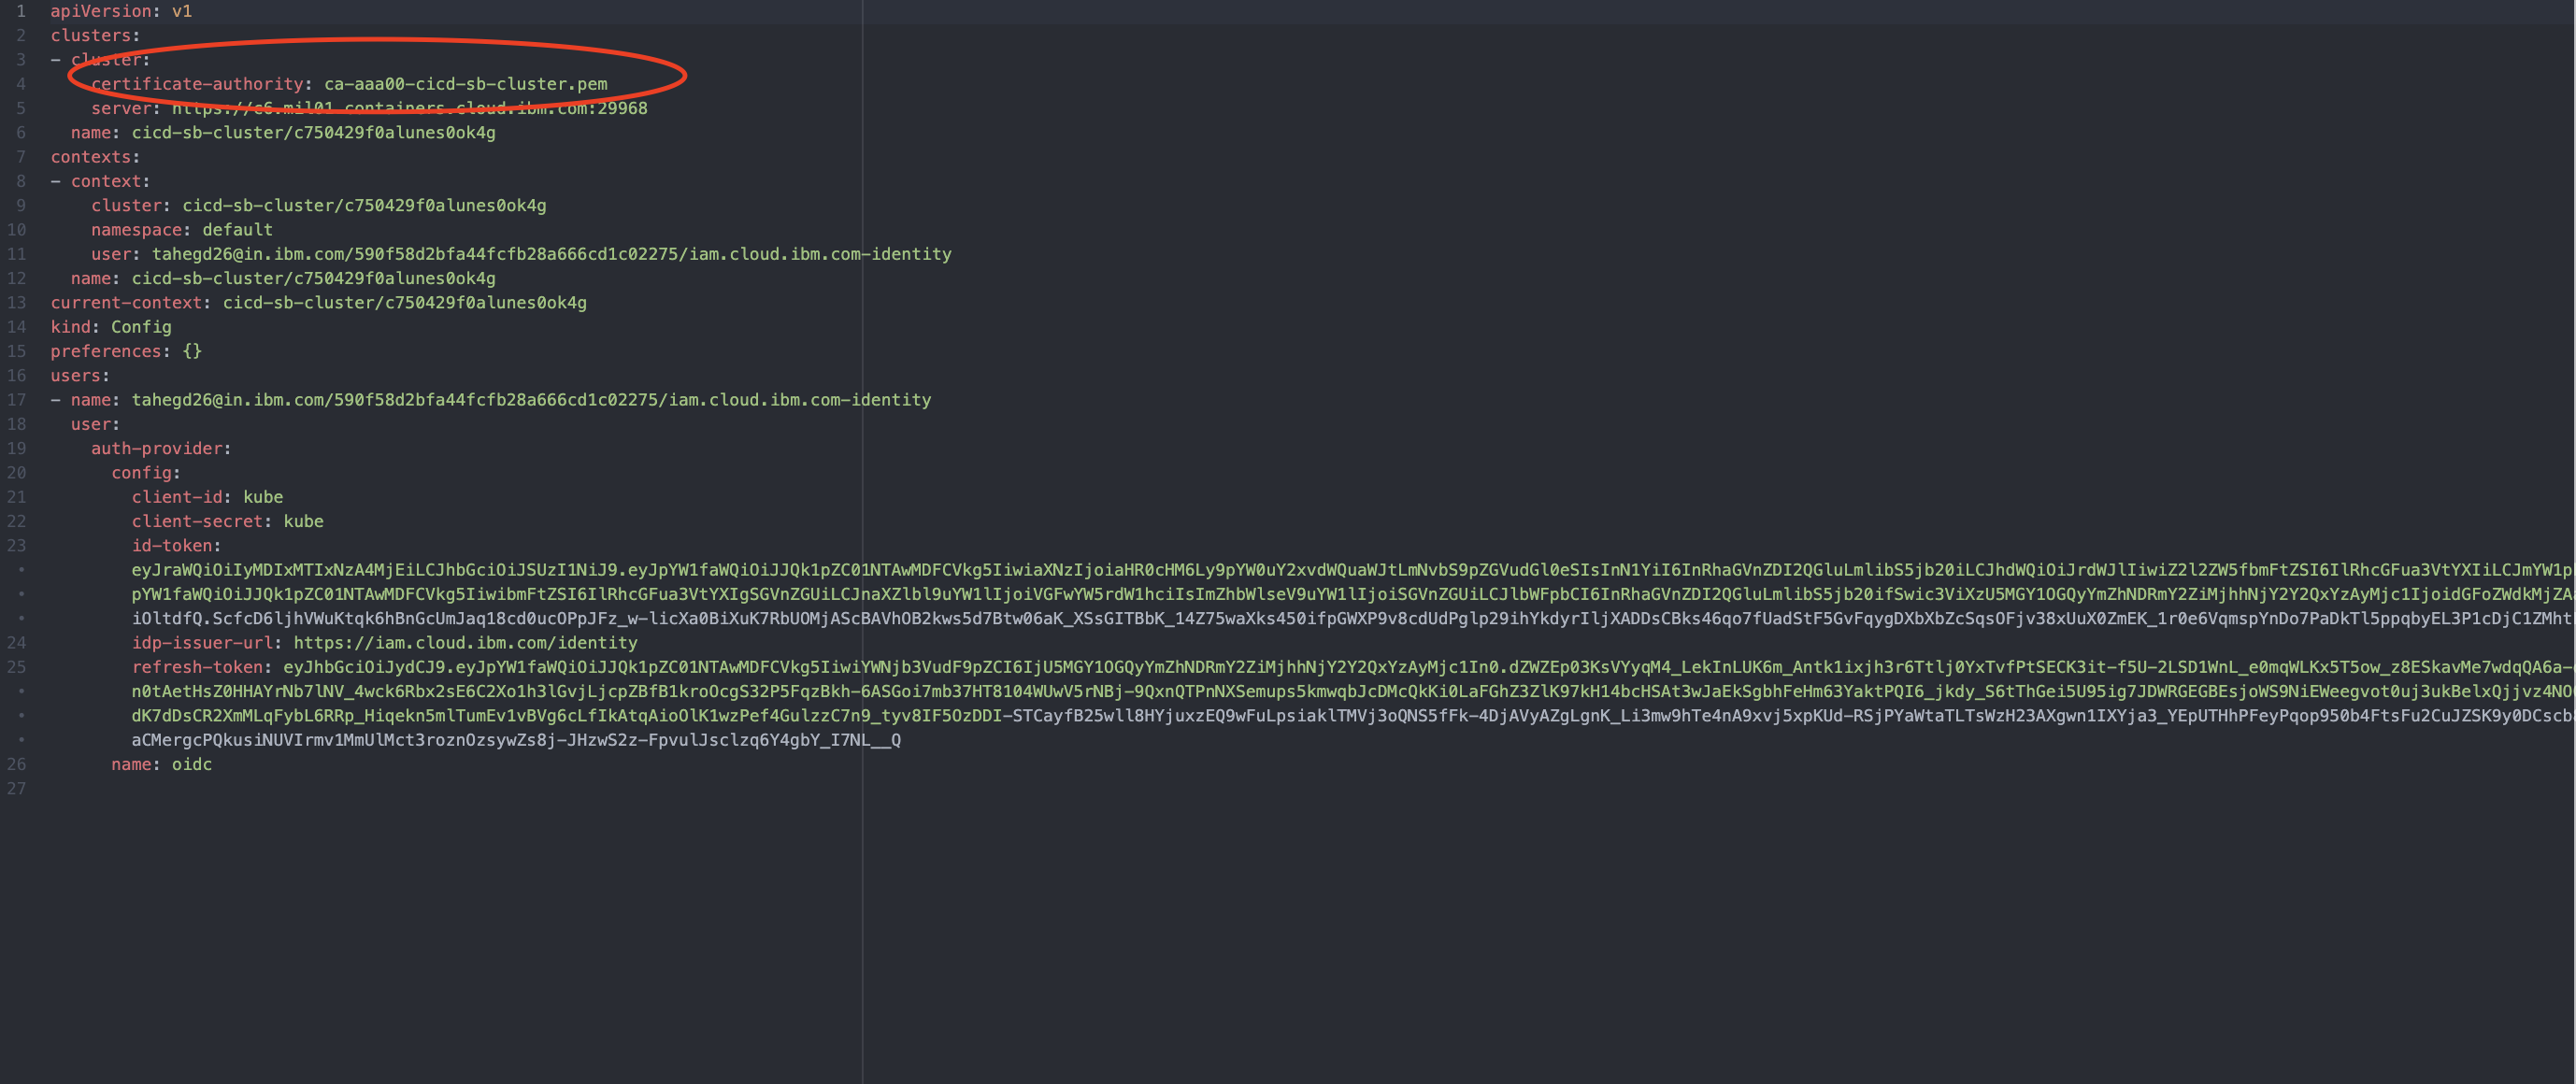
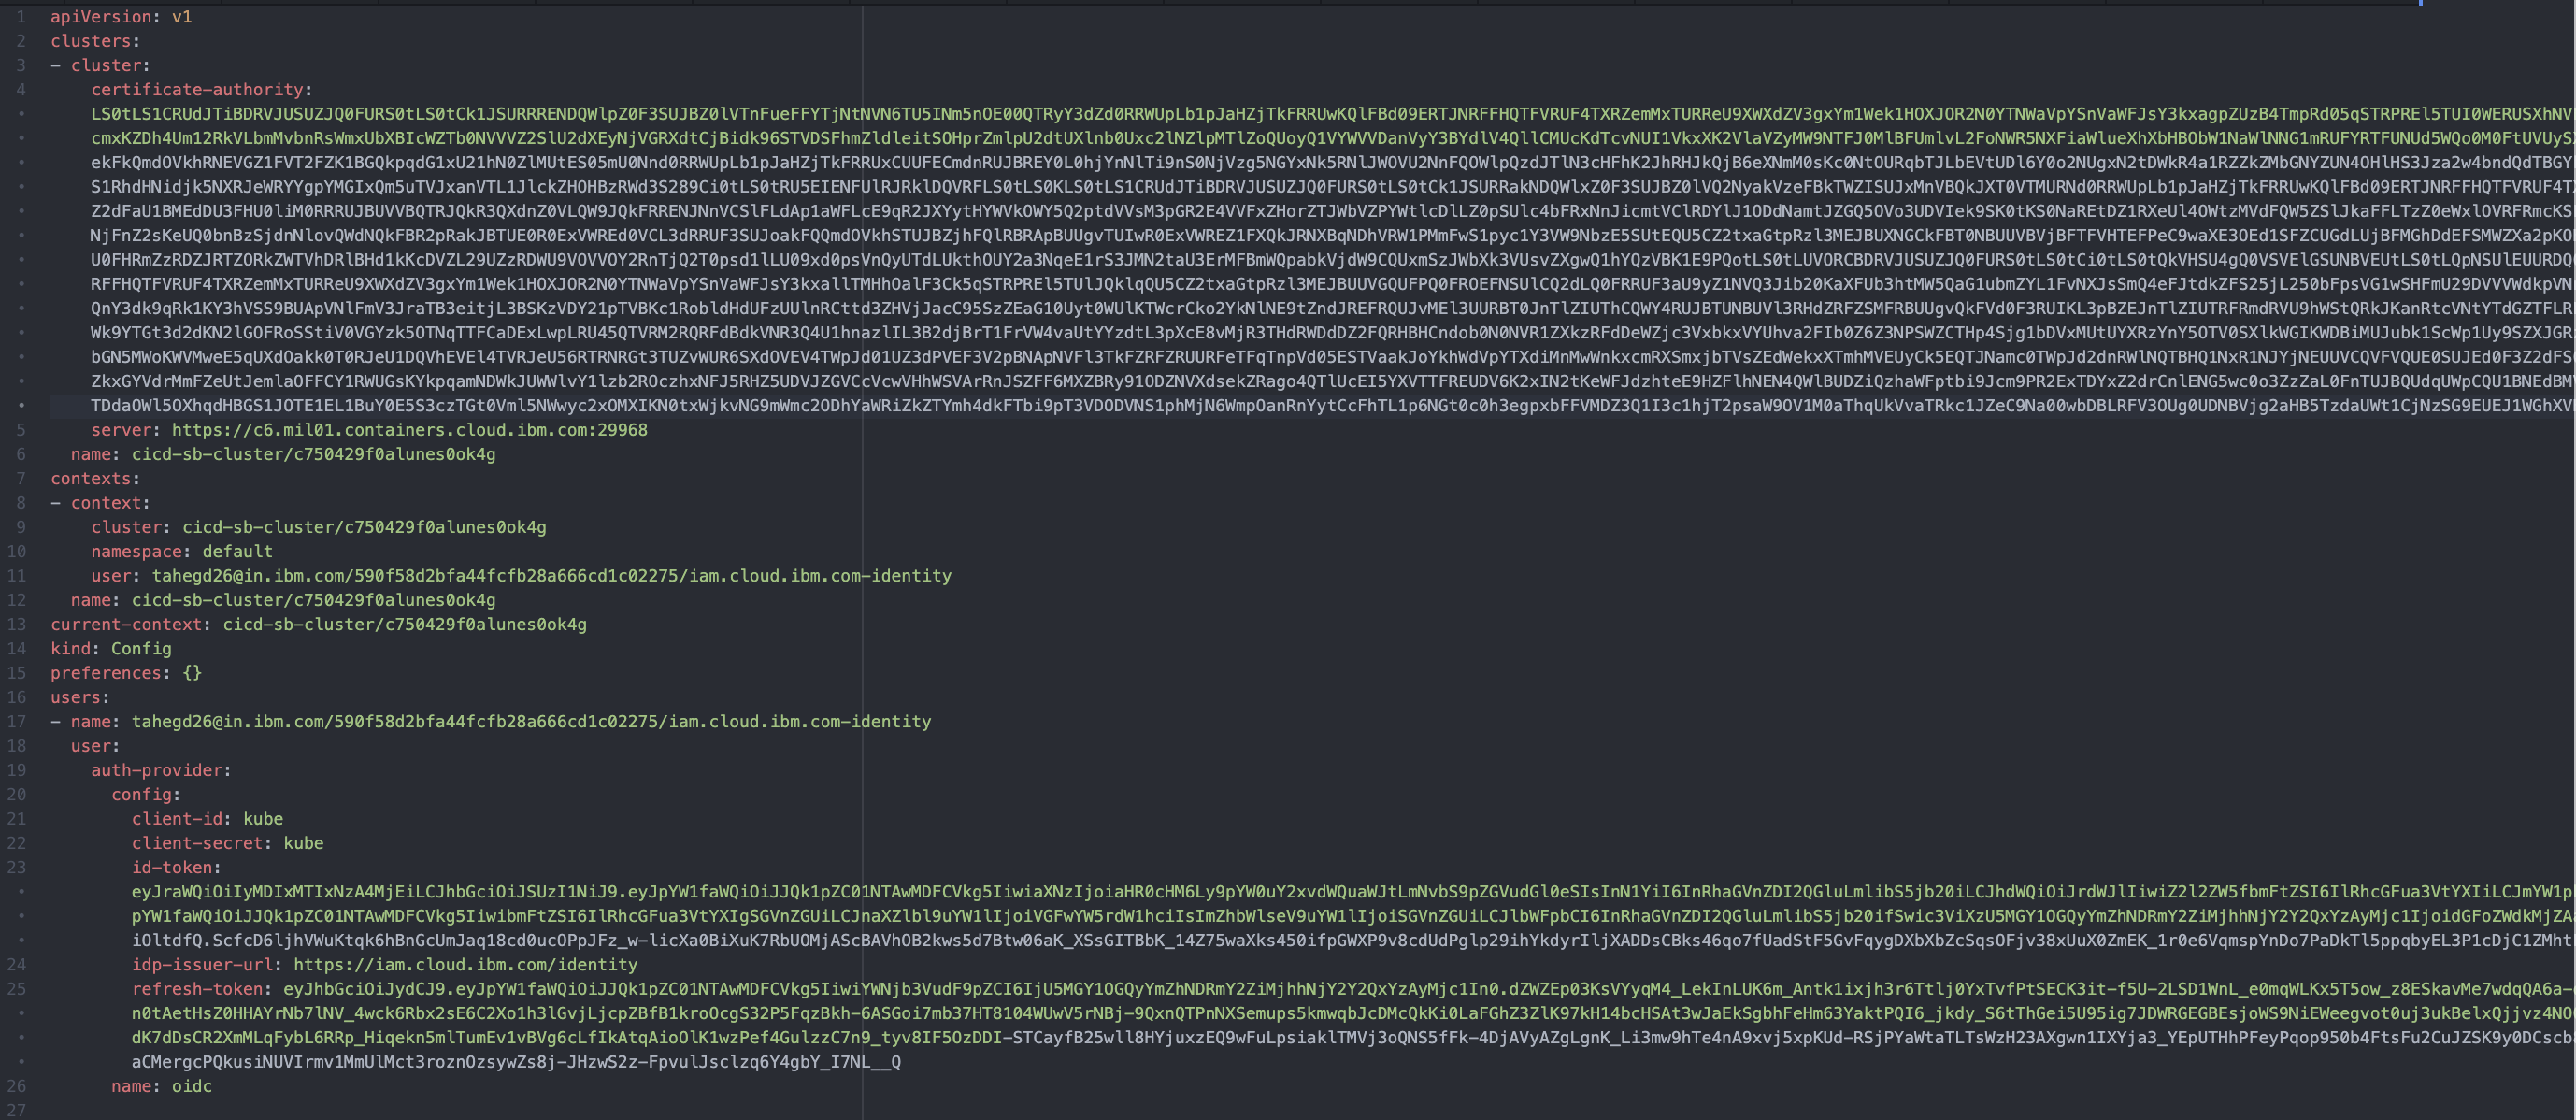
After completing the steps above, the '<KUBE-CONFIG>.yml' now contains the '<PEM-FILE>.pem' file.
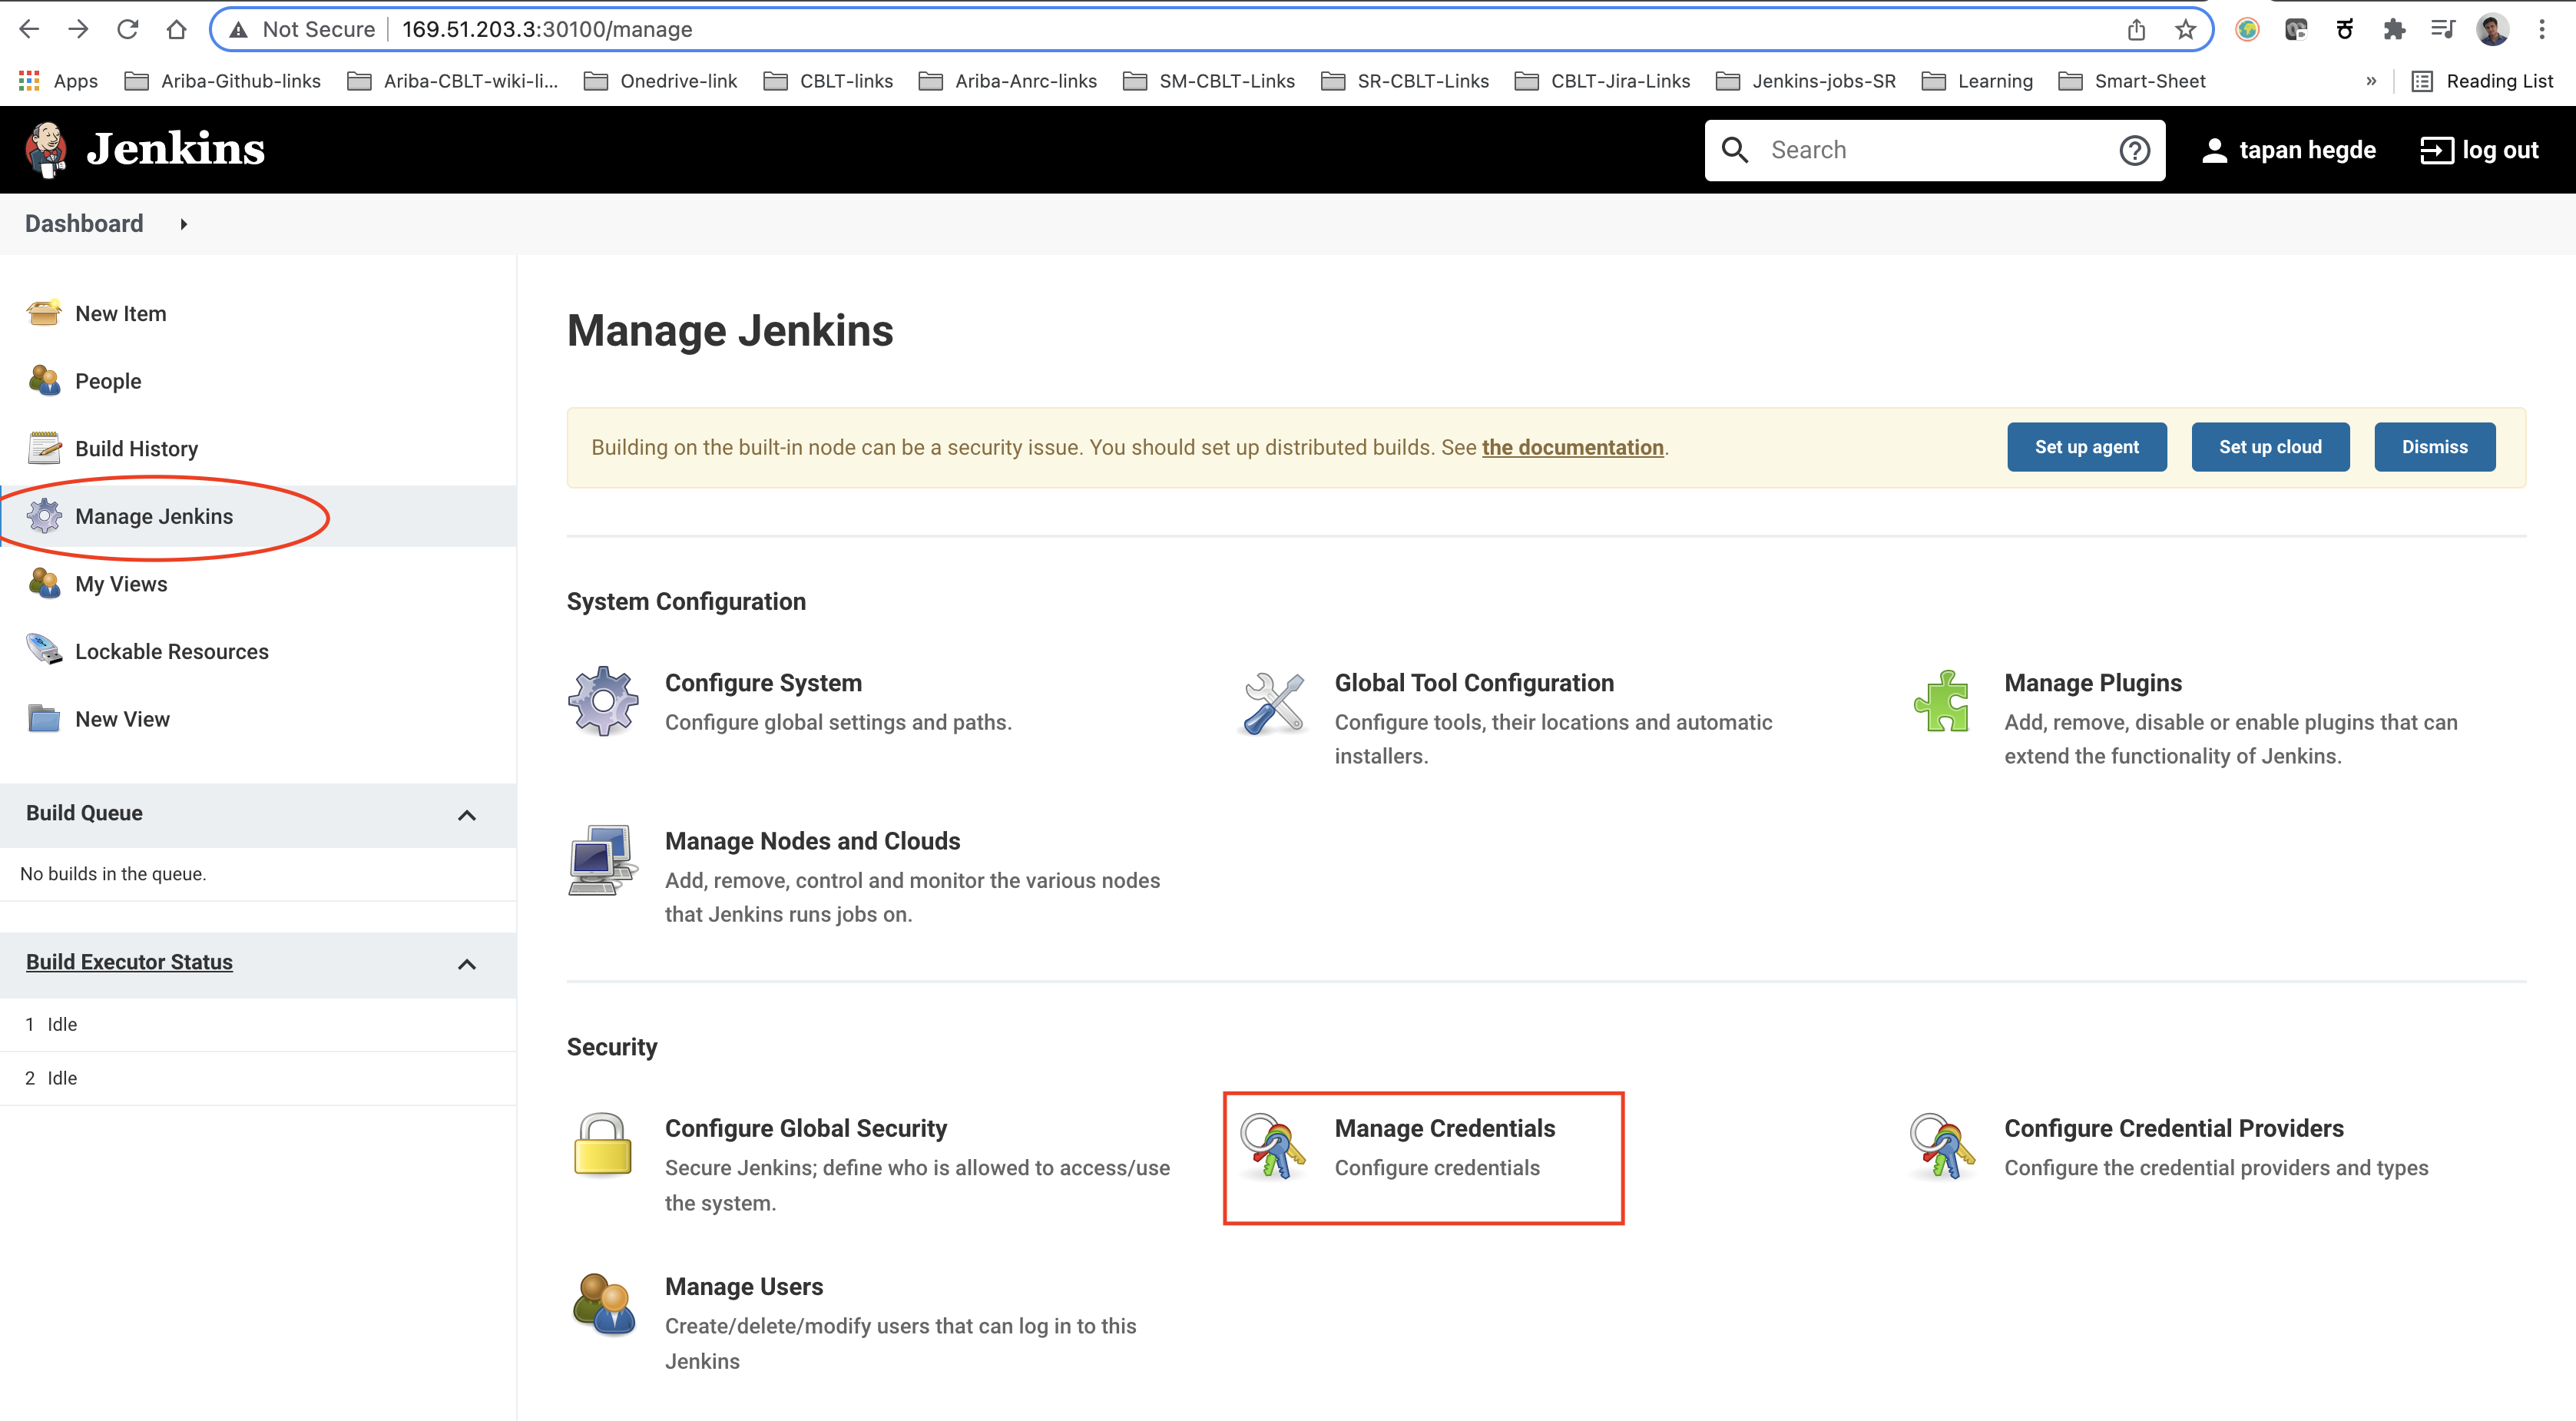
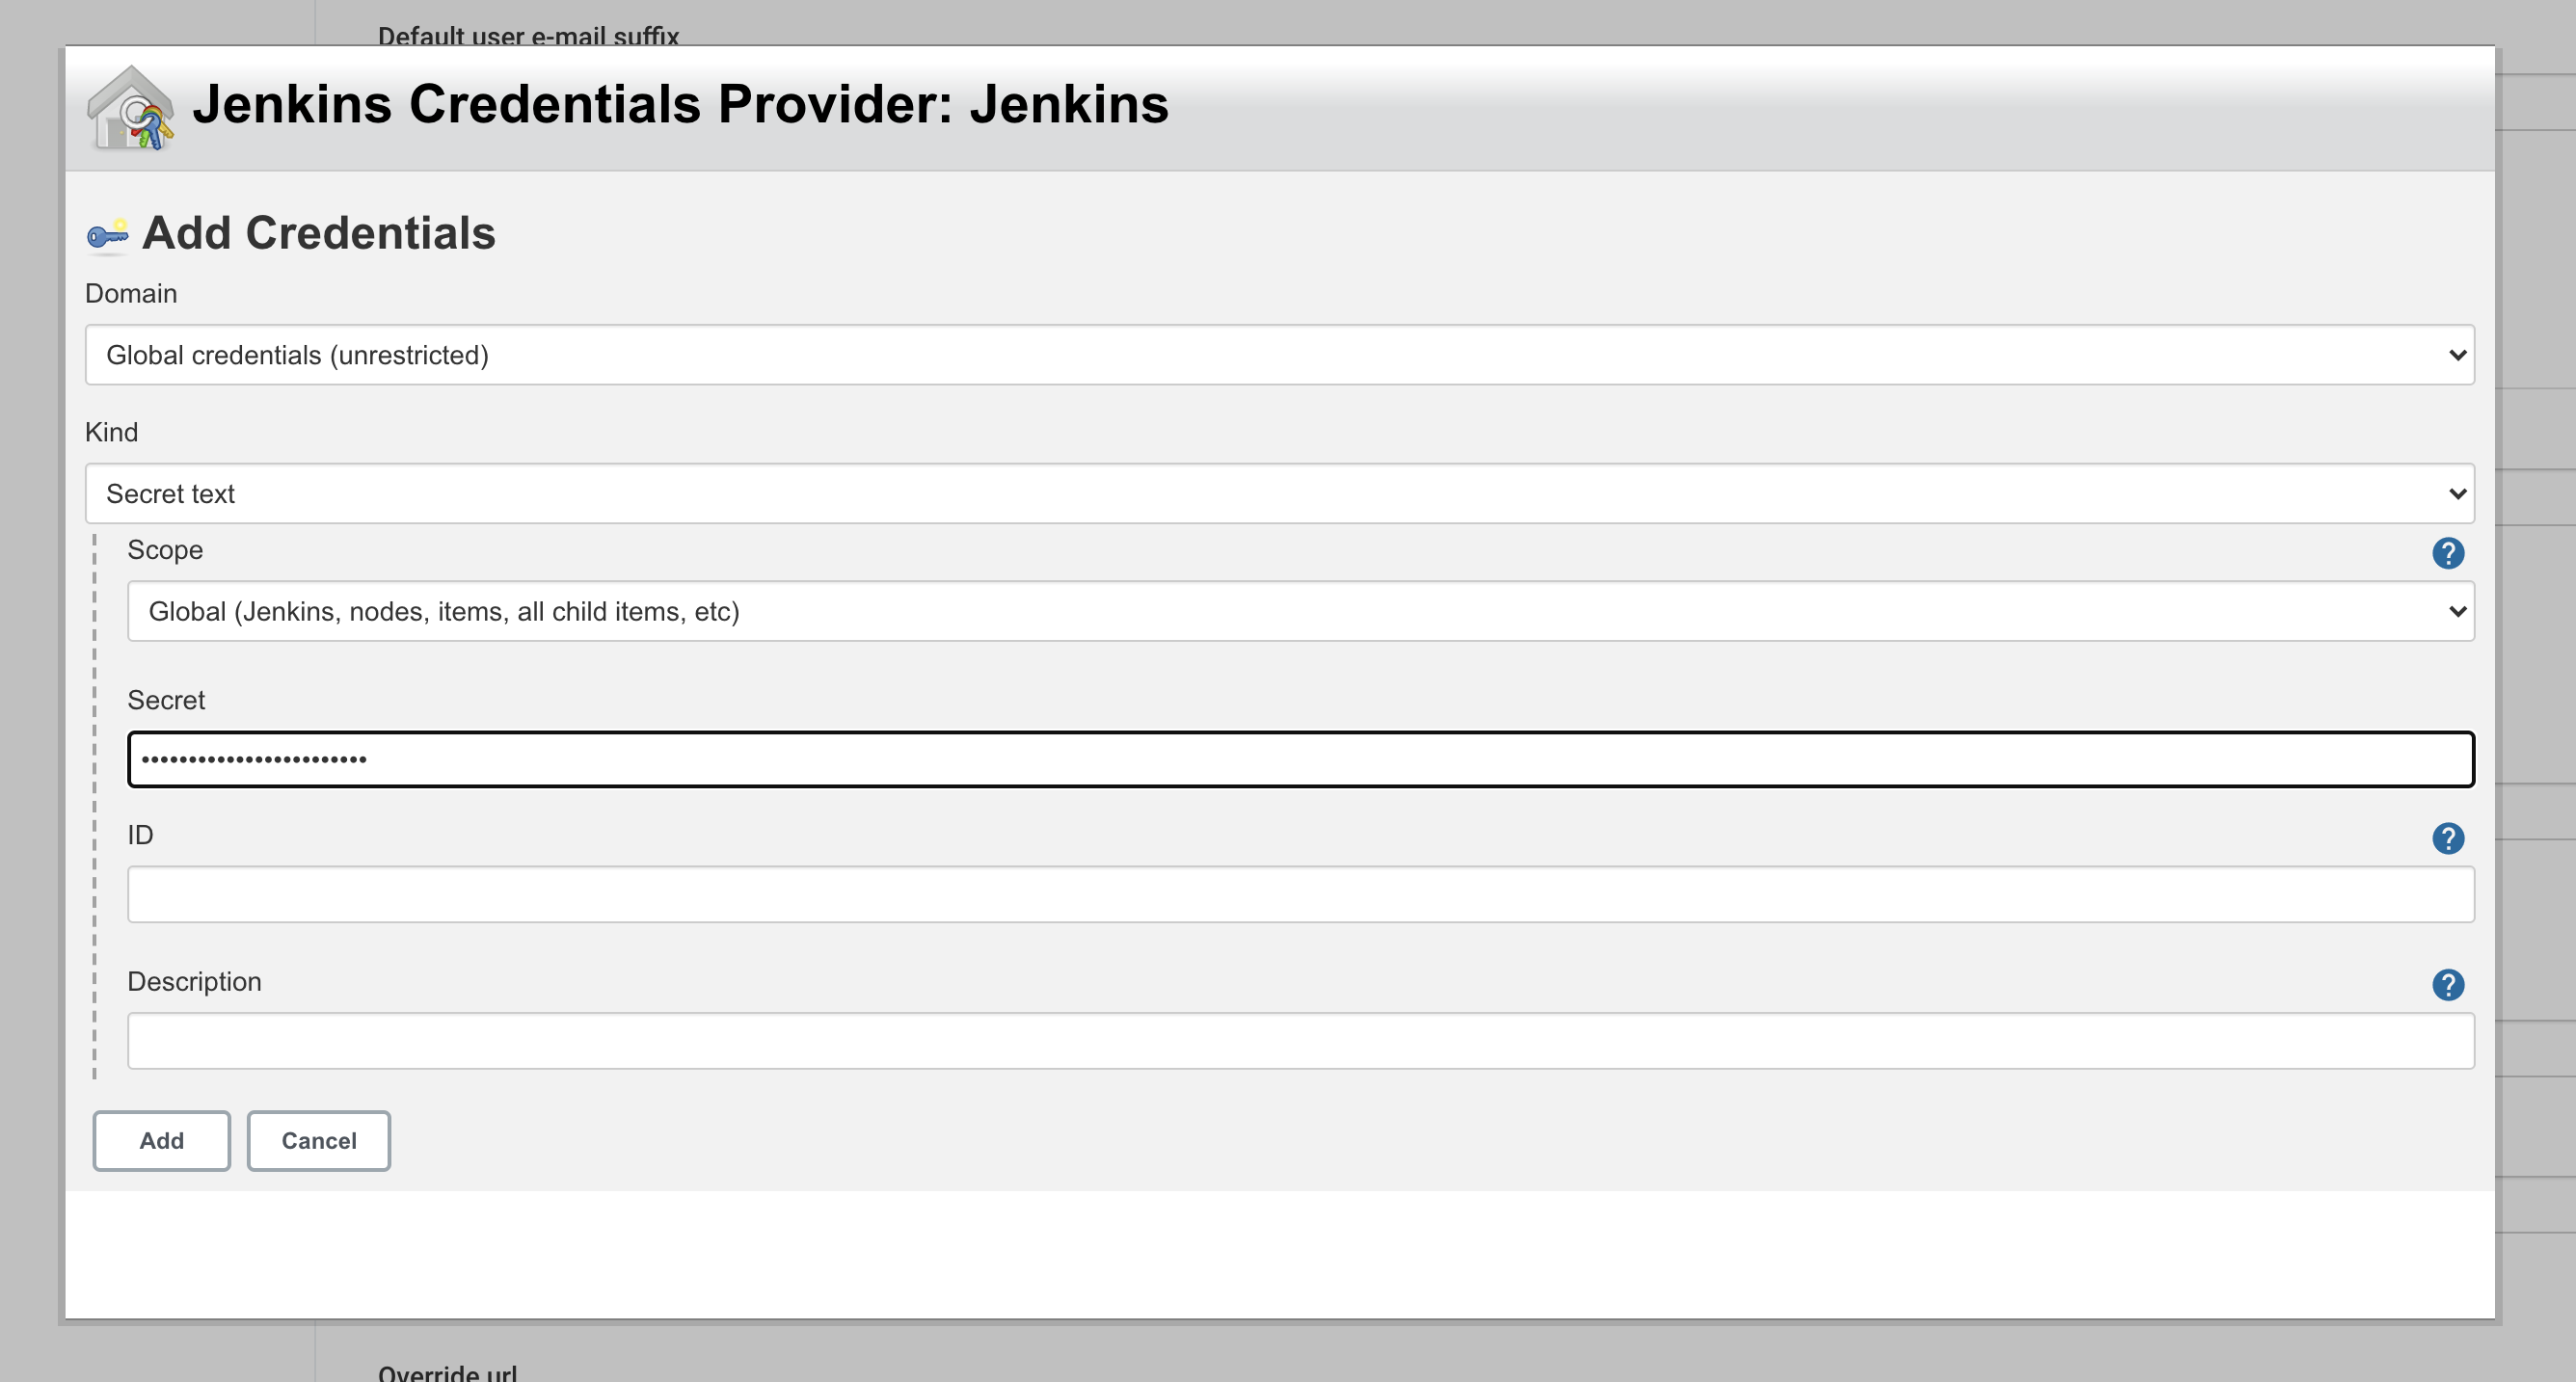
Now go back to the Jenkins dashboard and find the 'Credentials' option in the left pane and select the '(global)' option. The credentials can be added by clicking the 'Add Credentials' button in the left pane.
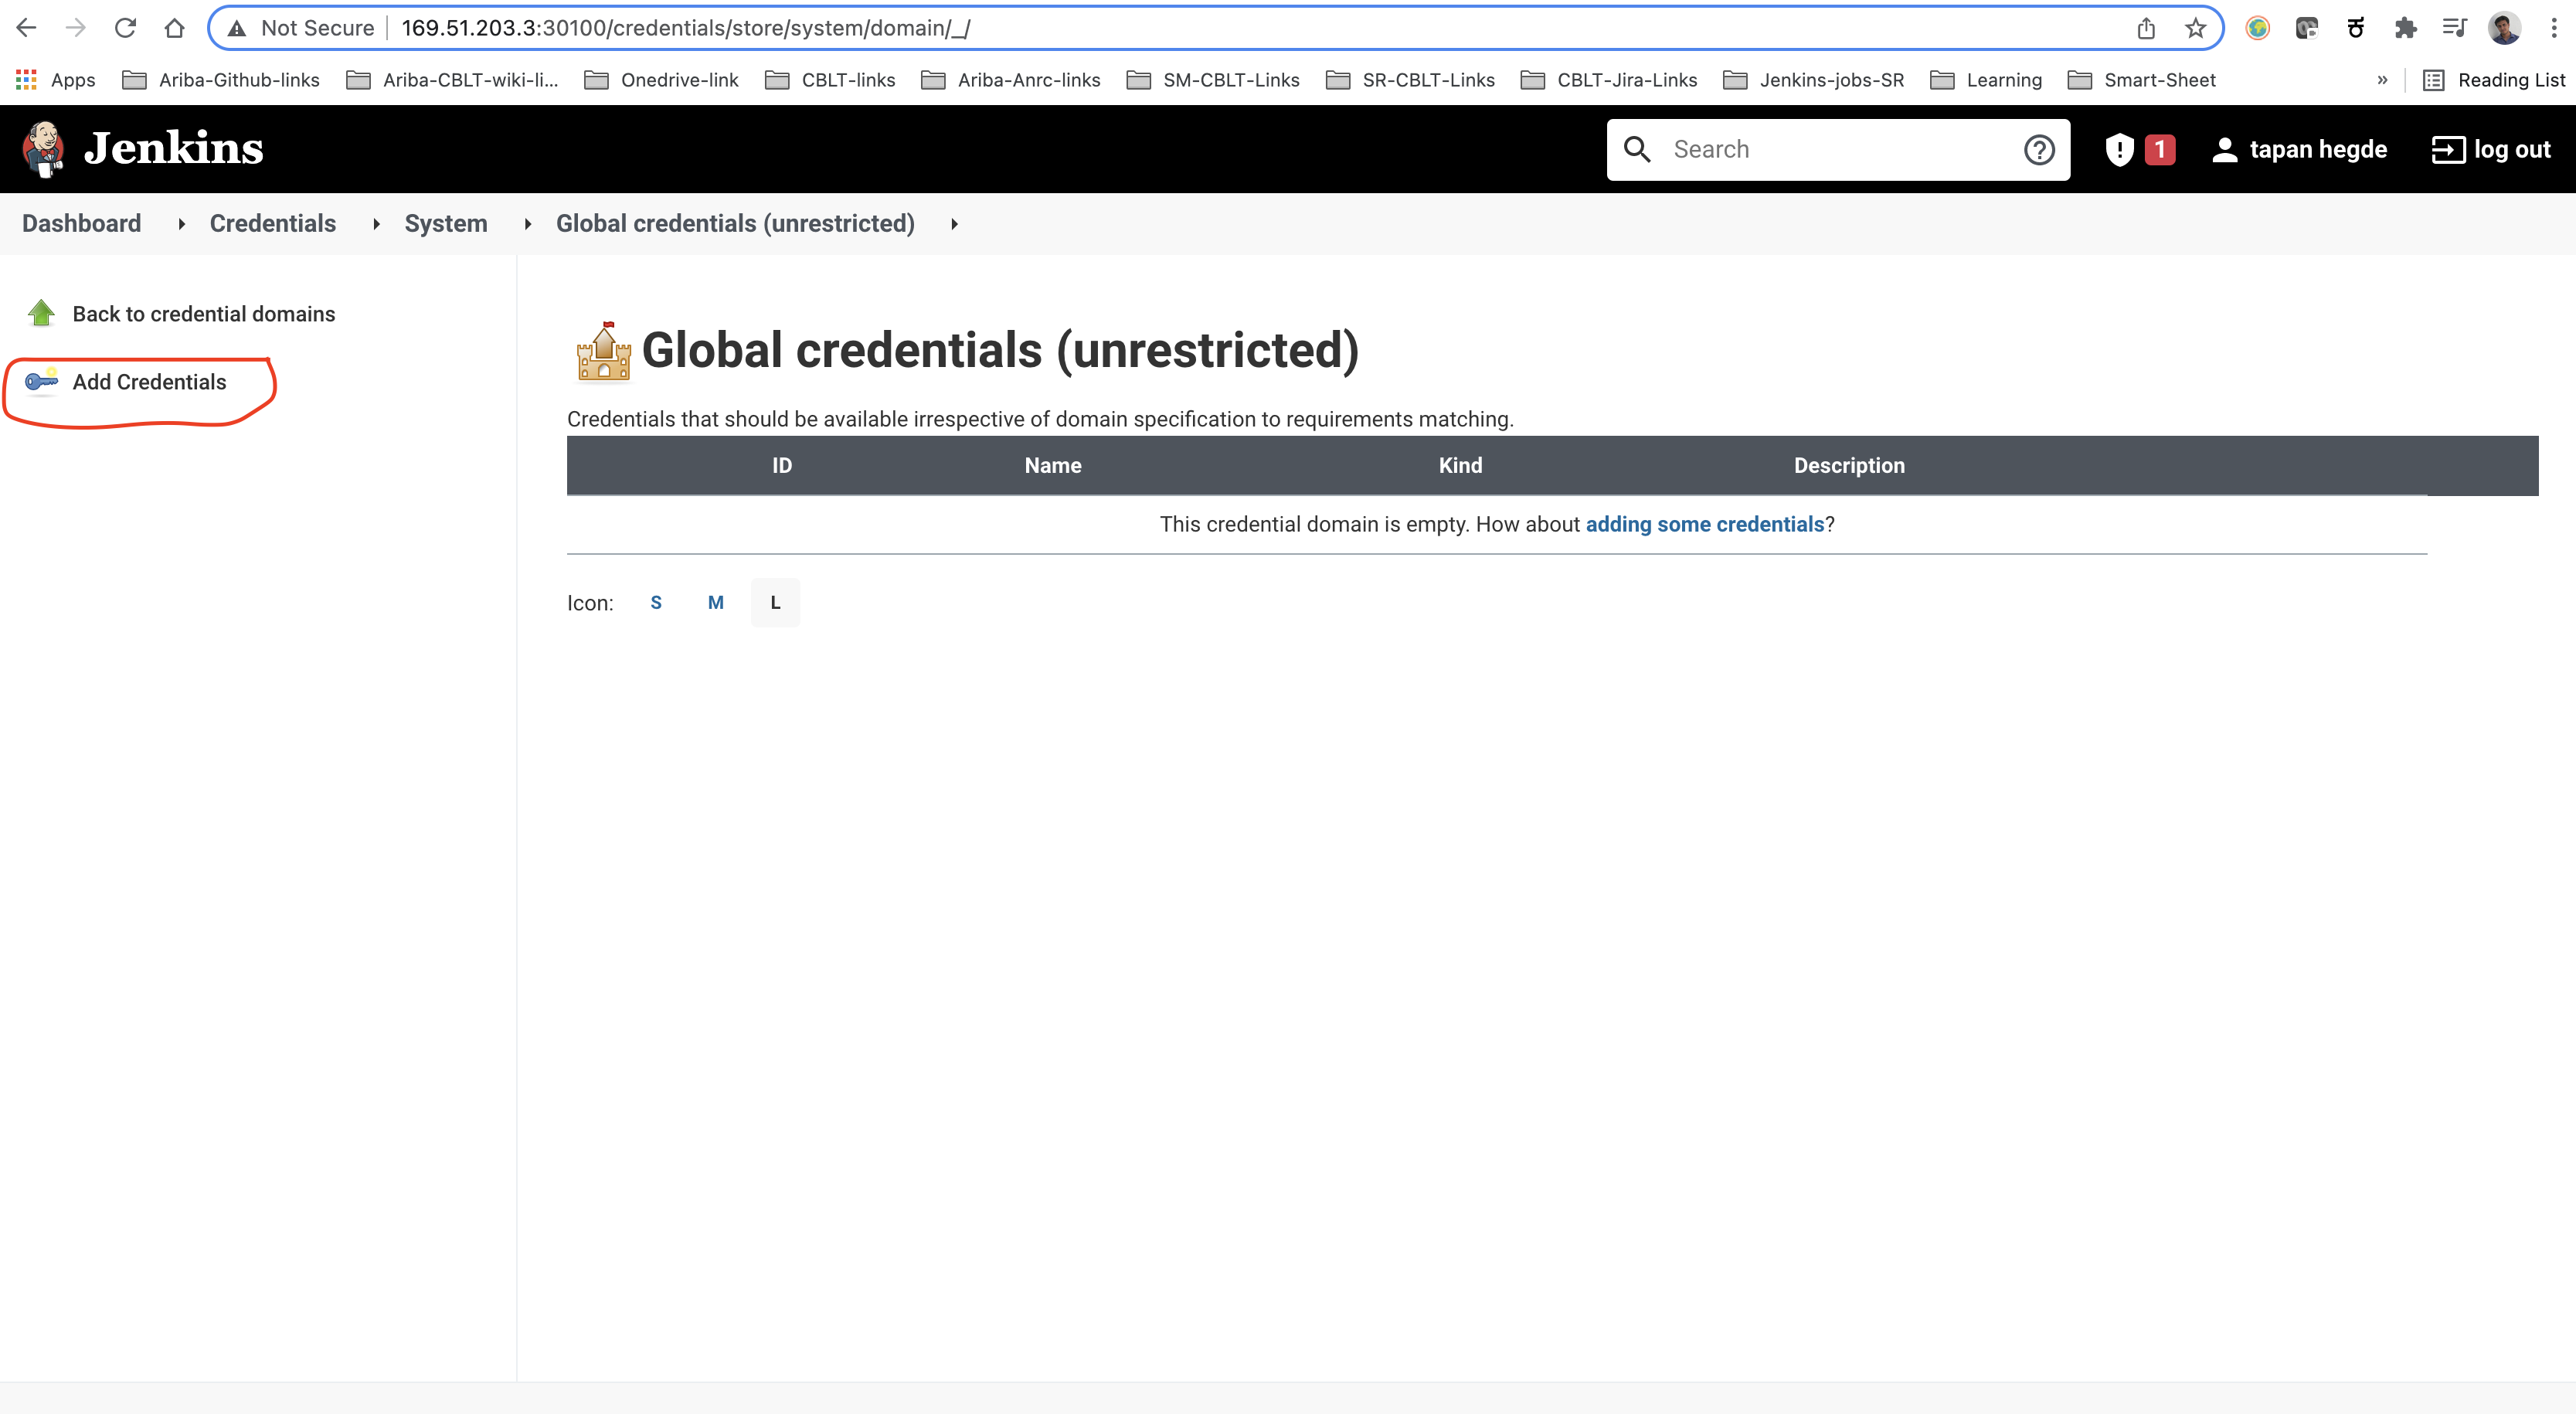
First, add the 'GitHub' credentials as 'Username with password' with the ID 'github'. Then add the 'DockerHub' credentials as 'Username with password' with the ID 'dockerhub'. Lastly, add the 'Kubeconfig' credentials as 'Secret file' with the ID 'kubeconfig'.


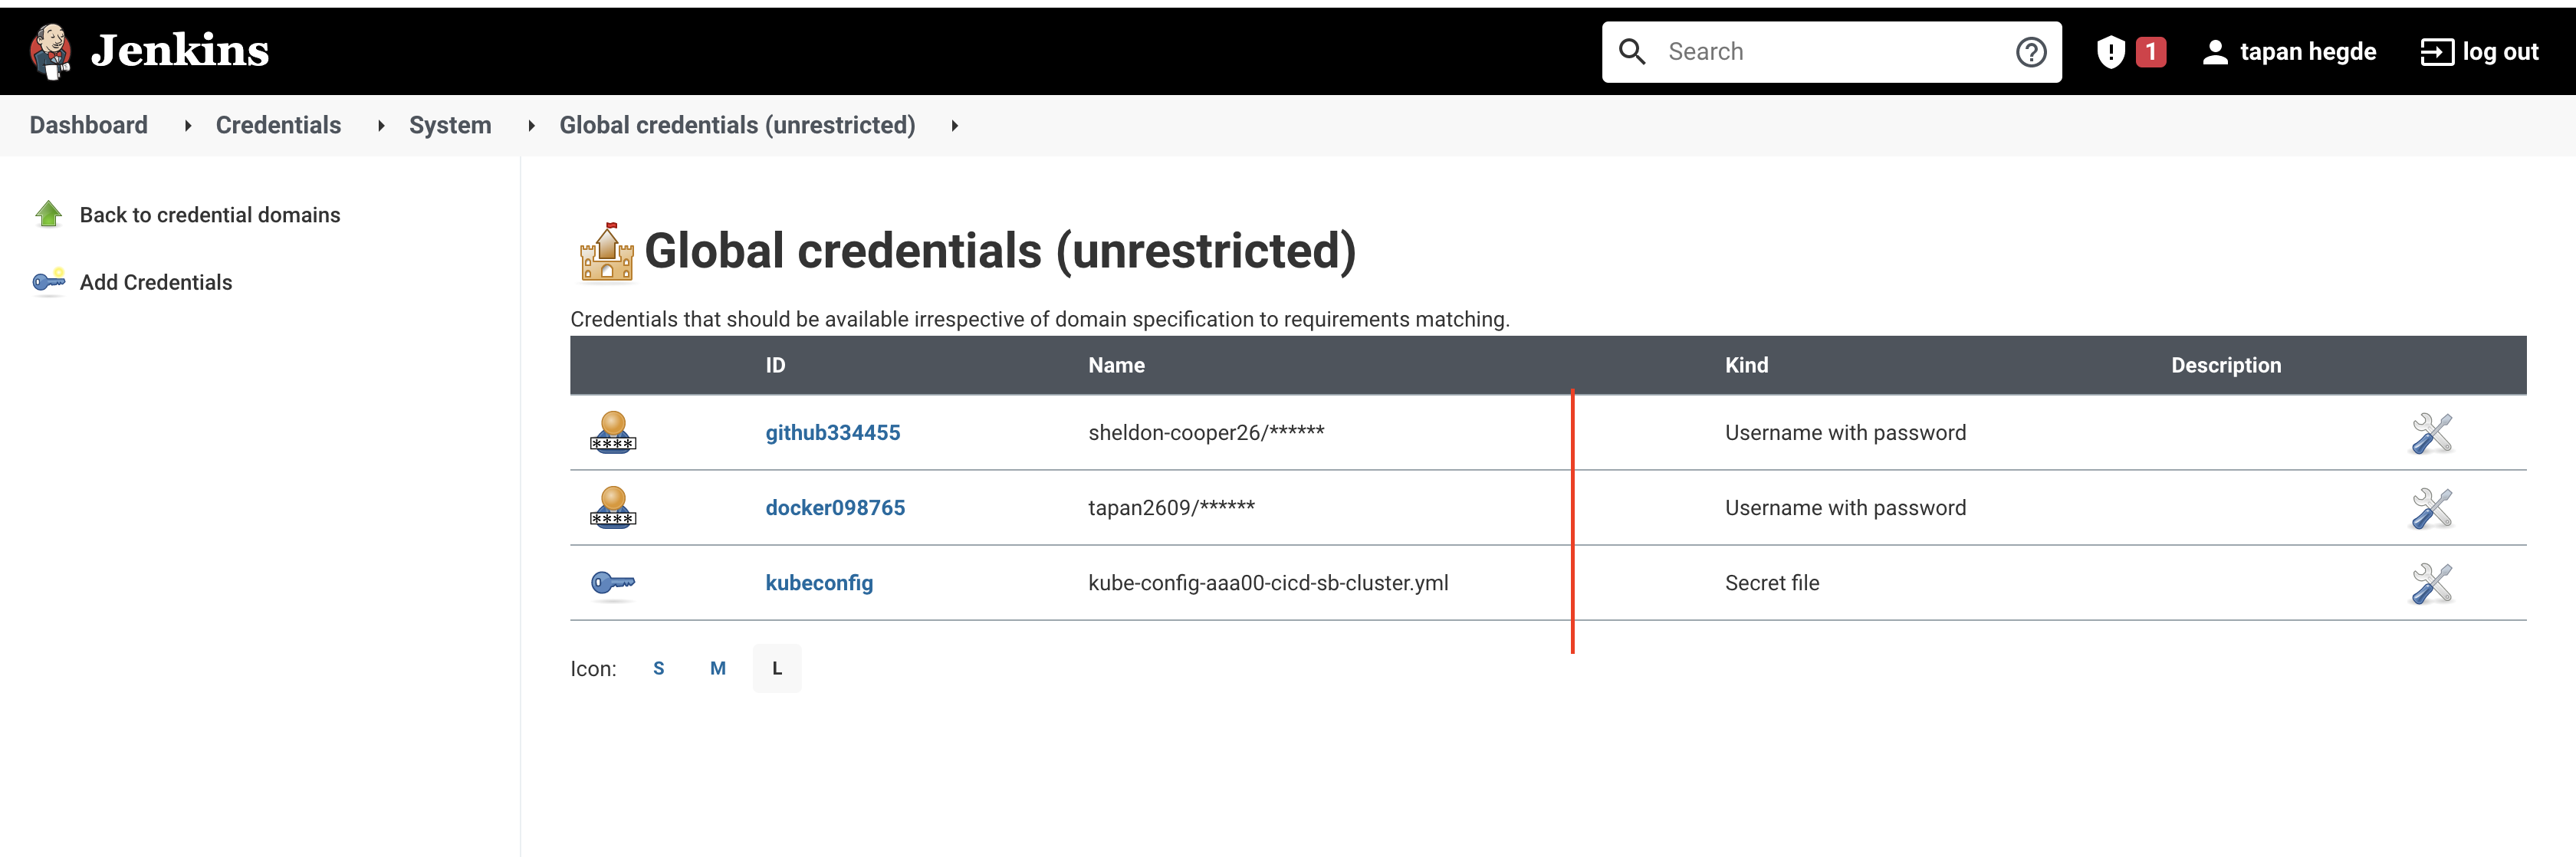
Note : Remember to select .yml file as a secret file entry for Kubernetes credentials. This file contains base64 decoded .pem entries. (Don’t select .pem file here)
The credentials are now ready to use and now plugins need to be installed. Jenkins has a wide range of plugin options. The Kubernetes CLI plugin is not mandatory; however, it eases the process. Kubernetes CLI allows you to configure 'kubectl' to interact with Kubernetes clusters.
Let’s get that set up by going back to the Jenkins dashboard and finding the 'Manage Jenkins' option in the left pane. Select 'Manage Plugins' and then choose the 'Available' tab. There should be a lot of available plugins in that tab. Search for the 'Kubernetes CLI' plugin and install it. Voila!! Jenkins is ready for the first landing!
5. Create the First Jenkins Pipeline
Now we shall create a Jenkins pipeline for the spring-boot project which got committed in the Github repo.
reference repo: https://github.com/sheldon-cooper26/springboot-docker-kubernates
To create the Jenkins pipeline, a GitHub account that contains the following files is needed. 'deployment.yaml', 'Dockerfile', 'spring-boot-project', 'Jenkinsfile' and 'service.yaml'.
Let's see the contents of all files listed above
- deployment.yaml
apiVersion: apps/v1
kind: Deployment
metadata:
  name: sbmvnpodinfo-deployment
  labels:
    app: sbmvnpodinfo
spec:
  replicas: 1
  selector:
    matchLabels:
      app: sbmvnpodinfo
  template:
    metadata:
      labels:
        app: sbmvnpodinfo
    spec:
      containers:
      - name: sbmvnpodinfo
        image: tapan2609/sbmvnpodinfo:{{BUILD_NUMBER}}
        imagePullPolicy: Always
        ports:
        - containerPort: 8080
        env:
        - name: MY_NODE_NAME
          valueFrom:
            fieldRef:
              fieldPath: spec.nodeName
        - name: MY_POD_NAME
          valueFrom:
            fieldRef:
              fieldPath: metadata.name
        - name: MY_POD_NAMESPACE
          valueFrom:
            fieldRef:
              fieldPath: metadata.namespace
        - name: MY_POD_IP
          valueFrom:
            fieldRef:
              fieldPath: status.podIP
        - name: MY_POD_SERVICE_ACCOUNT
          valueFrom:
            fieldRef:
              fieldPath: spec.serviceAccountName
- Dockerfile
# Build stage
FROM maven:3.6.3-jdk-8-slim AS build
COPY holaworld/src /home/app/src
COPY holaworld/pom.xml /home/app
RUN mvn -f /home/app/pom.xml clean test package

# Package stage
FROM openjdk:8-jdk-alpine
COPY – from=build /home/app/target/*.jar app.jar
EXPOSE 8080
ENTRYPOINT ["java","-jar","app.jar"]
- Jenkinsfile
pipeline {
  agent any
  stages {
    stage('Docker Build') {
      steps {
        sh "docker build -t tapan2609/sbmvnpodinfo:${env.BUILD_NUMBER} ."
      }
    }
    stage('Docker Push') {
      steps {
        withCredentials([usernamePassword(credentialsId: 'docker098765', passwordVariable: 'dockerHubPassword', usernameVariable: 'dockerHubUser')]) {
          sh "docker login -u ${env.dockerHubUser} -p ${env.dockerHubPassword}"
          sh "docker push tapan2609/sbmvnpodinfo:${env.BUILD_NUMBER}"
        }
      }
    }
    stage('Docker Remove Image') {
      steps {
        sh "docker rmi tapan2609/sbmvnpodinfo:${env.BUILD_NUMBER}"
      }
    }
    stage('Apply Kubernetes Files') {
      steps {
          withKubeConfig([credentialsId: 'kubeconfig']) {
          sh 'cat deployment.yaml | sed "s/{{BUILD_NUMBER}}/$BUILD_NUMBER/g" | kubectl apply -f -'
          sh 'kubectl apply -f service.yaml'
        }
      }
  }
}
post {
    success {
      slackSend(message: "sbmvn Pipeline is successfully completed.")
    }
    failure {
      slackSend(message: "sbmvn Pipeline failed. Please check the logs.")
    }
}
}
- service.yml
apiVersion: v1
kind: Service
metadata:
  name: sbmvnpodinfo-service
spec:
  type: NodePort
  selector:
    app: sbmvnpodinfo
  ports:
  - protocol: TCP
    nodePort: 30301
    port: 8080
    targetPort: 8080
Navigate back to the Jenkins dashboard and find the 'New Item' option in the left pane.
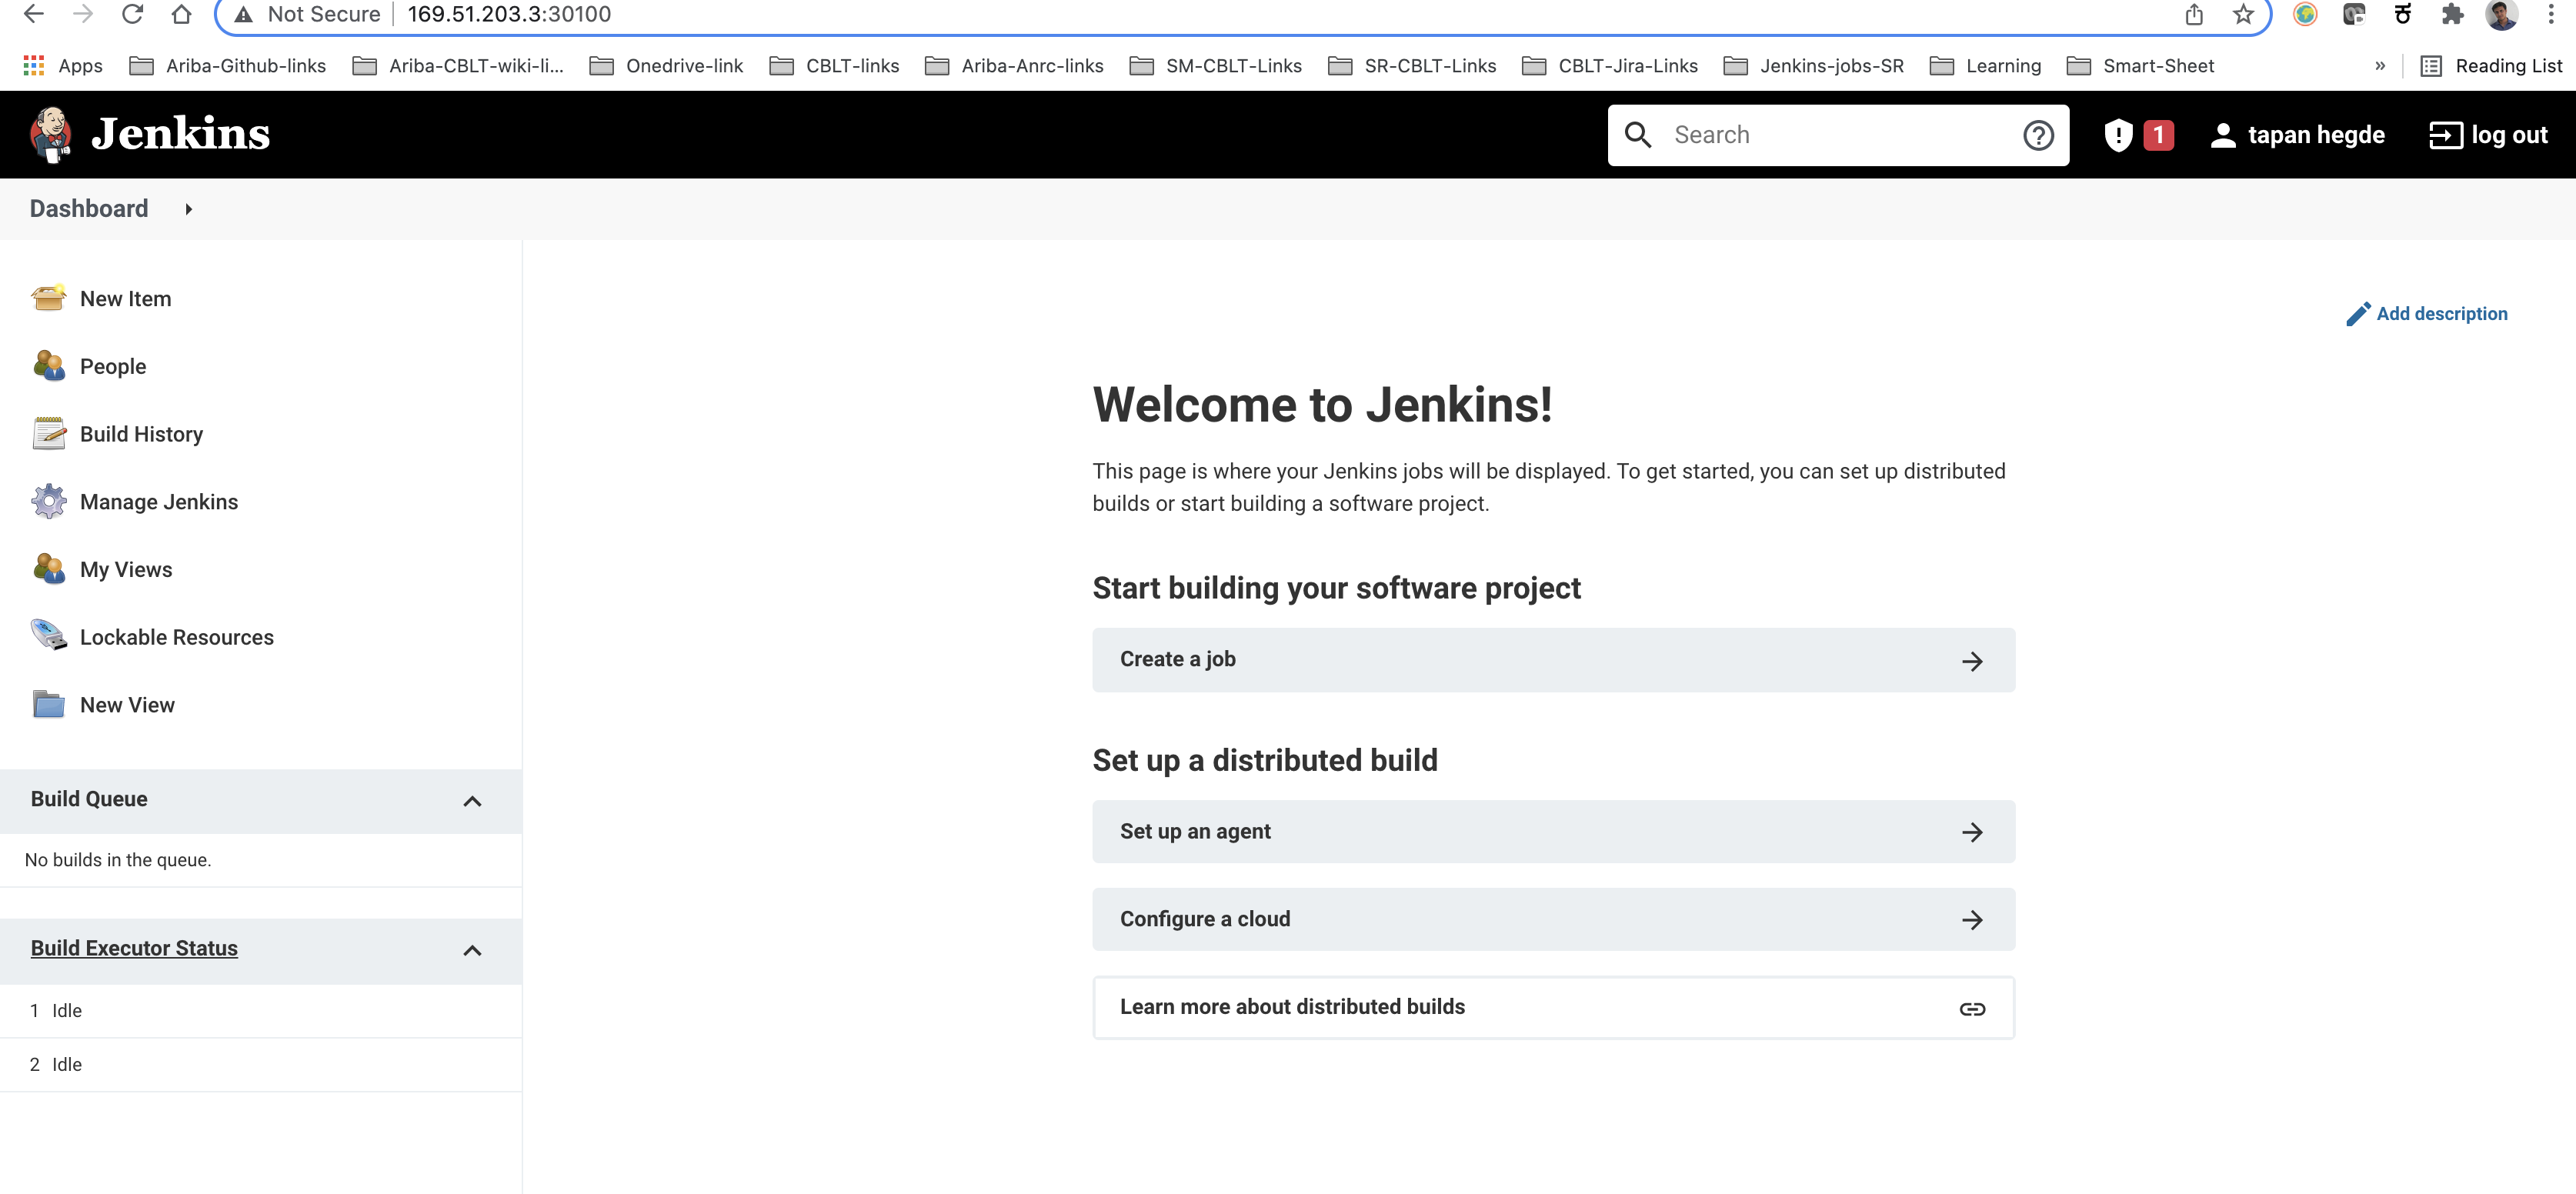
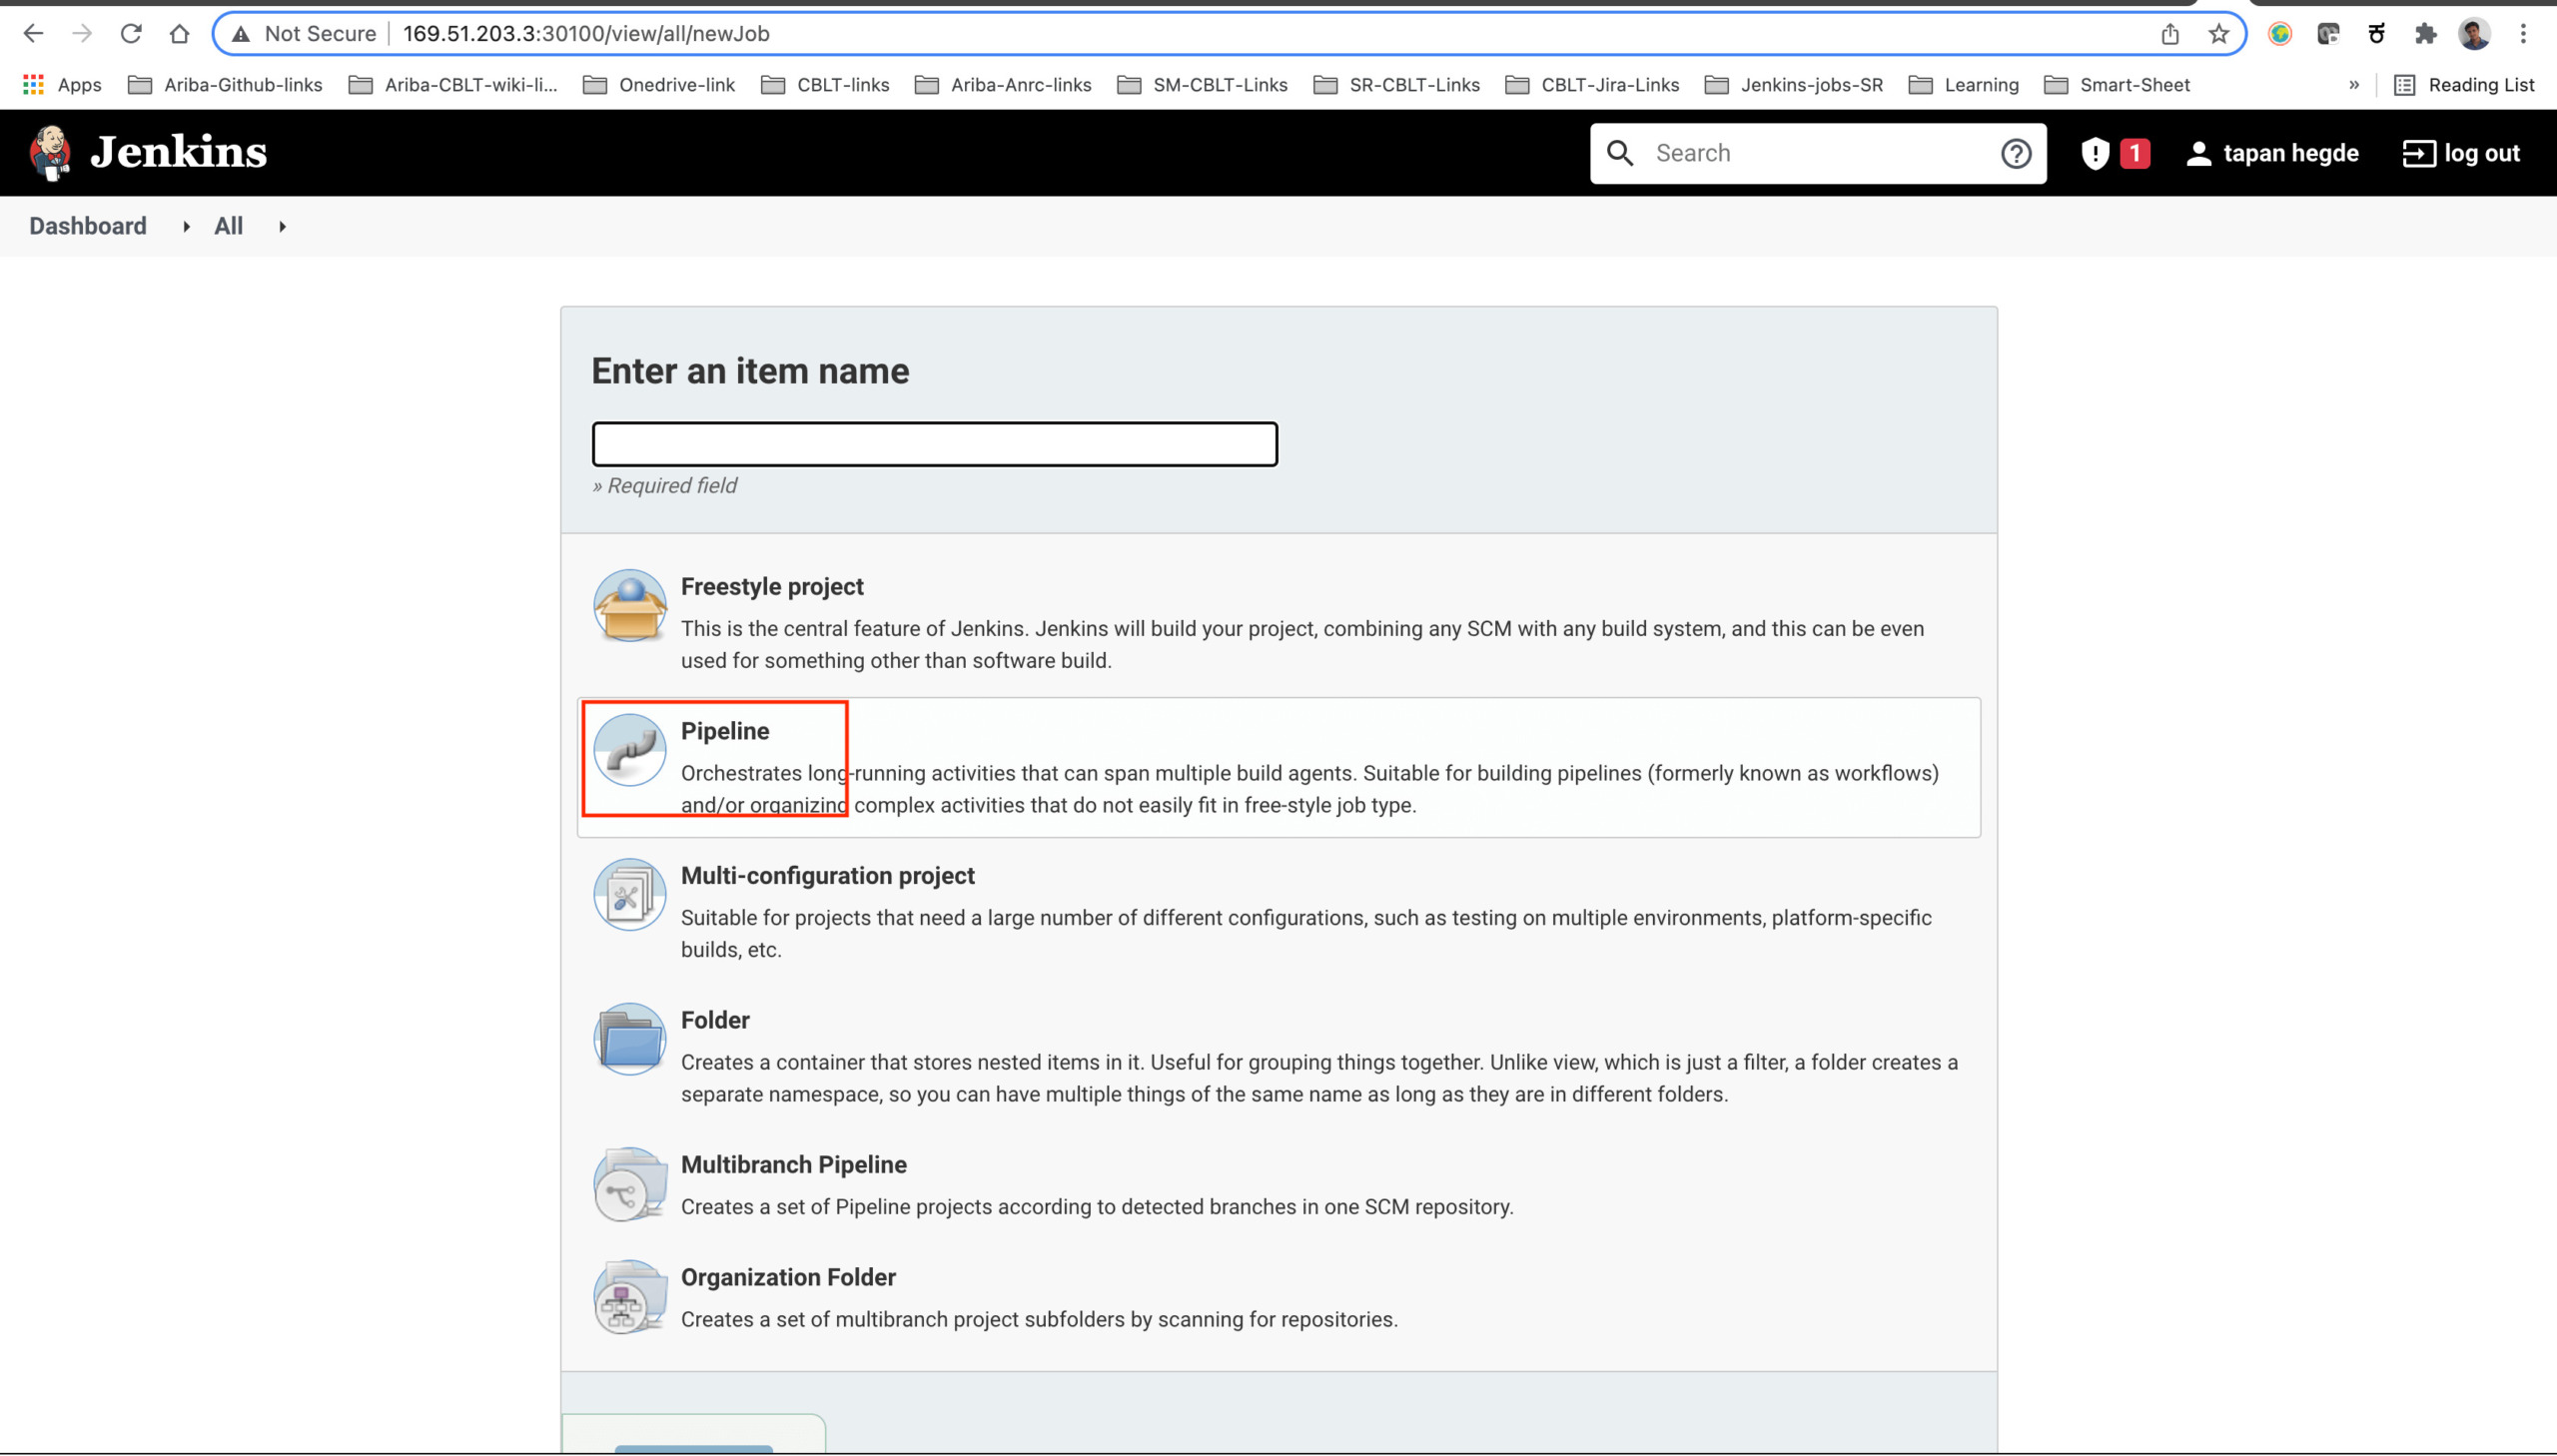
Enter an item name and choose 'Pipeline'. (An example project URL is '')
![]()
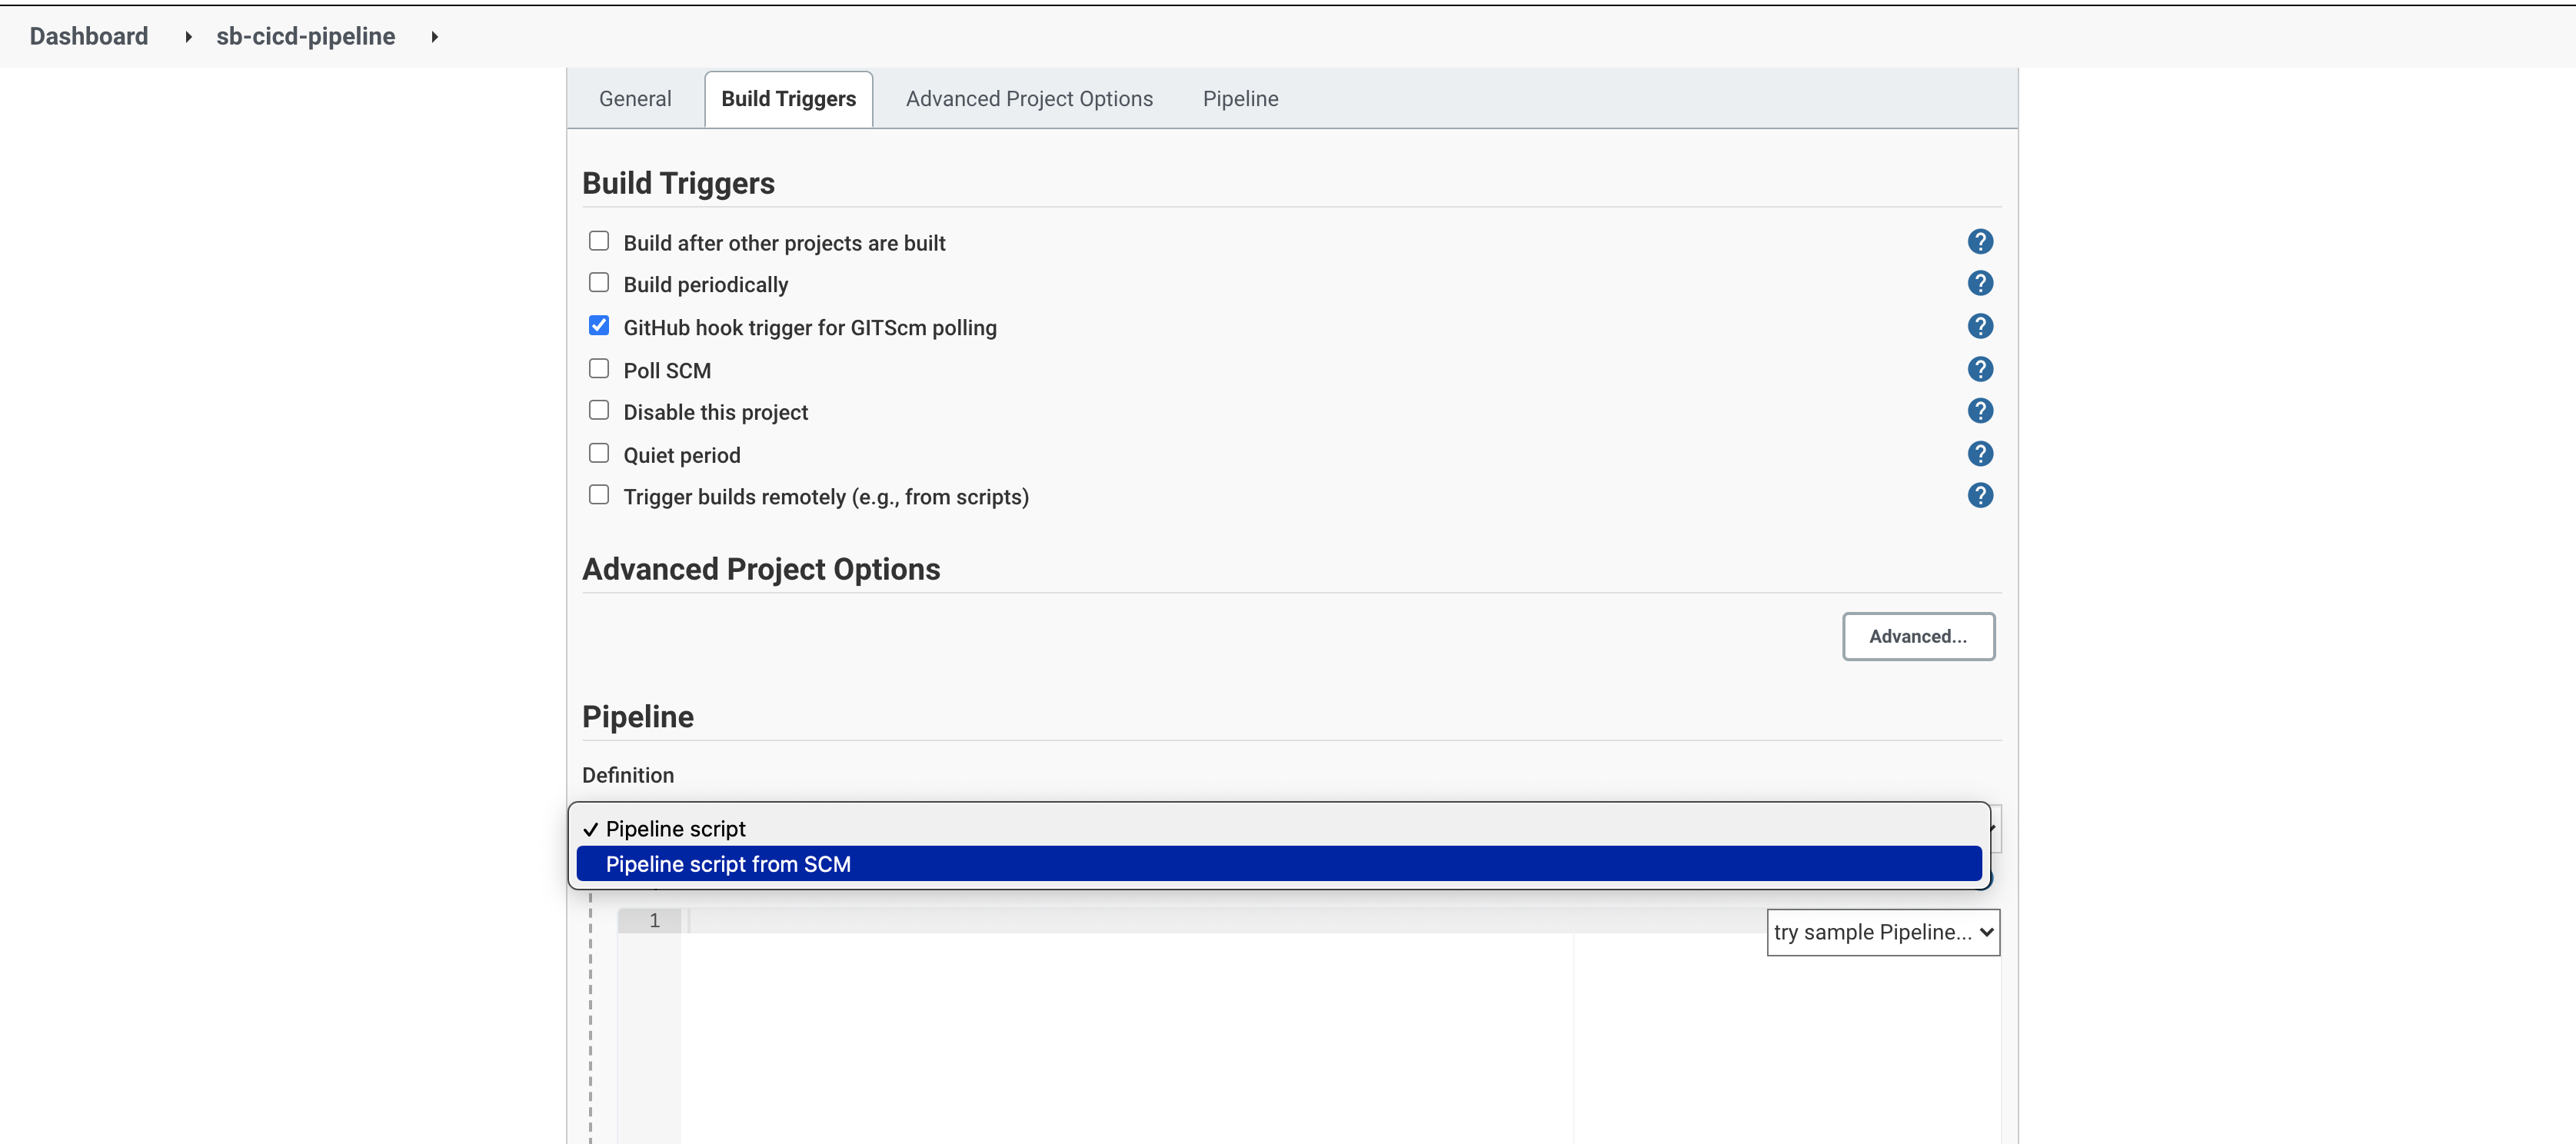
Choose 'GitHub project' and type your project’s URL. Find the 'Pipeline' section and change the definition value from 'Pipeline script' to 'Pipeline script from SCM'. For the 'SCM' option, choose 'Git'.
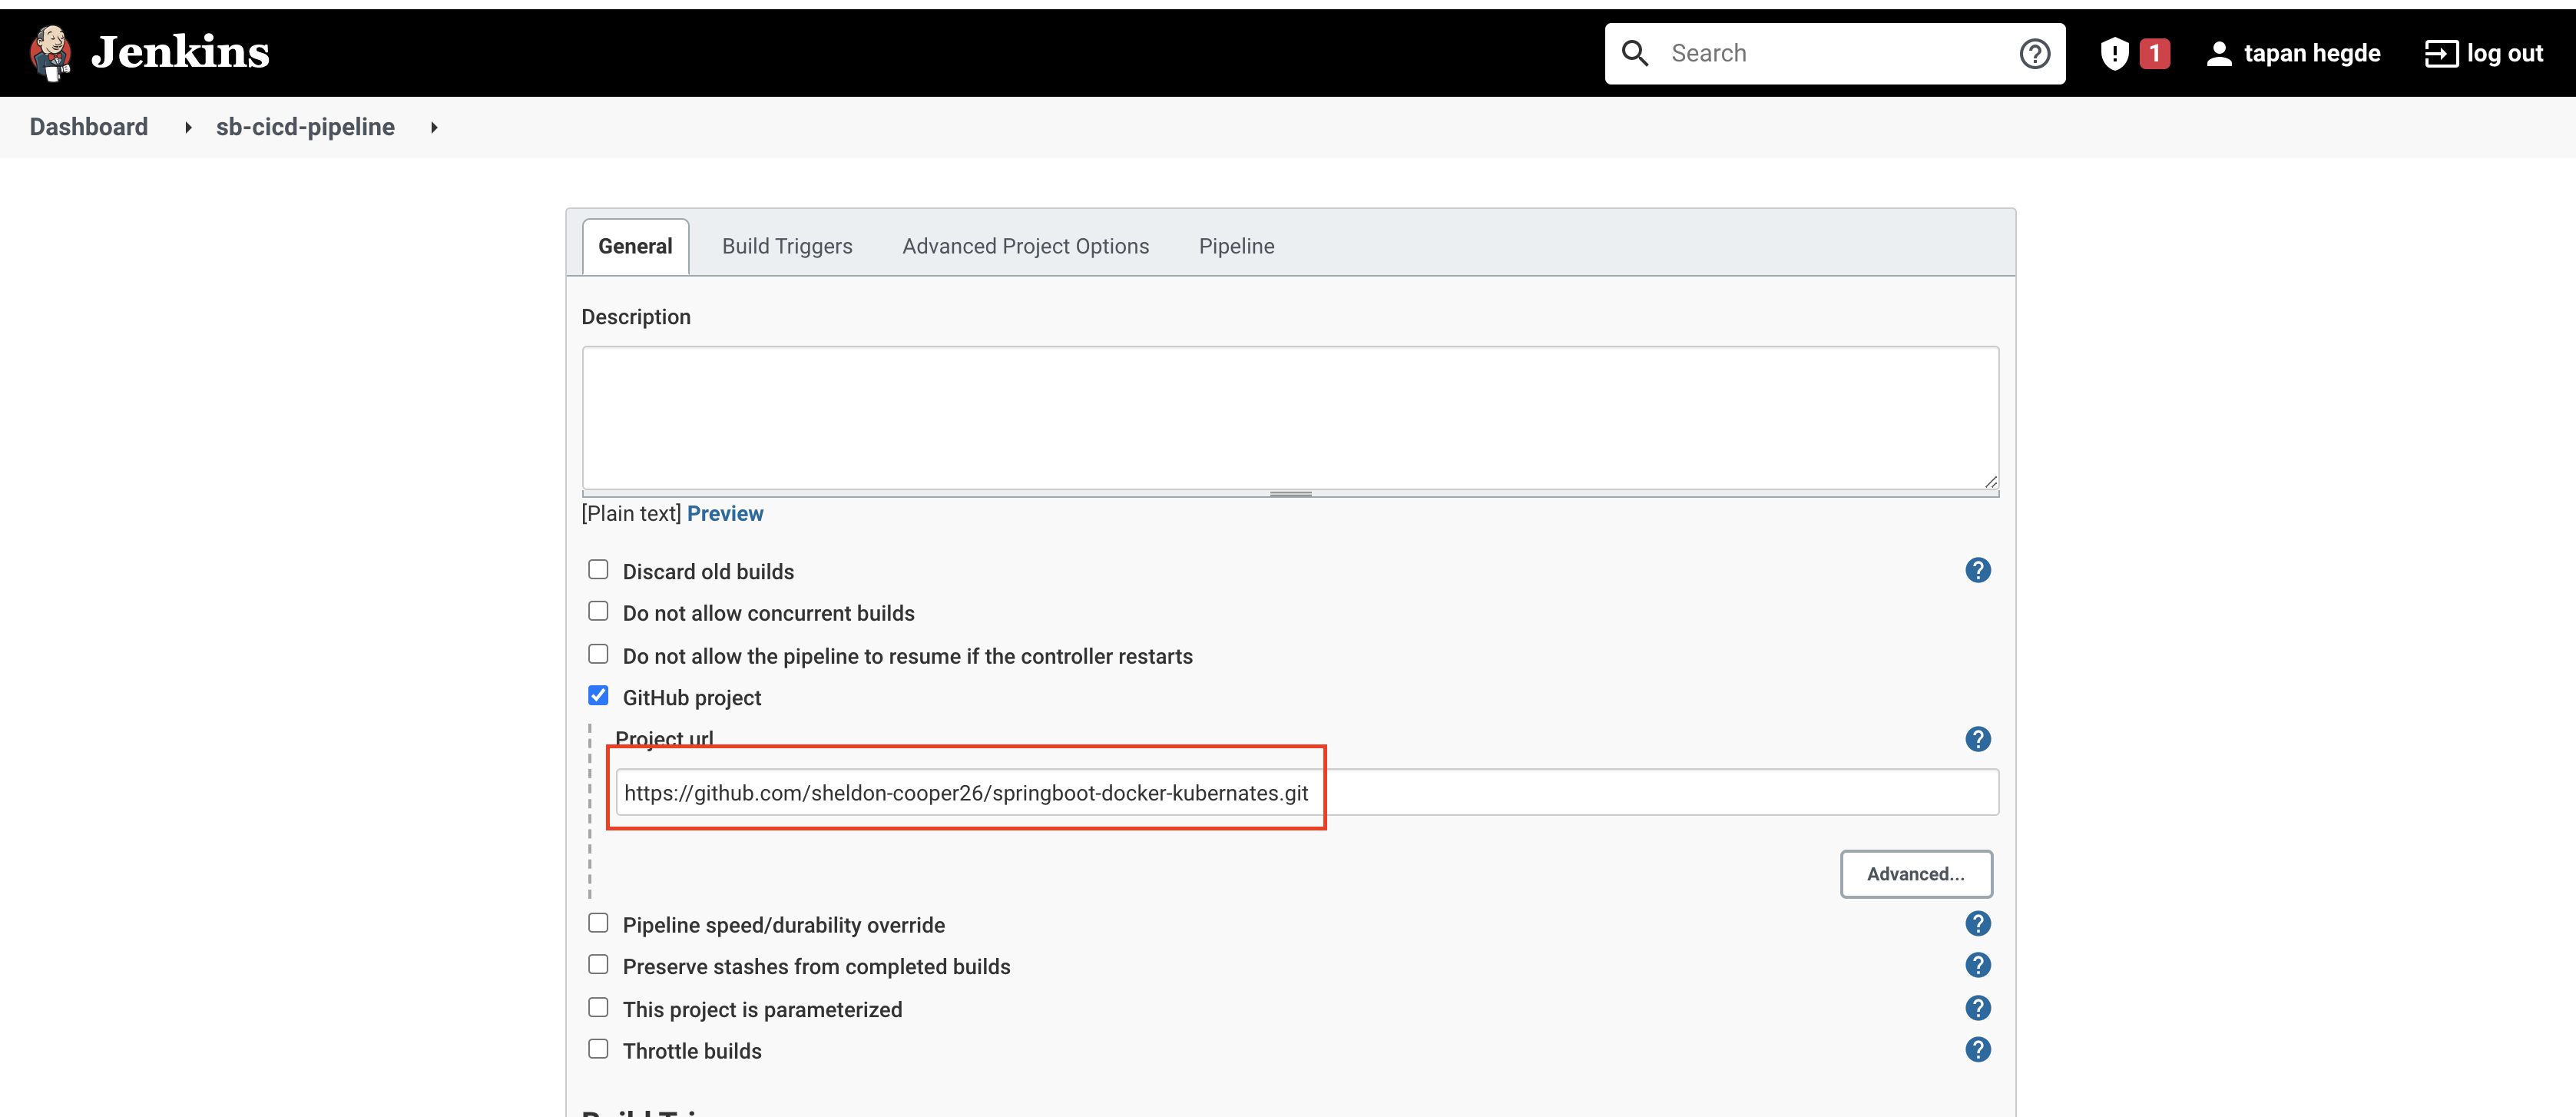
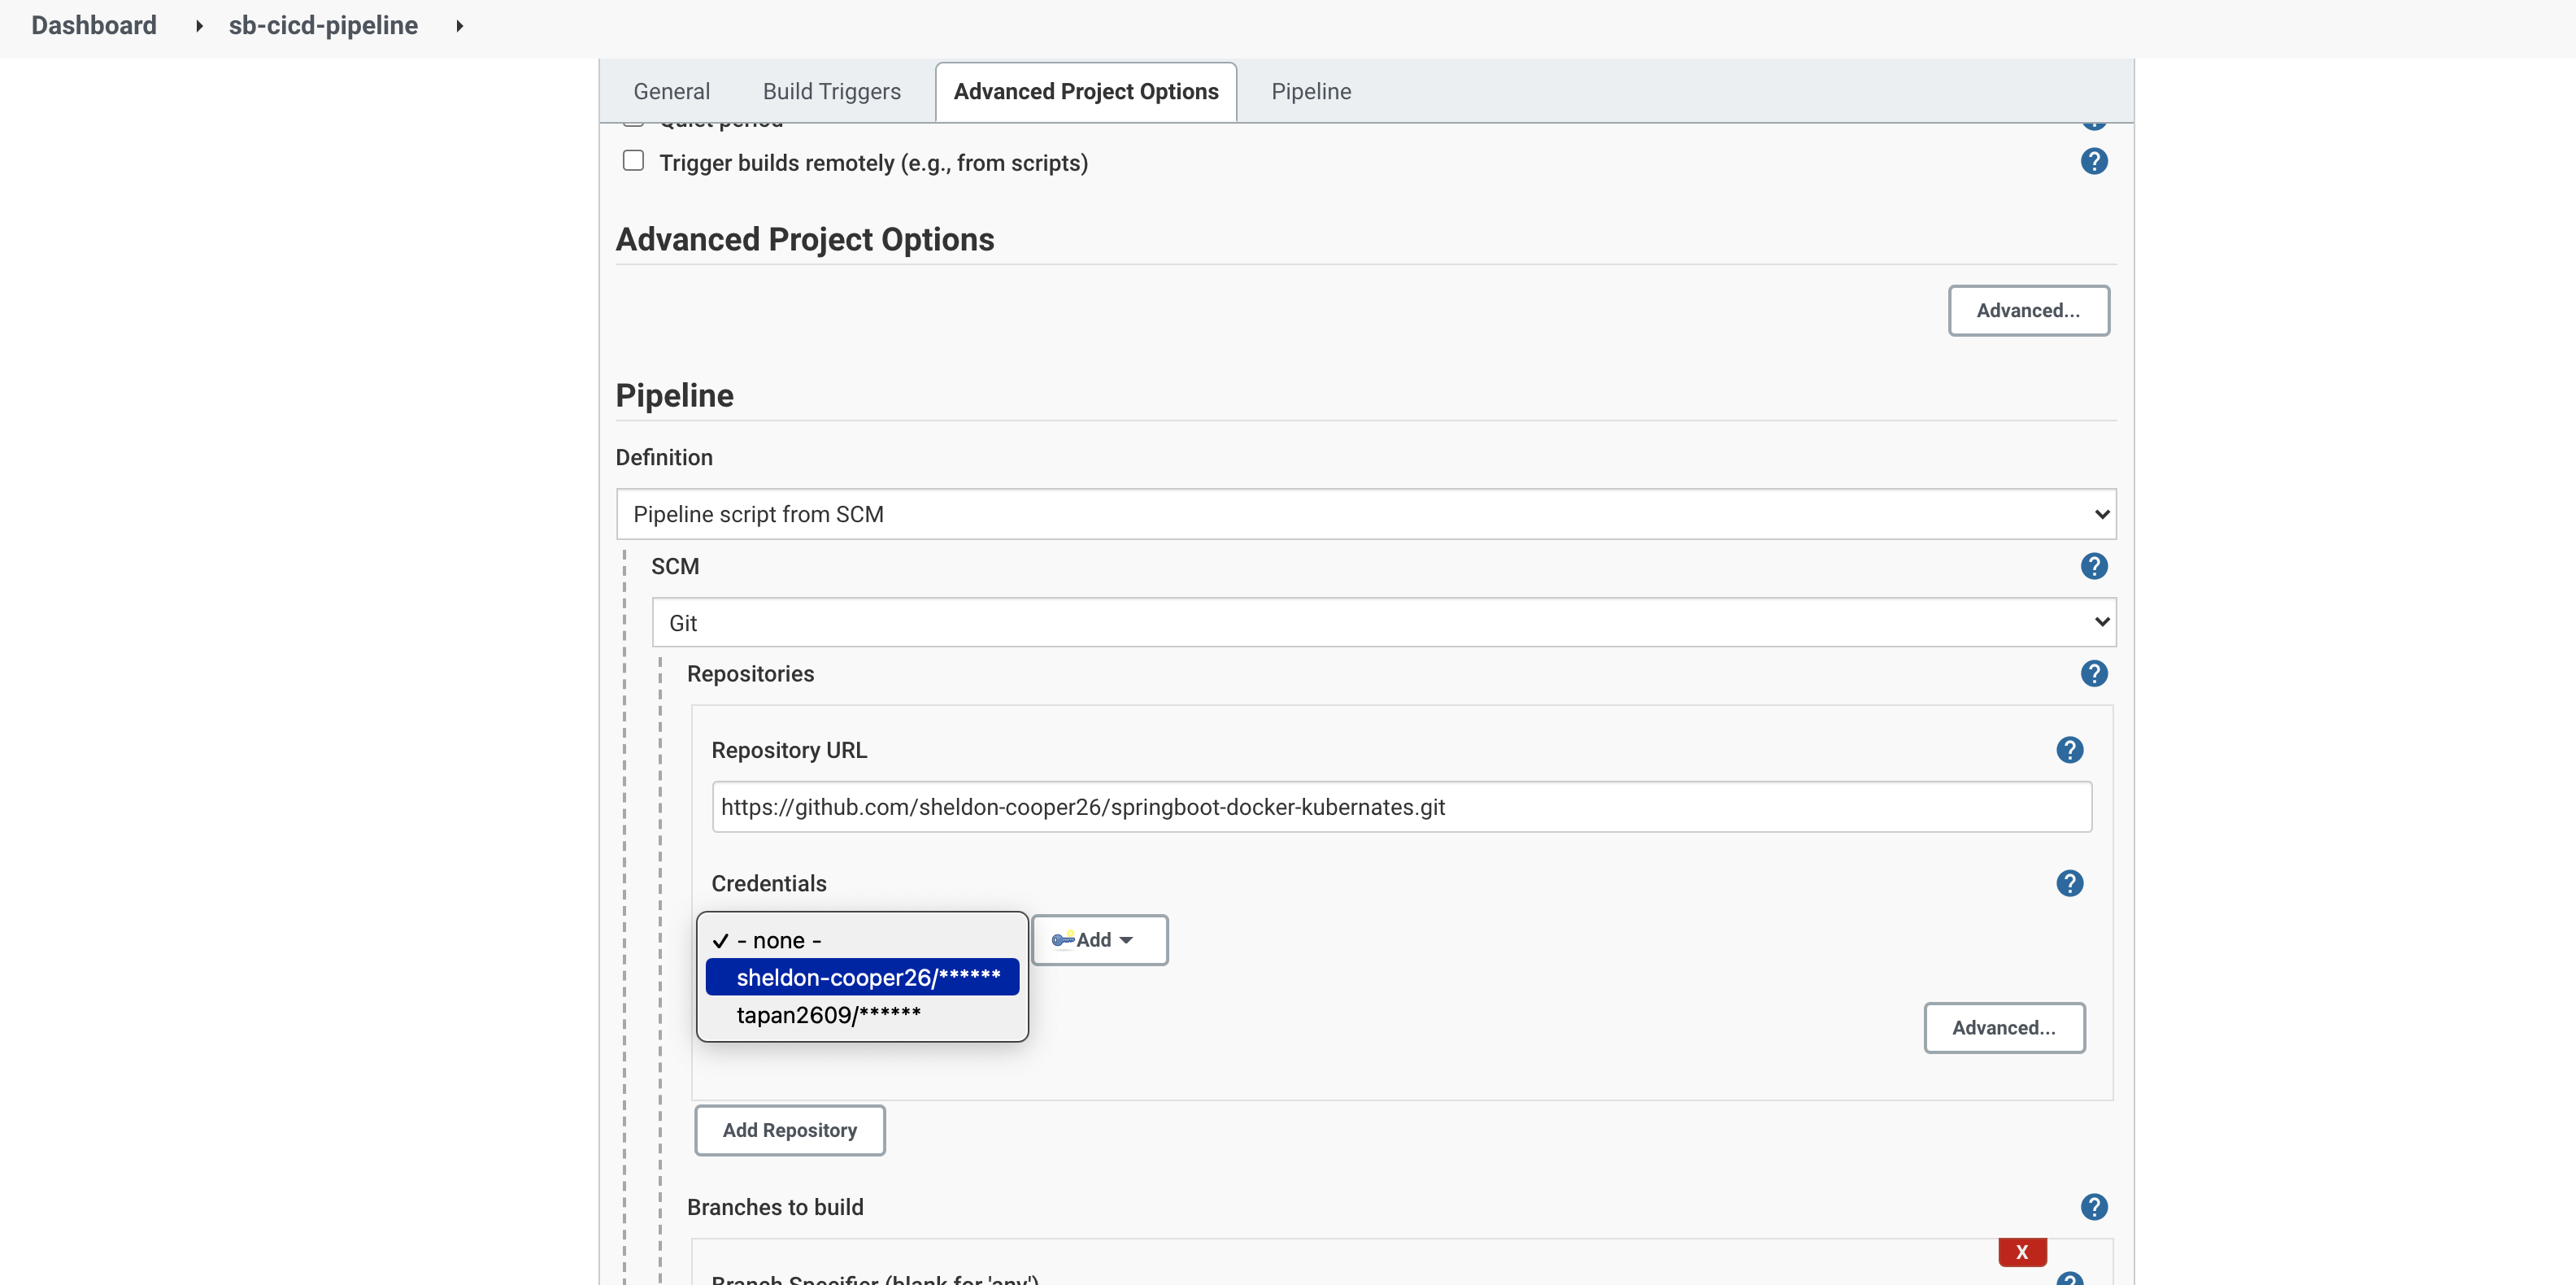
Now type in your repository URL and choose the 'Github' credentials. (An example repository url is '<https://github.com/sheldon-cooper26/springboot-docker-kubernates.git'>)
6. Integrate Jenkins and Slack
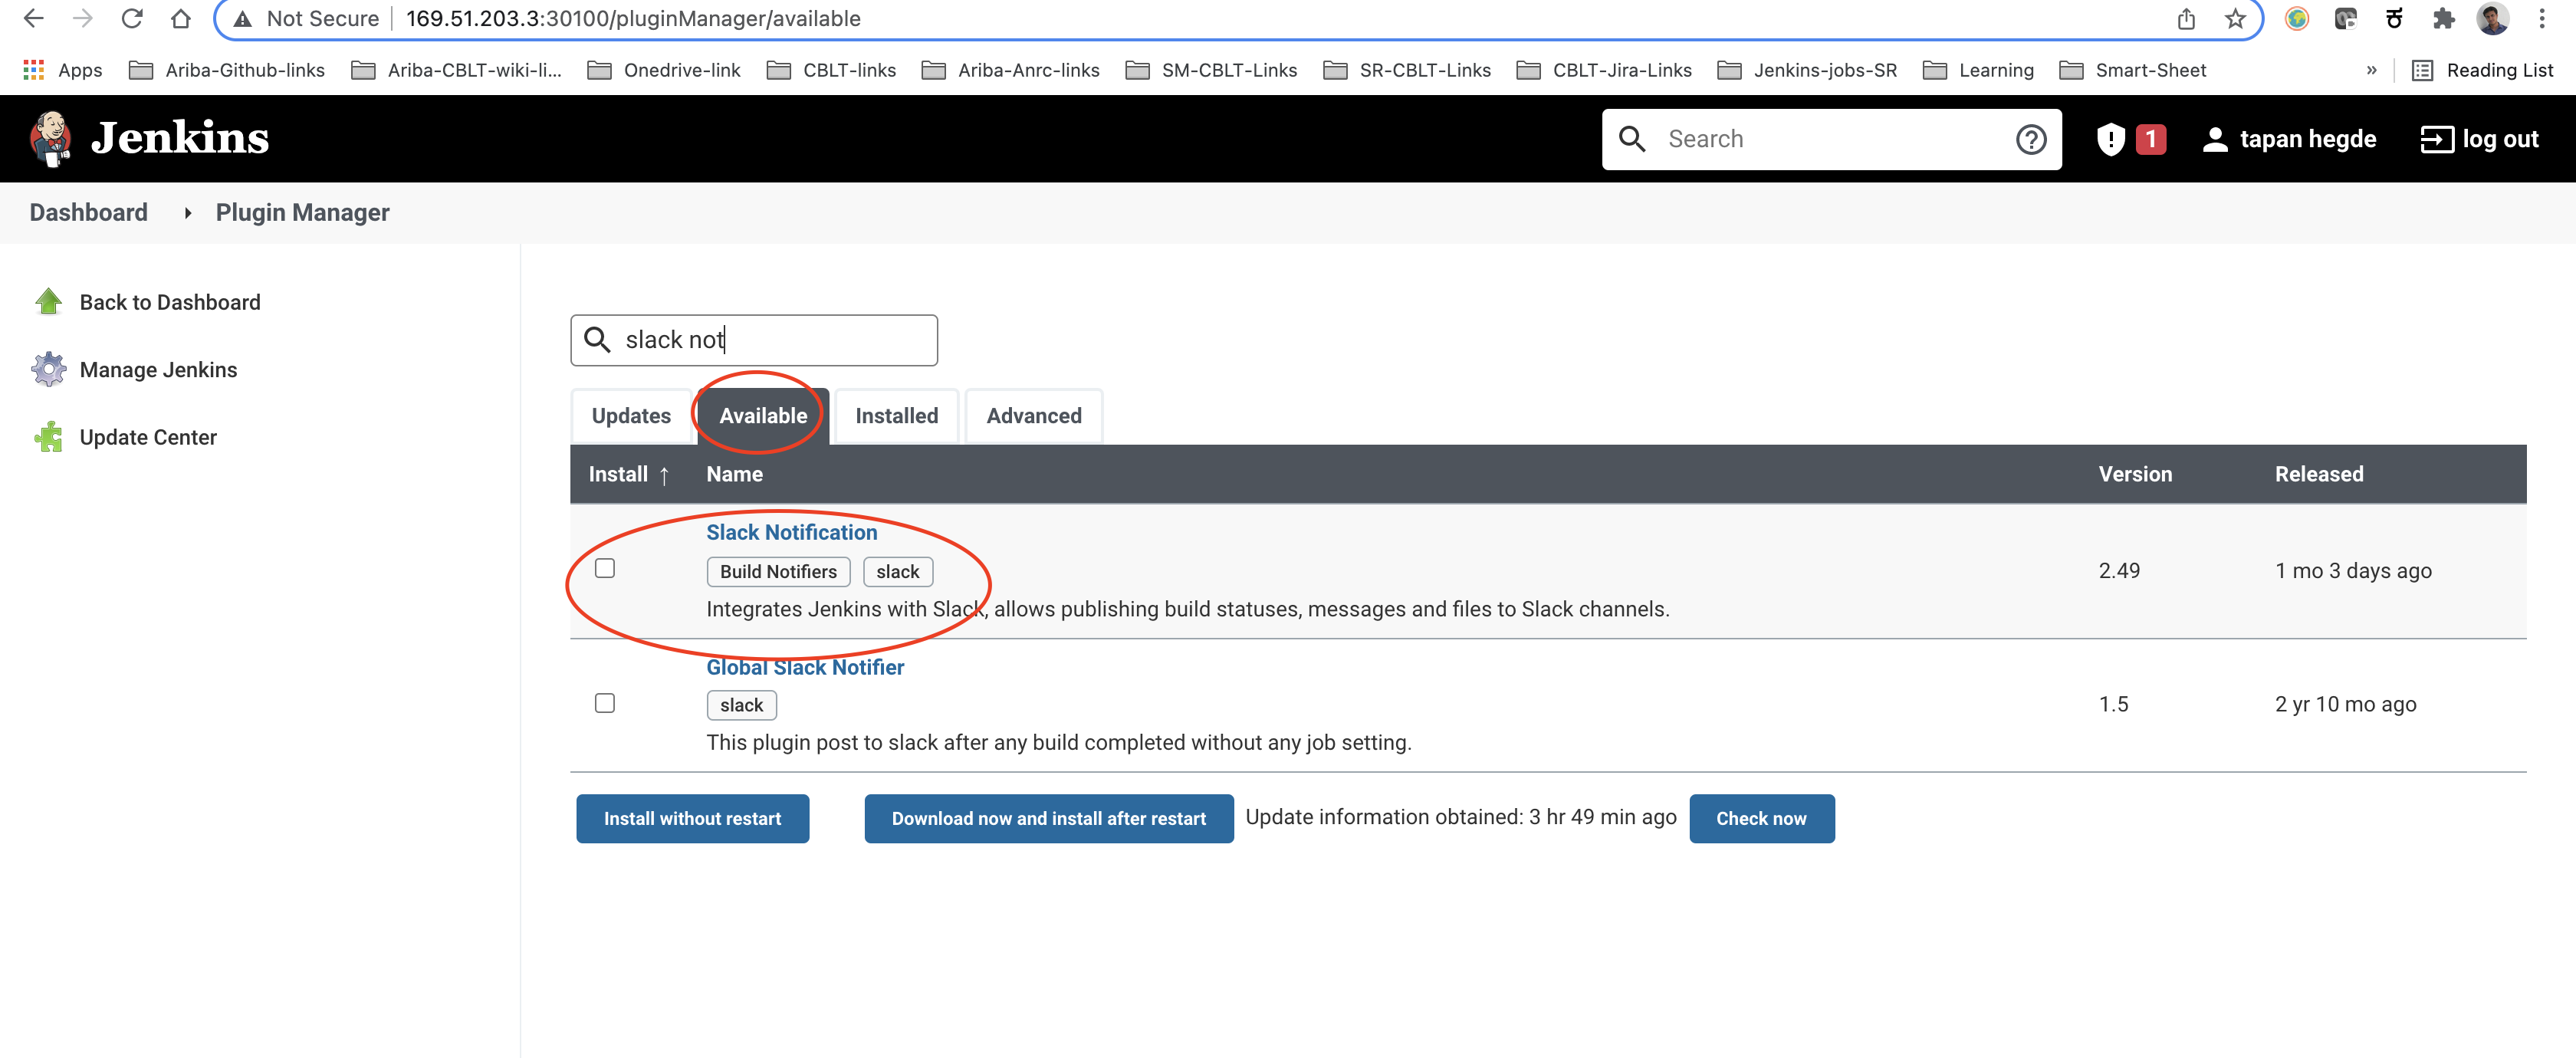
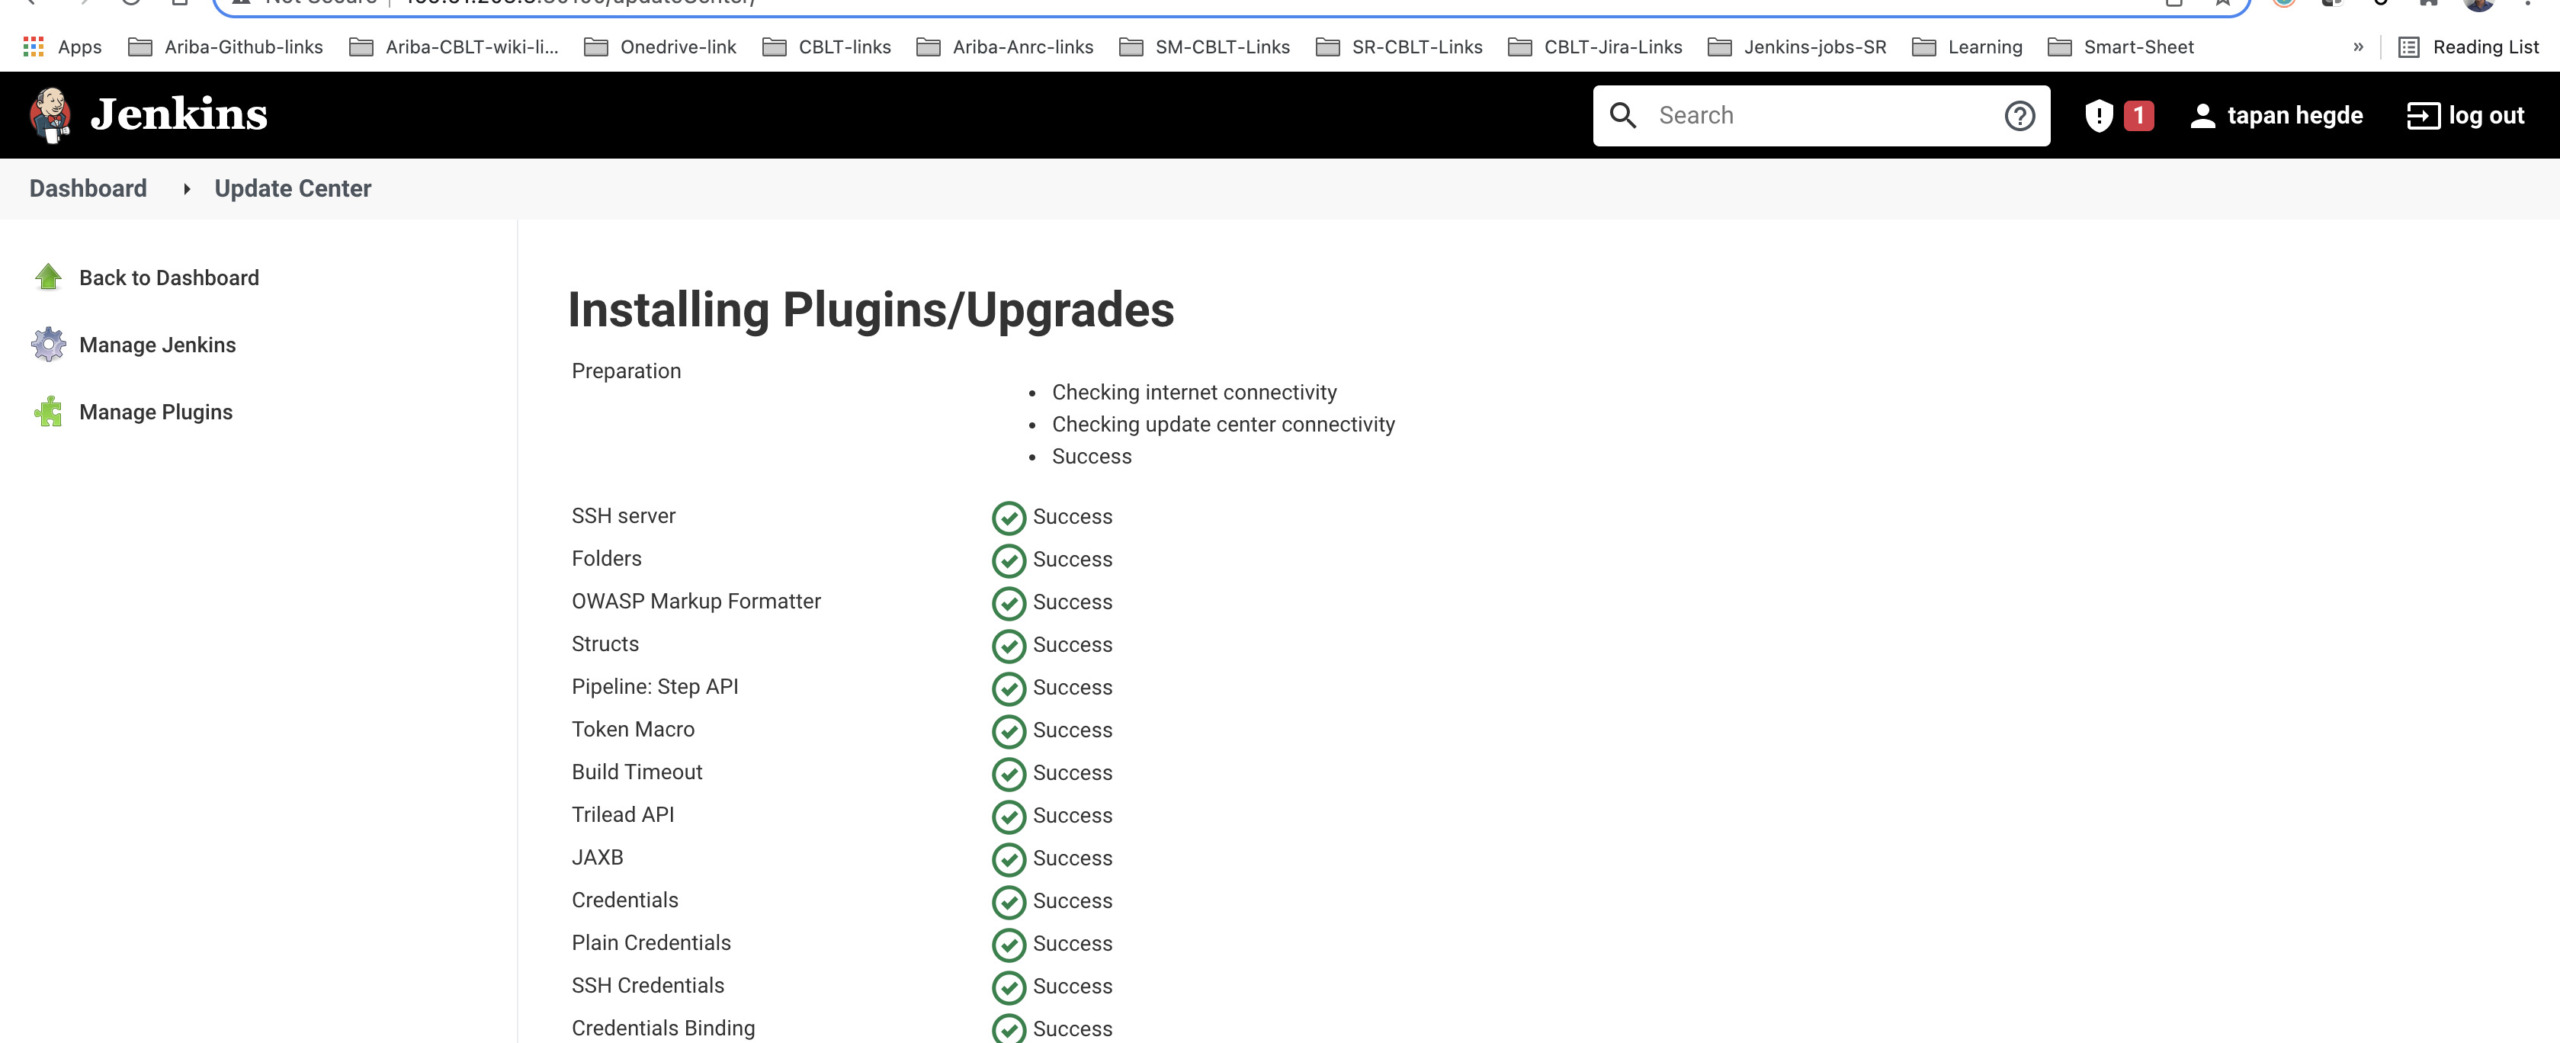
To post notifications to a Slack channel, Jenkins needs the 'Slack Plugin'. Go back to the Jenkins dashboard and find the 'Manage Jenkins' option in the left pane. Select the 'Manage Plugins' option and choose the 'Available' tab. Search for the 'Slack Notification' plugin and install it.

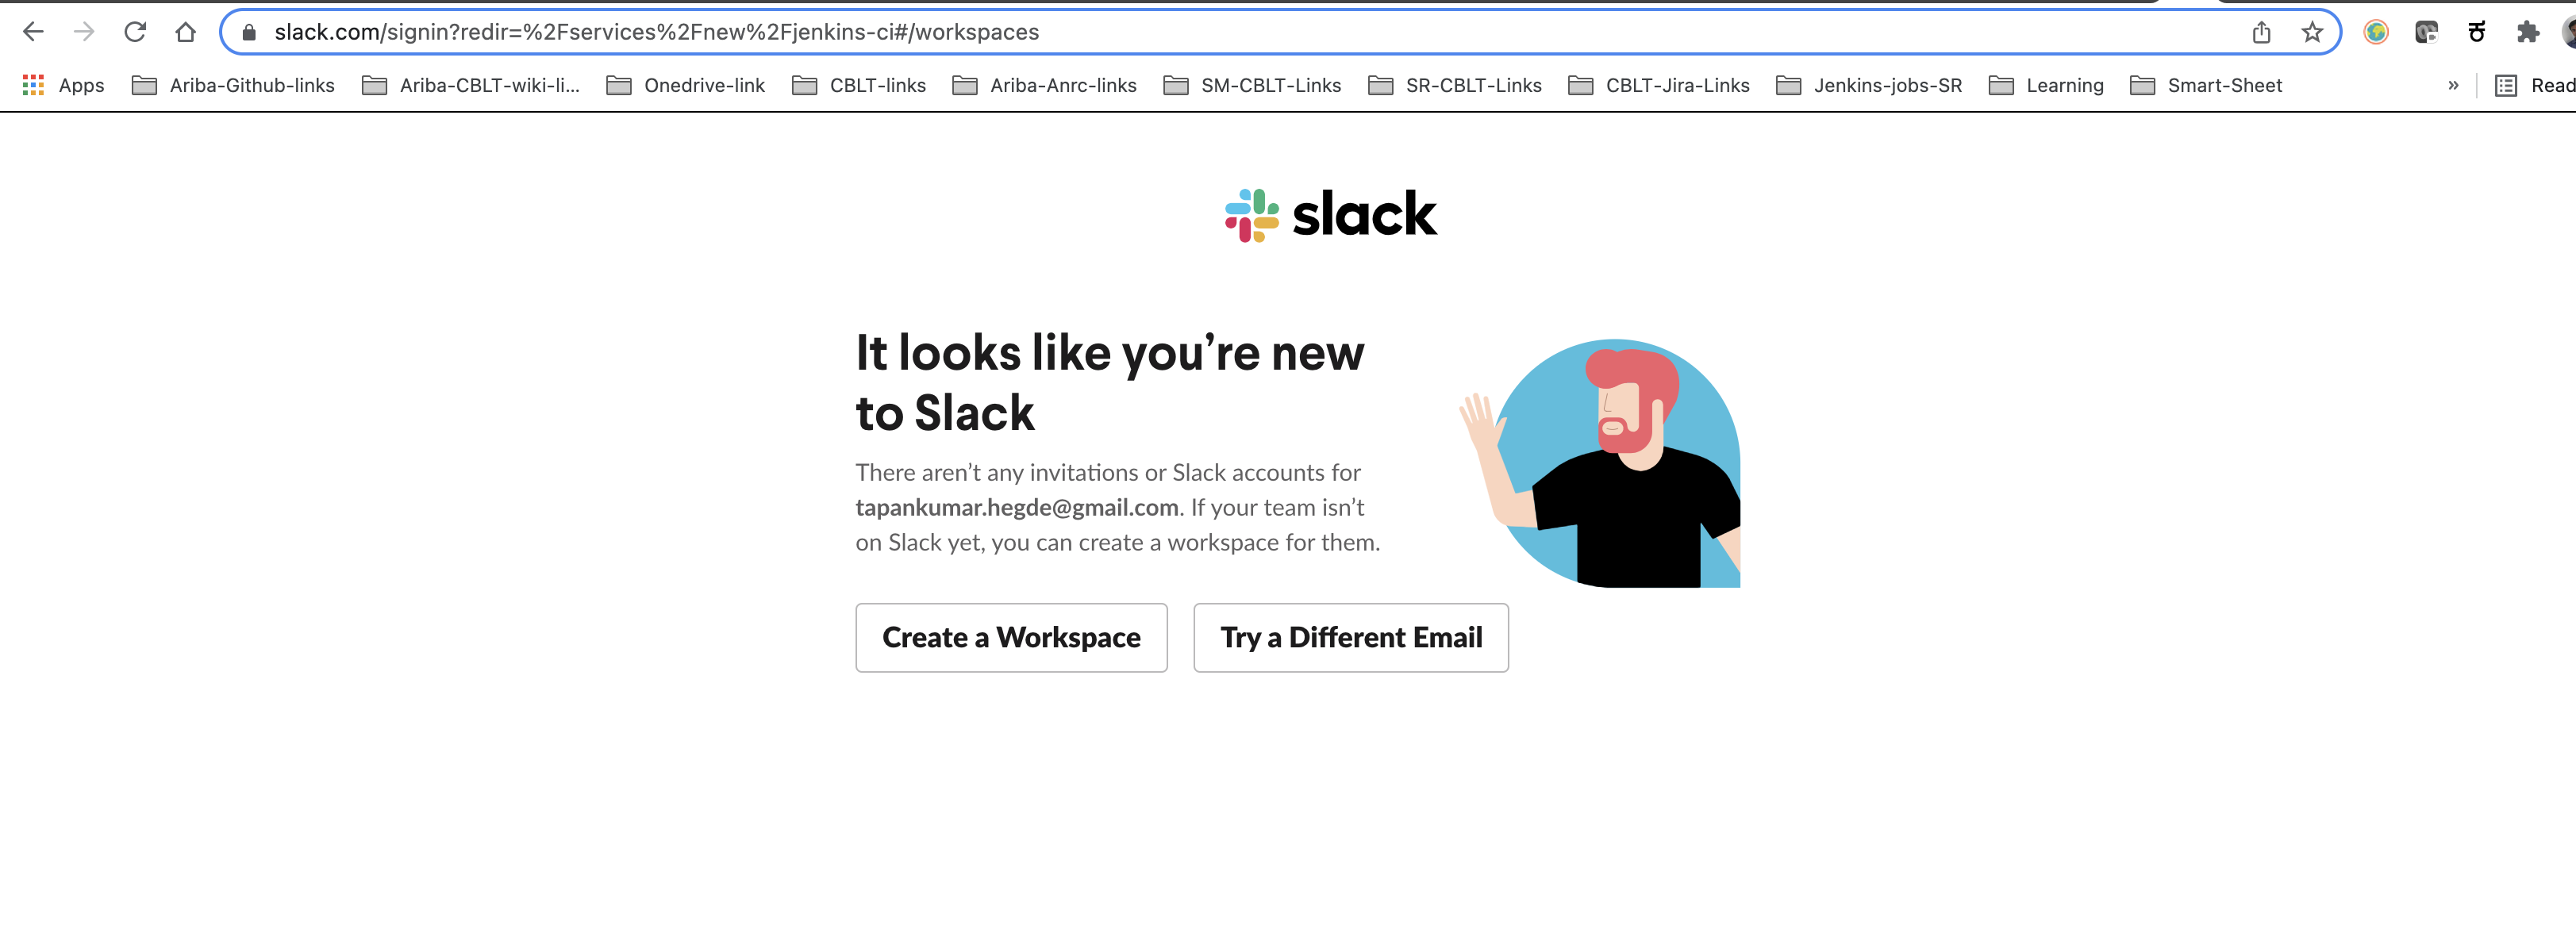
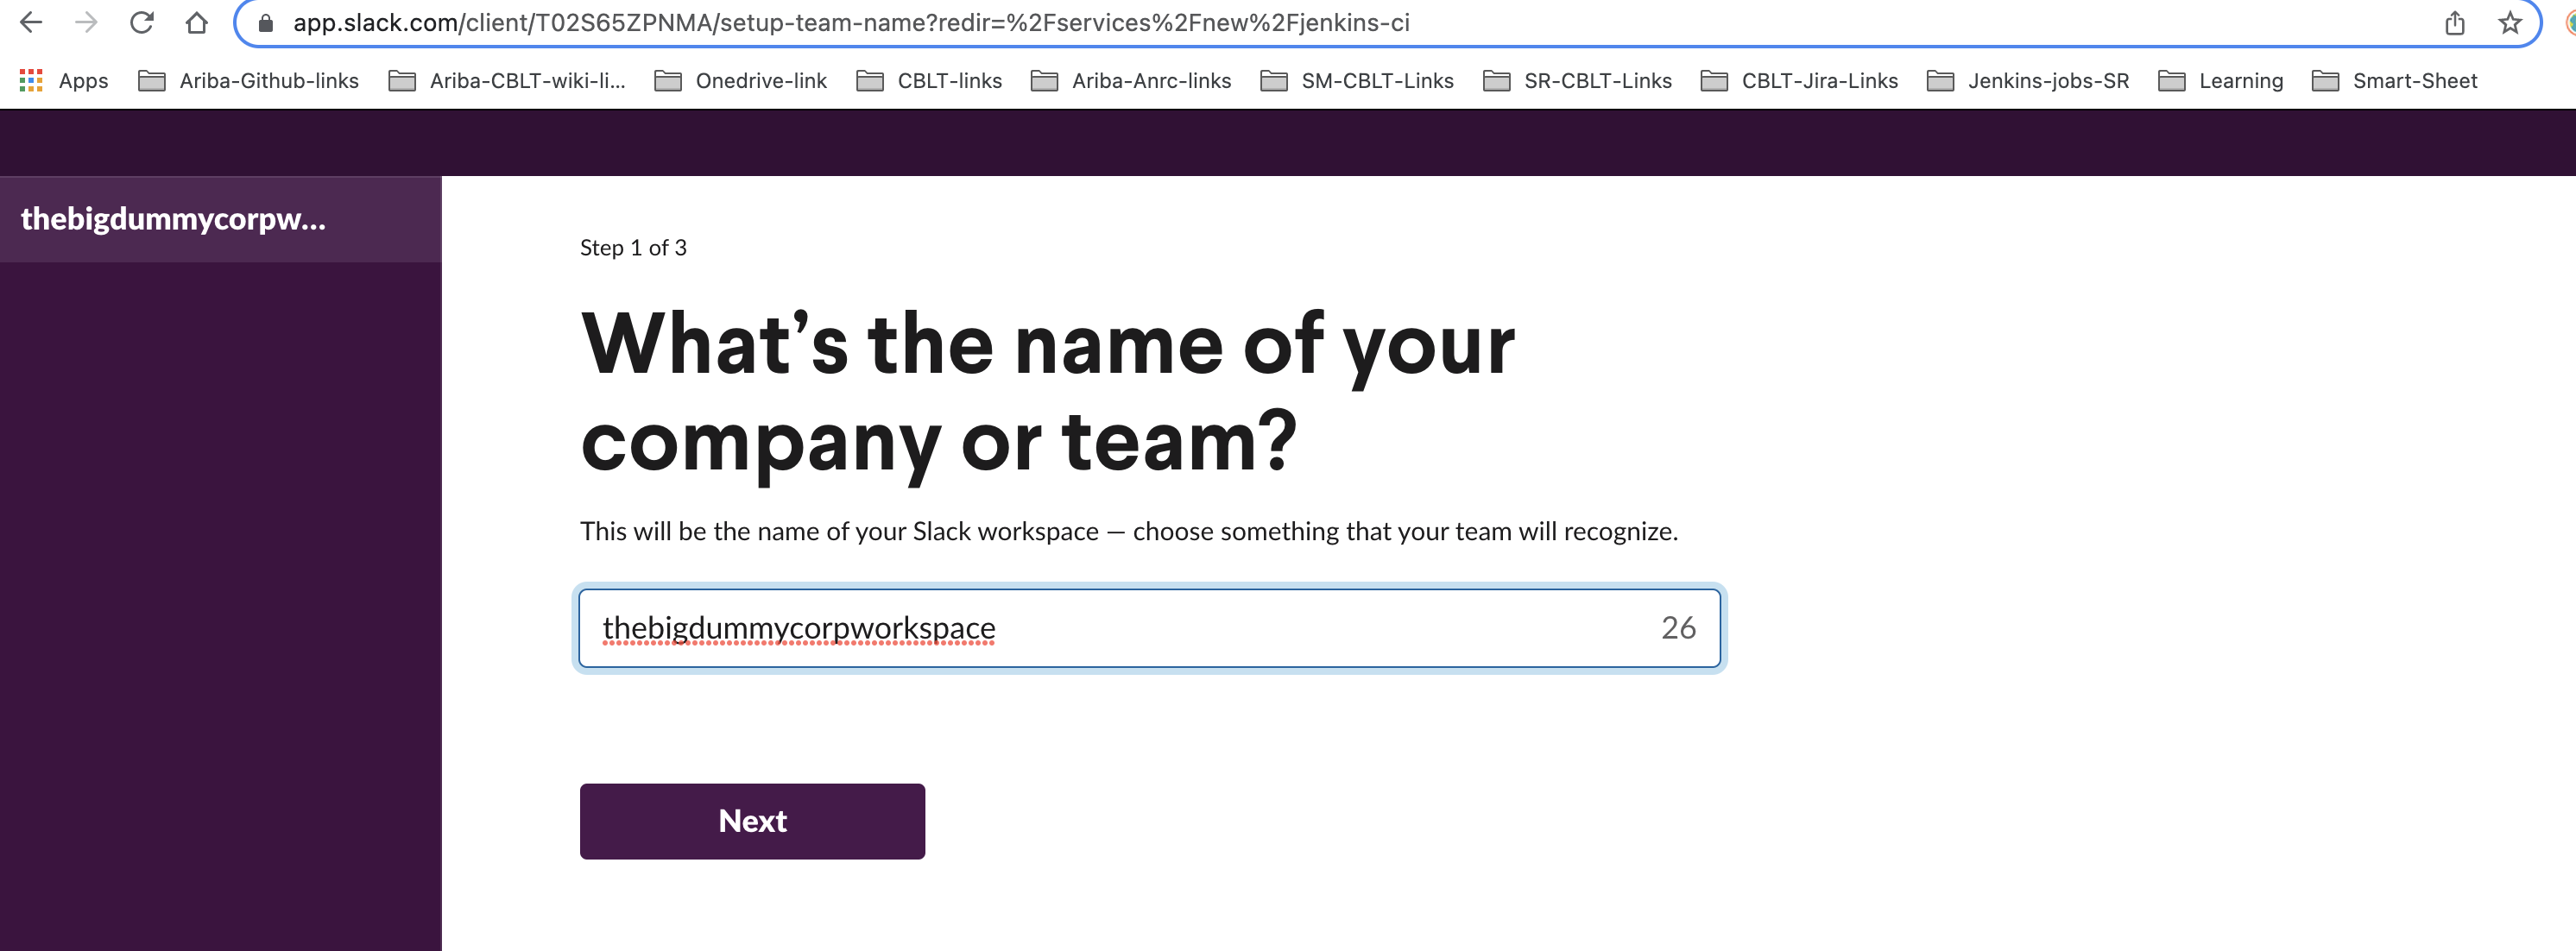
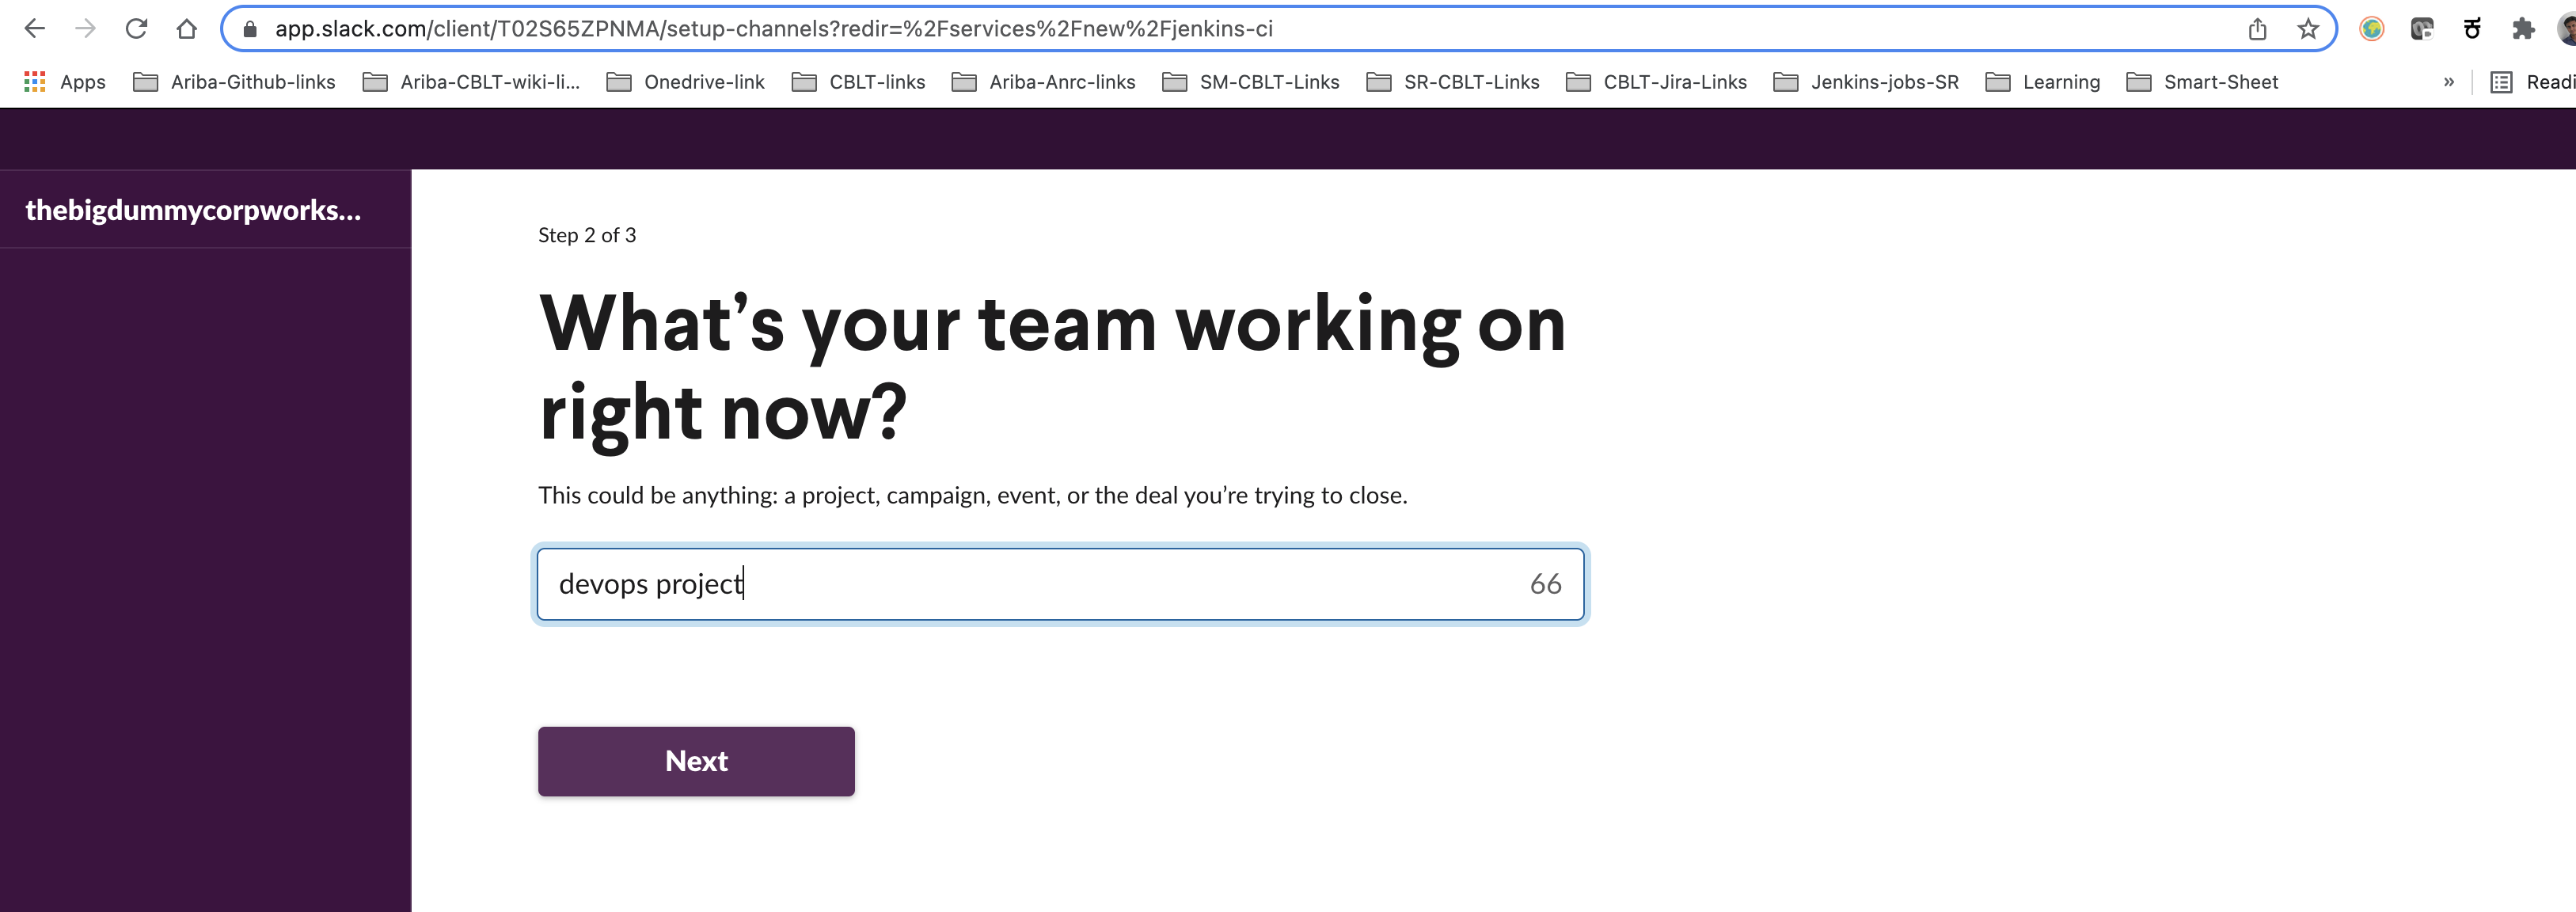
Hopefully, you’ve already created your Slack account. If not, click here to get started.
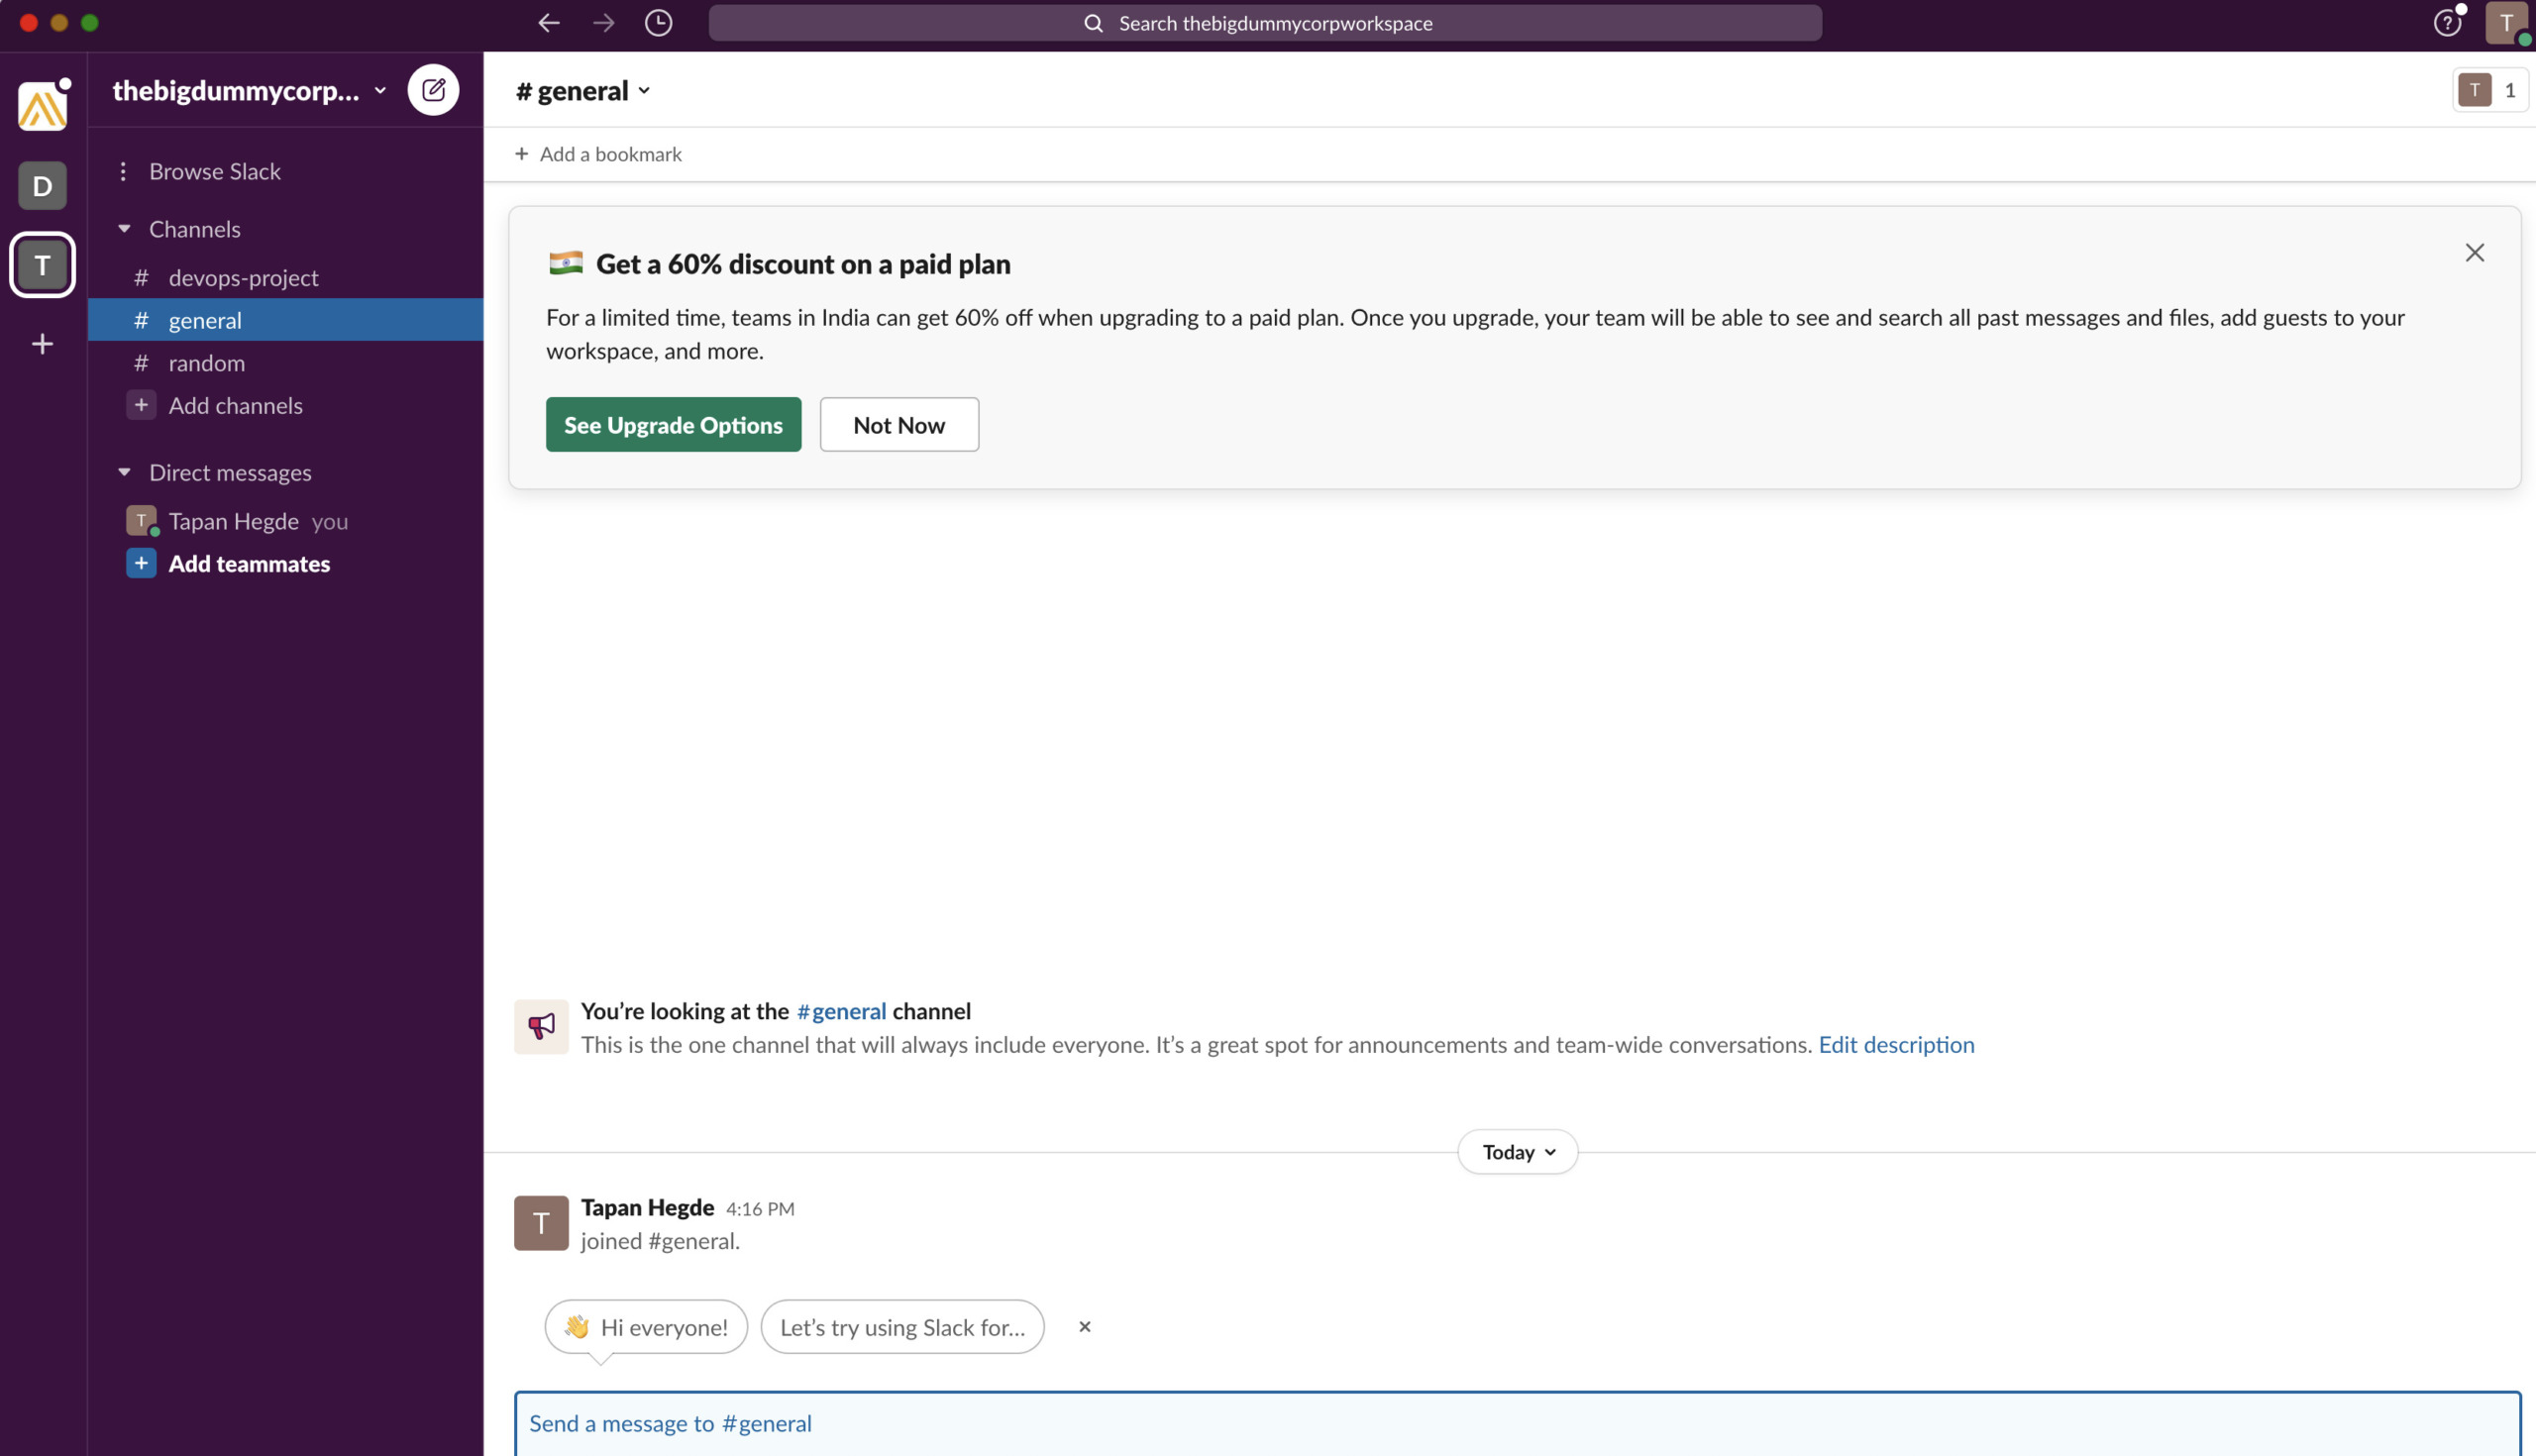
Once you have a Slack account, configure the Jenkins integration by using Jenkins CI.
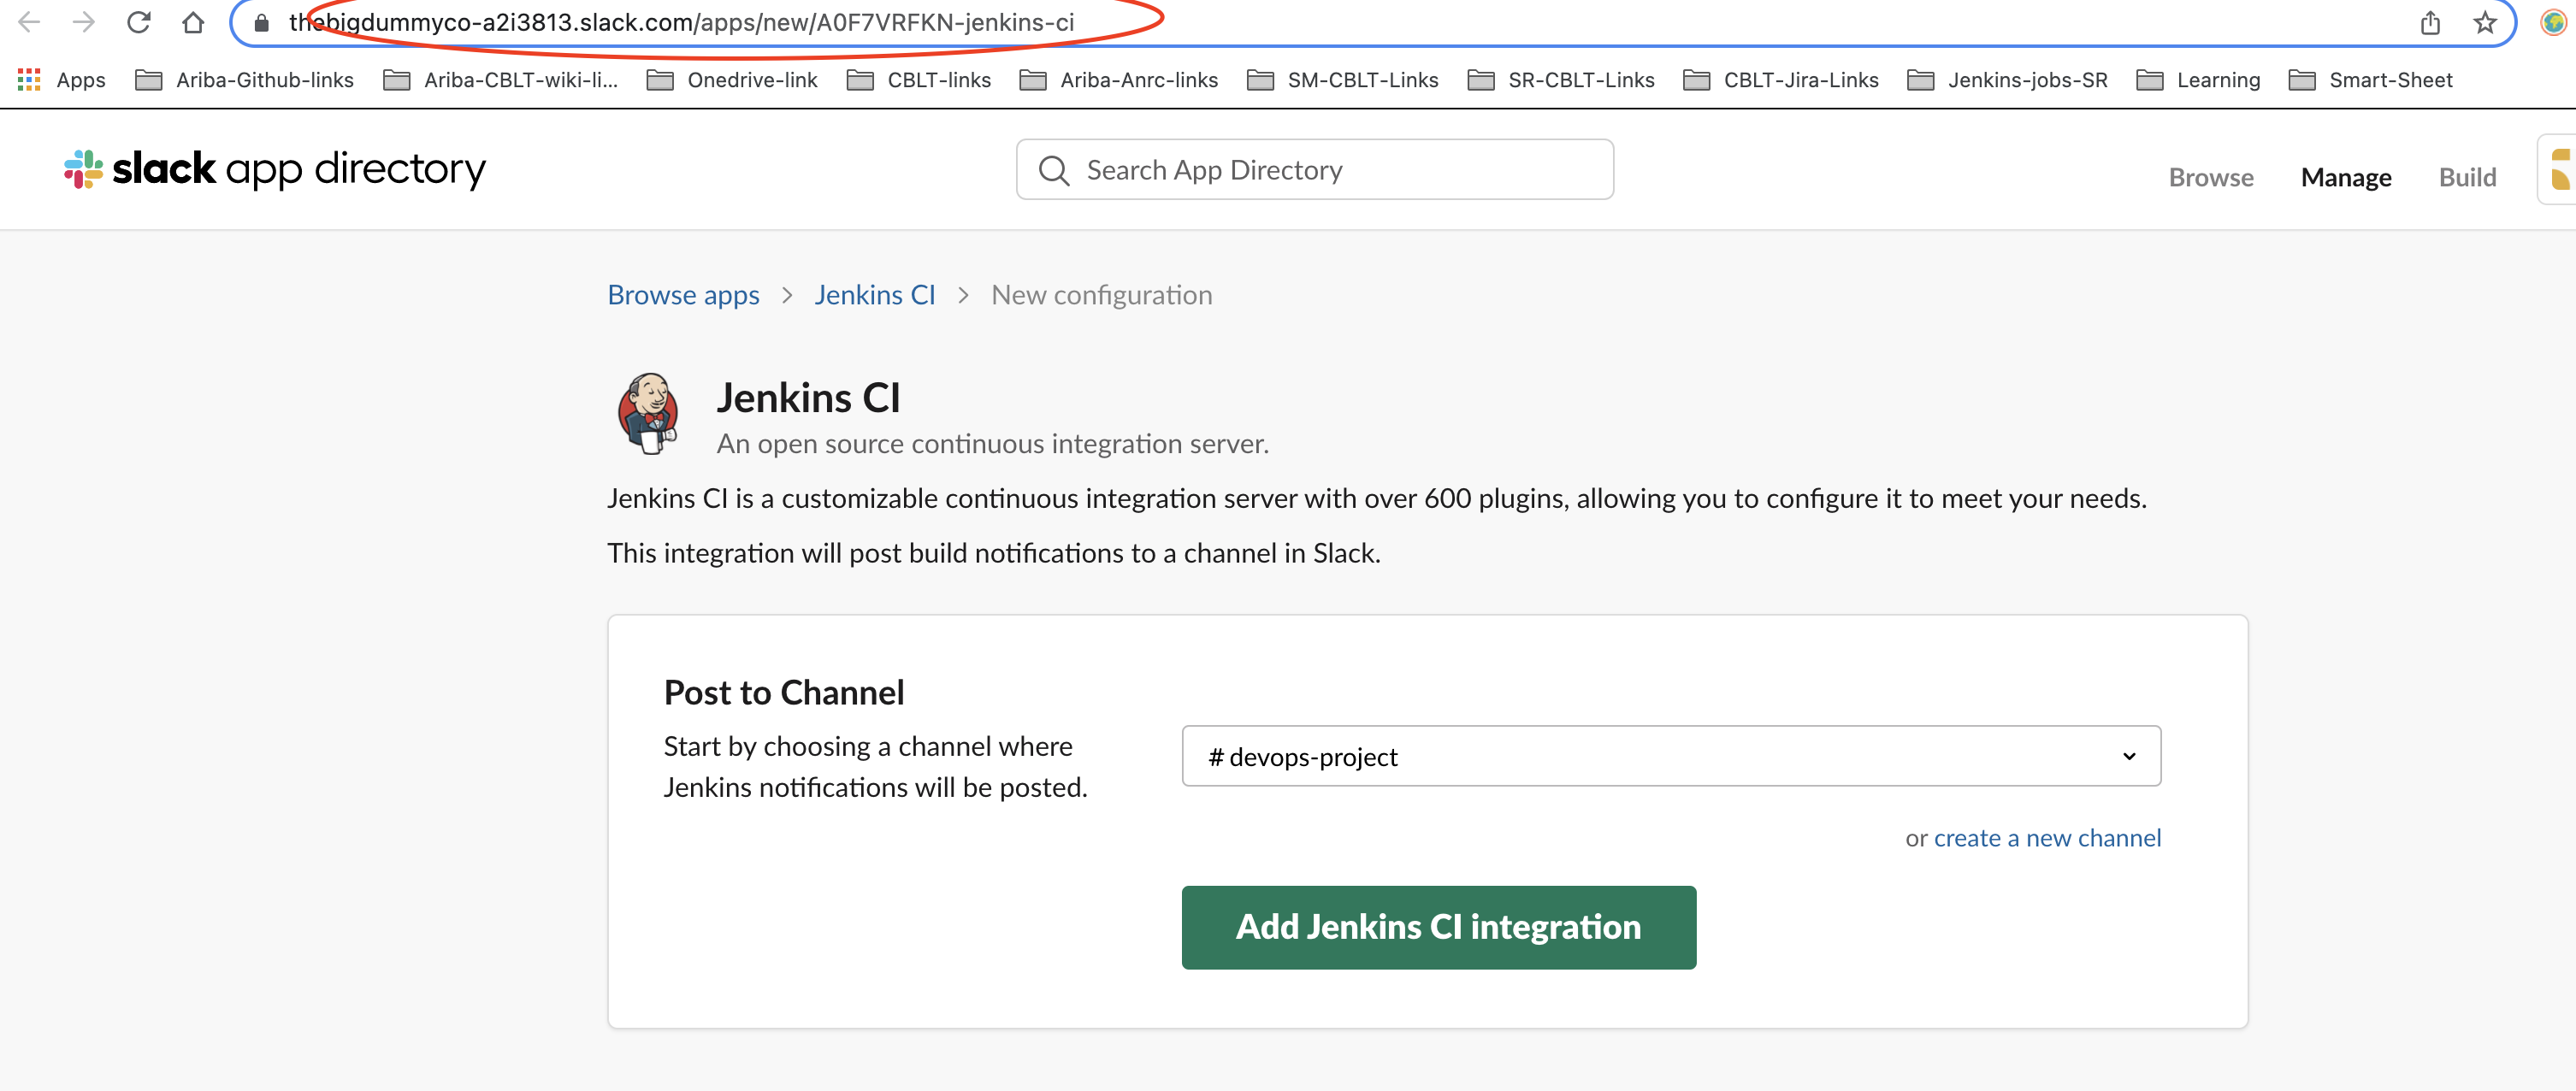
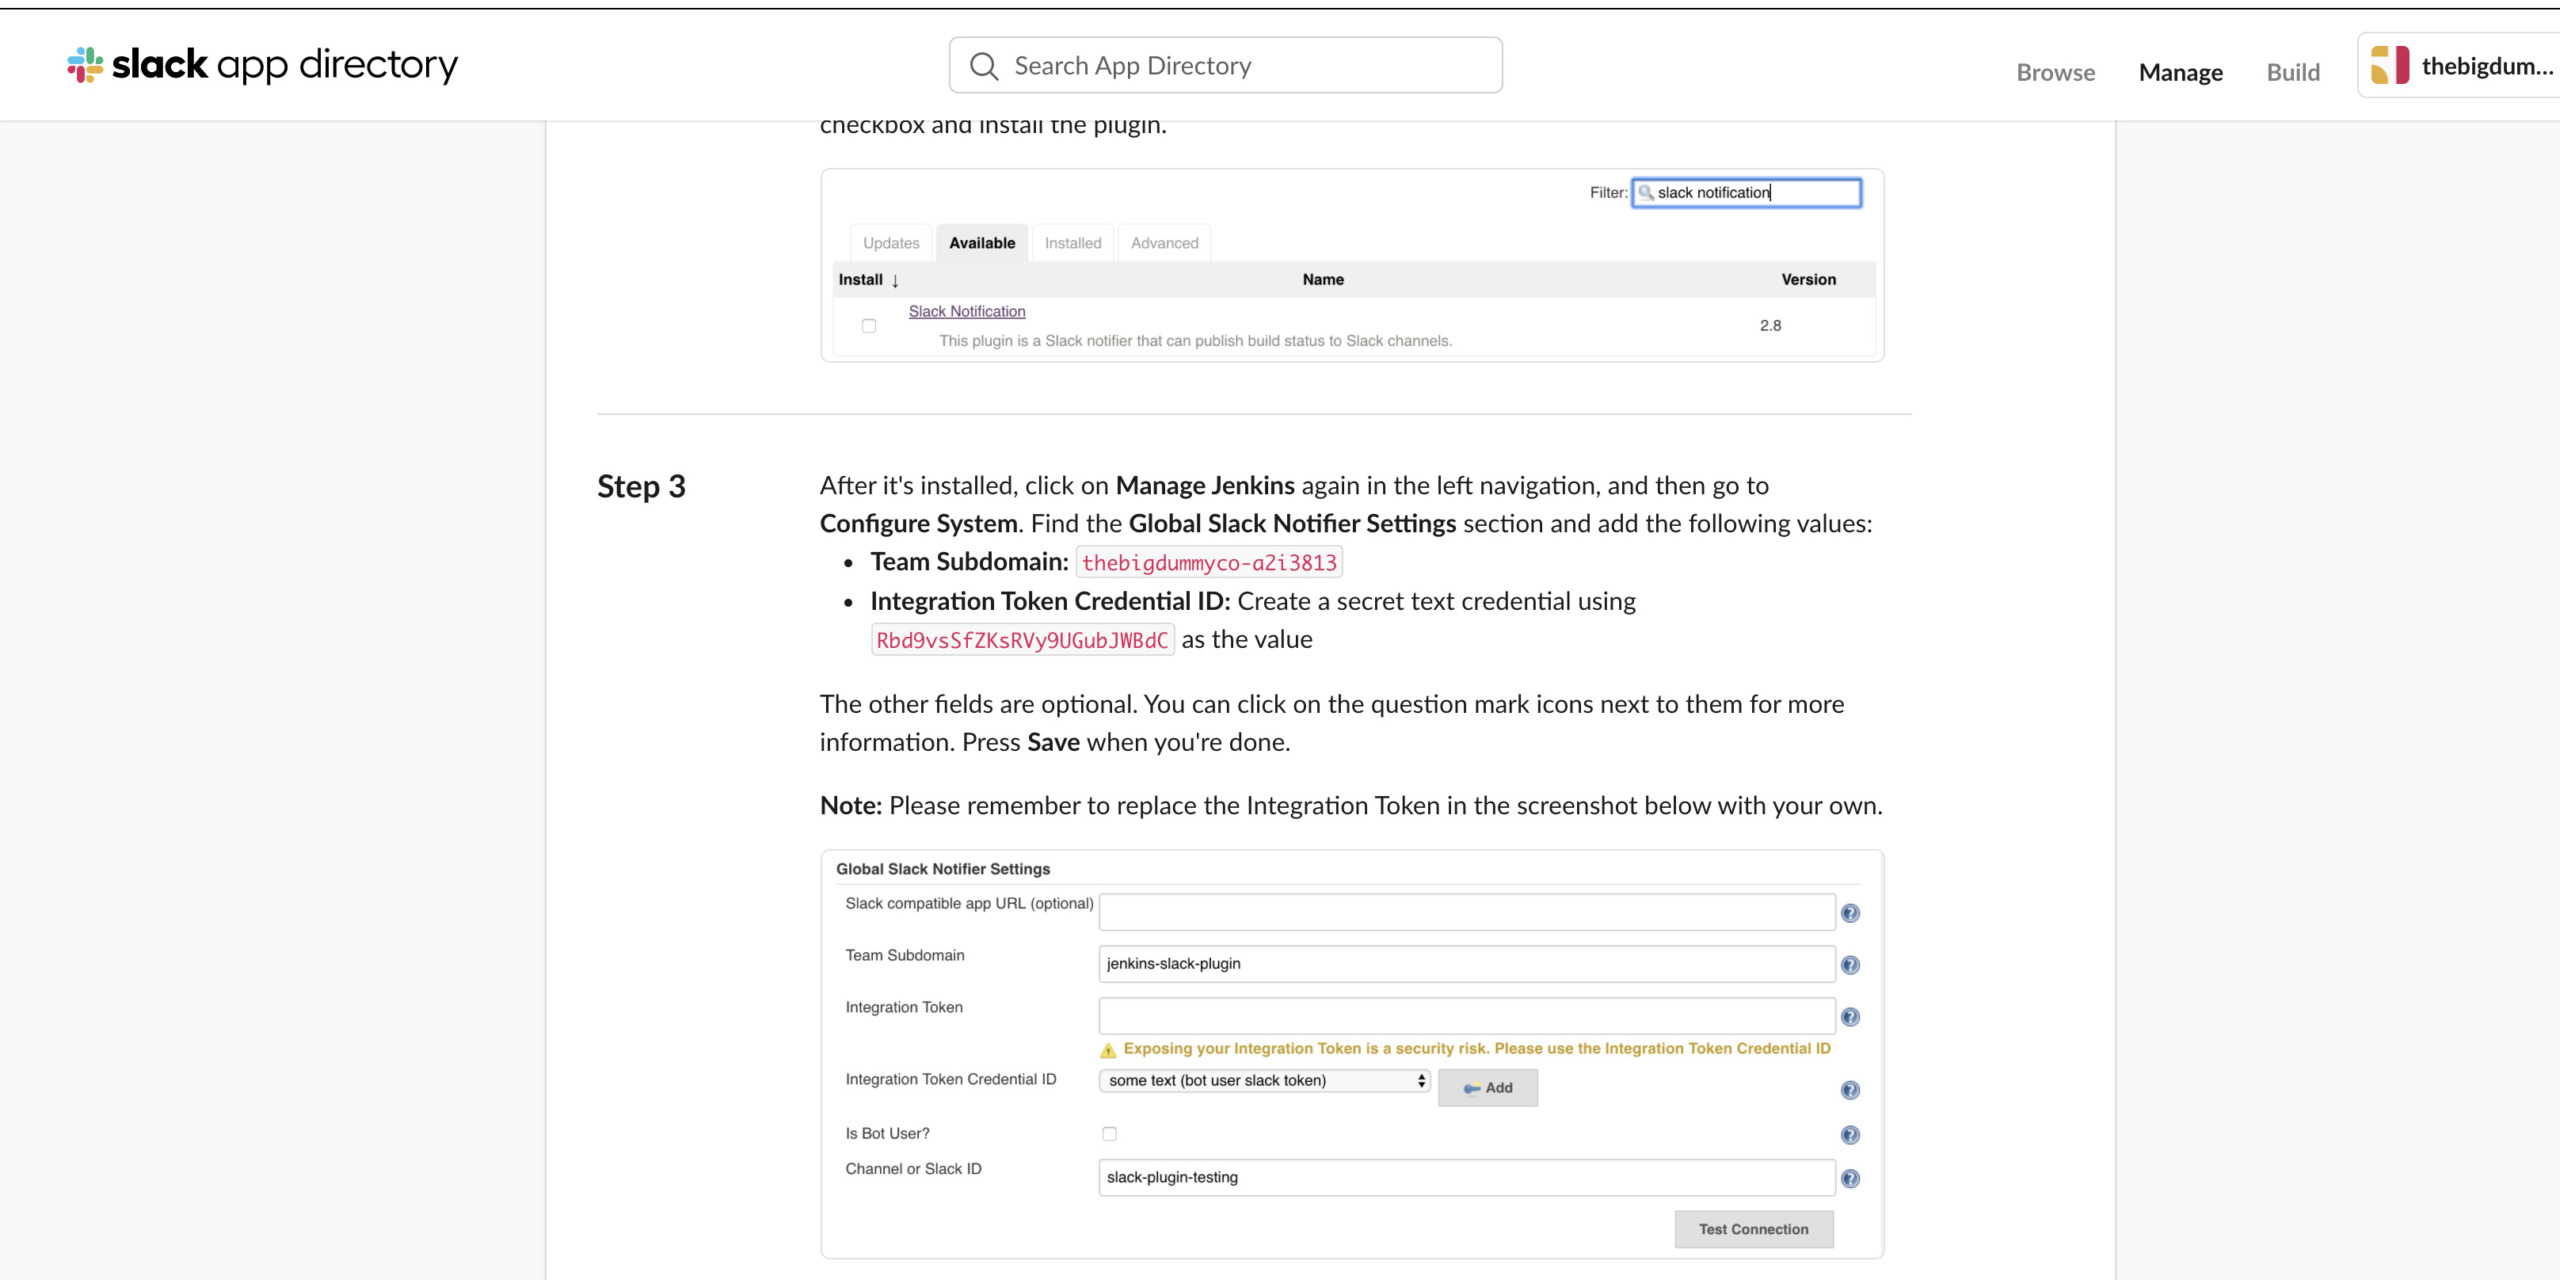
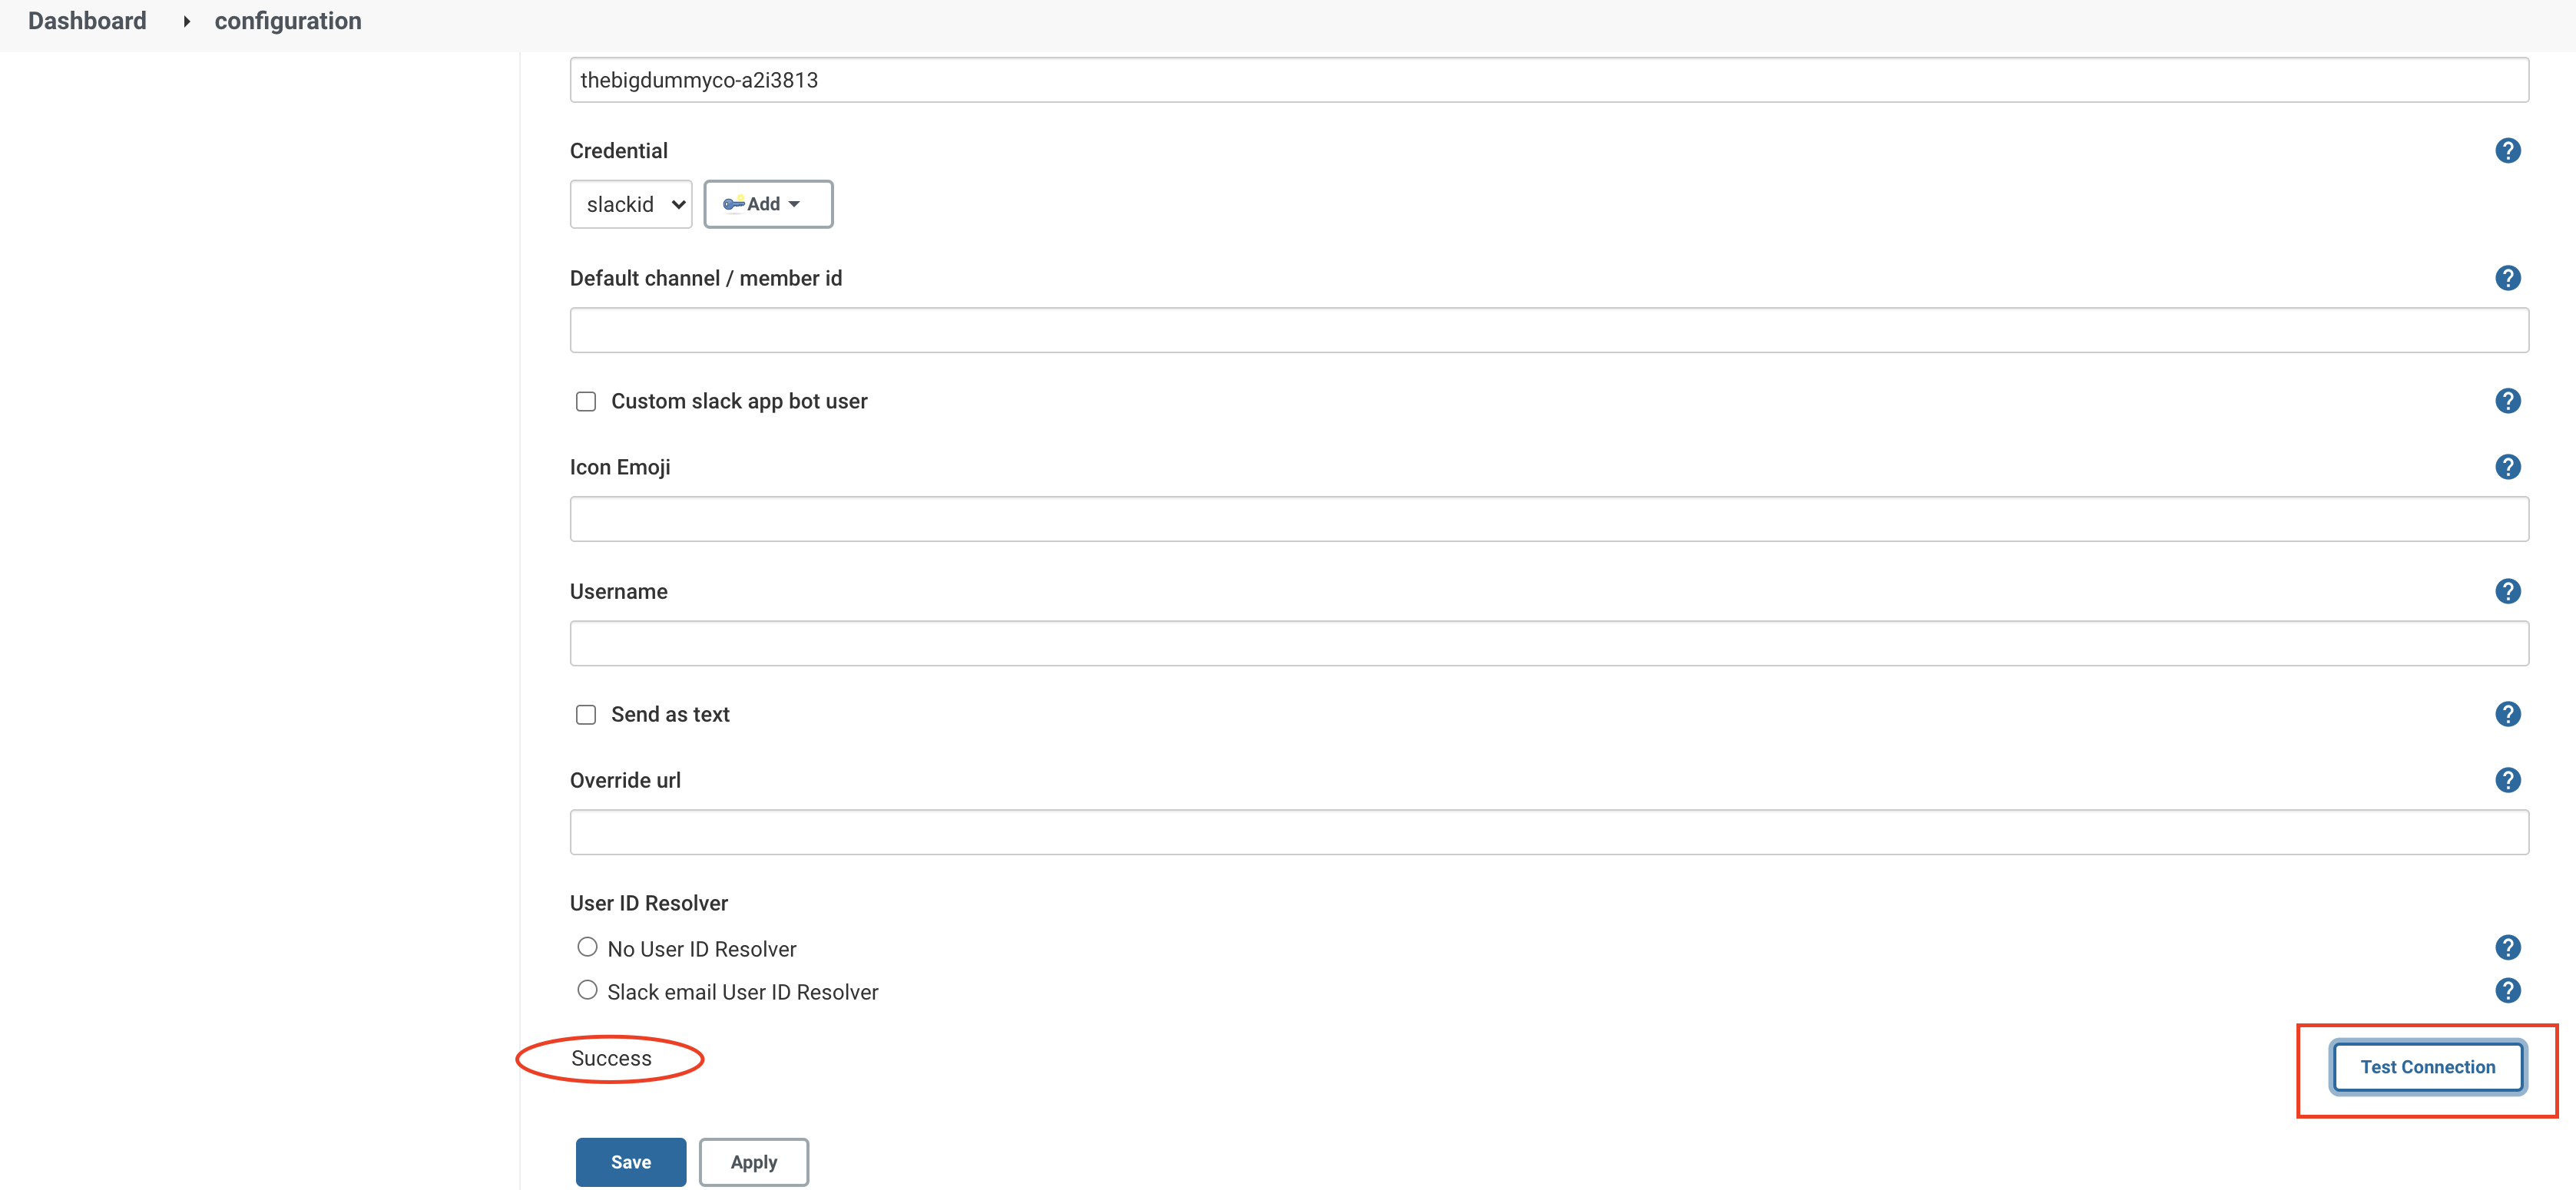
After configuration, click on 'Manage Jenkins' again in the left navigation and go to 'Configure System'. Find the 'Slack' section and add the following values:
Workspace: <TEAM-SUBDOMAIN>Credential: <INTEGRATION-TOKEN-CREDENTIAL-ID>Default channel / member id: <CHANNEL-NAME>

If you’d like, you can create a secret text credential by clicking the 'Add' button. You can also test the Jenkins and Slack integration by clicking the 'Test Connection' button.
7. Integrate Jenkins and GitHub
To receive specified events to Jenkins from GitHub, you need to configure Webhooks. Webhooks allow external services to be notified when certain events happen. When the specified events happen, GitHub will send a POST request to Jenkins.
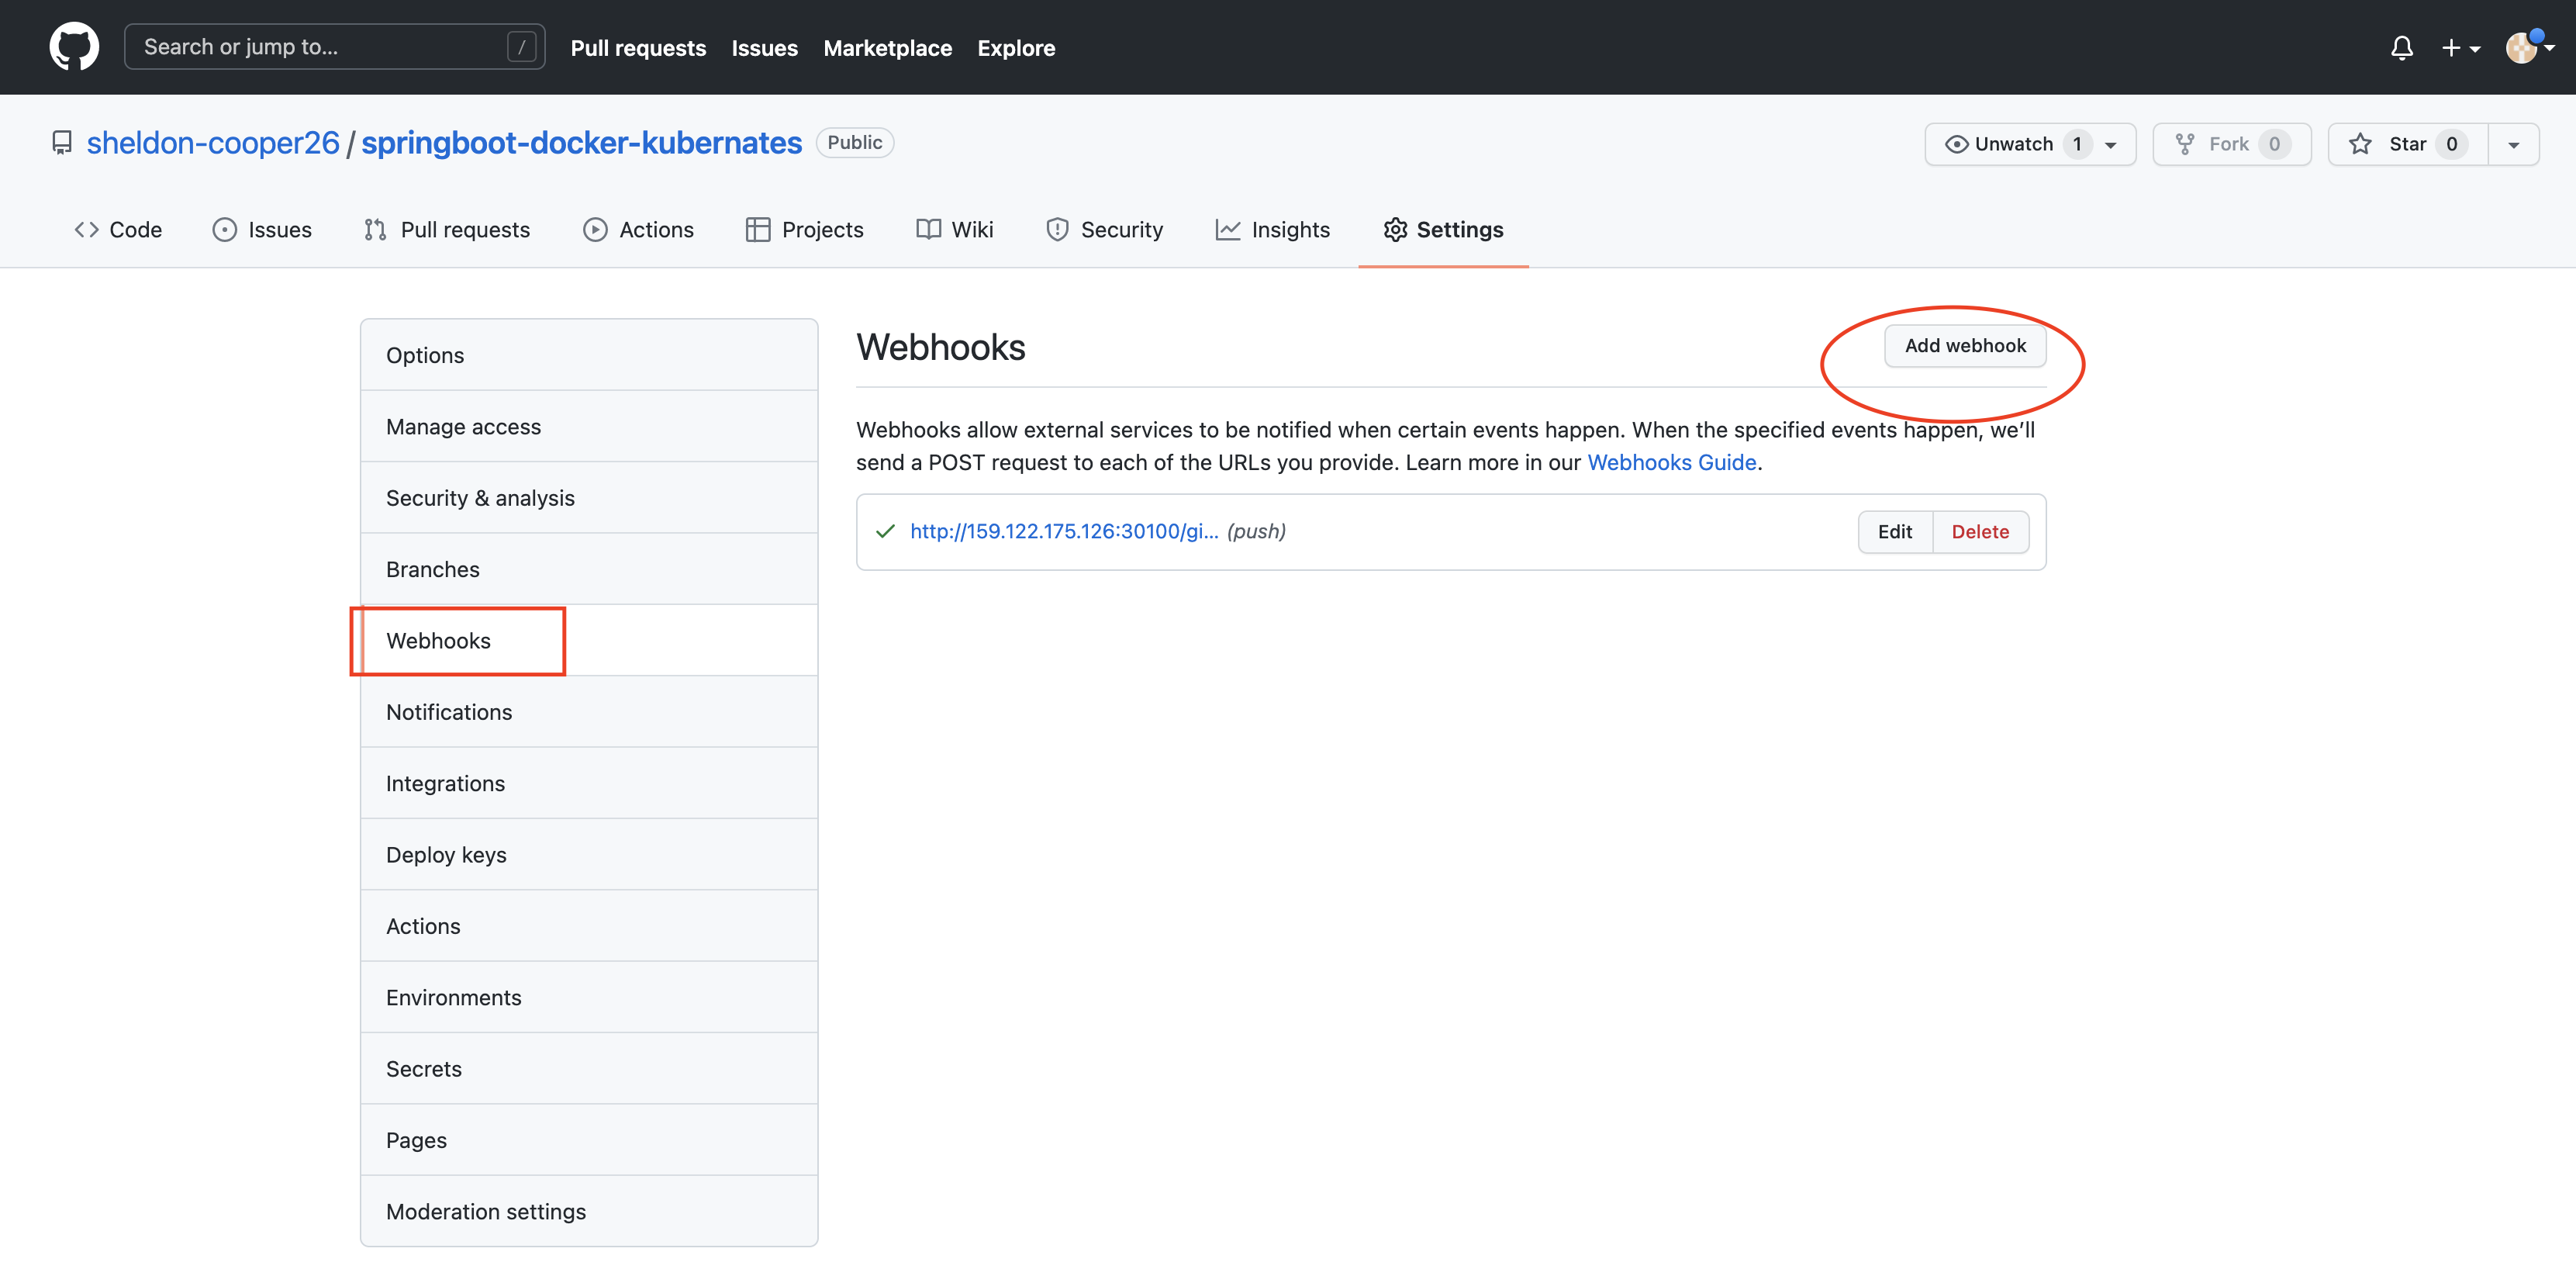
To begin configuration, navigate to your project repository on GitHub. Click Settings in the right corner and find the Webhooks option in the left pane.
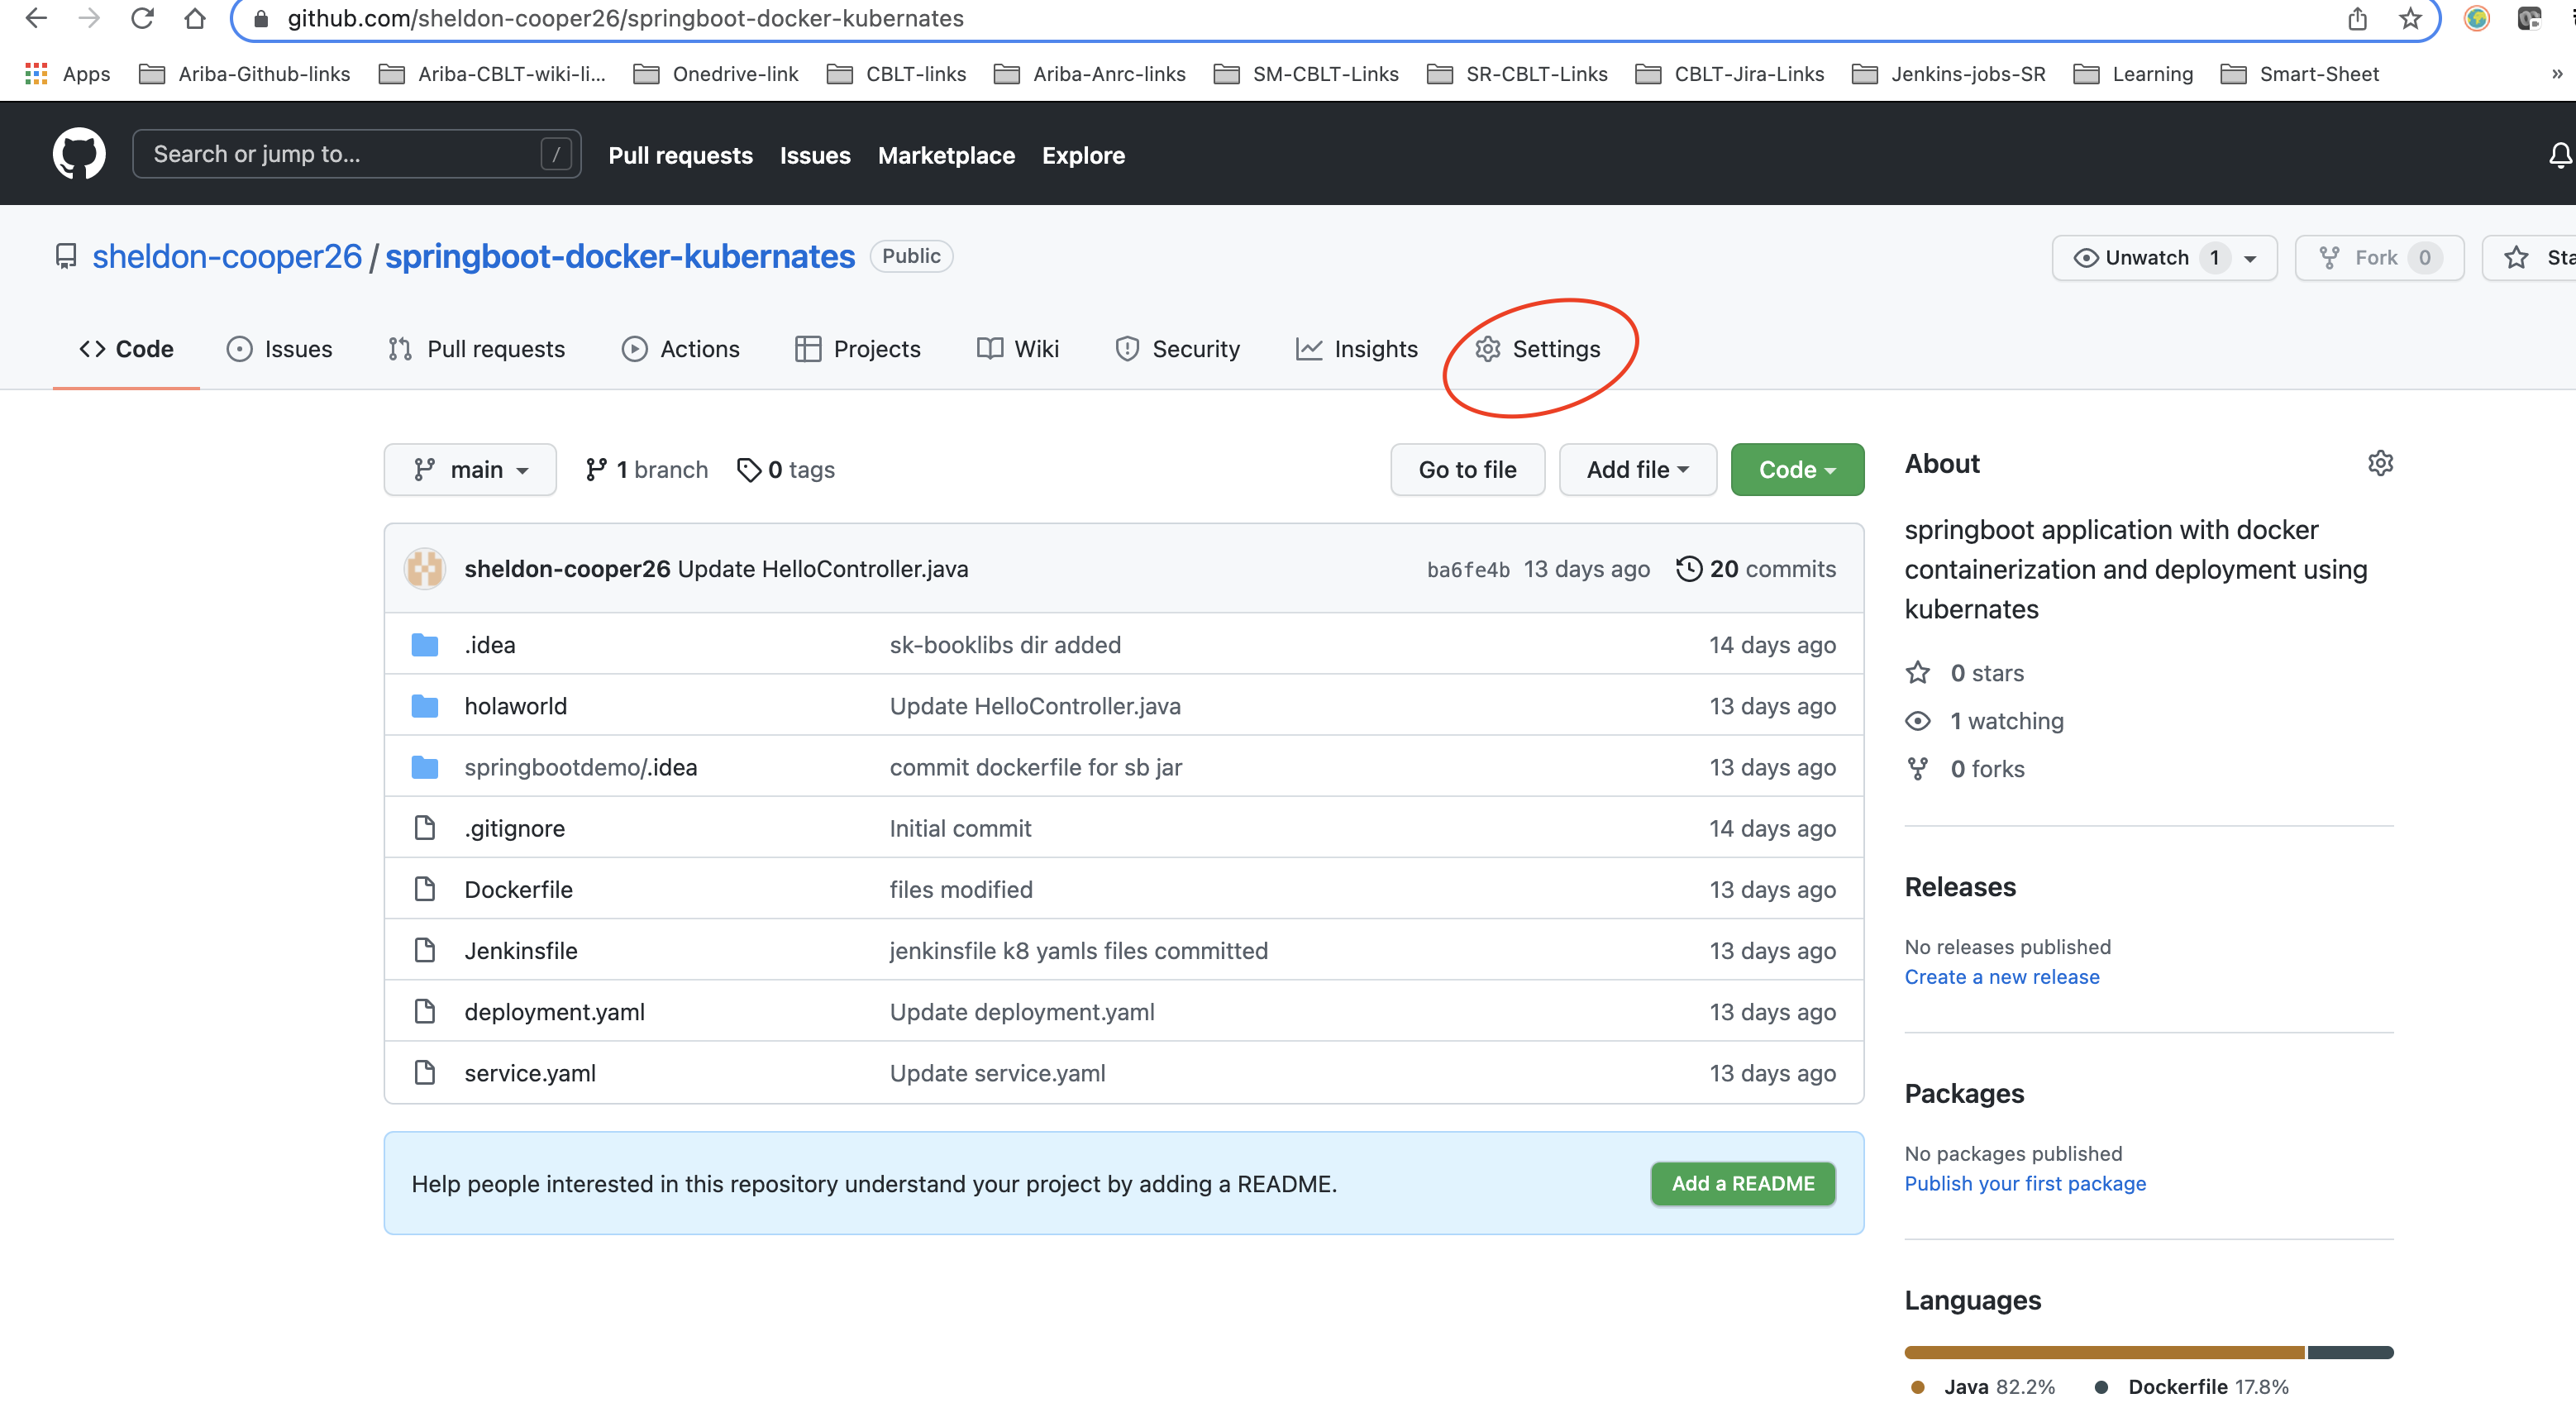
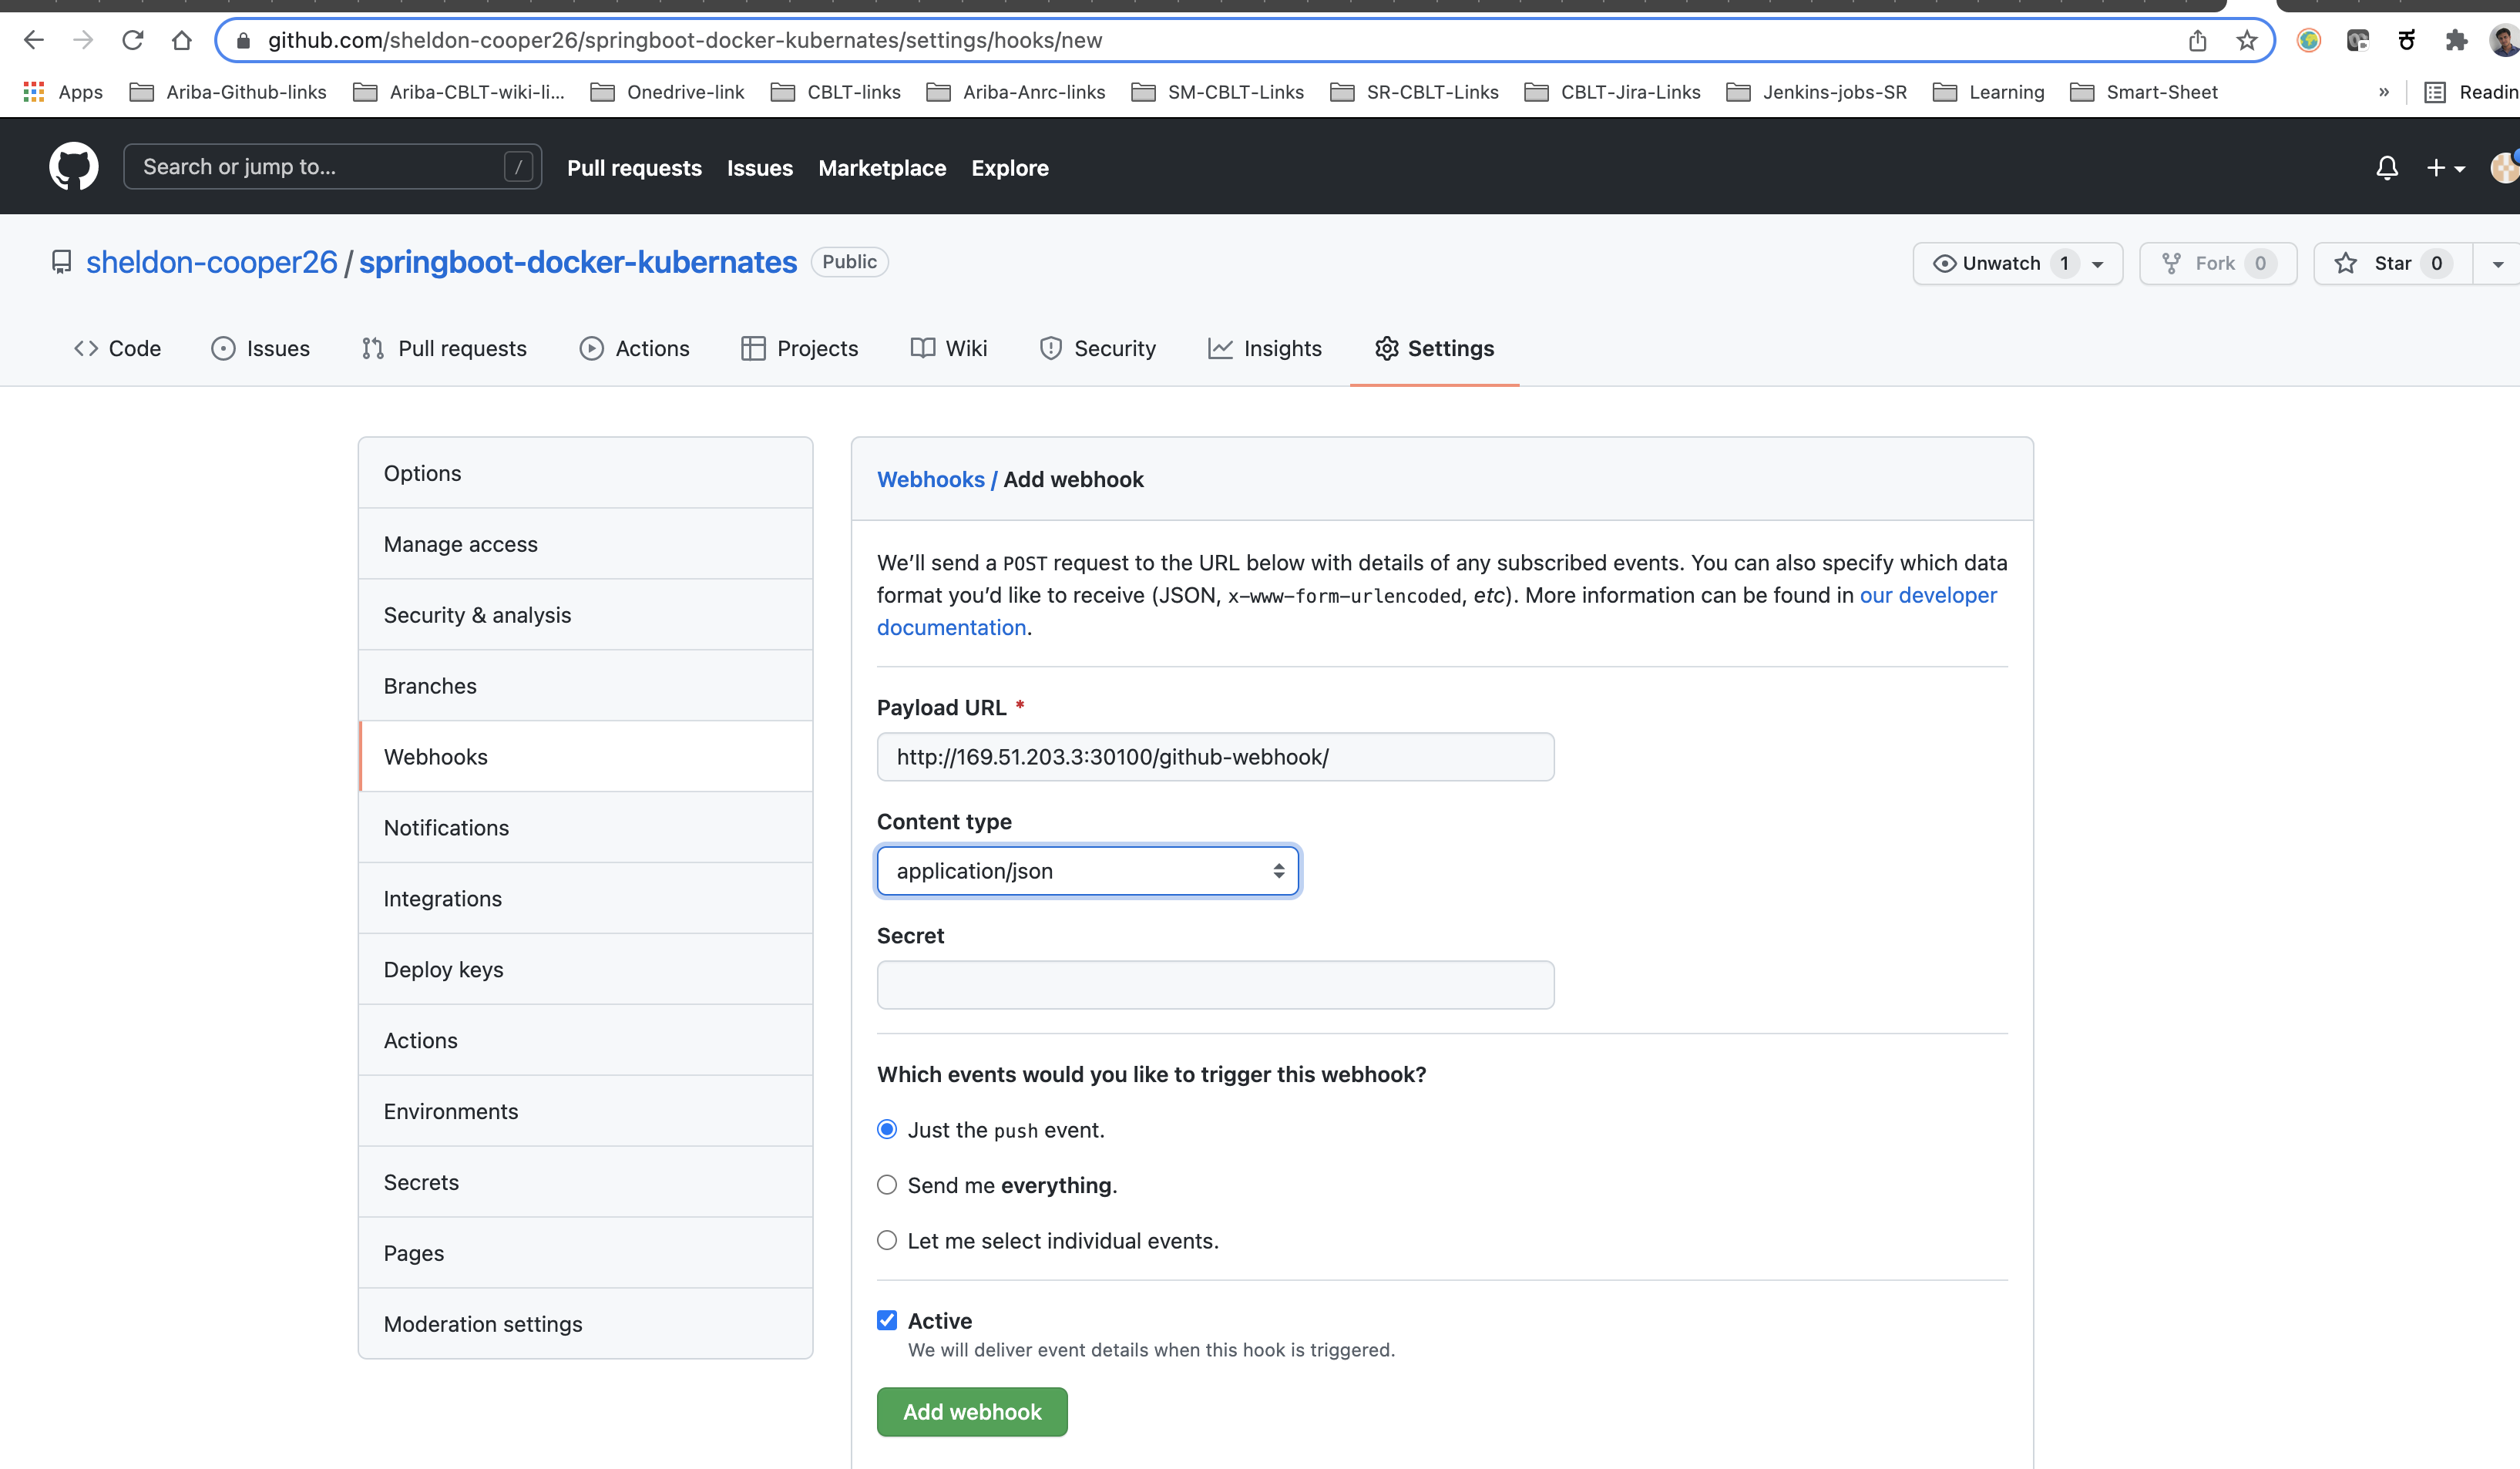
Click the Add webhook button. The payload URL is http://<JENKINS-URL>:<JENKINS-PORT>/github-webhook/. An example URL looks like http://169.47.252.31:30100/github-webhook/. Make sure you save the webhook.
Jenkins is now configured to accept events from GitHub and there are only a few more steps to complete the Jenkins and GitHub integration.
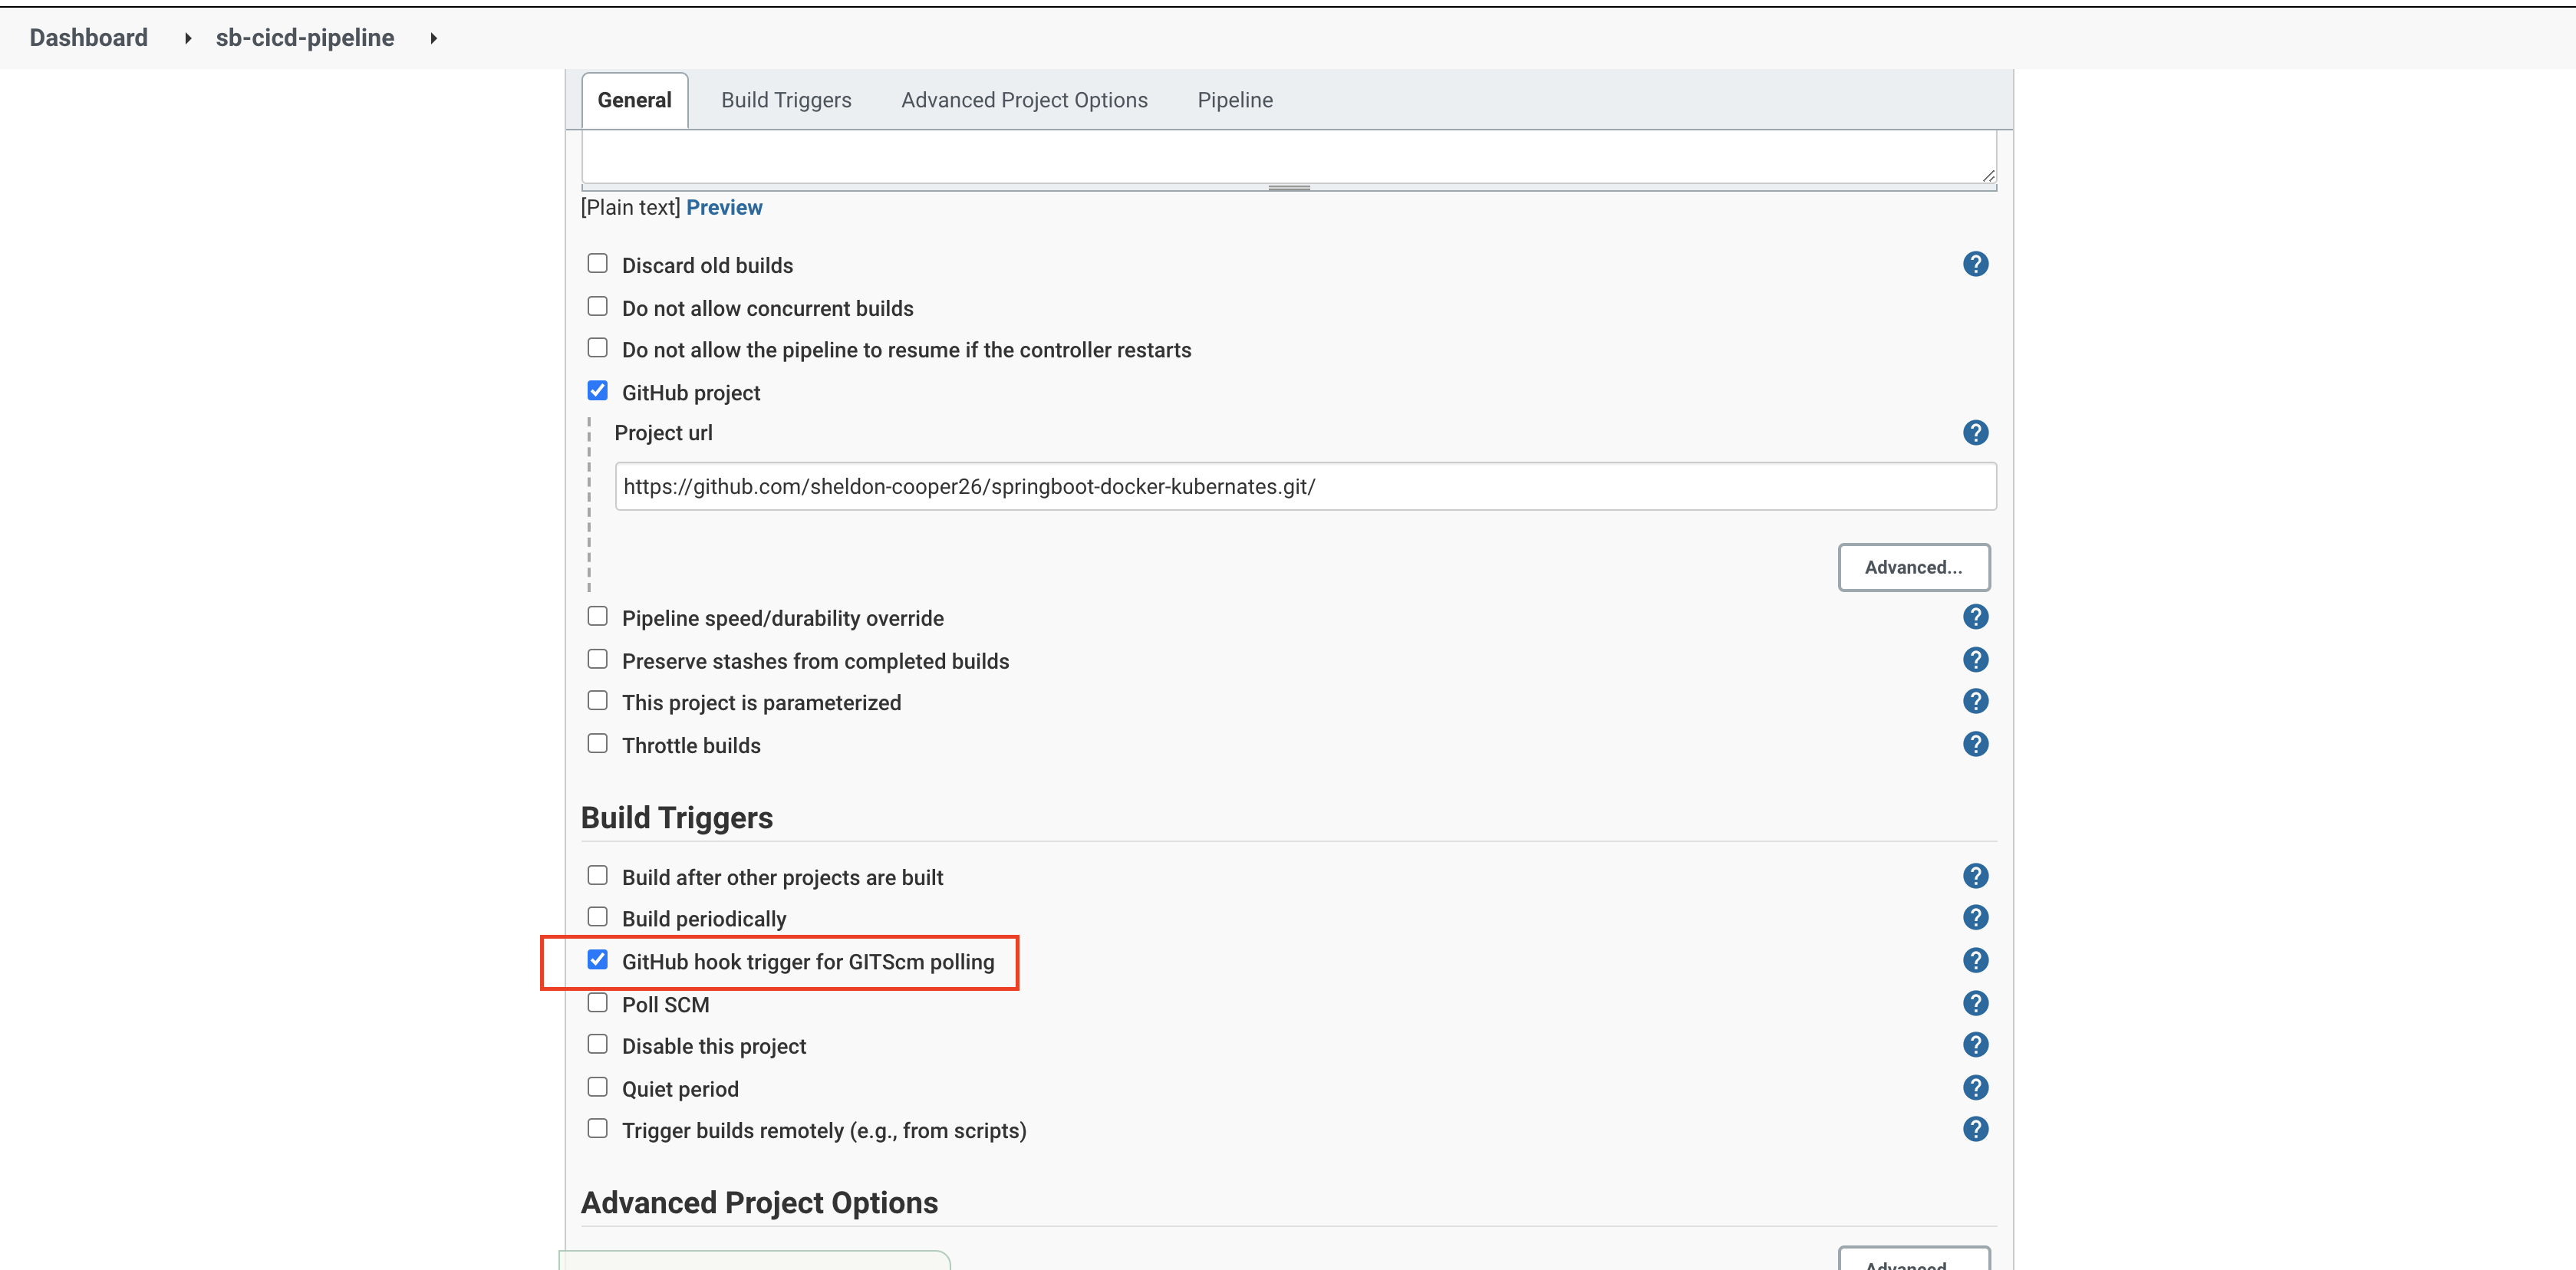
Head over to the first pipeline's dashboard and click the 'Configure' option. Choose 'GitHub hook trigger for GITScm polling' under the 'Build Triggers' section and save the configuration.
The pipeline should be triggered manually once to identify stages that are used in the Jenkinsfile. After that, the GitHub webhook can trigger the pipeline.
8. Test the First Jenkins Pipeline
Jenkins is finally ready to test.
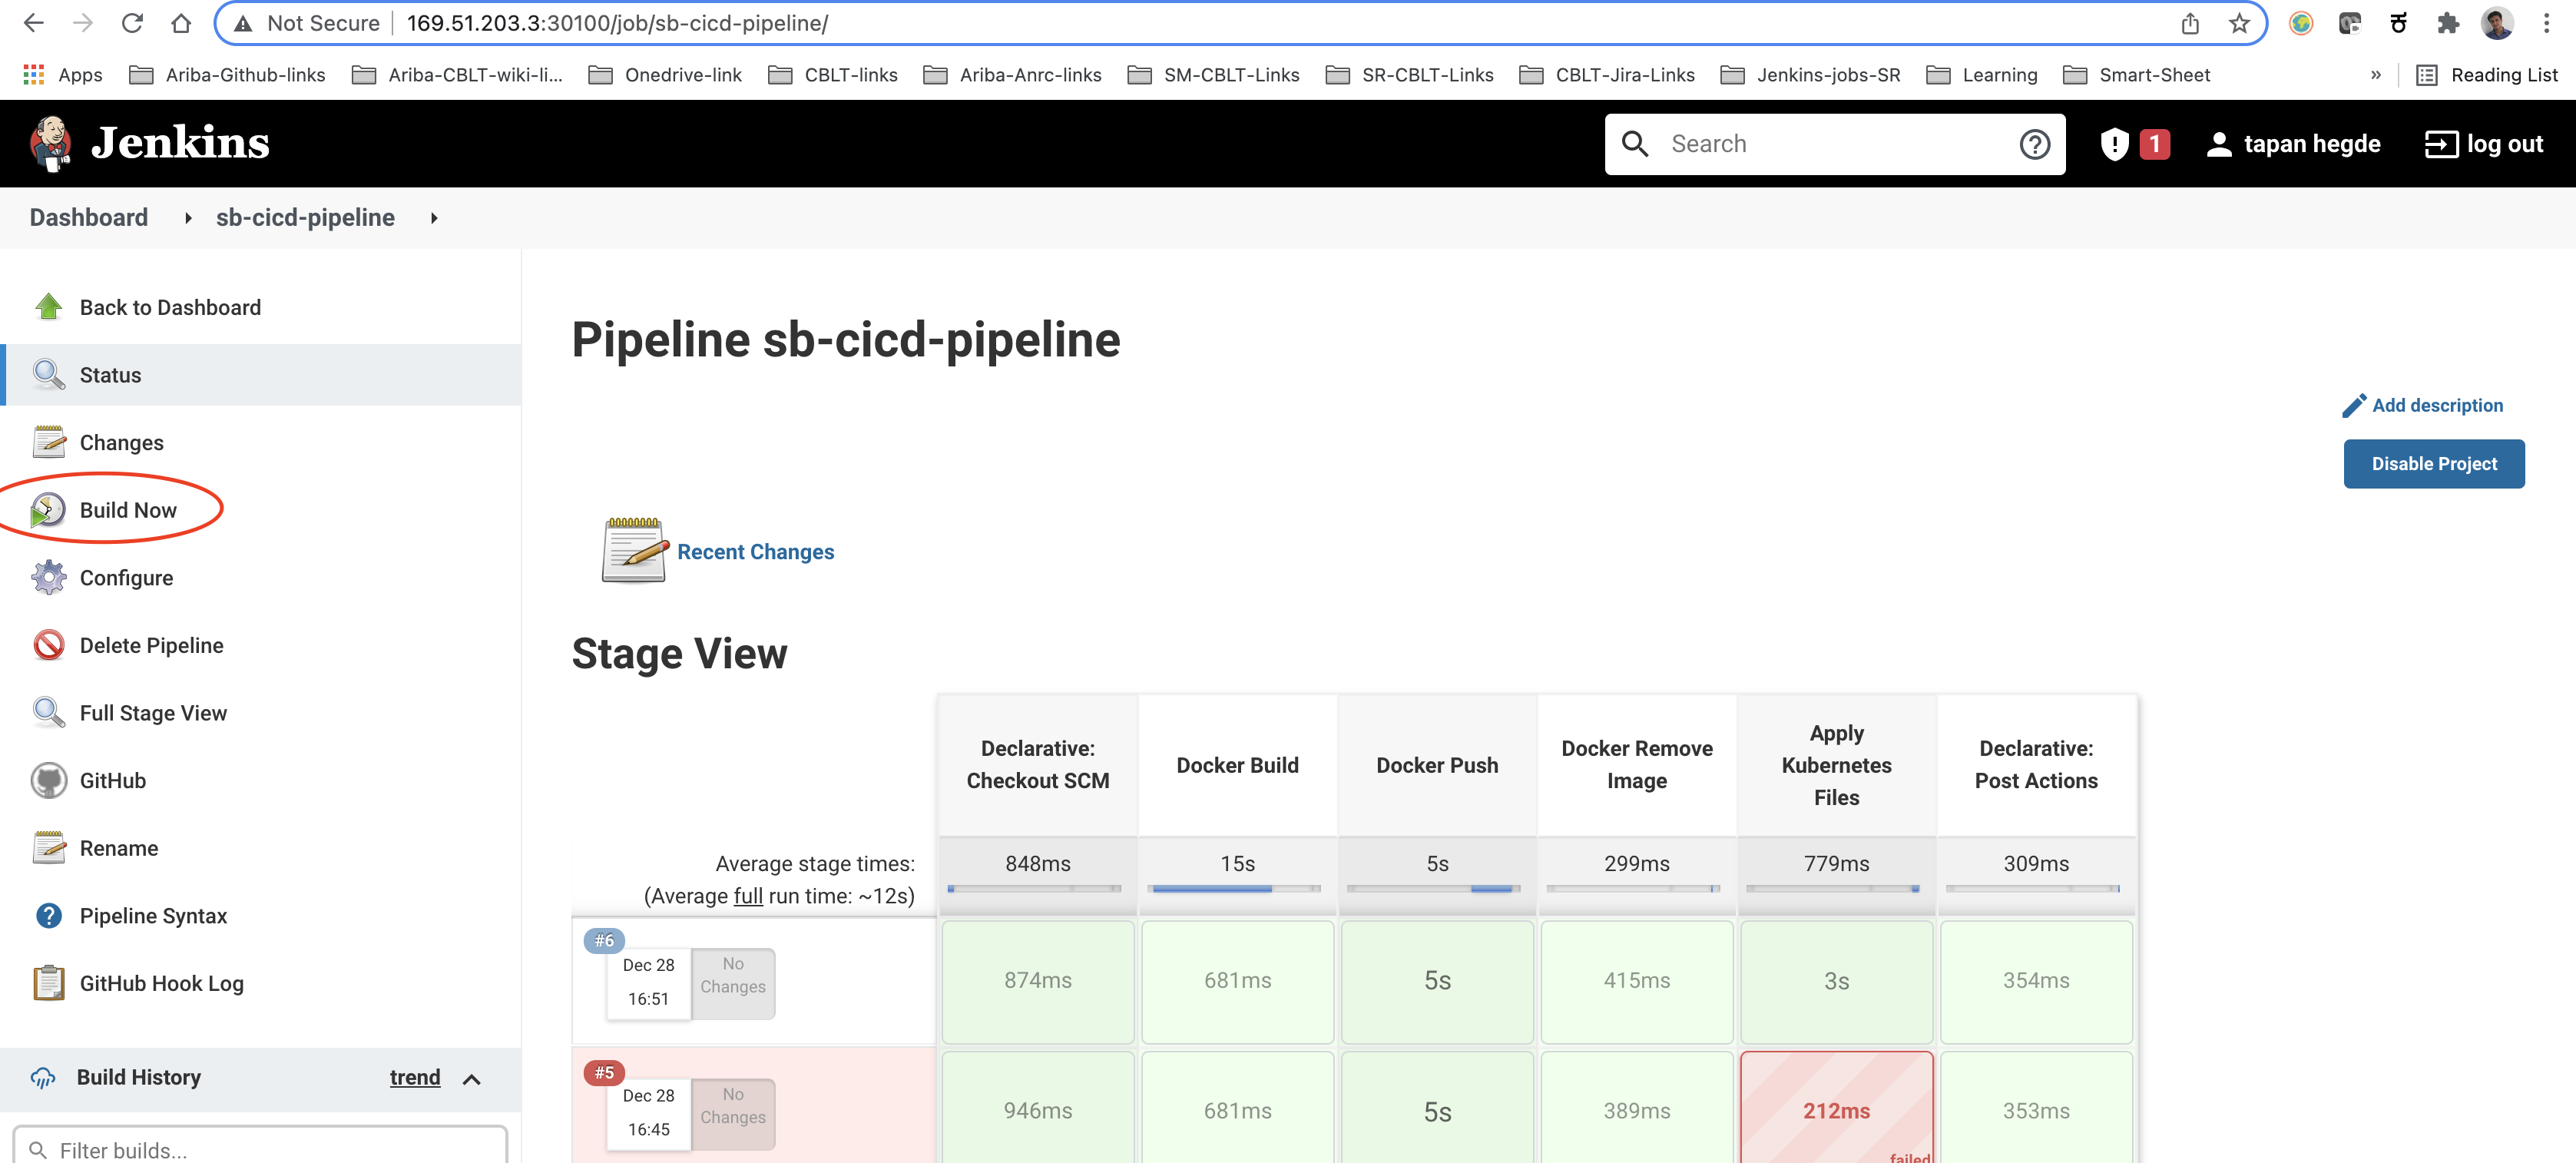
Go to the first pipeline's dashboard and click 'Build Now'.
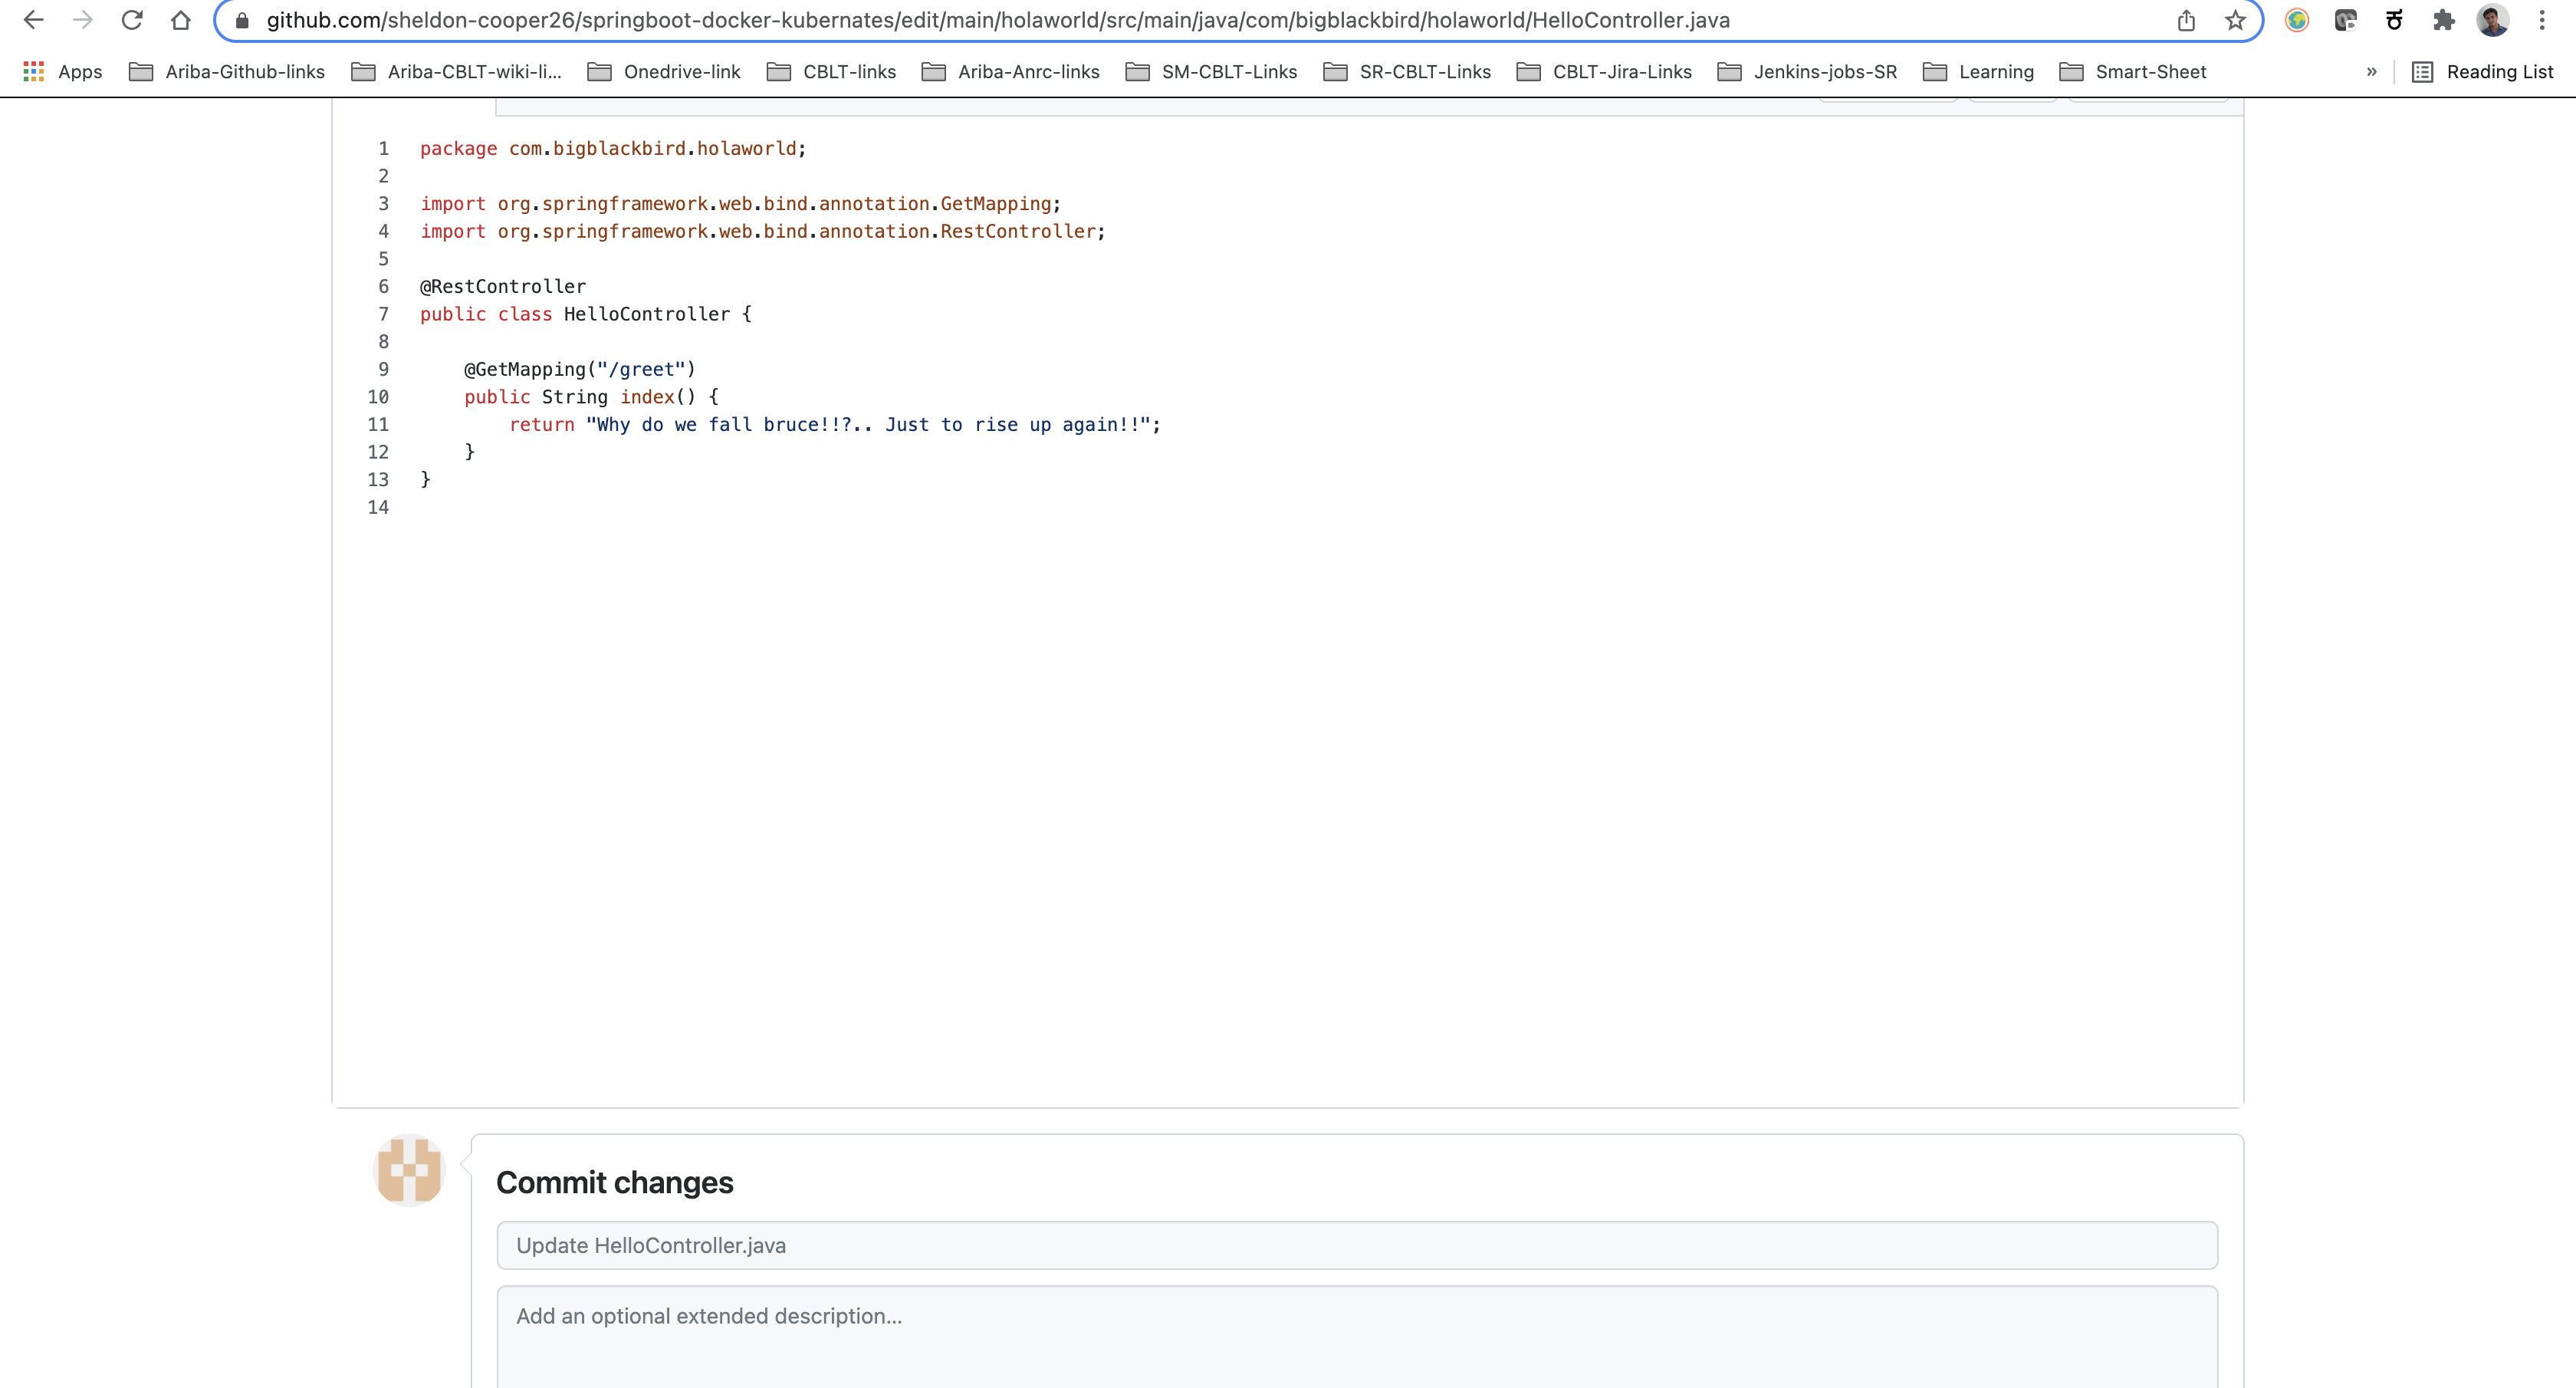
The steps that are defined in Jenkinsfile are now available. Simply make a small change on the ’HelloController.java’(https://github.com/sheldon-cooper26/springboot-docker-kubernates/blob/main/holaworld/src/main/java/com/bigblackbird/holaworld/HelloController.java) and push it to GitHub.
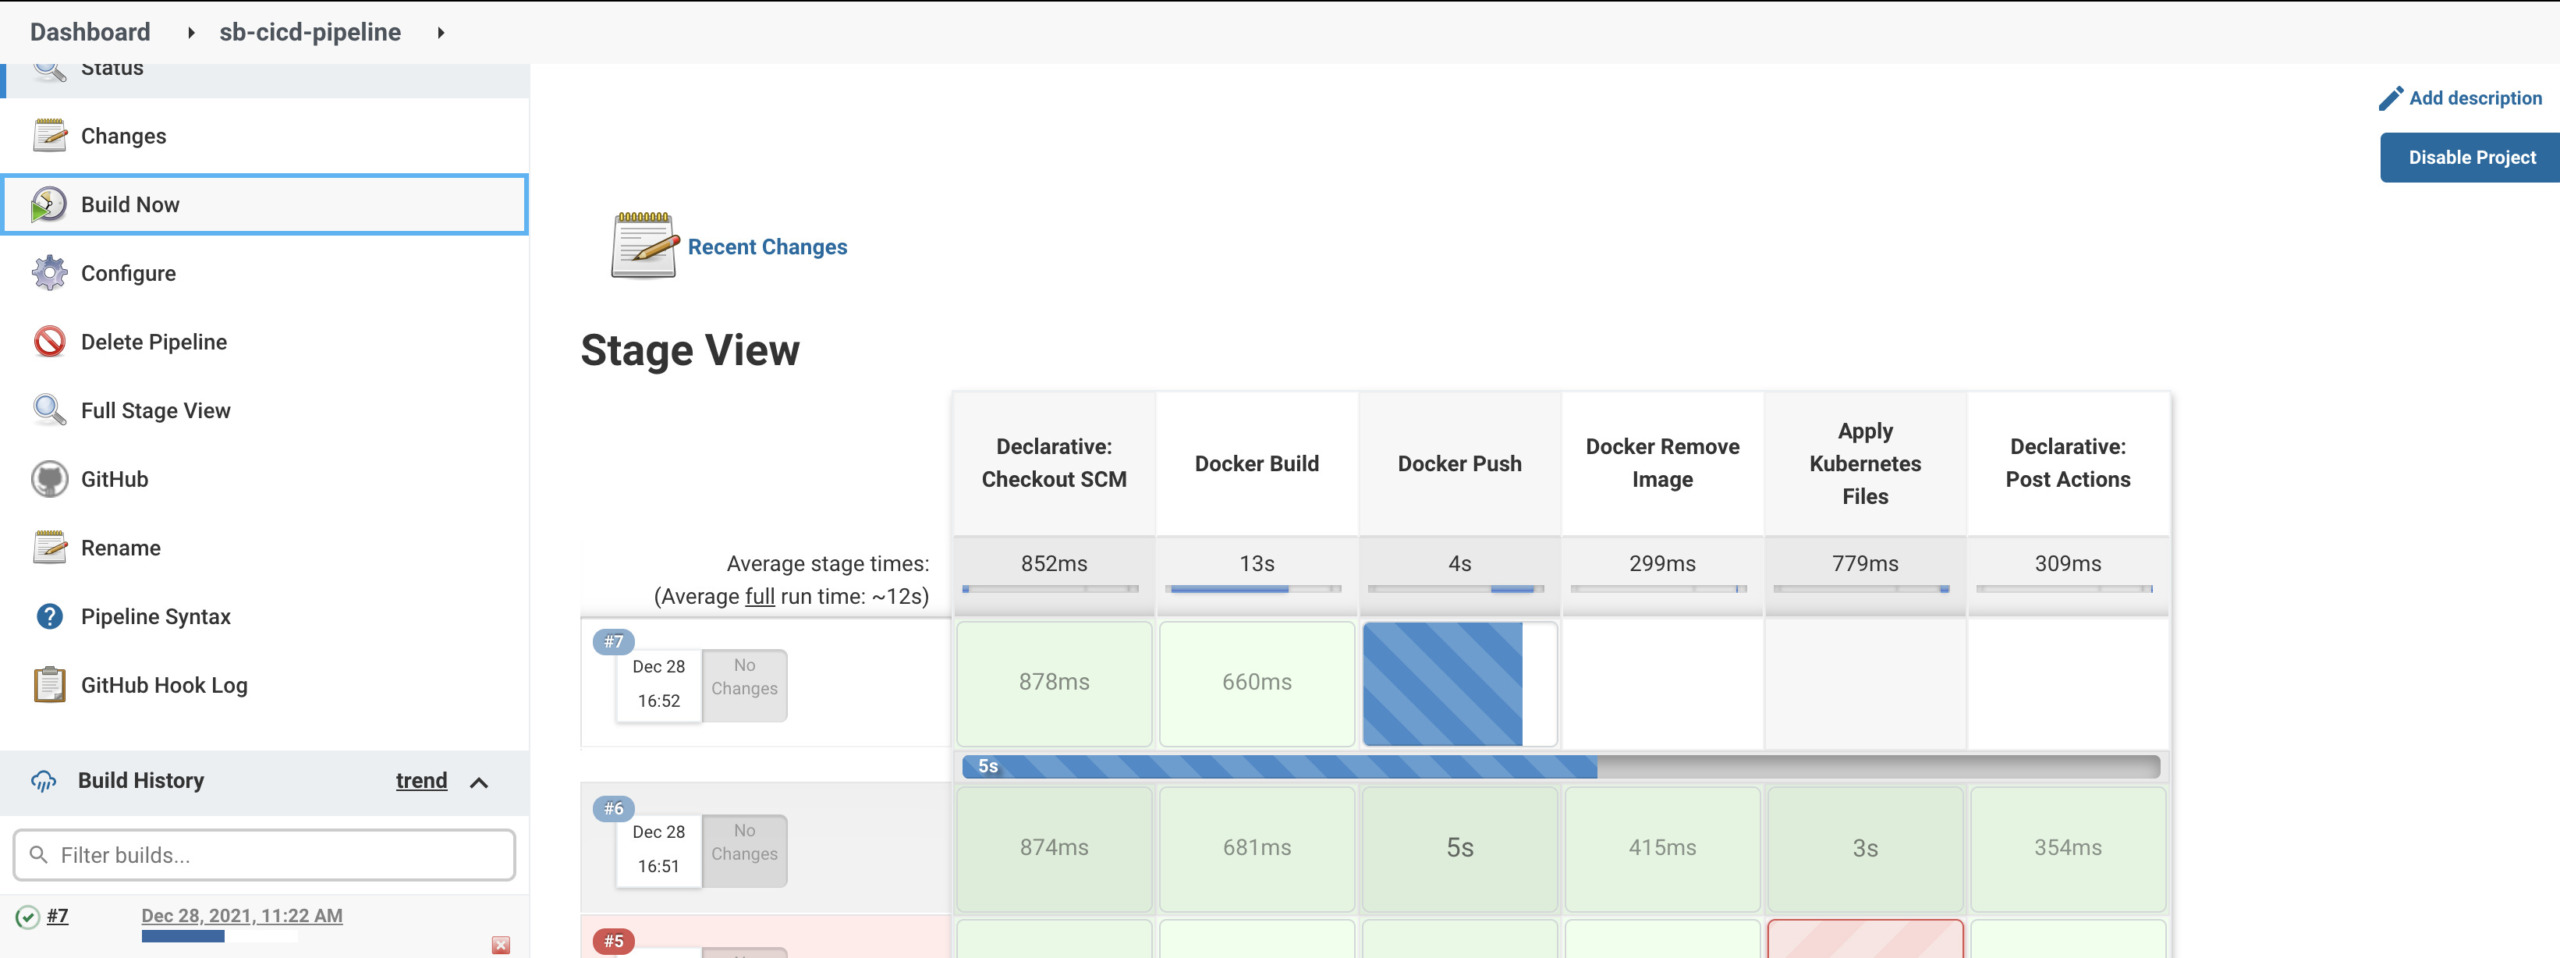
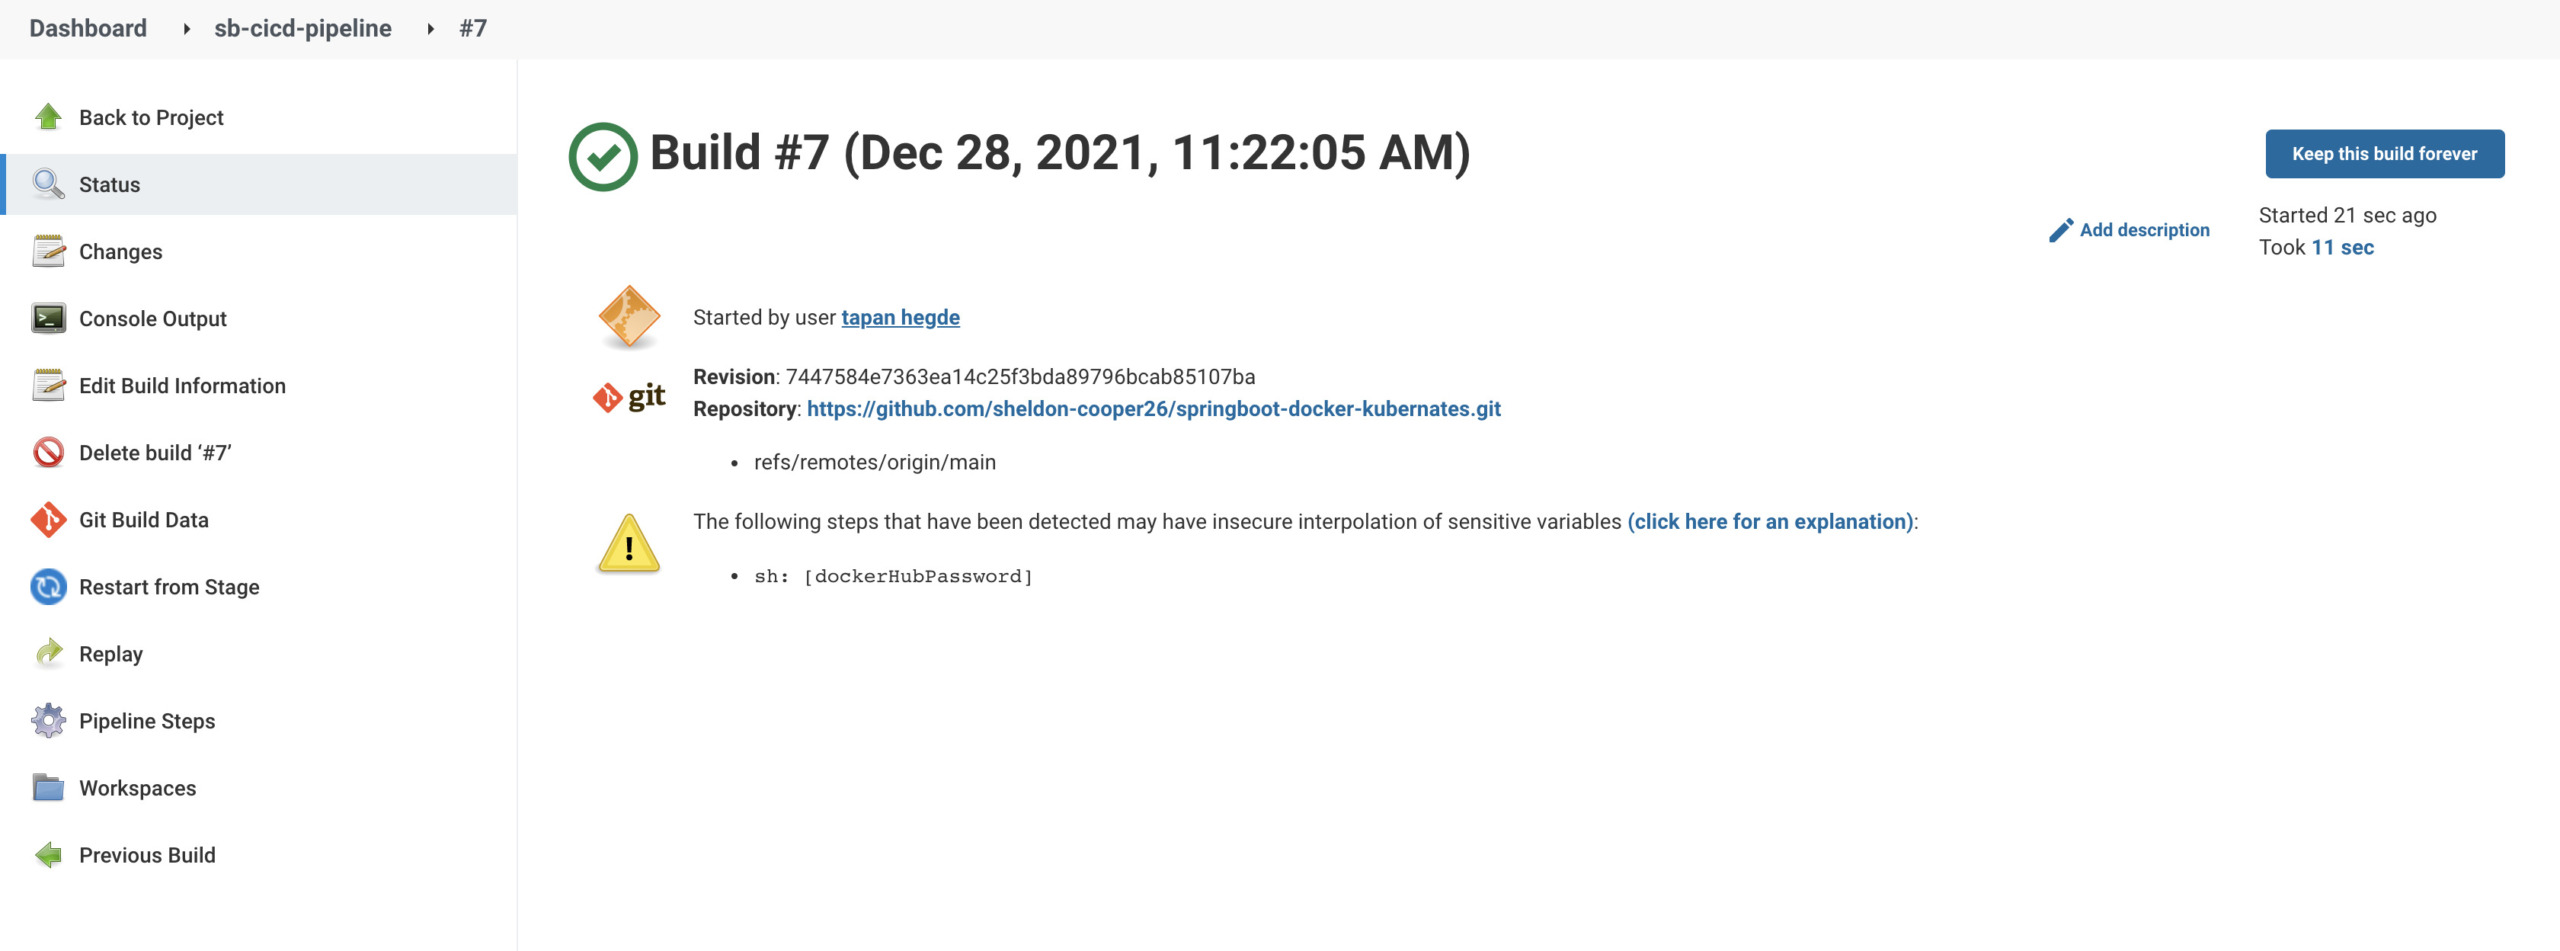
The pipeline is triggered by GitHub and Jenkins deploys a runs application to Kubernetes.
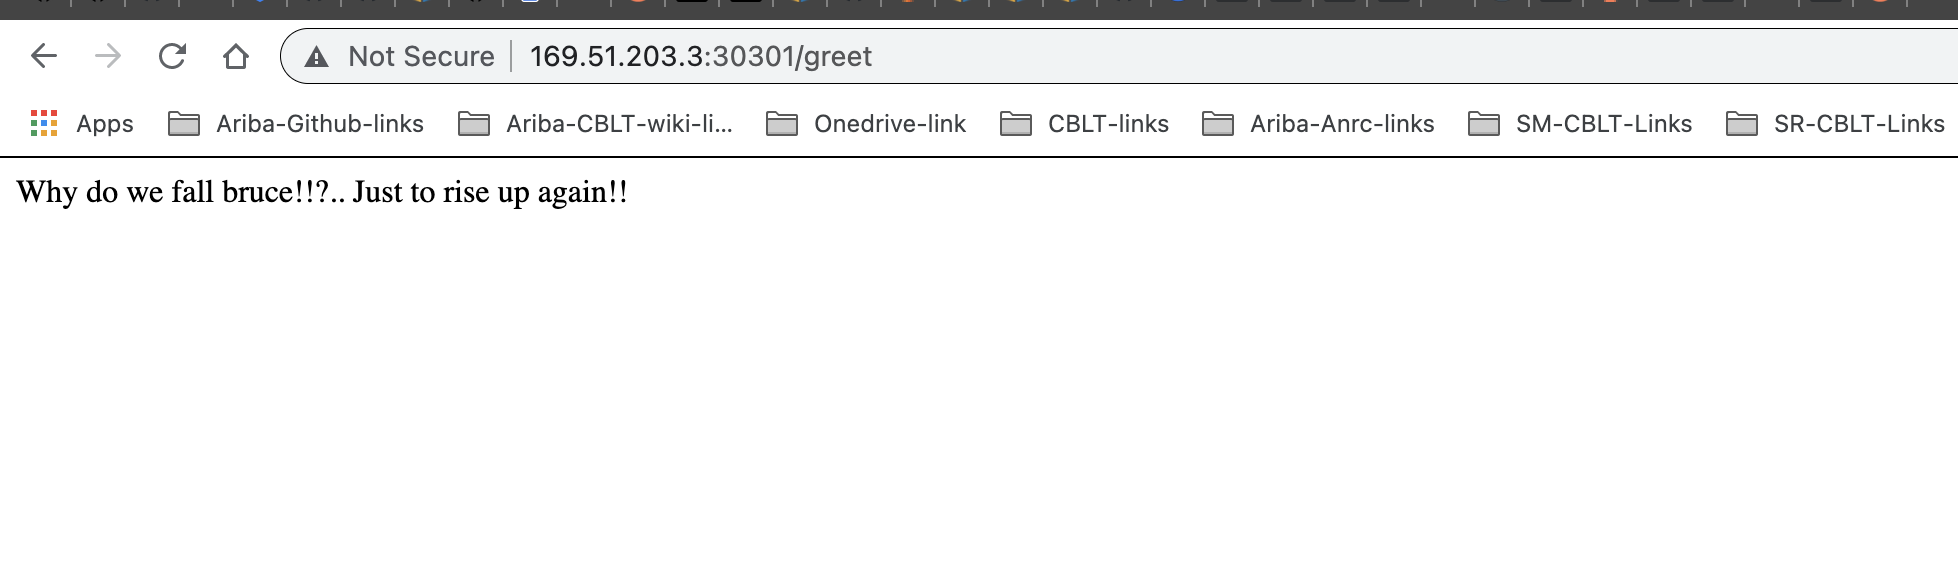
The application can be found at http://169.51.203.3:30301/greet
(http://<jenkins url>:<application port>/greet)

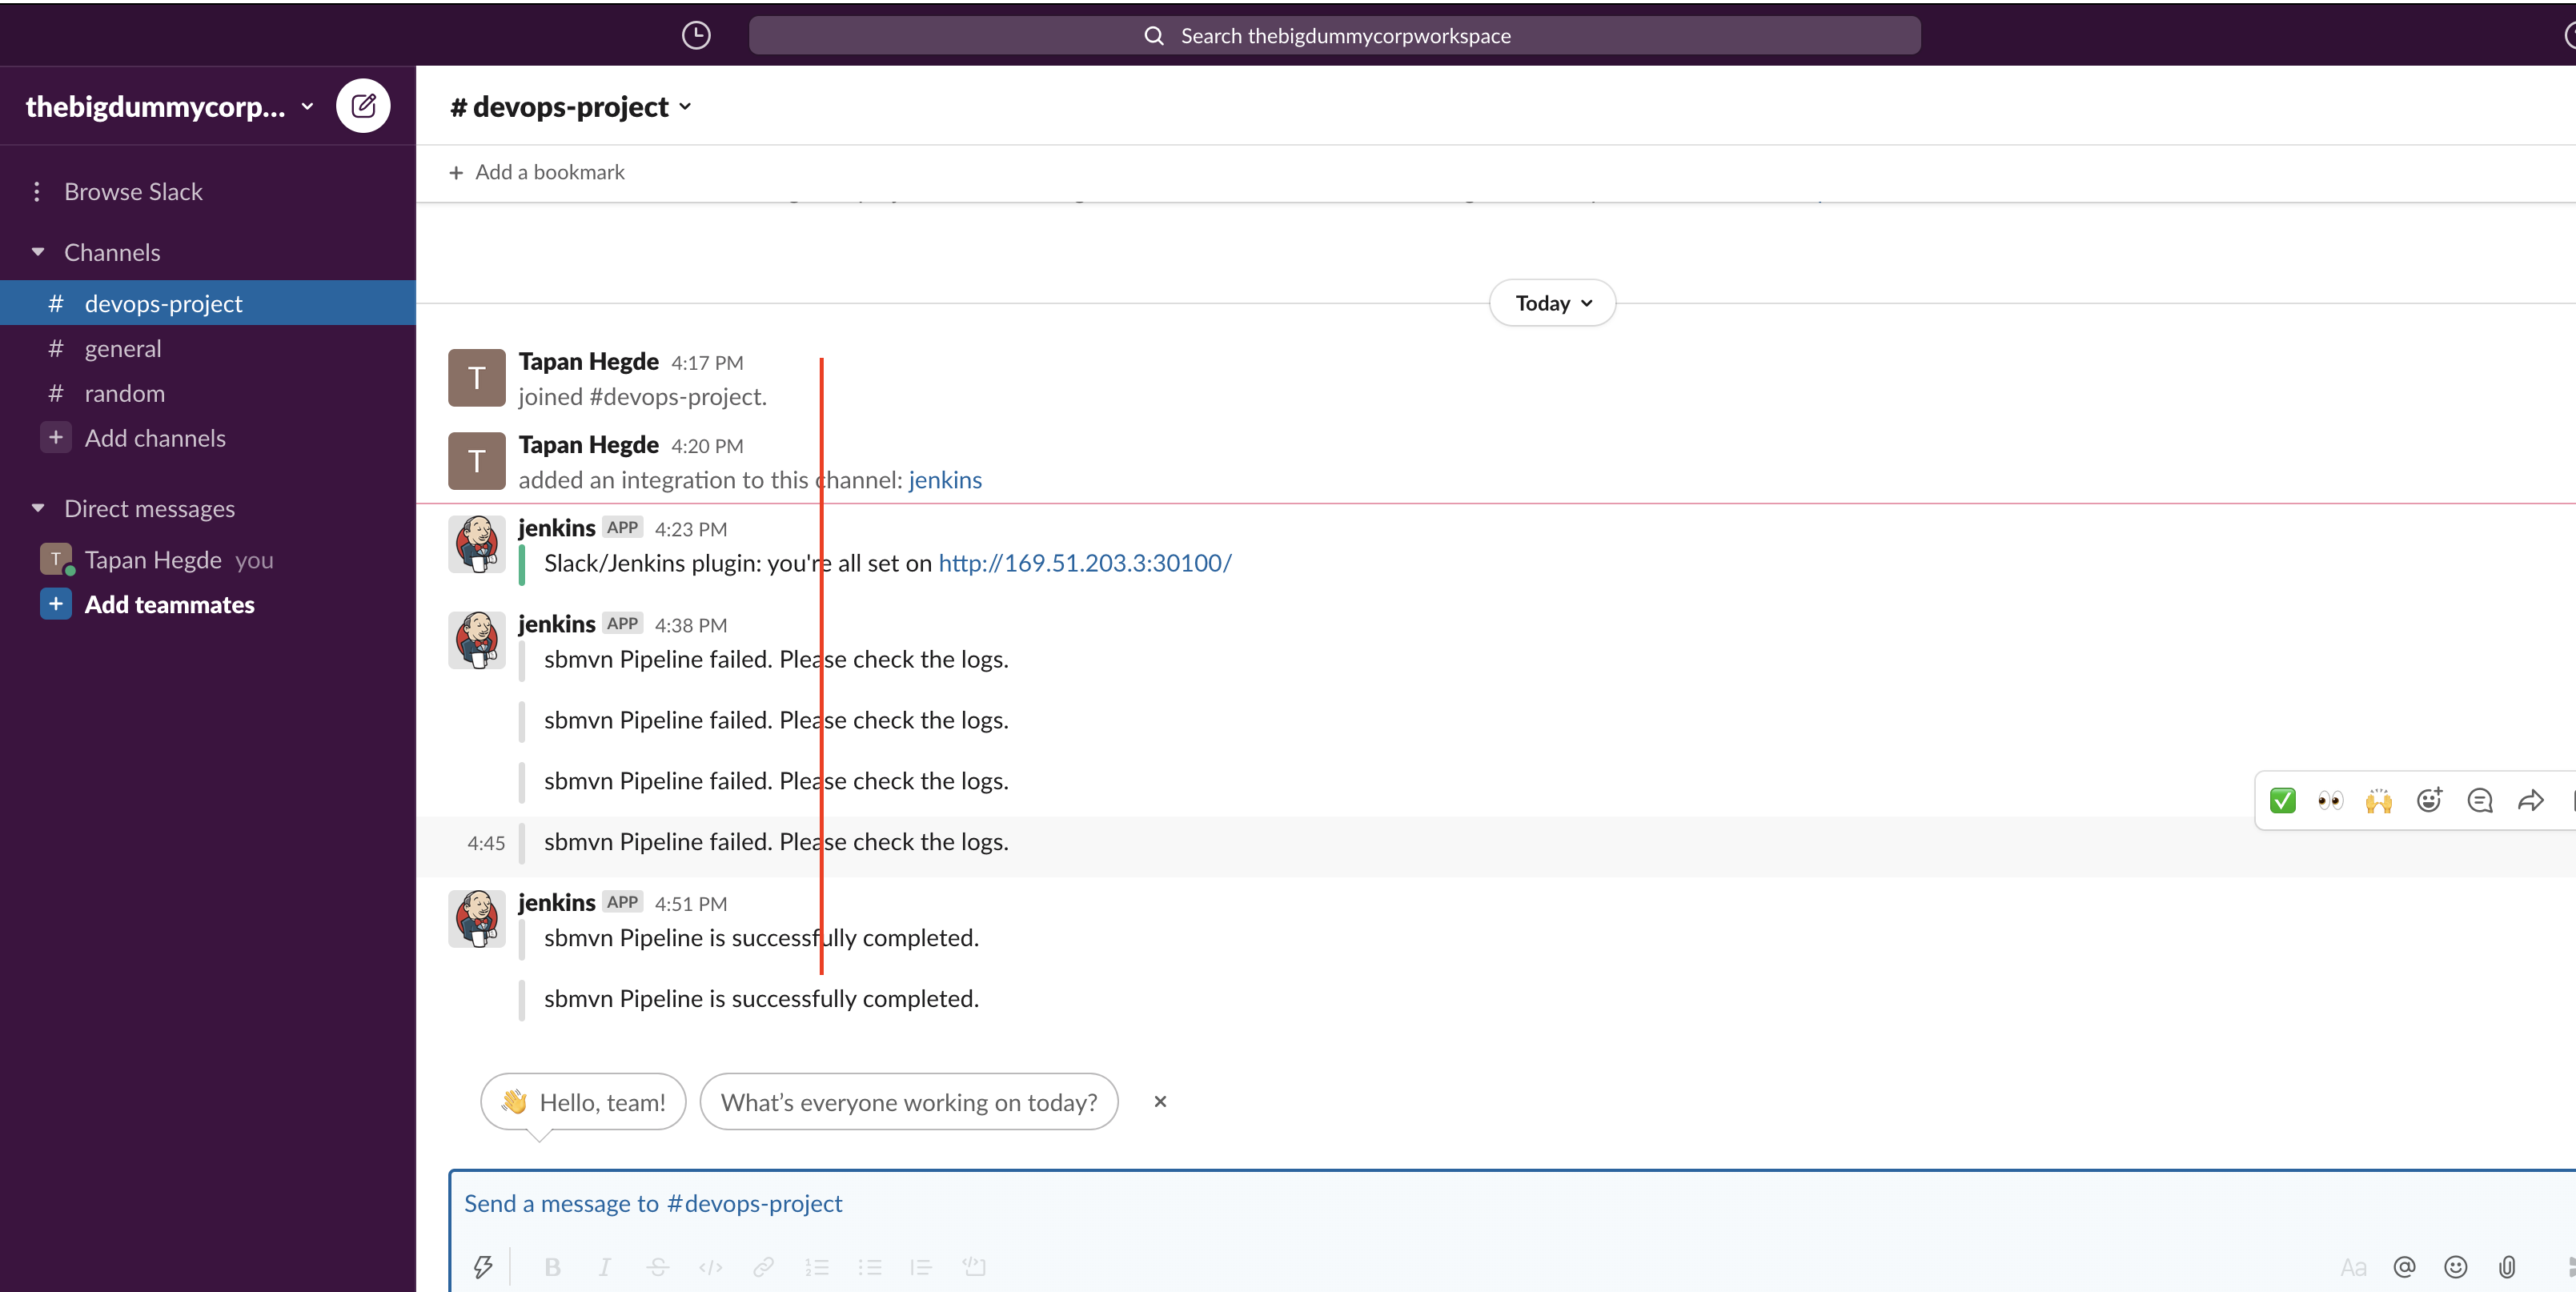
Meantime you should be getting notifications in slacks about your build status.
Now as a further step, let's make small changes to HelloController.java, and let's confirm if Jenkins pickups are the same and build it.
Here, I am changing the string value from ‘When you are good at something!!..don’t do it for free to ‘Why do we fall bruce!!?.. Just to rise up again!!”
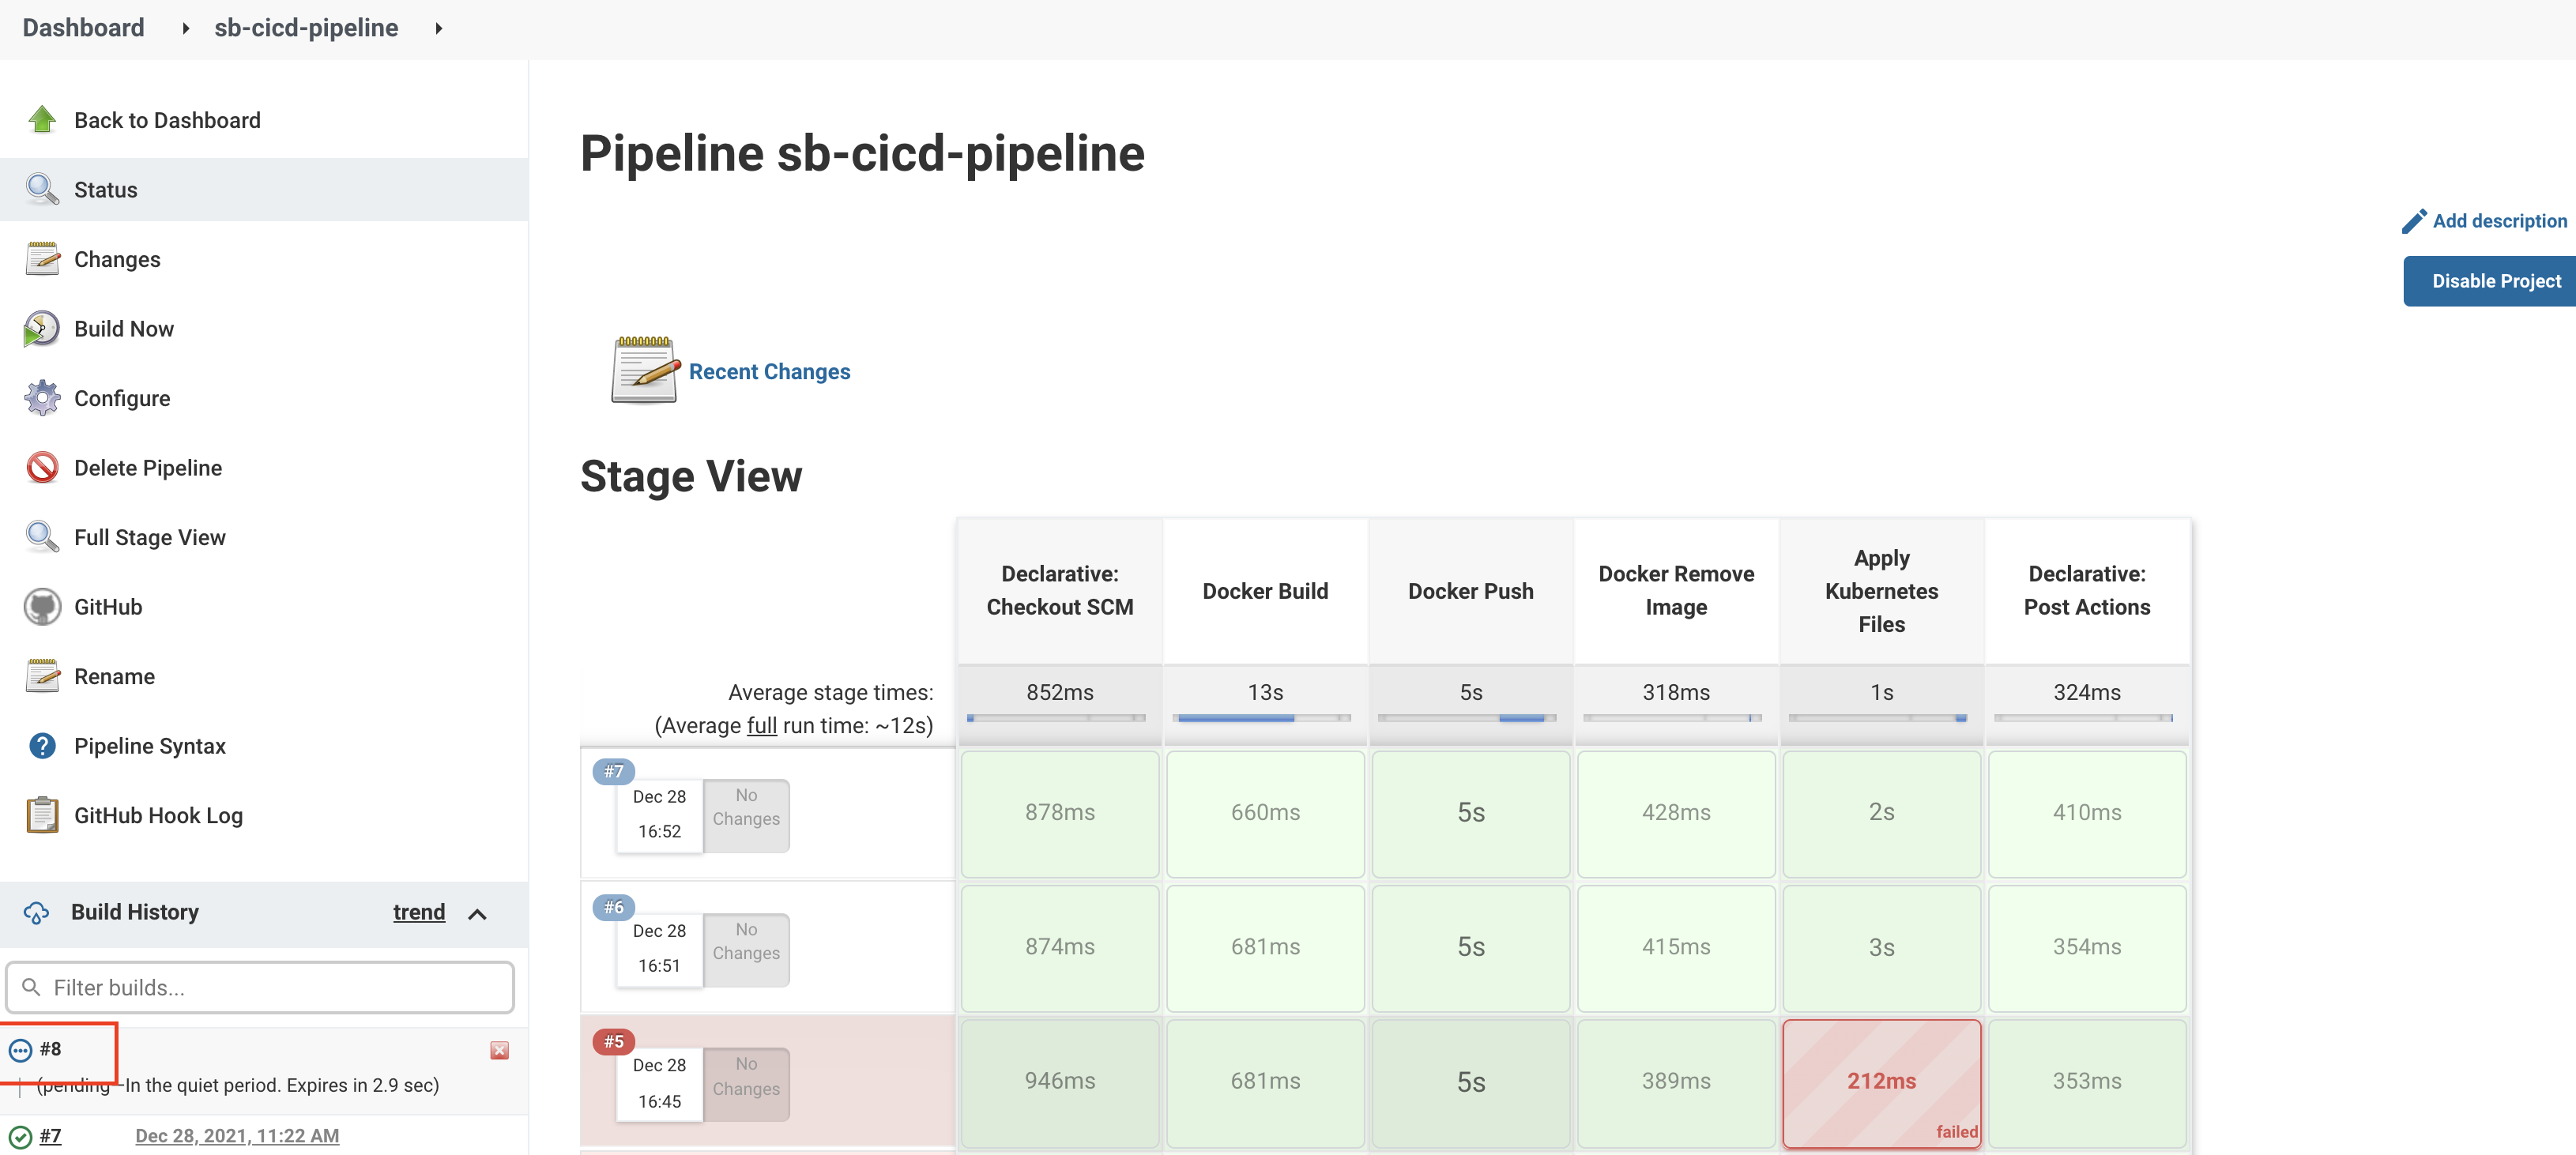
I can see Jenkins has picked up changes and started to build new commits. (Build number - 8)
Now try to access the same URL (http://169.51.203.3:30301/greet) in a browser, and we should be able to see new string content.
Congratulations!! (This time for real)😀😀 You have successfully constructed a fully-fledged CI-CD pipeline for Spring-Boot application using IBM cloud, Jenkins, Docker, Kubernetes, Slack.
Cheers
Tapen Hegde