Traefik Loadbalancer is growing in the container and microservices industry as a leader in Loadbalancing, Routing and service management. It has everything that typical load balancers like haproxy provides and a few cooler and advanced features like Auto Service detections and LetsEncrypt SSL integration and SNI support etc.
Here is the quick diagram that explains what is traefik and what it can do for you.
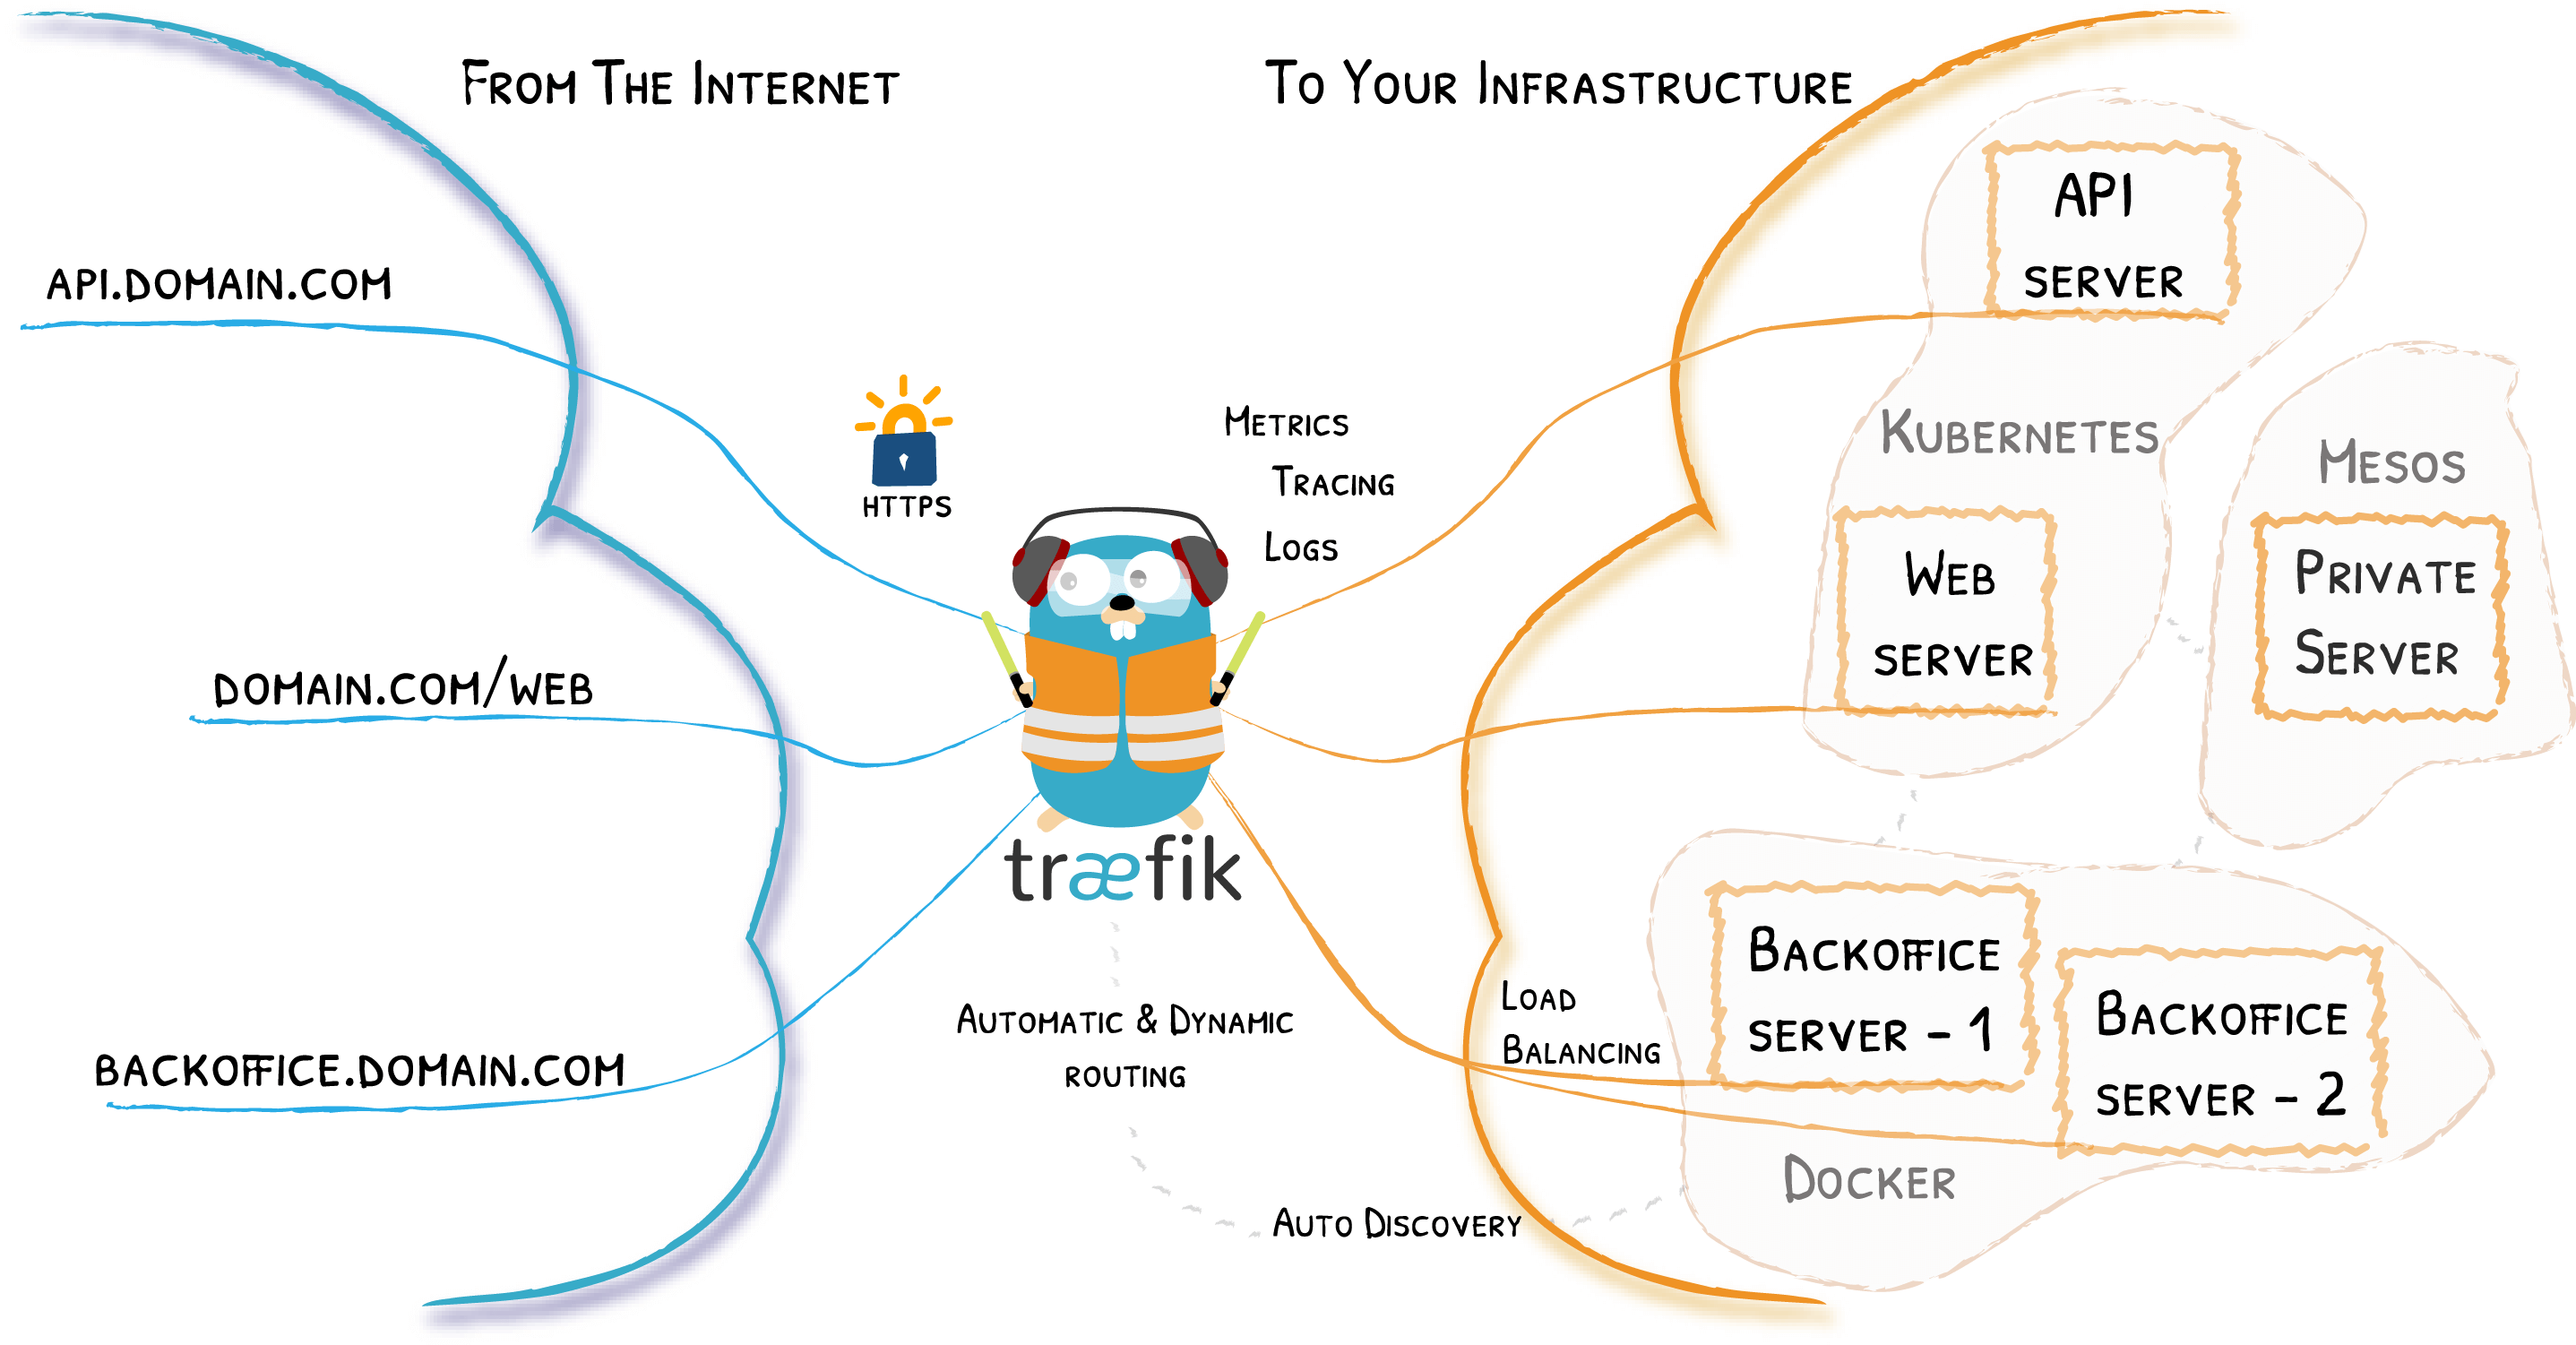
Here is the list of few important features that make traefik standout in the market
- Traefik is natively compliant with every major cluster technology, such as Kubernetes, Docker, Docker Swarm, AWS, Mesos, Marathon, and the list goes on;
- There is no need to maintain and synchronize a separate configuration file: everything happens automatically, in real-time (no restarts, no connection interruptions).
- Designed for modern infrastructure, Micro Services in mind.
- Innovative Web User Interface than any of its competitor products in the market.
- Built-in LetsEncrypt SSL Certificate provisioning is another major key factor
- Auto Services Discovery - When you add a new docker service, without any modification Traefik would reconfigure itself and your services would be ready to be used.
- TCP Support with SNI Routing & Multi-Protocol Support HTTP & TLS
- Canary Deployments and A/B testing - Know more about types of deployment in DevOps
- More Customization in terms of Routing and Redirection policies with various middleware products and services. Refer this article for more
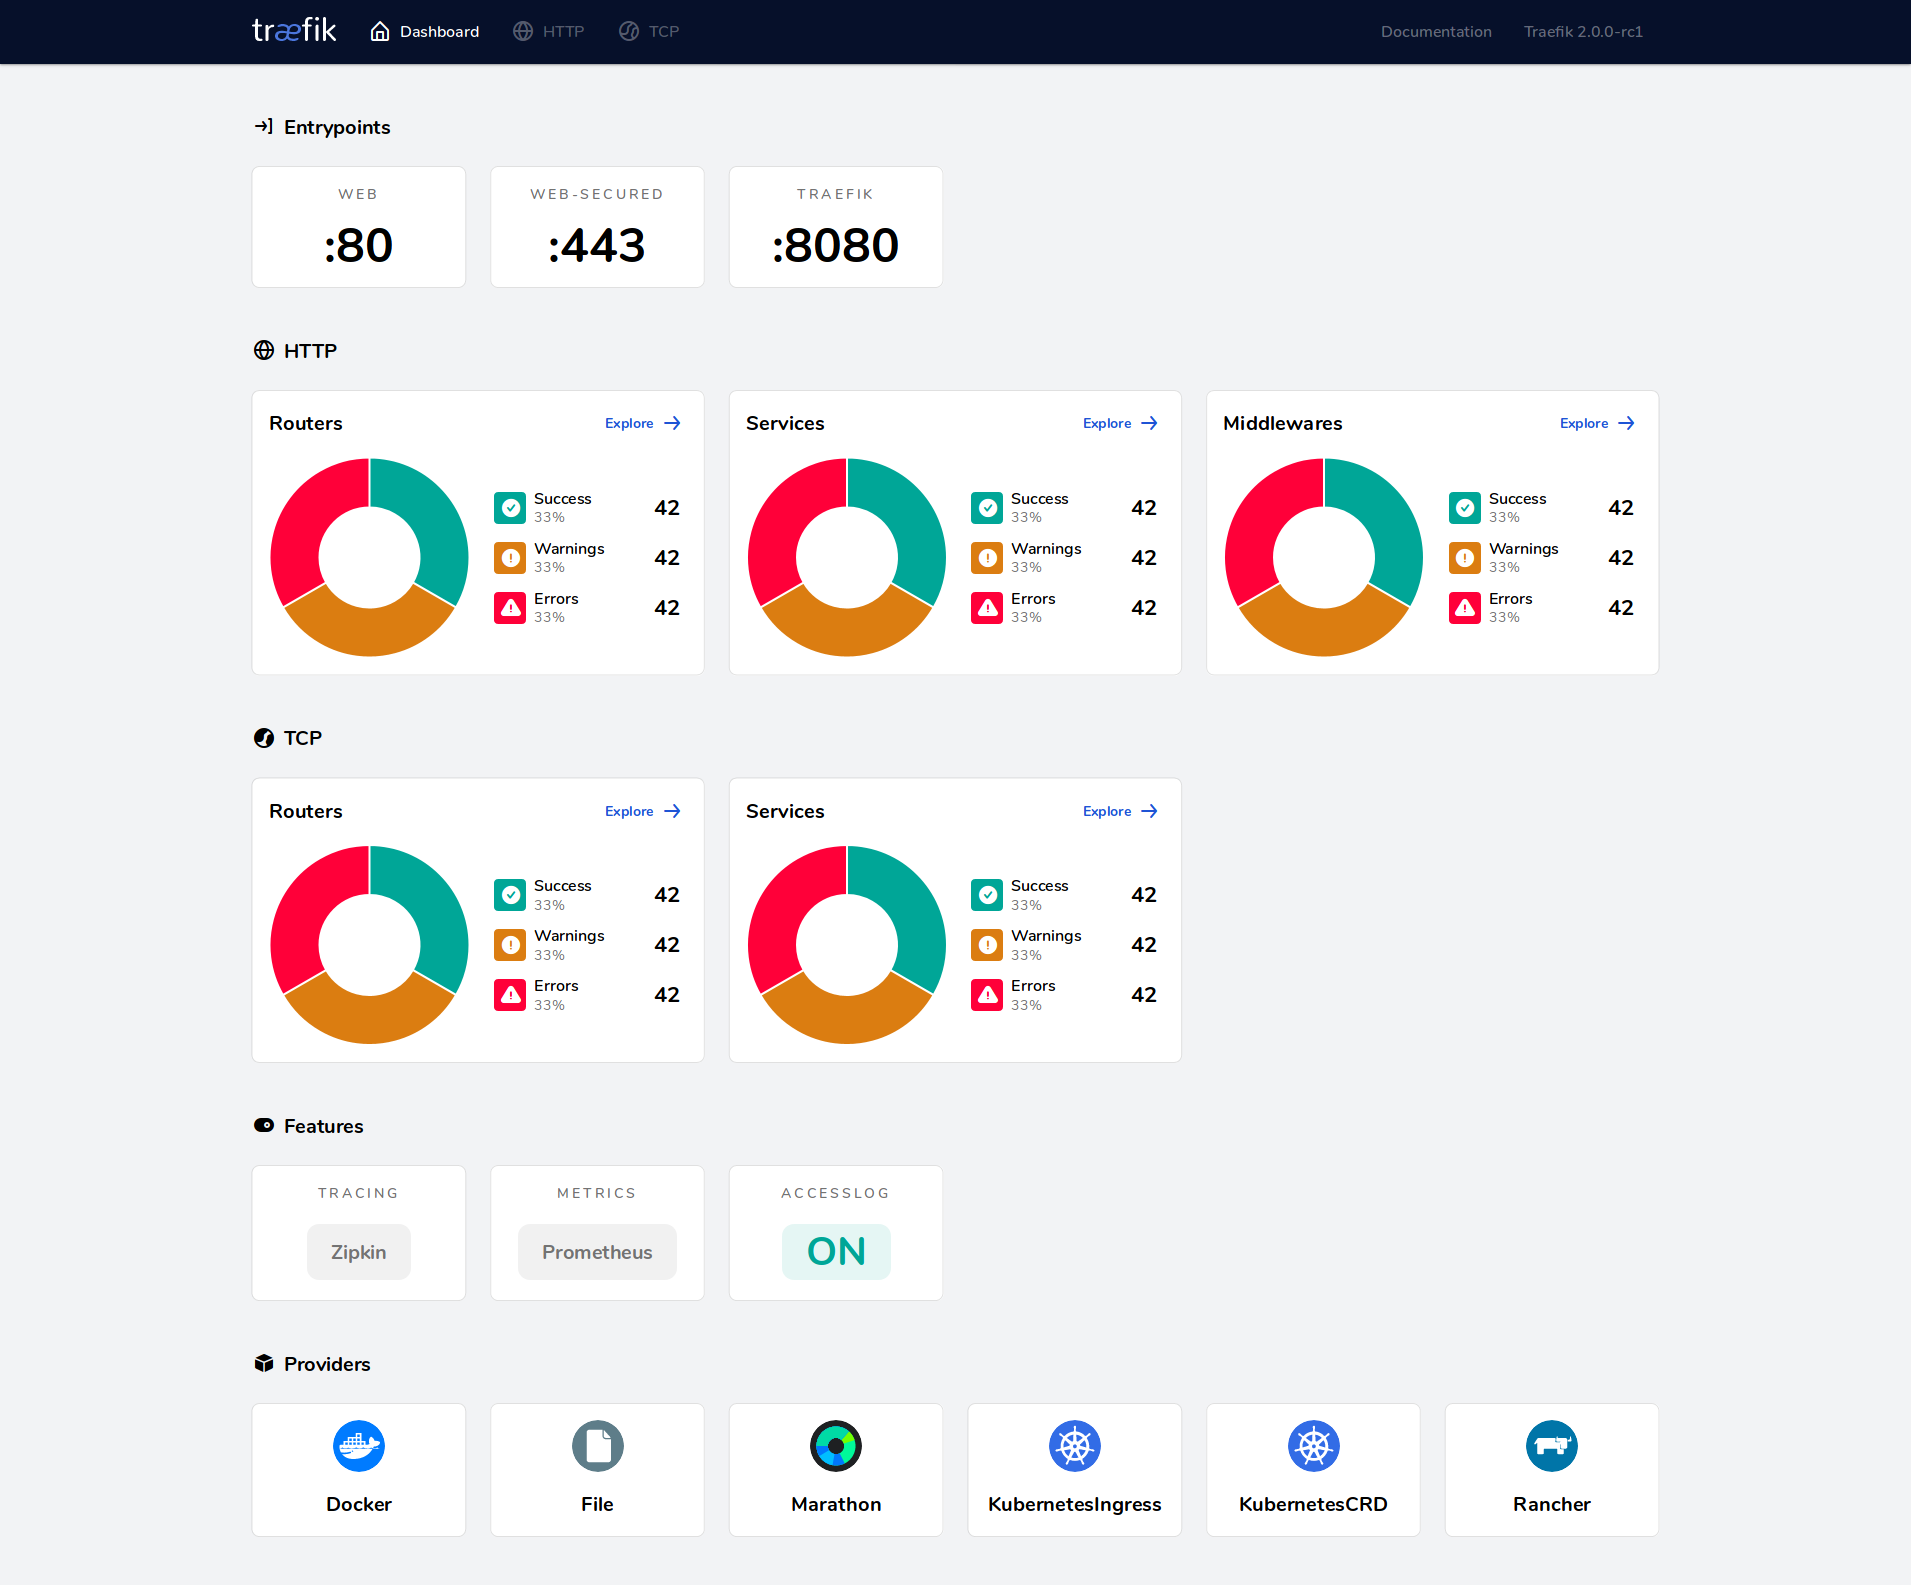
Here is a quick look of the Traefik Web UI.
Traefik Docker Testing with Docker Desktop CE
The Best way to learn something is to try it out. that's what we are going to do in this article. We are going to deploy Traefik Docker image in locally ( mac ) running Docker CE
I presume that you have a Docker CE installed and you have some basic idea on how to deploy docker image as a container
This article would help you get started with Docker if you are new to Docker and Containers
Docker Run Image as Container – Create Container From Docker Image
Onward to Creating few Containers in Docker before setting up Traefik
Before testing the Traefik Loadbalancer we need to have few applications to test it with. Without any backend how can we test the load balancer any way?
If you have a container of that sort then you can skip this step, otherwise buckle up
For this post, I am taking an Nginx Docker image and going to set up two static websites with HTML files
Creating workspace and HTML files
Let's call these applications webapp1 and webapp2
So Now we need to create two static HTML pages for our web applications.
Choose some directory in your local file system and create two directories named webapp1 and webapp2 beneath the same. In my case, /apps/docker is my workspace in which am going to create
Given below is the Tree Structure of entire workspace and I have created two index.html files inside my webapp directories
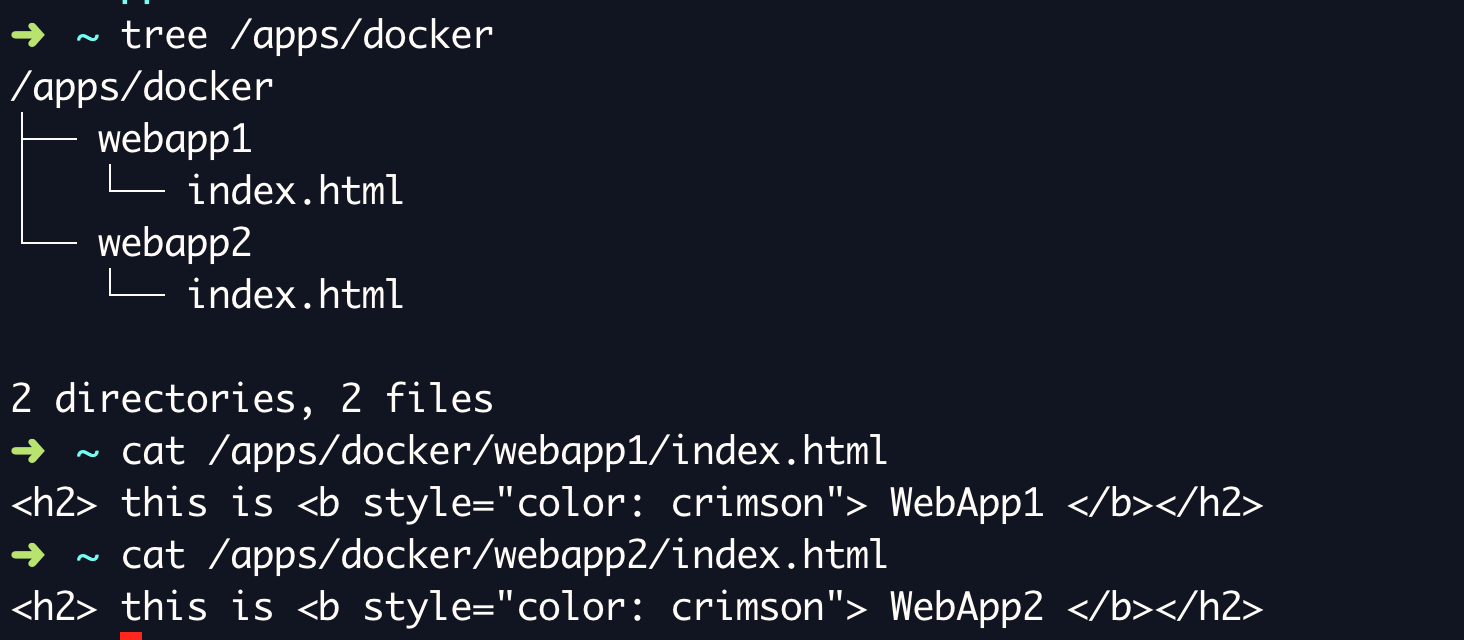
Here is the file content for the webapp1/index.html
<h2> this is <b style="color: crimson"> WebApp1 </b></h2>
Here is the file content for the webapp2/index.html
h2> this is <b style="color: crimson"> WebApp2 </b></h2>
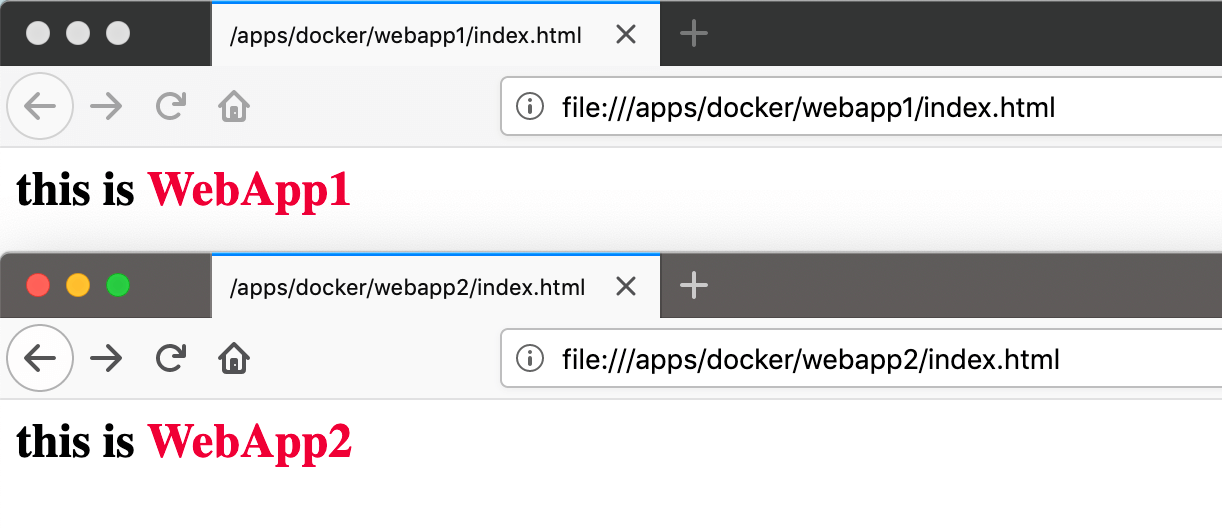
If you test this file locally in your browser the output would look something like this
Launch our web applications with NGINX Container
It is a time now to start our NGINX Containers with our customized index.html files. We are going to share the /apps/docker/webapp1 and /apps/docker/webapp2 as a Shared volume to the containers, we are creating.
here is the command to launch our containers with Shared Volumes
webapp1
docker run – name webapp1 -v
/apps/docker/webapp1
:/usr/share/nginx/html:ro -d nginx
webapp2
docker run – name webapp2 -v
/apps/docker/webapp2
:/usr/share/nginx/html:ro -d nginx
You can see that we are sharing the directories to the containers and it would be mounted as /usr/share/nginx/html inside the container where NGINX default document root is pointed to.
So when the NGINX comes up inside the container we would be able to access our Application.
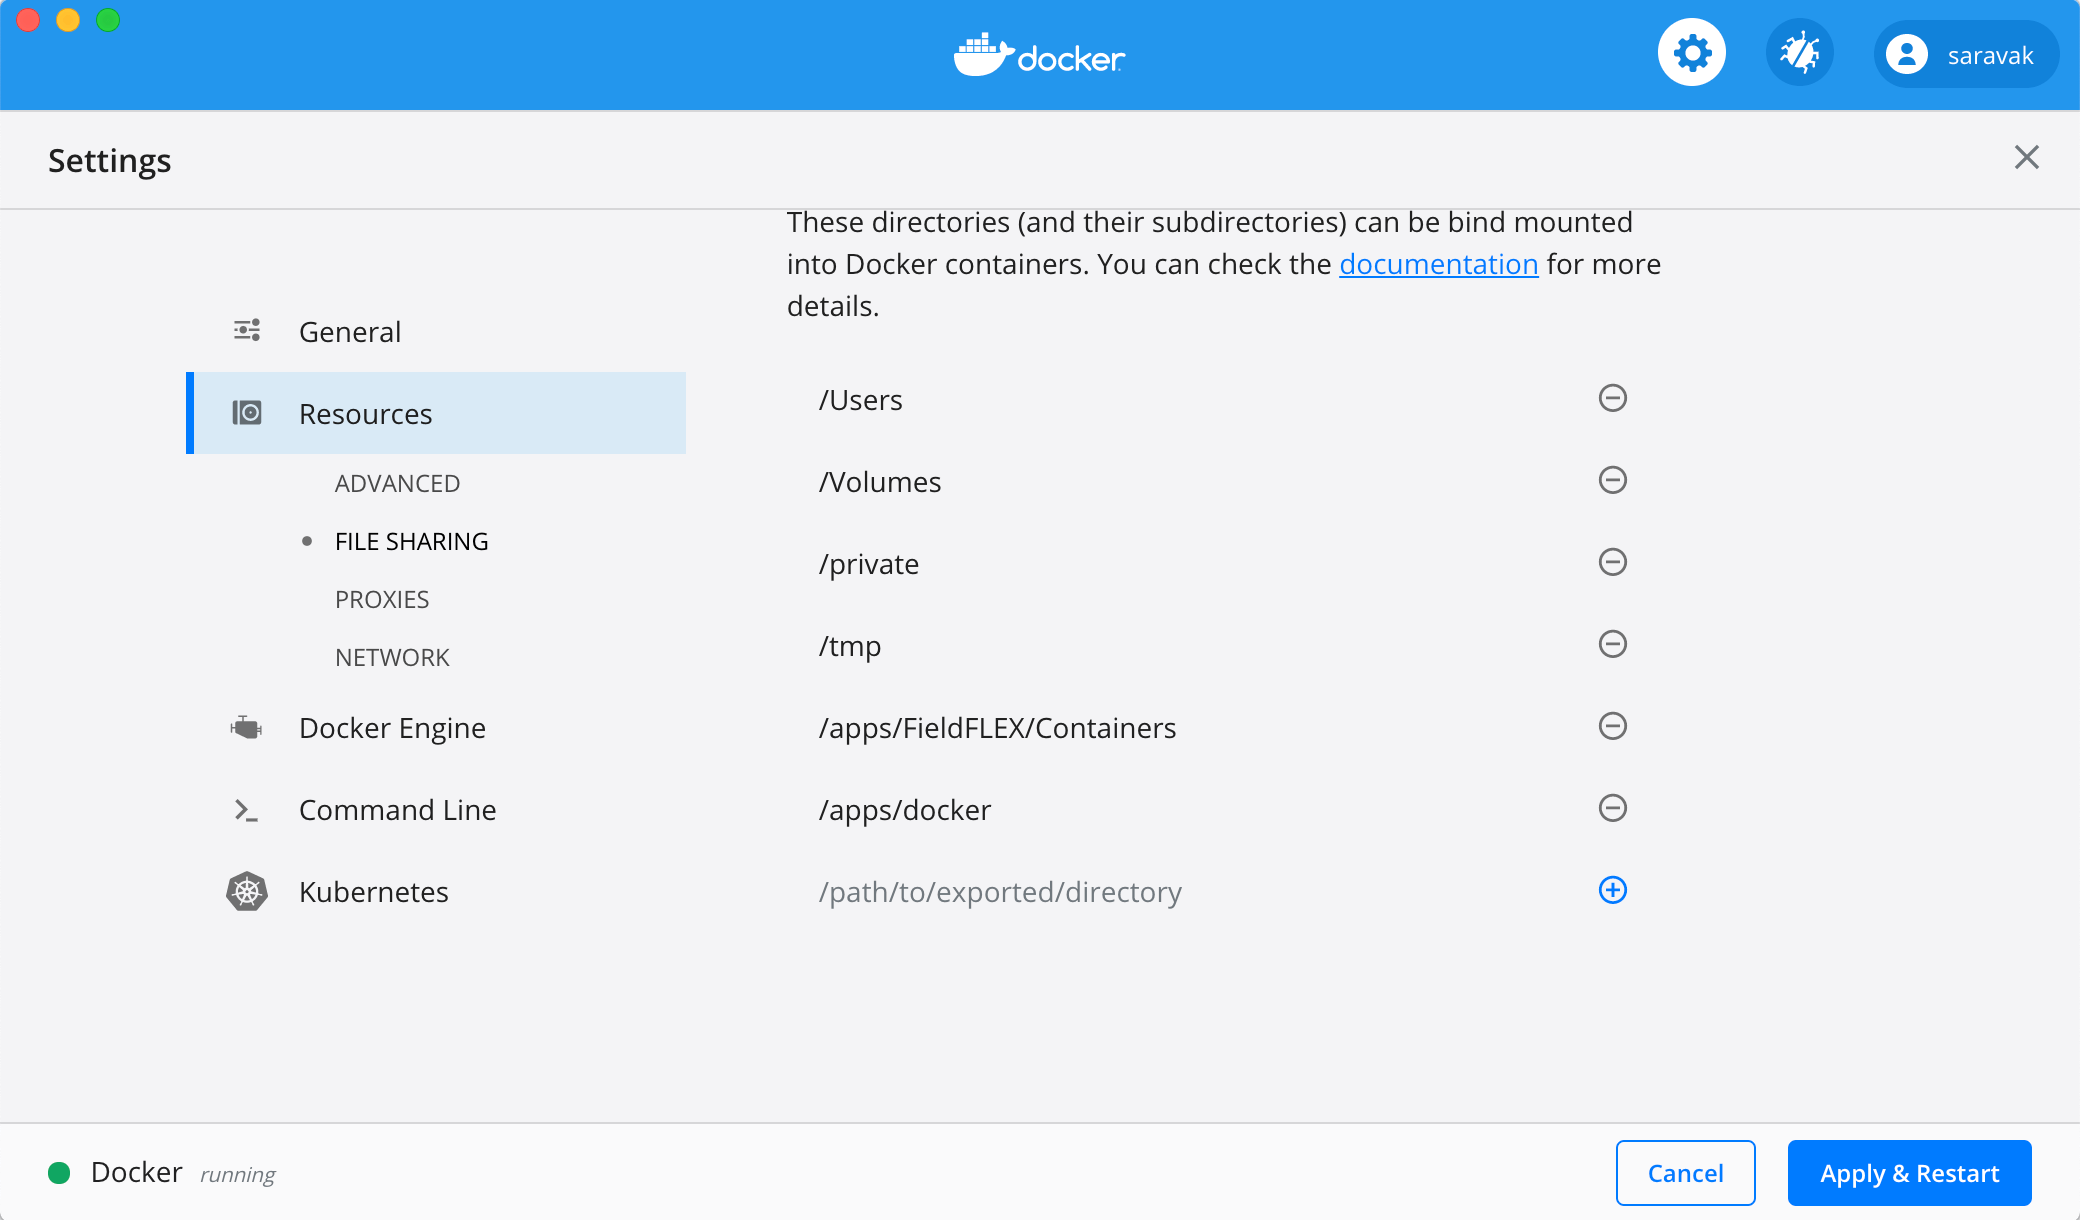
For Mac Users:
You have to share these directories using the Docker File Sharing option available in your Docker Desktop Preferences.
Docker -> Preferences... -> File Sharing.
Once you have shared the FileSystem, you have to restart your DockerCE for the changes to take effect.
Note that we have not done any port forwarding to local. so technically the webapp1 and webapp2 should not be accessible from the host (mac/windows).
Because we are going to use traefik to handle all our incoming calls efficiently and with the power of Traefik, we achieve any level of routing and load balancing.
With no further ado, let us start traefik
Launch the Traefik Container
Traefik comes with a lot of features and capabilities as mentioned earlier. But for a starter, let us start with having a Simple Host-based routing with Traefik
Before launching the traefik, Let us create a configuration file with the default rule for Traefik to start doing its magic.
Here is the basic level traefik configuration file with host-based routing enabled to all other containers running on the local. It would auto-detect our webapp1 and webapp2 and would also detect any container that we might start in the future
In Kubernetes, this same configuration auto-detection and forwarding is known as Ingress Controller
## traefik.yml

# Docker configuration backend
providers:
  docker:
    defaultRule: "Host(`{{ trimPrefix `/` .Name }}.dev.local`)"

# API and dashboard configuration
api:
  insecure: true
Save this file as traefik.yml and run the following docker command to start our beloved traefik
docker run -d -p 8080:8080 -p 80:80 \
-v $PWD/traefik.yml:/etc/traefik/traefik.yml \
-v /var/run/docker.sock:/var/run/docker.sock – name traefik \
traefik:v2.0
If you look at the preceding docker run command closely you would see that we are sharing the docker.sock file with traefik container along with the configuration file named traefik.yml
this file serves as a repository and configuration for docker and docker runtime containers. this is how traefik is able to auto-detect the containers. to know more about docker.sock file refer this post
I have two nginx containers and traefik running for now so technically traefik would be able to detect all these containers.

If you have tools like dnsmasq installed in your Mac/Windows you can easily achieve the wildcard based domain name like *.dev.local to 127.0.0.1 like that
Otherwise, let us use our default option of editing the /etc/hosts file and add the below entries
127.0.0.1 webapp2.dev.local
127.0.0.1 webapp1.dev.local
That's all.
Testing the Setup
If you have done everything right. You should be able to access your application using webapp1.dev.local and webapp2.dev.local
How this names are taken ? webapp1 and webapp2
webapp1 and webapp2 are the container names we have given with
--nameparameter while starting our container. If you have given someother name while starting the container this would not work.
Also, you can reach the beautiful frontend of Traefik using http://localhost:8080 URL, as you have forwarded this port 8080 when you were launching the container
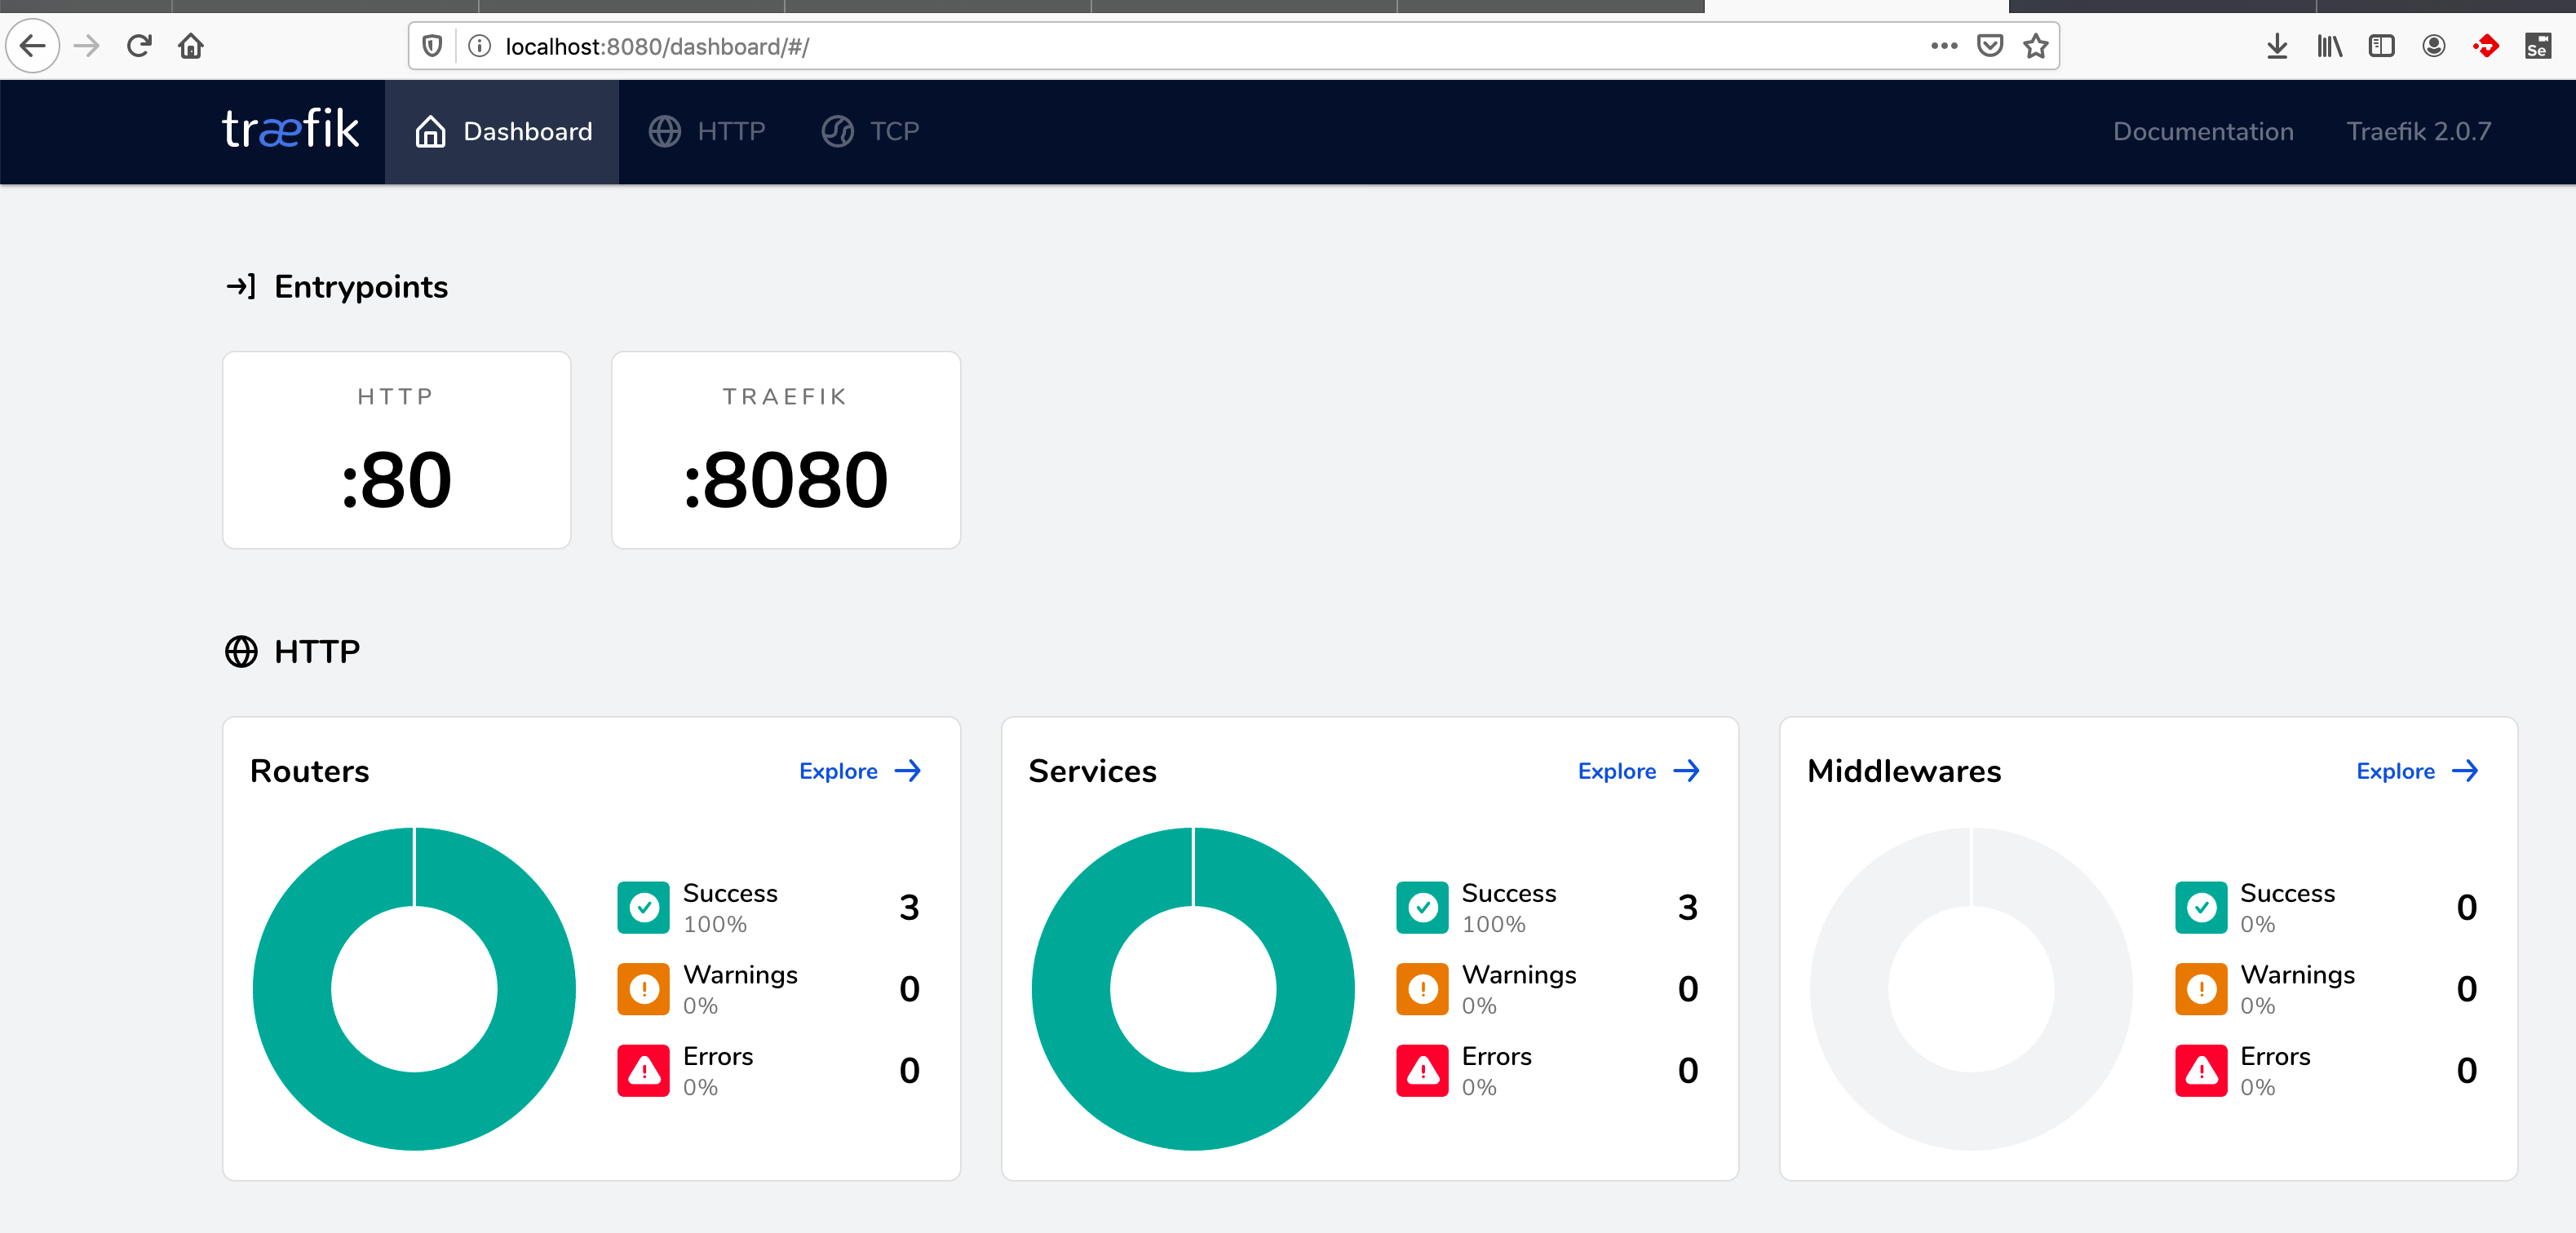
If you click on the HTTP tab on the WEB UI you can view the services listed
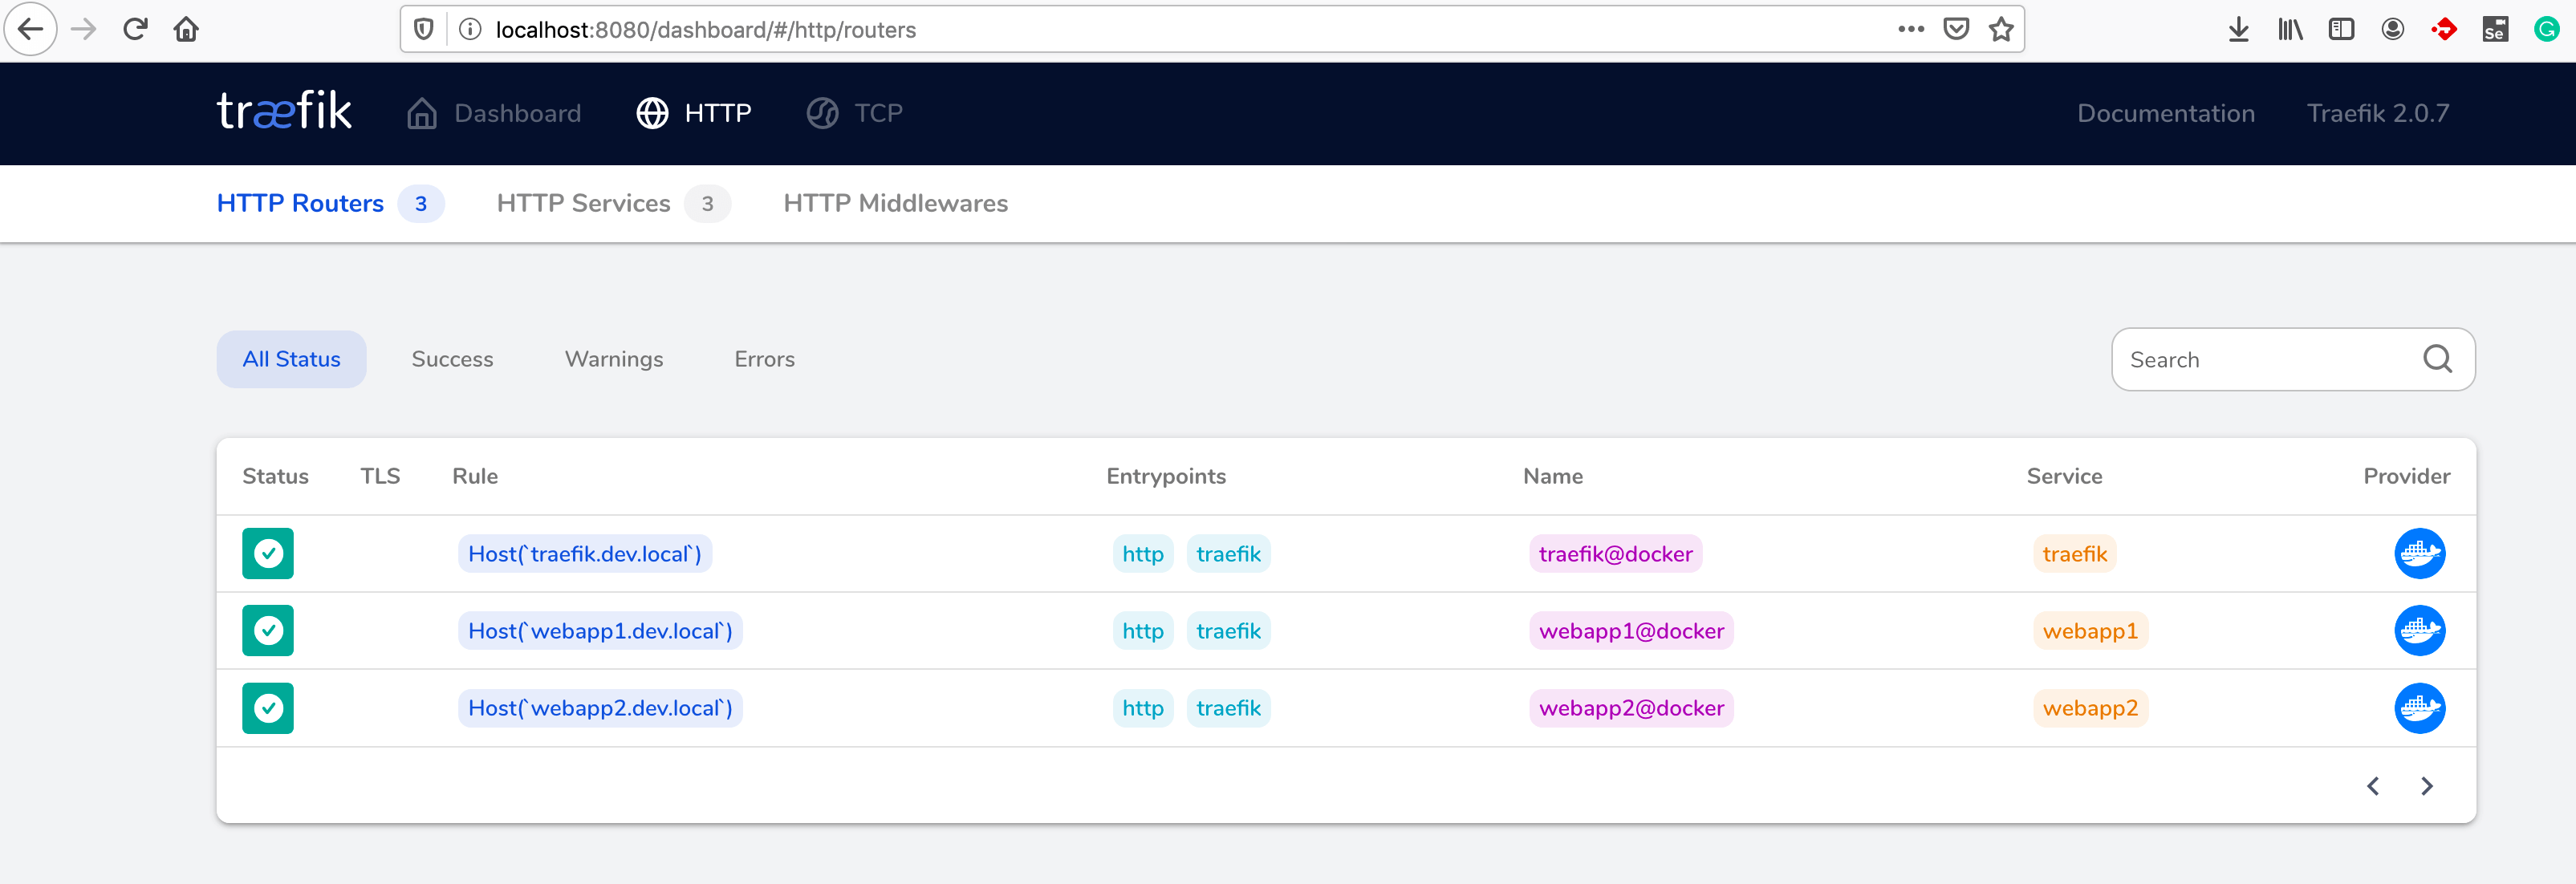
Now we can test the application in our browser and in my side results were good as expected.

Test with CURL host header field
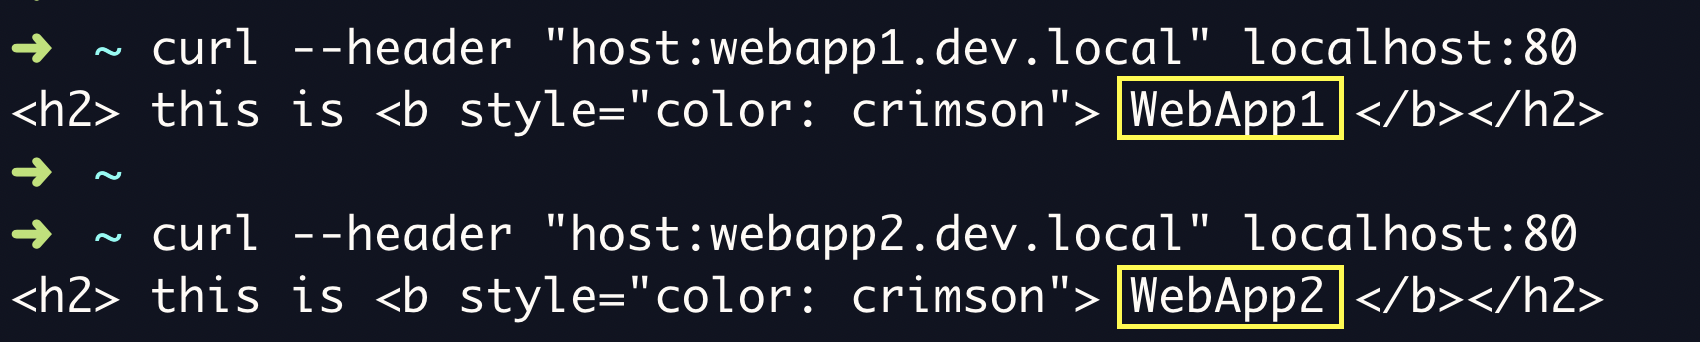
For some reason, you don't want to update the /etc/hosts file and still want to test this setup. You can use the CURL command with the host header field to achieve the same result.
WebServers and Proxy Servers like traefik gets its name from the host header field so if you are customizing the host header and send a request to your localhost:80 you would be able to reach the site you have intended to reach
to reach webapp1
curl – header "host:webapp1.dev.local" localhost:80
to reach webapp2
curl – header "host:webapp2.dev.local" localhost:80
You can see that we are actually making a call to the http://localhost here but we are able to reach our applications, this is host-based virtual hosting is achieved
Testing the Auto Detection of Traefik
Now we should test if traefik is auto-detecting if we are launching a new container in our system. This time let us take another tomcat application container image from docker hub.
Go to the terminal or command line and launch a new container and name the container as tomcat according to our rule, traefik should auto-detect this container and make it available at tomcat.dev.local
docker run -d – name tomcat saravak/tomcat8
without any hostname update you are ready to test this with curl
➜ ~
curl – header "host:tomcat.dev.local" localhost/SampleWebApp/
<!DOCTYPE html>
<!--
To change this license header, choose License Headers in Project Properties.
To change this template file, choose Tools | Templates
and open the template in the editor.
-->
<html>
<head>
<title>SampleWebApp</title>
<meta charset="UTF-8">
<meta name="viewport" content="width=device-width, initial-scale=1.0">
</head>
<body>
<h2>Sample Web Application To Deploy and Test</h2>
<br>
<div> click <a href="SnoopServlet">Click to Invoke a SnoopServlet</a></div>
<br>
<br>


</body>
</html>
Or you can update the /etc/hosts file and add an entry like this
127.0.0.1 tomcat.dev.local
this is my sample Tomcat based Application which would reveal some useful information including the container hostname and the ip address, this would match with your docker ps results.
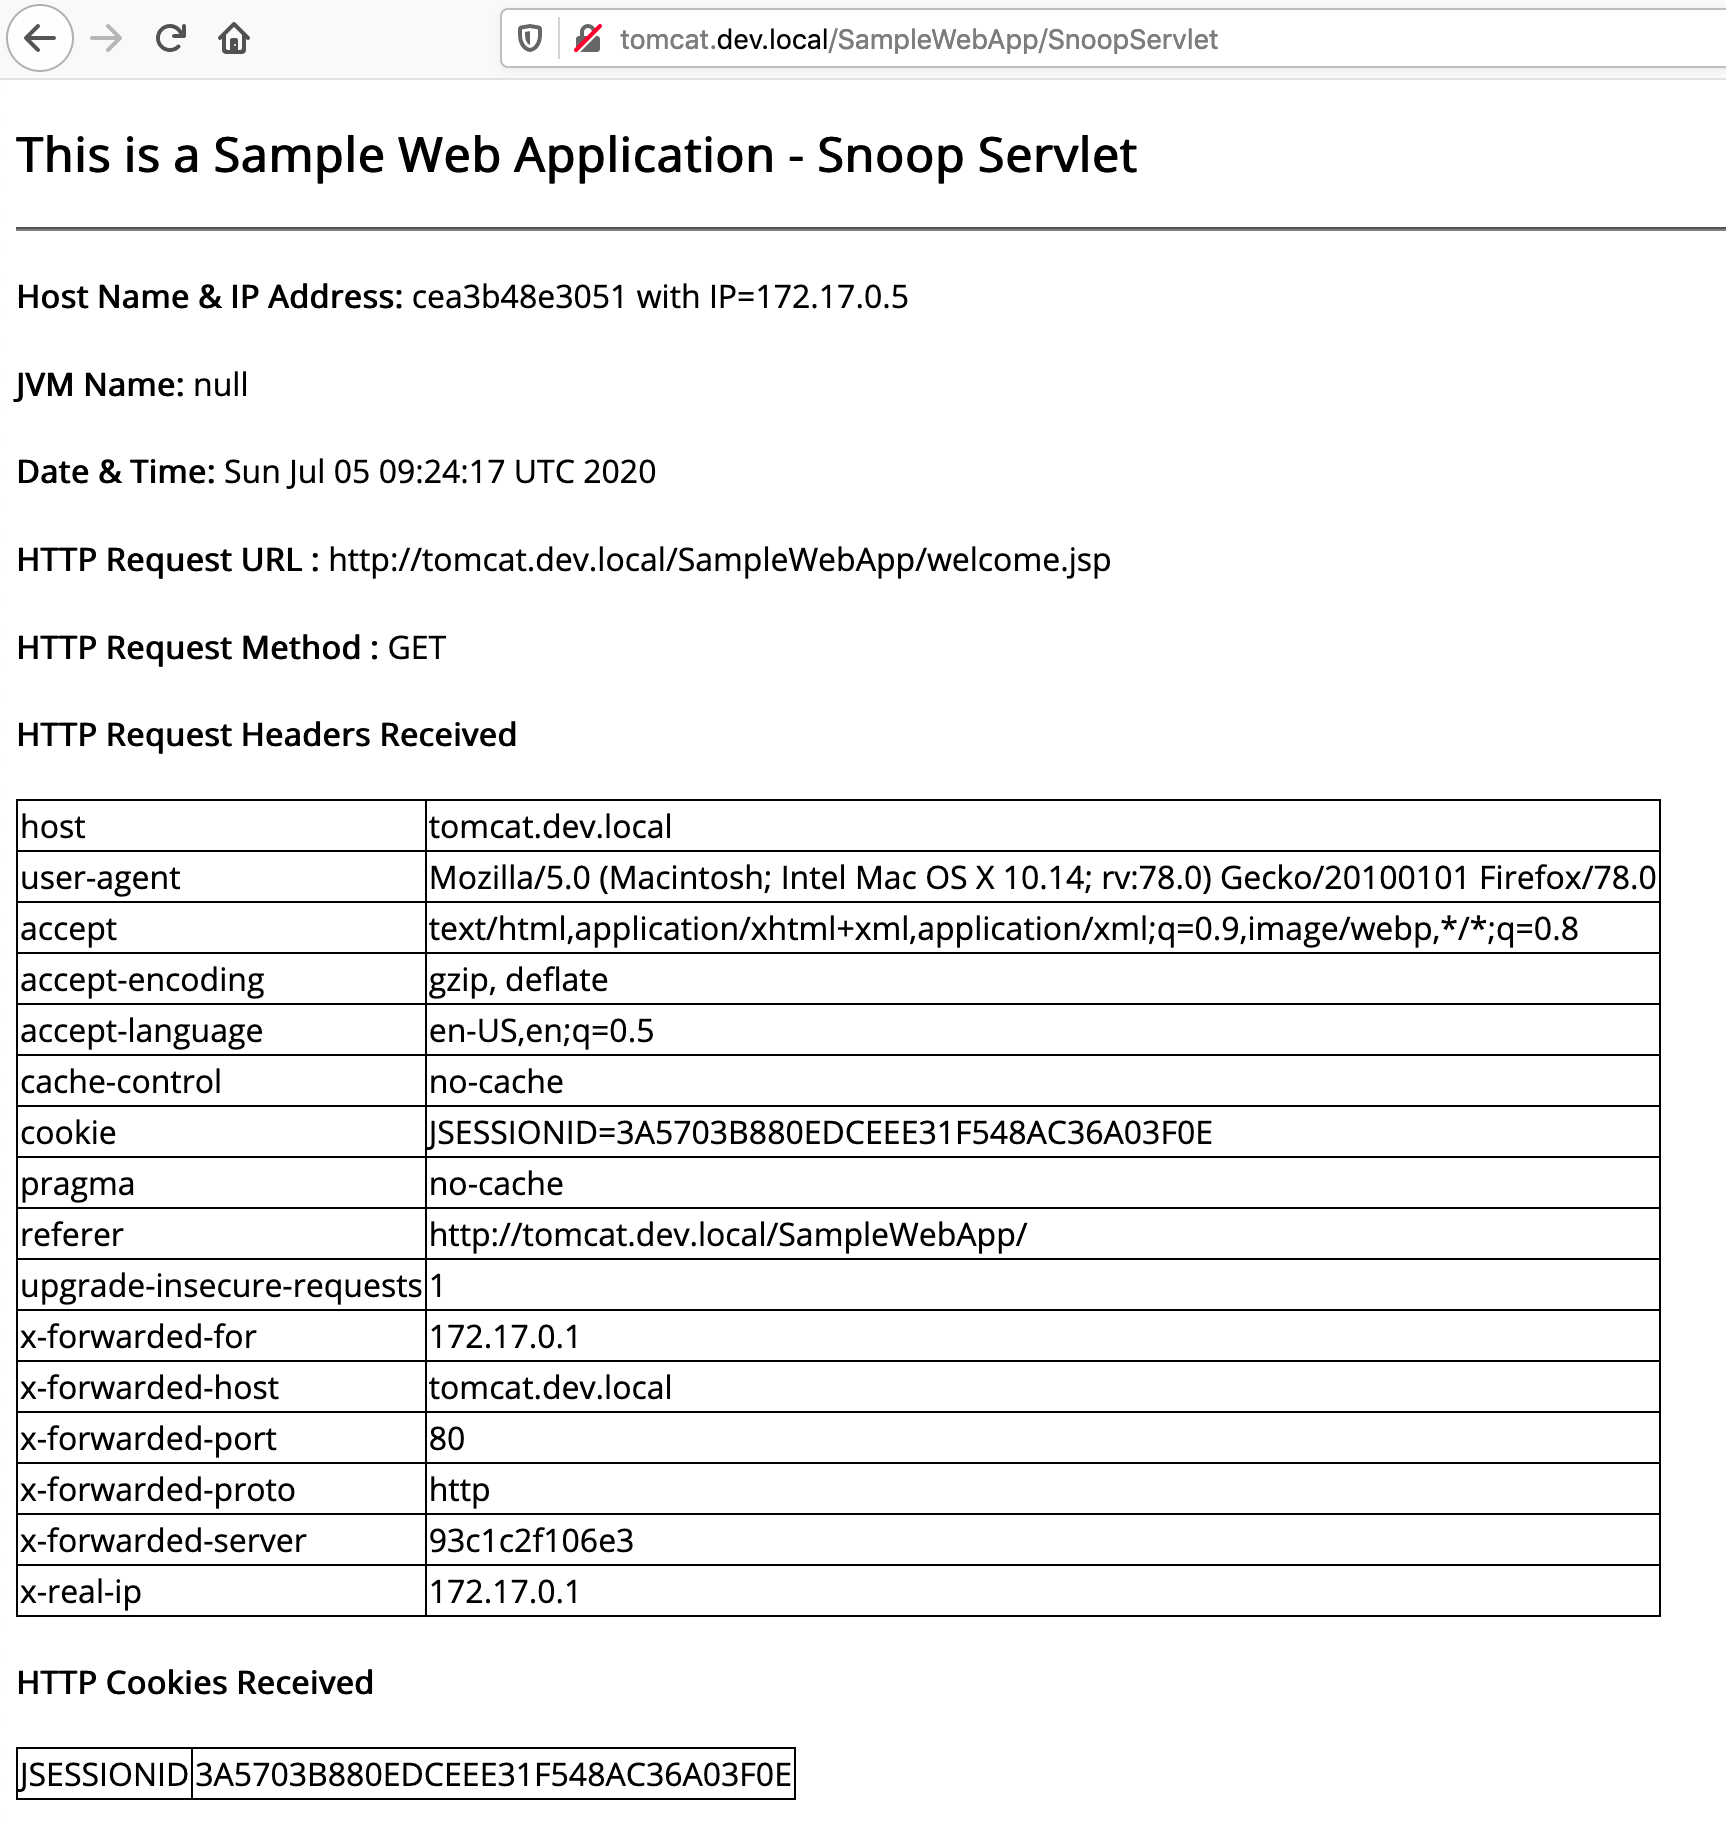
This is how the Auto-detection feature of traefik works. Mission accomplished. Henceforth without having to open multiple ports and port forwardings. You can keep launching the containers and traefik would take care of the rest for you.
I think this is enough for the introduction article, In my next article, we will cover more about other rules and options available with Traefik including SSL.
Until then. Stay Safe, Stay Connected.!
Cheers
SaravAK

Follow me on Linkedin My Profile Follow DevopsJunction onFacebook orTwitter For more practical videos and tutorials. Subscribe to our channel
Signup for Exclusive "Subscriber-only" Content