In this post, we are going to share a WLST jython script and an ansible playbook to create JMS Queues in weblogic 12c
Here is the simple jython/python WLST script.
The script is simply designed to create and set up a fully functioning JMS Queue in weblogic. It creates all the dependencies before creating the queue as follows.
- JMS Server
- JMS Module
- SubDeployment
this also takes care of targeting each aforementioned resources.
JMS Server targeted to a JVM - Managed Server instance
Sub Deployment targeted to a JMS Server and Queue is targeted to the Sub Deployment using Advanced Targeting.
The WLST - Jython script to create JMS Server, Module, Queue
you can copy the content of the script given below to and save it as a file with *.py file extension on your Server where weblogic is running
Please update the variables to suit your needs with your environment information and your requirement.
admin_user = "weblogic"
admin_pass = "weblogic1"
admin_server_url = "t3://localhost:8001"
jmsservername = "jmsserver-ms2"
jmsmodulename = "jmsmodule2"
queuename = "queue2"
queuejndiname = "jndi/queue2"
jmsservertarget = "ms2"
sdtarget = "jmsserver-ms2"
sdname = "queue2sd"


connect(admin_user,admin_pass,admin_server_url)
edit()
startEdit()

cd('/')
cmo.createJMSServer(jmsservername)

cd('/JMSServers/'+jmsservername)
set('Targets',jarray.array([ObjectName('com.bea:Name='+jmsservertarget+',Type=Server')], ObjectName))

cd('/')
cmo.createJMSSystemResource(jmsmodulename)

cd('/JMSSystemResources/'+jmsmodulename)
set('Targets',jarray.array([ObjectName('com.bea:Name='+jmsservertarget+',Type=Server')], ObjectName))
cmo.createSubDeployment(sdname)

cd('/JMSSystemResources/'+jmsmodulename+'/JMSResource/'+jmsmodulename)
cmo.createQueue(queuename)

cd('/JMSSystemResources/'+jmsmodulename+'/JMSResource/'+jmsmodulename+'/Queues/'+queuename)
cmo.setJNDIName(queuejndiname)
cmo.setSubDeploymentName(queuename)

cd('/JMSSystemResources/'+jmsmodulename+'/SubDeployments/'+sdname)
set('Targets',jarray.array([ObjectName('com.bea:Name='+jmsservername+',Type=JMSServer')], ObjectName))

save()
activate()
In my case, the file name is jmscreate.py
You can navigate to $DOMAIN_HOME/bin/ and execute the setDomainEnv.sh
In my case the domain_home is /opt/weblogic/domains/mwidomain/
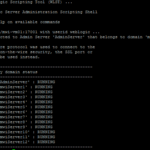
Once the Environment is set correctly. you can run the script with the following command
java weblogic.WLST jmscreate.py
Ansible Playbook version (role)
This has been designed as an Ansible Role since it has a template and variables along with it. Ansible role is an efficient way to create Ansible playbooks and distribute them.
You can download the role directory from my GitHub repo
For better understanding, I will keep the content of the files here as well.
this is the tree structure of my role directory
setup-jms
├── README.md
├── defaults
│   └── main.yml
├── files
├── handlers
│   └── main.yml
├── meta
│   └── main.yml
├── tasks
│   └── main.yml
├── templates
│   └── createjms.j2
├── tests
│   ├── inventory
│   └── test.yml
└── vars
    └── main.yml
tasks/main.yml
A list of tasks executed as part of this role. A Main playbook
---
# tasks file for setup-jms
- name: Copy the file with template feature
  tags: templatecopy
  become: yes
  become_user: "{{ userid }}"
  template:
     src: "{{ item.src }}"
     dest: "{{ oracle_home }}/{{ item.dest }}"
     mode: 0755
  with_items:
    - { src: 'createjms.j2', dest: 'createjms.py' }

- name: Create JMS resources
  tags: jmscreate
  become: yes
  become_user: "{{ userid }}"
  shell:  "source {{oracle_home}}/domains/{{domain_name}}/bin/setDomainEnv.sh && java weblogic.WLST {{ oracle_home }}/createjms.py"
  register: jmscreate
  args:
    chdir: "{{ oracle_home }}"
  # when: "{{ inventory_hostname == groups['launched'][0] }}"
  environment:
          USER_MEM_ARGS: "-Djava.security.egd=file:/tmp/big.random.file"
          CONFIG_JVM_ARGS: "-Djava.security.egd=file:/tmp/big.random.file"
vars/main.yml
Variables are stored in this yaml file required for the role
---

# Paths
oracle_home: "/opt/oracle"
wlshome: "/opt/oracle/wlserver"
domainroot: "/opt/oracle/domains"
domain_name: "mwidomain"

# User ID of weblogic process
userid: weblogic

# vars file for setup-jms
admin_user: weblogic
admin_pass: weblogic1
admin_listen_port: 8001
admin_server_url: t3://localhost:8001
jmsservername: jmsserver-ms2
jmsmodulename: jmsmodule2
queuename: queue2
queuejndiname: jndi/queue2
jmsservertarget: ms2
sdname: queue2sd
sdtarget: jmsserver-ms2
templates/createjms.j2
Jinja 2 templated version of the createjms jython file. the variables defined in the vars/main.yml would be replaced in this template during the copy to a remote server
admin_user = "{{admin_user}}"
admin_pass = "{{admin_pass}}"
admin_server_url = "{{admin_server_url}}"
jmsservername = "{{jmsservername}}"
jmsmodulename = "{{jmsmodulename}}"
queuename = "{{queuename}}"
queuejndiname = "{{queuejndiname}}"
jmsservertarget = "{{jmsservertarget}}"
sdtarget = "{{sdtarget}}"
sdname = "{{sdname}}"


connect(admin_user,admin_pass,admin_server_url)
edit()
startEdit()

cd('/')
cmo.createJMSServer(jmsservername)

cd('/JMSServers/'+jmsservername)
set('Targets',jarray.array([ObjectName('com.bea:Name='+jmsservertarget+',Type=Server')], ObjectName))

cd('/')
cmo.createJMSSystemResource(jmsmodulename)

cd('/JMSSystemResources/'+jmsmodulename)
set('Targets',jarray.array([ObjectName('com.bea:Name='+jmsservertarget+',Type=Server')], ObjectName))
cmo.createSubDeployment(sdname)

cd('/JMSSystemResources/'+jmsmodulename+'/JMSResource/'+jmsmodulename)
cmo.createQueue(queuename)

cd('/JMSSystemResources/'+jmsmodulename+'/JMSResource/'+jmsmodulename+'/Queues/'+queuename)
cmo.setJNDIName(queuejndiname)
cmo.setSubDeploymentName(queuename)

cd('/JMSSystemResources/'+jmsmodulename+'/SubDeployments/'+sdname)
set('Targets',jarray.array([ObjectName('com.bea:Name='+jmsservername+',Type=JMSServer')], ObjectName))

save()
activate()
Ansible Galaxy Version
You could directly install the role from Ansible Galaxy as well by executing the following command.
You can later refer the role name aksarav.weblogicjmsansible in your playbook under roles section
ansible-galaxy install aksarav.weblogicjmsansible
How to use this Ansible role
You can create a simple playbook an abstract one and call the role by the name.
Here is the sample main playbook.yml file with the roles defined
---
- name: Weblogic JMS setup
  hosts: weblogicadminserver
  roles:
    - role: setup-jms
If you are downloading the role with ansible-galaxy you have to call the role with the globally available name
---
- name: Weblogic JMS setup
  hosts: weblogicadminserver
  roles:
    - role: aksarav.weblogicjmsansible
Validation and testing in weblogic
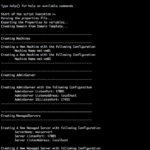
Once you have executed the playbook successfully without any issues. You can log in to weblogic console and validate if the resources are created
You can write some test messages into the Queue from your application (or) any JMS testing client and make sure the messages are arriving

Conclusion
Hope this helps you and am working on creating a weblogic JMS testing application just like my previous ActiveMQ CLI client
If you have any requirements (or) looking for consultation. please approach me
Stay connected.
Happy New Year 2021.!
Cheers
Sarav AK

Follow me on Linkedin My Profile Follow DevopsJunction onFacebook orTwitter For more practical videos and tutorials. Subscribe to our channel
Signup for Exclusive "Subscriber-only" Content