In this article, we are going to see how to achieve a Blue-Green deployment strategy with canary tests using AWS ALB and terraform scripts.
Blue-green deployments and canary tests(rolling deployment) are deployment strategies that are often used by DevOps engineers to release new software gradually
This strategy helps us to identify and mitigate the potential blast radius of a failed software release. This allows you to release new software with near-zero downtime.
If you want to learn more about the Blue-Green deployment strategy refer this article from RedHat Inc
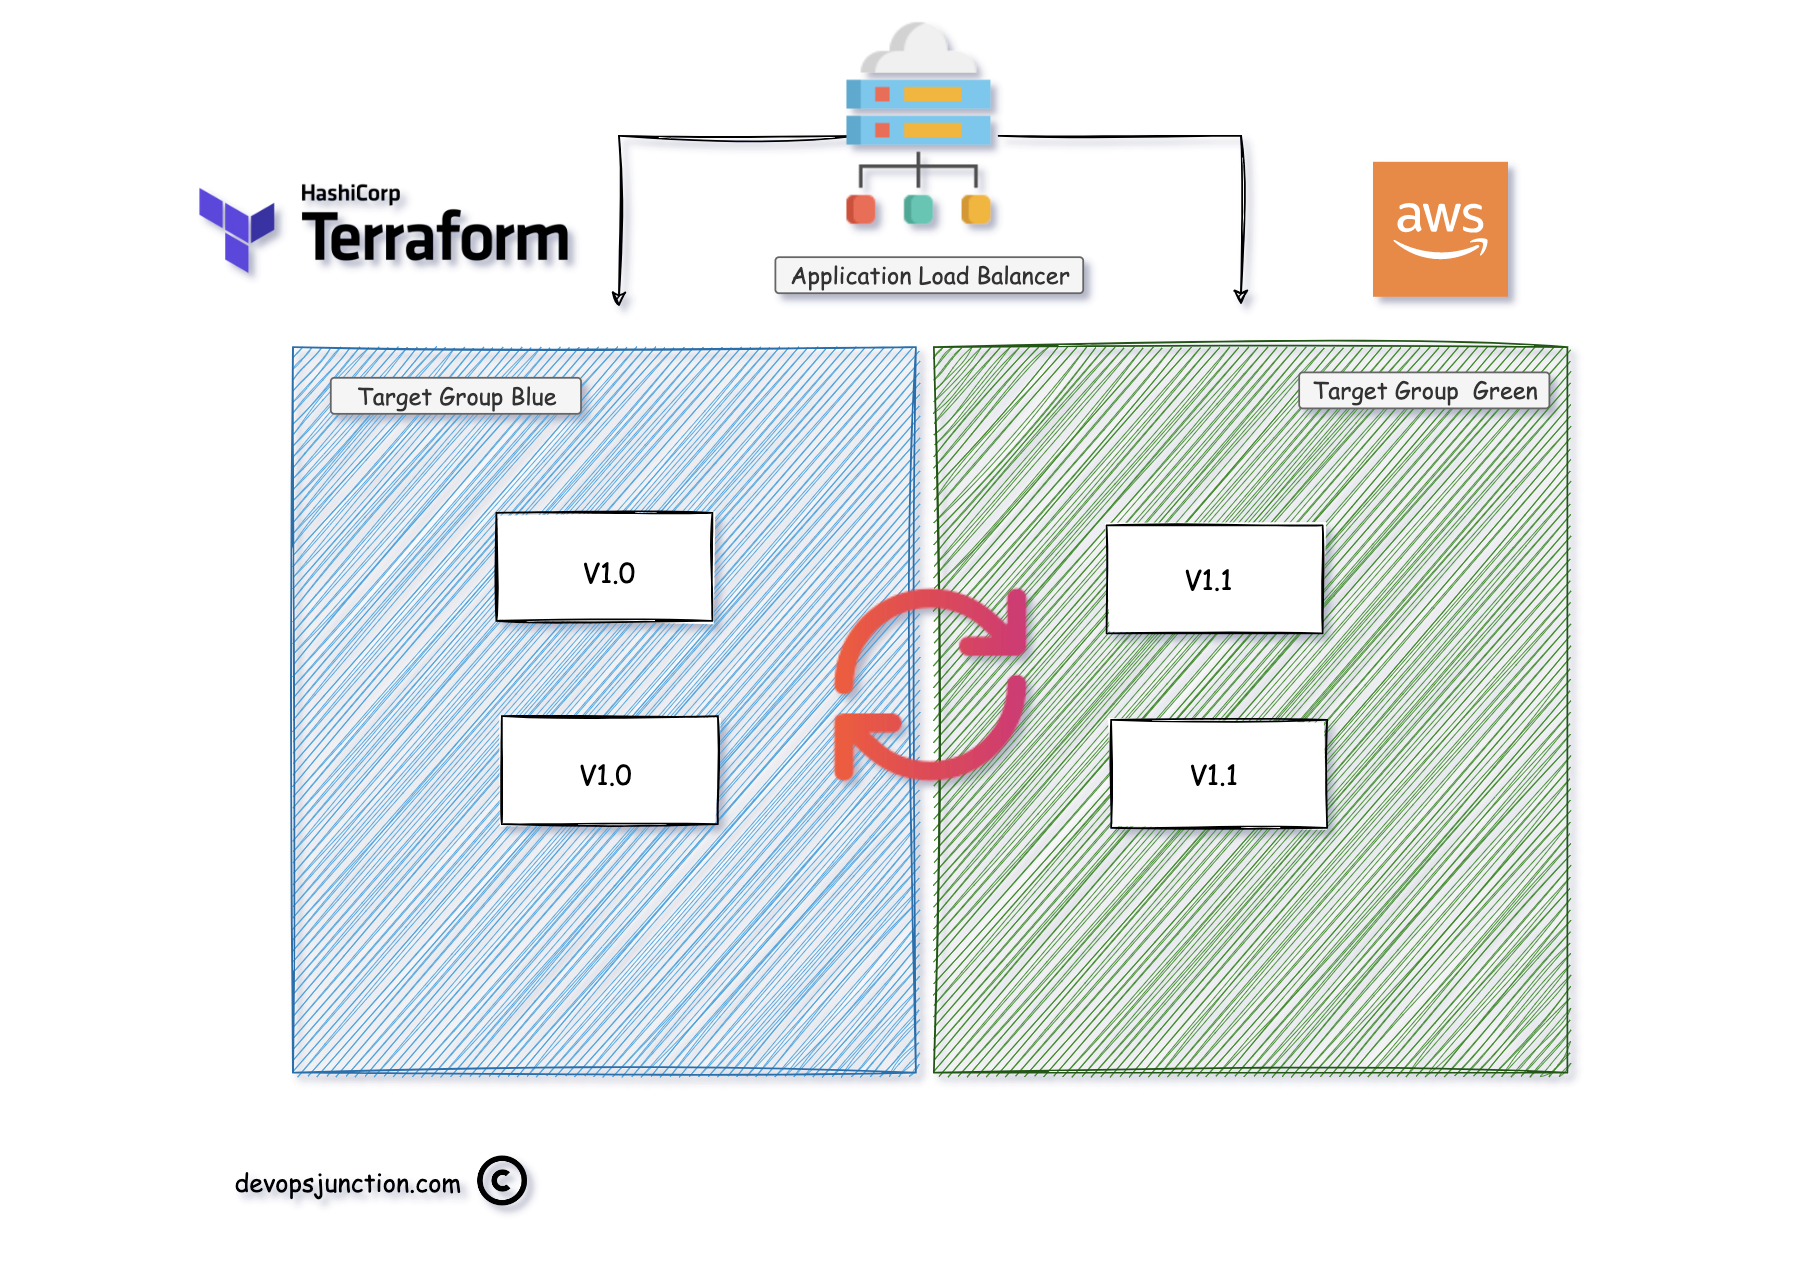
Our Application we are going to test today is behind AWS Application Load Balancer that works on Layer 7 of TCP/IP
Application Load Balancer has Target Groups where we can add two sets of servers and distribute the load with various conditions. Blue Green is one of them
The Simple logic of Blue-Green deployment is. Releasing the application gradually, starting with one pair of servers (blue) and after successful validation moving on to the other servers ( green)
This way we can minimalize the Impact even if the application has some issues.
Terraform and ALB - Blue Green
In this tutorial, We use terraform to achieve the Blue-Green deployment strategy by doing the following set of actions.
- Provision of underlying Infrastructure resources like VPC, security groups, load balancers
- Create the First set of web servers to serve as the blue environment.
- Provision a second set of web servers to serve as the green environment.
- Add feature toggles to your Terraform configuration to define a list of potential deployment strategies.
- Use feature toggles to conduct a canary test and incrementally promote your green environment.
Prerequisites
This tutorial assumes you are familiar with the standard Terraform workflow.
For this tutorial, you will need:
- Terraform 0.14+ installed locally
- an AWS account
Terraform Blue-Green Deployment Implementation
In your local system, Create a directory with the name blue-green-deploymentthis would serve as our workspace where all the terraform code files would be kept.
Going forward this directory would be referred as parent folder
mkdir blue-green-deployment
cd blue-green-deployment
These are the list of files we are going to create.
main.tfcontains the configuration to deploy this tutorial's VPC, security groups, and load balancersvariables.tfdefines variables used by the configuration such as region, CIDR blocks, number of subnets, etc- blue.tf contains the configuration to deploy 2 AWS instances and start a web server. These instances represent a sample application's "version 1.0".
init-script.shcontains the script to start the web server.versions.tfcontains aterraformblock that specifies the Terraform binary version and AWS provider version
variables.tf
variable "region" {
  description = "The region Terraform deploys your instances"
  type        = string
  default     = "us-west-2"
}

variable "vpc_cidr_block" {
  description = "CIDR block for VPC"
  type        = string
  default     = "10.0.0.0/16"
}

variable "enable_vpn_gateway" {
  description = "Enable a VPN gateway in your VPC."
  type        = bool
  default     = false
}

variable "public_subnet_count" {
  description = "Number of public subnets."
  type        = number
  default     = 2
}

variable "private_subnet_count" {
  description = "Number of private subnets."
  type        = number
  default     = 2
}

variable "public_subnet_cidr_blocks" {
  description = "Available cidr blocks for public subnets"
  type        = list(string)
  default = [
    "10.0.1.0/24",
    "10.0.2.0/24",
    "10.0.3.0/24",
    "10.0.4.0/24",
    "10.0.5.0/24",
    "10.0.6.0/24",
    "10.0.7.0/24",
    "10.0.8.0/24",
  ]
}

variable "private_subnet_cidr_blocks" {
  description = "Available cidr blocks for private subnets"
  type        = list(string)
  default = [
    "10.0.101.0/24",
    "10.0.102.0/24",
    "10.0.103.0/24",
    "10.0.104.0/24",
    "10.0.105.0/24",
    "10.0.106.0/24",
    "10.0.107.0/24",
    "10.0.108.0/24",
  ]
}

variable "enable_blue_env" {
  description = "Enable blue environment"
  type        = bool
  default     = true
}

variable "blue_instance_count" {
  description = "Number of instances in blue environment"
  type        = number
  default     = 2
}
Now take a close look at the following main.tf, it contains all necessary details related to the base infrastructure for this tutorial,
Including a VPC, subnets, an application security group, and a load balancer security group.
main.tf
provider "aws" {
  region = var.region
}

data "aws_availability_zones" "available" {
  state = "available"
}

module "vpc" {
  source  = "terraform-aws-modules/vpc/aws"
  version = "2.64.0"

  name = "main-vpc"
  cidr = var.vpc_cidr_block

  azs             = data.aws_availability_zones.available.names
  private_subnets = slice(var.private_subnet_cidr_blocks, 0, var.private_subnet_count)
  public_subnets  = slice(var.public_subnet_cidr_blocks, 0, var.public_subnet_count)

  enable_nat_gateway = false
  enable_vpn_gateway = var.enable_vpn_gateway
}

module "app_security_group" {
  source  = "terraform-aws-modules/security-group/aws//modules/web"
  version = "3.17.0"

  name        = "web-sg"
  description = "Security group for web-servers with HTTP ports open within VPC"
  vpc_id      = module.vpc.vpc_id

  #   ingress_cidr_blocks = module.vpc.public_subnets_cidr_blocks
  ingress_cidr_blocks = ["0.0.0.0/0"]
}

module "lb_security_group" {
  source  = "terraform-aws-modules/security-group/aws//modules/web"
  version = "3.17.0"

  name        = "lb-sg"
  description = "Security group for load balancer with HTTP ports open within VPC"
  vpc_id      = module.vpc.vpc_id

  ingress_cidr_blocks = ["0.0.0.0/0"]
}

data "aws_ami" "amazon_linux" {
  most_recent = true
  owners      = ["amazon"]

  filter {
    name   = "name"
    values = ["amzn2-ami-hvm-*-x86_64-gp2"]
  }
}

resource "random_pet" "app" {
  length    = 2
  separator = "-"
}

resource "aws_lb" "app" {
  name               = "main-app-${random_pet.app.id}-lb"
  internal           = false
  load_balancer_type = "application"
  subnets            = module.vpc.public_subnets
  security_groups    = [module.lb_security_group.this_security_group_id]
}

resource "aws_lb_listener" "app" {
  load_balancer_arn = aws_lb.app.arn
  port              = "80"
  protocol          = "HTTP"

  default_action {
    type             = "forward"
    target_group_arn = aws_lb_target_group.blue.arn
  }
Toward the end of the file, you'll find aws_lb which represents an ALB.
When the load balancer receives the request, it evaluates the listener rules, defined by aws_lb_listener.app, and routes traffic to the appropriate target group.
This load balancer currently directs all traffic to the blue load balancing target group on port 80.
resource "aws_lb" "app" {
  name               = "main-app-lb"
  internal           = false
  load_balancer_type = "application"
  subnets            = module.vpc.public_subnets
  security_groups    = [module.lb_security_group.this_security_group_id]
}

resource "aws_lb_listener" "app" {
  load_balancer_arn = aws_lb.app.arn
  port              = "80"
  protocol          = "HTTP"

  default_action {
    type             = "forward"
    target_group_arn = aws_lb_target_group.blue.arn
  }
}
blue.tf
Now take a look blue.tf
Here you'll find the configuration to deploy 2 AWS instances that start web servers, which return the text Version 1.0 - #${count.index}This represents the sample application's first version.
This file defines the blue load balancer target group and attaches the blue instances to it using 'aws_lb_target_group_attachment'
resource "aws_instance" "blue" {
  count = var.enable_blue_env ? var.blue_instance_count : 0

  ami                    = data.aws_ami.amazon_linux.id
  instance_type          = "t2.micro"
  subnet_id              = module.vpc.public_subnets[count.index % length(module.vpc.public_subnets)]
  vpc_security_group_ids = [module.app_security_group.this_security_group_id]
  user_data = templatefile("${path.module}/init-script.sh", {
    file_content = "version 1.0 - #${count.index}"
  })

  tags = {
    Name = "version-1.0-${count.index}"
  }
}

resource "aws_lb_target_group" "blue" {
  name     = "blue-tg-${random_pet.app.id}-lb"
  port     = 80
  protocol = "HTTP"
  vpc_id   = module.vpc.vpc_id

  health_check {
    port     = 80
    protocol = "HTTP"
    timeout  = 5
    interval = 10
  }
}

resource "aws_lb_target_group_attachment" "blue" {
  count            = length(aws_instance.blue)
  target_group_arn = aws_lb_target_group.blue.arn
  target_id        = aws_instance.blue[count.index].id
  port             = 80
}
Initialize and apply terraform configuration
terraform init

Apply the terraform configuration
Plan and Apply configuration, confirm application with a yes
terraform plan
terraform apply – yes
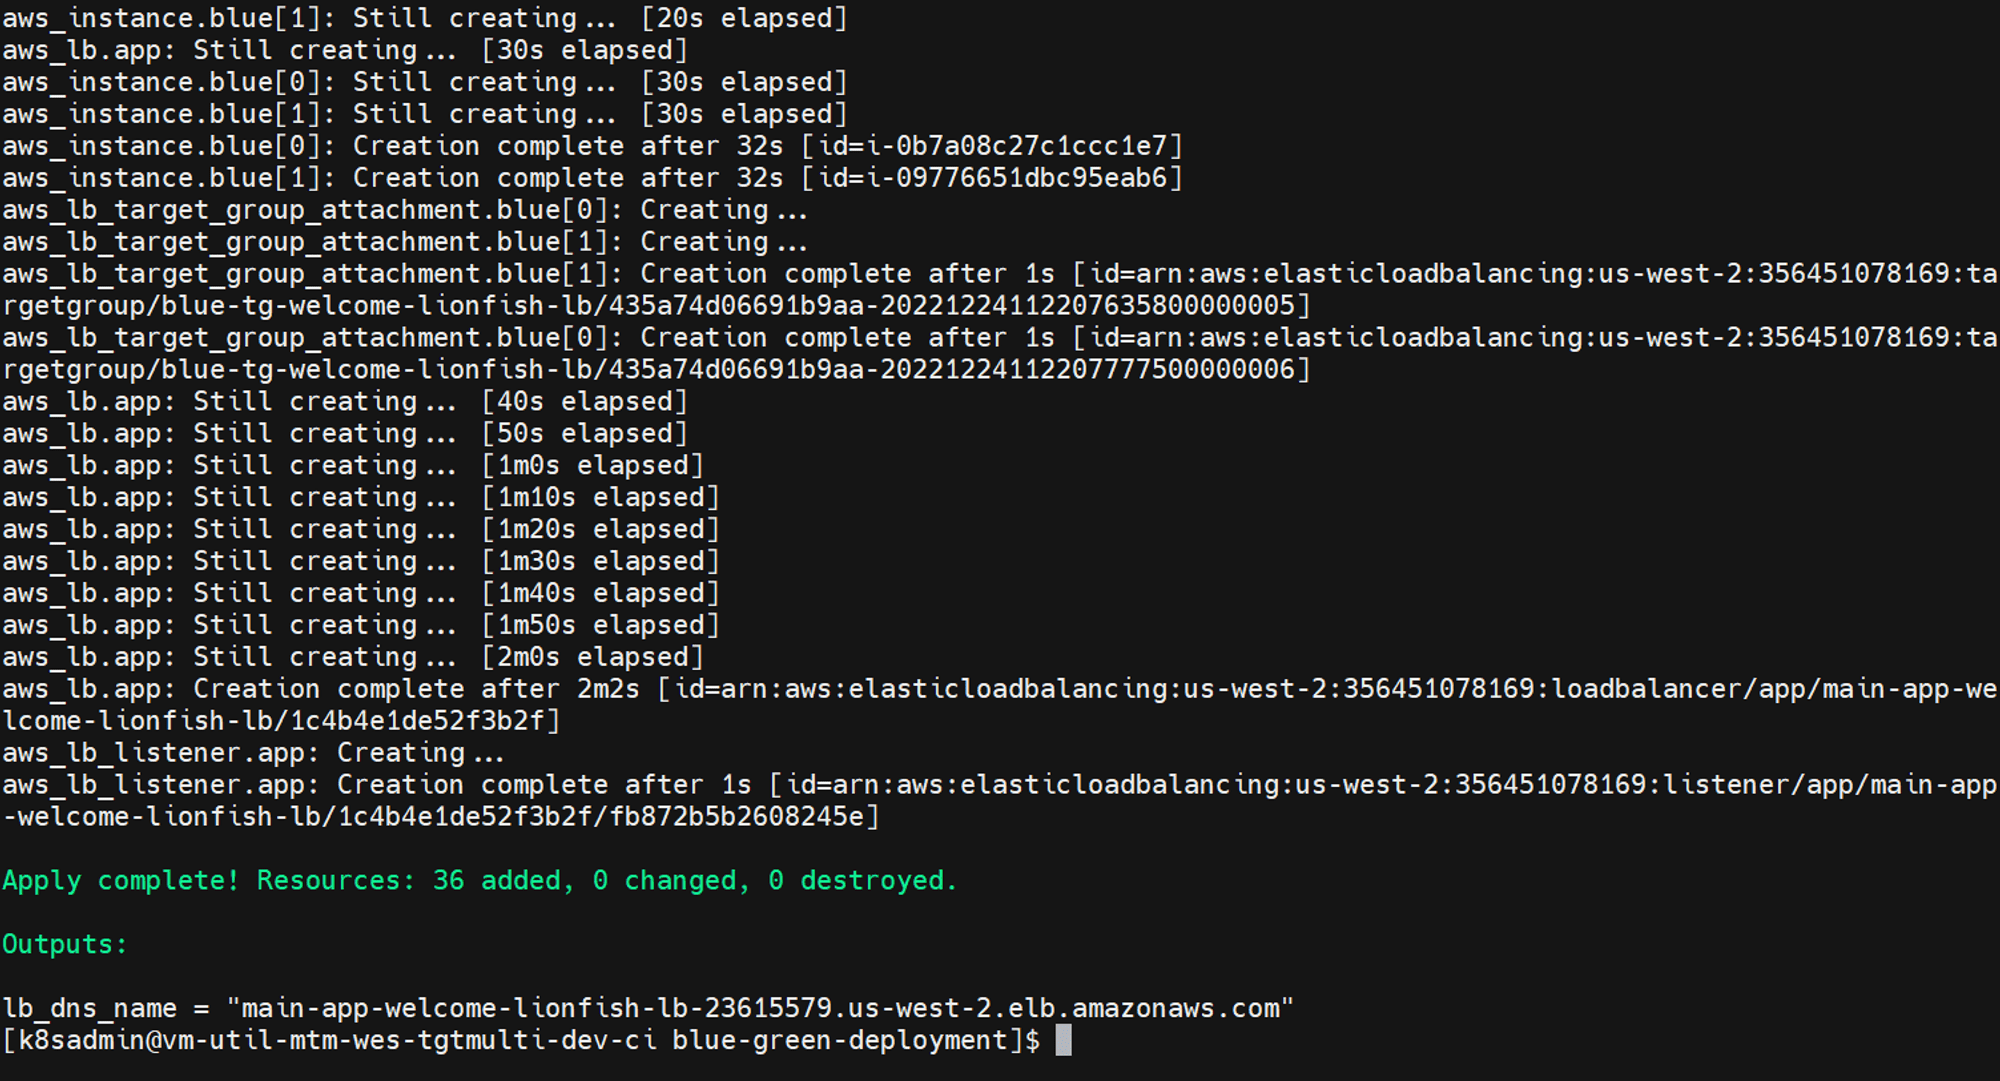
Verify blue environment
Verify that your blue environment was deployed successfully by visiting the load balancer's DNS name in your browser or cURLing it from your terminal.
for i in `seq 1 5`; do curl $(terraform output -raw lb_dns_name); done
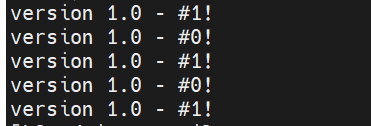
Notice that the load balancer is routing traffic evenly to both VMs in the blue environment.
Adding Green Deployment Environment
So far we have successfully setup the Blue Deployment Environment and tested it as well.
Now let us create our Green deployment Environment.
Will with creating a .tf file called green.tf and paste in the configuration for the sample application's version 1.1
Note*: We are releasing a new version of our Application. The Blue had 1.0 version of the application. with Green we are relasing version 1.1
green.tf
resource "aws_instance" "green" {
  count = var.enable_green_env ? var.green_instance_count : 0

  ami                    = data.aws_ami.amazon_linux.id
  instance_type          = "t2.micro"
  subnet_id              = module.vpc.public_subnets[count.index % length(module.vpc.public_subnets)]
  vpc_security_group_ids = [module.app_security_group.this_security_group_id]
  user_data = templatefile("${path.module}/init-script.sh", {
    file_content = "version 1.1 - #${count.index}"
  })

  tags = {
    Name = "green-${count.index}"
  }
}

resource "aws_lb_target_group" "green" {
  name     = "green-tg-${random_pet.app.id}-lb"
  port     = 80
  protocol = "HTTP"
  vpc_id   = module.vpc.vpc_id

  health_check {
    port     = 80
    protocol = "HTTP"
    timeout  = 5
    interval = 10
  }
}

resource "aws_lb_target_group_attachment" "green" {
  count            = length(aws_instance.green)
  target_group_arn = aws_lb_target_group.green.arn
  target_id        = aws_instance.green[count.index].id
  port             = 80
}
this configuration is similar to the blue application, except that the web servers return green #${count.index}
Update variables.tf to support Green deployment
Now go back and Add the following variables to variables.tf
variable "enable_green_env" {
  description = "Enable green environment"
  type        = bool
  default     = true
}

variable "green_instance_count" {
  description = "Number of instances in green environment"
  type        = number
  default     = 2
}
Apply the Green deployment with Terraform
Apply these Green changes using terraform apply
terraform apply
You can validate that even though you deployed your green environment, the load balancer is currently not routing traffic to it.
Verify Green environment
Verify that your Green environment was deployed successfully by visiting the load balancer's DNS name in your browser or cURLing it from your terminal.
for i in `seq 1 5`; do curl $(terraform output -raw lb_dns_name); done
But you might see the traffic is still going to Blue.
To control the Blue to Green transition and phased Canary roll out, we have to make some more modification
Terraform Traffic Distribution Map
We are going to add a controller variable that takes care of setting the traffic percentage between blue and green.
In this step, you will add a traffic_distribution variable and traffic_dist_map local variable to your configuration. The configuration will automatically assign the target group's weight based on the traffic_distribution variable.
First, add the configuration for the local value and traffic distribution variable to variables.tf.
locals {
  traffic_dist_map = {
    blue = {
      blue  = 100
      green = 0
    }
    blue-90 = {
      blue  = 90
      green = 10
    }
    split = {
      blue  = 50
      green = 50
    }
    green-90 = {
      blue  = 10
      green = 90
    }
    green = {
      blue  = 0
      green = 100
    }
  }
}

variable "traffic_distribution" {
  description = "Levels of traffic distribution"
  type        = string
}
There are five traffic distributions defined by the local variable. Each traffic distribution specifies the weight for the respective target group.
Decoding the Distribution Logic
- The
bluetarget distribution is what is currently being applied 100% of the traffic is routed to the blue environment, 0% to the green environment. - The
blue-90target distribution simulates canary testing. This canary test will route 90% of the traffic to the blue environment and 10% to the green environment. - The
splittarget distribution builds on top of canary testing by increasing traffic to the green environment. This will split the traffic evenly between the blue and green environments (50/50). - The
green-90target distribution increases traffic to the green environment — 90% of the traffic is routed to the green environment, and 10% to the blue environment. - The
greentarget distribution will completely promote the green environment — the load balancer will route 100% of the traffic to the green environment.
Updating the Main.tf to Support this traffic distribution Logic
The previous version of main.tf was designed to direct all traffic to the blue environment with no control.
As we have set the target_group_arn as the aws_lb_target_group.blue.arn
resource "aws_lb_listener" "app" {
  load_balancer_arn = aws_lb.app.arn
  port              = "80"
  protocol          = "HTTP"
  default_action {
    type             = "forward"
    target_group_arn = aws_lb_target_group.blue.arn
  }
Now to add more control and to switch the traffic between Blue and Green to perform a Phased rollout aka Canary deployment, we need to make some changes
We basically have to say what percentage of traffic should be routed through Blue and Green.
As we have already created a few predefined templates such as
- blue
- blue-90
- split
- green
- green-90
Now we can use these templates to control the traffic between Blue and Green and achieve the canary deployment
Now let us Modify the aws_lb_listener.app's default action block in main.tf to match the following.
resource "aws_lb_listener" "app" {
  ## ...
    default_action {
  type             = "forward"
   forward {
     target_group {
       arn    = aws_lb_target_group.blue.arn
       weight = lookup(local.traffic_dist_map[var.traffic_distribution], "blue", 100)
     }

     target_group {
       arn    = aws_lb_target_group.green.arn
       weight = lookup(local.traffic_dist_map[var.traffic_distribution], "green", 0)
     }

     stickiness {
       enabled  = false
       duration = 1
     }
       }
    }
}
As you can see we have two target groups in the lb listener configuration and we are using lookup to take the value from traffic_dist_map
The traffic_dist_map variable is the controller where we define the traffic for blue and green for each distribution logic
Shifting the traffic to Green using the Traffic distribution Logic - blue-90
Now let’s start shifting traffic to a green environment gradually
Apply your configuration to run a canary test by setting the traffic_distribution variable to blue-90
By using this value, we are defining 10% traffic to go to Green and 90% to Blue.
$ terraform apply -var 'traffic_distribution=blue-90'
Now let us Verify canary deployment traffic.
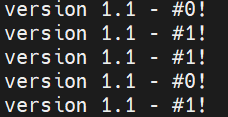
Verify that your load balancer is now routing 10% of the traffic to the green environment.
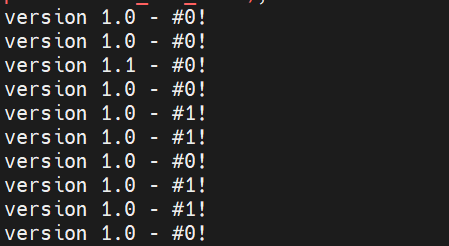
Notice that 10% of the traffic was routed to the green environment. (Version 1.1)
Applying the Traffic distribution Logic - Split 50/50
Now let us Increase the traffic to a green environment by using different distribution logic/setting
Let us this Split . This sets Both green and Blue to 50% equal.
$ terraform apply -var 'traffic_distribution=split'
Apply your configuration to run a canary test by setting the traffic_distribution variable to split.
Now create some traffic to your application using the same for loop we have used earlier and see the traffic distribution.
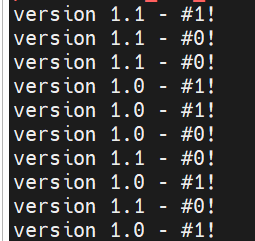
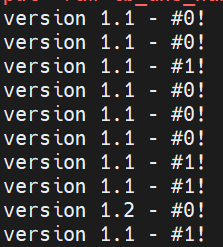
Verify that your load balancer is now splitting the traffic to the blue and green environments.
for i in `seq 1 10`; do curl $(terraform output -raw lb_dns_name); done
Notice how 50% of the traffic was routed to the blue environment and the rest to the green environment.
Promoting the Green deployment to 100%
Now let us promote the green environment to 100% ( publishing the new version)
Now that both the canary and rolling deployments were successful, route 100% of the load balancer's traffic to the green environment to promote it.
terraform apply -var 'traffic_distribution=green'
Apply your configuration to promote the green environment by setting the traffic_distribution variable to green.
verify load-balancing traffic
for i in `seq 1 5`; do curl $(terraform output -raw lb_dns_name); done
Congrats! You have successfully promoted your green environment with near-zero downtime.
Now you can scale down the blue environment
Disabling the Blue Environment as the Green is LIVE in production
Now that you have verified that all traffic is directed to your green environment, it is safe to disable the blue environment.
Apply your configuration to disable the blue environment by setting the traffic_distribution variable to green and enable_blue_env to false.
$ terraform apply -var 'traffic_distribution=green' -var 'enable_blue_env=false'
With this setting, we have disabled the Blue Environment completely.
Releasing a New Version of the Application - Blue to Green
Now let’s deploy a new version
As we have deployed the application's Version 1.0 on the blue environment and the new version, 1.1, On the green environment.
When you have promoted the green environment, it became the current production environment.
Deploy the next release on the blue environment, which minimizes modifications to your existing configuration by alternating the blue and green environments.
Let’s deploy a new application version, and update the blue environment instances.
Modify the aws_instance.blue's user_data and tags blocks in blue.tf to display a new version number, 1.2.
Enable new version environment
Apply your configuration to provision the new version of your infrastructure. Notice that the traffic_distributionvariable is set to green.
This is because the green environment contains your current production environment.
terraform apply -var 'traffic_distribution=green'
Shifting traffic to the blue with Distribution logic green-90
Now that the new version is deployed to the blue environment, start shifting traffic to it.
Apply your configuration to run a canary test by setting the traffic_distribution variable to green-90.
terraform apply -var 'traffic_distribution=green-90'
Once the terraform apply complete, Verify that the load balancer is routing all traffic to the green environment.
Promote blue environment
Once the apply complete, Verify that the load balancer is routing all traffic to the green environment.
Now that the canary deployment is successful, fully promote your blue environment.
Make the Blue as the new production
Apply your configuration to promote the blue environment by setting the traffic_distribution variable to blue.
$ terraform apply -var 'traffic_distribution=blue'
Verify that your load balancer is routing all traffic to the blue environment.
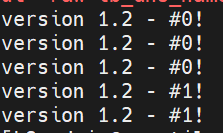
Now Your production is Live with version 1.2 on Blue Environment. Now you can use the green to release version 1.3 with zero downtime.
Congrats! You have successfully used blue-green, canary and rolling deployments to schedule two releases.
Destroy your infrastructure to avoid unnecessary costs
$ terraform destroy
GitHub Repo with Full Source code
You can find the completed and perfectly working code in our Github repository
To download you can simply clone
git clone https://github.com/Gritfy/terraform-blue-green.git
AWS Blue-Green Deployments with Jenkins
If you do not want to Control Blue Green deployments this way with Terraform. You can opt to use our Jenkins Blue Gree deployment strategy.
Refer to our exclusive article on how to perform blue-green deployment with Jenkins on AWS
AWS Blue Green Deployment Example – Jenkins | Devops Junction
Conclusion
In this tutorial, You got a basic understanding of the blue-green deployment strategy and canary tests and you used an ALB with terraform scripts to incrementally deploy a new application release.
In addition, you implemented feature toggles to codify and run these advanced deployment techniques in a consistent, reliable manner.
If you have any questions for us. please feel free to reach out on the comments section
Thanks for reading!!
Co-Authored By
Tapan H - Sarav AK
Follow us onFacebook orTwitter For more practical videos and tutorials. Subscribe to our channel Find me on Linkedin My Profile For any Consultation or to hire us [email protected] If you like this article. Show your Support! Buy me a Coffee.
Signup for Exclusive "Subscriber-only" Content