Kubernetes has been a disruptive change in IT Infrastructure. It had been widely adopted across the industry
Managed Kubernetes are the best choice if you do not want to face the hurdles of setting up K8s from scratch Unless you want to deep learn Kubernetes.
AWS a market leader in Cloud Infrastructure as a service has a perfectly tailored solution for Kubernetes called EKS - Elastic Kubernetes Services.
Creating EKS Cluster is an easy task and they provide special command-line tools like eksctl to create and manage EKS effortlessly
But Can we create EKS Clusters with eksctl commands for production? What if we want to automate it and customize it and add some IAC(infrastructure as code) standards to it.
When we talk about Infrastructure implementation and automation. Terraform is undeniably a leader and best for multi-cloud solutions and platform-agnostic solutions.
In this article, we are going to see how to create EKS Cluster with Terraform with built-in Karpenter auto-scaling capability
So what is Karpenter
Karpenter is a cluster auto scaler that takes care of scaling up and down worker nodes in your cluster for AWS EKS. As of Feb 2022 only AWS is supported by Karpenter
It takes care of Compute provisioning for your EKS cluster and enables you to add on-demand and spot instances to your cluster.
If you have exposure to EKS world or any managed Kubernetes, you might have used another product named cluster autoscaler for the same purpose
While the cluster autoscaler had been solving the purpose and widely accepted. Karpenter comes with various best things to offer.
Here are some of the key items, I can say Karpenter is doing great
- Creating the right capacity or the computing power based on the number of pods and resources they need. For example. If two pods are pending it can just create
t3.mediumor small instance automatically. if twenty pods are pending it can choose the right to compute power likec5.2xlarge- Cluster auto scaler cannot do this right. - Implementation of Karpenter is really easy and well documented - Cluster auto scaler falls behind a little.
- Since it adds the right compute power for the job. Karpenter offers a lot of cost-saving compared to the Cluster auto scaler.
There are more I can list but these are the ones to be highlighted.
Prerequisites
You need to install these tools and configure them before proceeding.
- AWS CLI
kubectl- the Kubernetes CLIterraform- infrastructure-as-code tool made by HashiCorphelm- the package manager for Kubernetes
Log in to the AWS CLI with a user that has sufficient privileges to create a cluster.
Configuring Terraform Workspace
The steps given below are designed for mac/Linux users. If you are using windows you can use either Windows Subsystem for Linux or git bash to be able to run these bash commands.
Set Environment variables
Before starting up, we need to set some environment variables like CLUSTER_NAME
export CLUSTER_NAME=gritfy-eks-karpenter
AWS CLI is powering our authentication needed for Terraform to access the AWS account and to create Terraform.
So you can set the following variables according to your requirement
export AWS_DEFAULT_REGION=us-east-2
export AWS_DEFAULT_PROFILE=personal
If you want to use the same default region configured during the aws configure this may not be needed.
The AWS_DEFAULT_PROFILE is to let terraform know which AWS CLI profile to use for authentication and to connect. This is needed if you are having multiple AWS Named profiles
Create Terraform files
Create a new directory as a workspace and copy the following .tf files
Variables.tf file
Create a new file named variables.tf and copy the following content to the file
this is to define the variables, that are needed for the project. In case no value is provided, it would prompt during the runtime
variable "cluster_name" {
  description = "The name of the cluster"
  type        = string
}
we can put default values for the variables by using tfvars file but we are not doing that here.
The main.tf file
Create a new file named main.tfand copy the following content into that file.
It does three things.
- Creates a
vpcwith subnets and the cluster-name would be used as a vpc name. - Creating a Kubernetes cluster using
eksmodule. A version of the cluster is defined as1.21 - Instance profile creation with policy attachment. It creates a new instance profile in this format
KarpenterNodeInstanceProfile-{cluster-name}
module "vpc" {
  source = "terraform-aws-modules/vpc/aws"

  name = var.cluster_name
  cidr = "10.0.0.0/16"

  azs             = ["us-east-2a", "us-east-2b", "us-east-2c"]
  private_subnets = ["10.0.1.0/24", "10.0.2.0/24", "10.0.3.0/24"]
  public_subnets  = ["10.0.101.0/24", "10.0.102.0/24", "10.0.103.0/24"]

  enable_nat_gateway     = true
  single_nat_gateway     = true
  one_nat_gateway_per_az = false

  private_subnet_tags = {
    "kubernetes.io/cluster/${var.cluster_name}" = "owned"
    "karpenter.sh/discovery" = var.cluster_name
  }
}

module "eks" {
  source          = "terraform-aws-modules/eks/aws"
  version         = "<18"

  cluster_version = "1.21"
  cluster_name    = var.cluster_name
  vpc_id          = module.vpc.vpc_id
  subnets         = module.vpc.private_subnets
  enable_irsa     = true

  # Only need one node to get Karpenter up and running
  worker_groups = [
    {
      instance_type = "t3a.medium"
      asg_max_size  = 1
    }
  ]

  tags = {
    "karpenter.sh/discovery" = var.cluster_name
  }
}

# Instance Profile

data "aws_iam_policy" "ssm_managed_instance" {
  arn = "arn:aws:iam::aws:policy/AmazonSSMManagedInstanceCore"
}

resource "aws_iam_role_policy_attachment" "karpenter_ssm_policy" {
  role       = module.eks.worker_iam_role_name
  policy_arn = data.aws_iam_policy.ssm_managed_instance.arn
}

resource "aws_iam_instance_profile" "karpenter" {
  name = "KarpenterNodeInstanceProfile-${var.cluster_name}"
  role = module.eks.worker_iam_role_name
}
The providers.tf file
To configure the aws provider right and to define the region and the profile to be used.
provider "aws" {
  region = "us-east-2"
  profile = "personal"
}
Terraform init and apply - Creating EKS
Now we have all the files copied in place, now it's time to initialize terraform and apply our configuration.
At this point, we assume your directory looks like this
Karpenter-test|⇒ ls -rlt
total 40
-rw-r--r – 1 sarav staff 1497 Feb 6 20:03 main.tf
-rw-r--r – 1 sarav staff 692 Feb 6 20:03 helm.tf
-rw-r--r – 1 sarav staff 1289 Feb 6 20:03 irsa.tf
-rw-r--r – 1 sarav staff 92 Feb 6 20:03 variables.tf
-rw-r--r – 1 sarav staff 64 Feb 6 20:03 providers.tf
Run terraform init
Karpenter-test|⇒ terraform init
Initializing modules...
Downloading terraform-aws-modules/eks/aws 17.24.0 for eks...
- eks in .terraform/modules/eks
- eks.fargate in .terraform/modules/eks/modules/fargate
- eks.node_groups in .terraform/modules/eks/modules/node_groups
Downloading terraform-aws-modules/iam/aws 4.7.0 for iam_assumable_role_karpenter...
- iam_assumable_role_karpenter in .terraform/modules/iam_assumable_role_karpenter/modules/iam-assumable-role-with-oidc
Downloading terraform-aws-modules/vpc/aws 3.11.5 for vpc...
- vpc in .terraform/modules/vpc

Initializing the backend...

Initializing provider plugins...
- Finding hashicorp/kubernetes versions matching ">= 1.11.1"...
- Finding hashicorp/cloudinit versions matching ">= 2.0.0"...
- Finding terraform-aws-modules/http versions matching ">= 2.4.1"...
- Finding latest version of hashicorp/helm...
- Finding hashicorp/aws versions matching ">= 2.23.0, >= 3.56.0, >= 3.63.0"...
- Finding hashicorp/local versions matching ">= 1.4.0"...
- Installing hashicorp/kubernetes v2.7.1...
- Installed hashicorp/kubernetes v2.7.1 (signed by HashiCorp)
- Installing hashicorp/cloudinit v2.2.0...
- Installed hashicorp/cloudinit v2.2.0 (signed by HashiCorp)
- Installing terraform-aws-modules/http v2.4.1...
- Installed terraform-aws-modules/http v2.4.1 (self-signed, key ID B2C1C0641B6B0EB7)
- Installing hashicorp/helm v2.4.1...
- Installed hashicorp/helm v2.4.1 (signed by HashiCorp)
- Installing hashicorp/aws v3.74.0...
- Installed hashicorp/aws v3.74.0 (signed by HashiCorp)
- Installing hashicorp/local v2.1.0...
- Installed hashicorp/local v2.1.0 (signed by HashiCorp)

Partner and community providers are signed by their developers.
If you'd like to know more about provider signing, you can read about it here:
https://www.terraform.io/docs/cli/plugins/signing.html

Terraform has created a lock file .terraform.lock.hcl to record the provider
selections it made above. Include this file in your version control repository
so that Terraform can guarantee to make the same selections by default when
you run "terraform init" in the future.

Terraform has been successfully initialized!

You may now begin working with Terraform. Try running "terraform plan" to see
any changes that are required for your infrastructure. All Terraform commands
should now work.

If you ever set or change modules or backend configuration for Terraform,
rerun this command to reinitialize your working directory. If you forget, other
commands will detect it and remind you to do so if necessary.
Run terraform apply with $CLUSTER_NAME
terraform apply -var cluster_name=$CLUSTER_NAME
You might probably get the following error
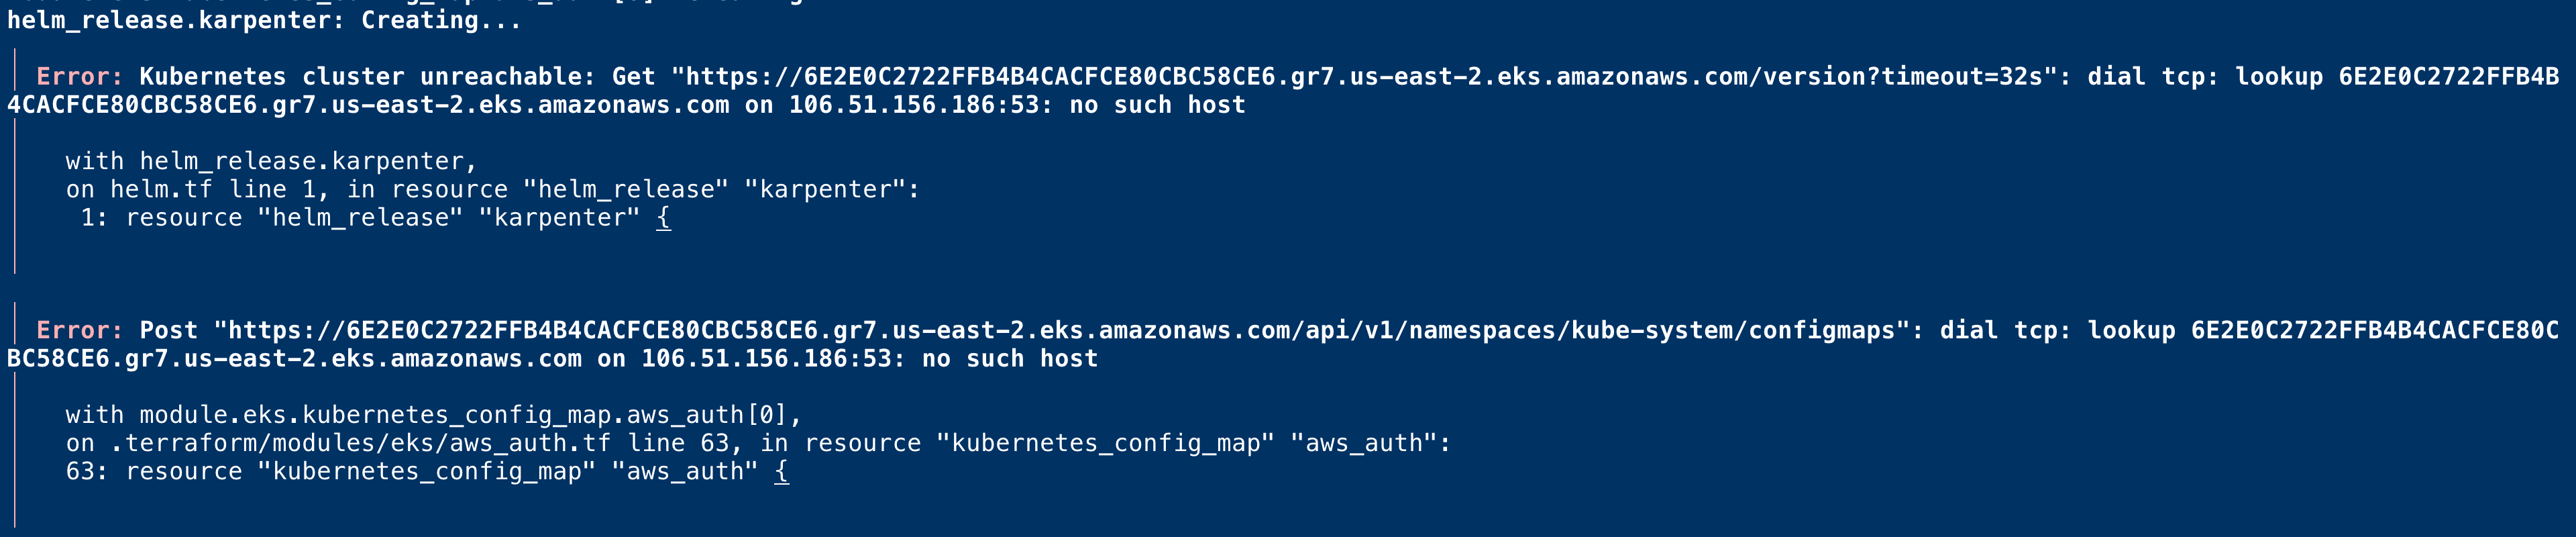
This is because of authorization. you can resolve it by setting an environment variable.
The Kubeconfig file should have been created already on the current directory with the cluster name. kubeconfig_{cluster-name}

You need to update your KUBECONFIGvariable to refer to this file along with KUBE_CONFIG_PATHvariable.
⇒ export KUBECONFIG=${PWD}/kubeconfig_${CLUSTER_NAME}
⇒ export KUBE_CONFIG_PATH=$KUBECONFIG
After doing this. you can retry and it would be successful this time
Now we have the cluster ready. Now we need to install Karpenter in this EKS Cluster.
Before we can install the Karpenter using the helm chart, we need to do Create an IAM role to give necessary access to Karpenter for managing the nodes like launching nodes, terminating nodes etc.
Creating Karpenter Controller IAM Role
In the same workspace directory, create a new file named irsa.tf and paste the following config
This terraform config does the following things
- Creating an AWS IAM Role
- Attaching a policy
- Authorizing the Service Account to assume the role - IRSA.( IAM Roles for Service Accounts)
We will create the ServiceAccount and connect it to this role during the Helm chart install.
Now we are creating an IAM role karpenter-policy-${var.cluster_name}its an assumable role will later be associated with EKS Service Account using IRSA principle
irsa.tf
module "iam_assumable_role_karpenter" {
  source                        = "terraform-aws-modules/iam/aws//modules/iam-assumable-role-with-oidc"
  version                       = "4.7.0"
  create_role                   = true
  role_name                     = "karpenter-controller-${var.cluster_name}"
  provider_url                  = module.eks.cluster_oidc_issuer_url
  oidc_fully_qualified_subjects = ["system:serviceaccount:karpenter:karpenter"]
}

resource "aws_iam_role_policy" "karpenter_controller" {
  name = "karpenter-policy-${var.cluster_name}"
  role = module.iam_assumable_role_karpenter.iam_role_name

  policy = jsonencode({
    Version = "2012-10-17"
    Statement = [
      {
        Action = [
          "ec2:CreateLaunchTemplate",
          "ec2:CreateFleet",
          "ec2:RunInstances",
          "ec2:CreateTags",
          "iam:PassRole",
          "ec2:TerminateInstances",
          "ec2:DescribeLaunchTemplates",
          "ec2:DescribeInstances",
          "ec2:DescribeSecurityGroups",
          "ec2:DescribeSubnets",
          "ec2:DescribeInstanceTypes",
          "ec2:DescribeInstanceTypeOfferings",
          "ec2:DescribeAvailabilityZones",
          "ssm:GetParameter"
        ]
        Effect   = "Allow"
        Resource = "*"
      },
    ]
  })
}
Now we have a terraform config file for the Karpenter controller IAM role. Let us add one more config file to take care of the karpenter installation using helm.
Installing Karpenter to EKS with Helm and Terraform.
using helm_release resource of terraform we are going to release/install karpenter to our cluster.
we are also configuring the following variable to let Karpenter know the IAM role that it can assume
serviceAccount.annotations.eks.amazonaws.com/role-arn
For this variable, we will be passing the IAM role we have craeted in the irsa.tf config file
module.iam_assumable_role_karpenter.iam_role_arn
Now, Copy the following config and save it as helm.tf in our workspace directory we have been using so far
helm.tf
resource "helm_release" "karpenter" {
  depends_on       = [module.eks.kubeconfig]
  namespace        = "karpenter"
  create_namespace = true

  name       = "karpenter"
  repository = "https://charts.karpenter.sh"
  chart      = "karpenter"
  version    = "v0.6.0"

  set {
    name  = "serviceAccount.annotations.eks\\.amazonaws\\.com/role-arn"
    value = module.iam_assumable_role_karpenter.iam_role_arn
  }

  set {
    name  = "controller.clusterName"
    value = var.cluster_name
  }

  set {
    name  = "controller.clusterEndpoint"
    value = module.eks.cluster_endpoint
  }

  set {
    name  = "aws.defaultInstanceProfile"
    value = aws_iam_instance_profile.karpenter.name
  }
}
so far we have added two files named irsa.tf and helm.tf Now your directory should look something like this

You can see the new files on the top.
Enable Spot instances in your AWS Account ( If not used spot instances before )
Before we move on to apply these configuration. you need to enable Spot instance support if you have not used Spot instances in your AWS account before
aws iam create-service-linked-role – aws-service-name spot.amazonaws.comIf the role has already been successfully created, you will see:
An error occurred (InvalidInput) when calling the CreateServiceLinkedRole operation:
Service role name AWSServiceRoleForEC2Spot has been taken in this account,
please try a different suffix.
Re-initialize Terraform and apply
Since we are adding two new modules with these two new configuration files. we need to reinitialize with terraform init on the same workspace
Note*: Re-initialize will not do any changes to your EKS Cluster which has been already created. so no worries
Now execute the following commands to initialize and apply
terraform init
terraform apply -var cluster_name=$CLUSTER_NAME
Upon Successful, To verify if the IAM role is created fine. you can use the following command. ( we are using jq command for filtering. you must have it installed before using it)
aws iam list-roles – profile personal|jq '.Roles[] | select(.RoleName == "karpenter-controller-gritfy-eks-karpenter")'
you would see some output like this

Connect to your EKS using Kubectl and Validate Karpenter
Since our EKS cluster is ready and the IAM roles are ready. You should be able to connect to our EKS cluster using kubectl.
since the KUBECONFIG variable is pointing to the current directory the kubectl would be able to use the context and connect to your EKS cluster with no issues

Since you are able to connect to EKS cluster already. you should also be able to list the helm release and karpenter installed
use the following command to list the helm releases. It should show our karpetner helm release
helm list – all-namespaces

Deploying the Provisioner
Provisioner is to instruct the karpenter what type of machines to launch like spot or on-demand etc.
Also to manage the Subnets and the security groups which are necessary for the karpenter to launch the nodes.
A single Karpenter provisioner is capable of handling many different pod shapes. Karpenter makes scheduling and provisioning decisions based on pod attributes such as labels and affinity. In other words, Karpenter eliminates the need to manage many different node groups.
We are going to create a default provisioner. This provisioner configures instances to connect to your cluster’s endpoint and discovers resources like subnets and security groups using the cluster’s name.
We are going with a simple configuration for our provisioner but you can control or extend your provisioner configuration further. refer provisioner api
cat <<EOF | kubectl apply -f -
apiVersion: karpenter.sh/v1alpha5
kind: Provisioner
metadata:
  name: default
spec:
  requirements:
    - key: karpenter.sh/capacity-type
      operator: In
      values: ["spot"]
  limits:
    resources:
      cpu: 1000
  provider:
    subnetSelector:
      karpenter.sh/discovery: ${CLUSTER_NAME}
    securityGroupSelector:
      karpenter.sh/discovery: ${CLUSTER_NAME}
  ttlSecondsAfterEmpty: 30
EOF
You can execute this command in your current terminal and it would create a new provisioner and name it default
As you can see in the configuration, we are using spot instances for our capacity while you can change it to on-demand or use both.
The limits instructs karpenter to create new nodes when the number of CPUs has reached 1000 this way you can set a max limit of nodes that can be created by Karpenter.
Another important element is the selectorthis helps the newly added karpenter nodes to choose the right subnetsand security groups
You need to handle this carefully if you are trying to set up Karpenter in your existing cluster. Sometimes instead of using selector by tags. you can simply go for defining the actual subnets and security groups yourself. ( its an option)
in our case, we are going to choose the subnets and security groups by the tag
karpenter.sh/discovery: ${CLUSTER_NAME}
These tags are defined by us in the main.tf file for the VPC and EKS configuration. You can go back and refer to confirm.
Listing the Subnets and Security Groups by Tag - to Validate
You can try to mimic this behaviour and try to list security groups and subnets having this tag using AWS CLI
# To List Security Groups
aws ec2 describe-security-groups – query "SecurityGroups[? Tags[? (Key=='karpenter.sh/discovery') && (Value=='$CLUSTER_NAME')]].GroupId"

# To list Subnets
aws ec2 describe-subnets – query "Subnets[? Tags[? (Key=='karpenter.sh/discovery') && (Value=='$CLUSTER_NAME')]].SubnetId"
Here is the output of these commands at my end

Now deploy an application to EKS Cluster
Till there are no deployments in our cluster. So let us deploy something.
we are going to deploy our famous aksarav/tomcat8 image
This image is covered in detail in our previous articles
Now let us deploy it.
This single line command would do the deployment. ( you can create a deployment manifest too and use kubectl apply -f)
kubectl create deployment tomcatinfra – image=saravak/tomcat8
Here is the quick terminal record
As you might have seen in the terminal capture, we deployed and tested the EKS Cluster and tried to scale the deployment and everything works fine.
Now it's a time to test Karpenter
Scale our Deployment and Test the Karpenter
Now it's time to validate, If Karpenter is able to add nodes and auto-scale in case we have pods in pending state and not scheduled due to capacity
Now we are going to scale our tomcatinfra deployment to higher levels to validate and see how Karpenter manages it
After a short time, we will scale it down to see if it brings down the node count
Here is the complete terminal record that shows the Karpenter doing its magic.
As shown in the terminal record. You can see the Karpenter logs adding and removing nodes based on demand and need.

You might find these kinds of logs during the even of Scaling up Nodes
2022-02-06T21:58:32.568Z INFO controller.provisioning Batched 39 pods in 1.761625115s {"commit": "62c4546", "provisioner": "default"}
2022-02-06T21:58:33.034Z INFO controller.provisioning Computed packing of 1 node(s) for 39 pod(s) with instance type option(s) [c4.xlarge c5.xlarge c5a.xlarge c6i.xlarge c5ad.xlarge c5d.xlarge c5n.xlarge m6i.xlarge m5.xlarge t3a.xlarge m5dn.xlarge t3.xlarge m5d.xlarge m4.xlarge m5zn.xlarge m5a.xlarge m5ad.xlarge m5n.xlarge i3.xlarge r4.xlarge] {"commit": "62c4546", "provisioner": "default"}
2022-02-06T21:58:35.834Z INFO controller.provisioning Launched instance: i-0ad3abd70a5de2d2b, hostname: ip-10-0-3-218.us-east-2.compute.internal, type: c5.xlarge, zone: us-east-2c, capacityType: spot {"commit": "62c4546", "provisioner": "default"}
2022-02-06T21:58:35.909Z INFO controller.provisioning Bound 39 pod(s) to node ip-10-0-3-218.us-east-2.compute.internal {"commit": "62c4546", "provisioner": "default"}
In case of Scaling down due to no usage on the node. you can find these kind log messages
2022-02-06T22:03:11.685Z INFO controller.node Added TTL to empty node {"commit": "62c4546", "node": "ip-10-0-3-218.us-east-2.compute.internal"}
2022-02-06T22:03:41.699Z INFO controller.node Triggering termination after 30s for empty node {"commit": "62c4546", "node": "ip-10-0-3-218.us-east-2.compute.internal"}
2022-02-06T22:03:41.725Z INFO controller.termination Cordoned node {"commit": "62c4546", "node": "ip-10-0-3-218.us-east-2.compute.internal"}
2022-02-06T22:03:41.935Z INFO controller.termination Deleted node {"commit": "62c4546", "node": "ip-10-0-3-218.us-east-2.compute.internal"}
Conclusion
Hope this article covers Everything you need to know about the Karpenter Setup on EKS.
To Summarize this is what we did so far
- Created EKS Cluster and VPC using Terraform
- Instance Profile Creation and Policy Attachment
- Created IAM Roles for Karpenter to Assume roles using IARC
- Installed Karpenter with Helm release Terraform.
- Created and Deployed a Provisioner
- Deployed Sample Application to test EKS Cluster
- Scaled the Sample application up and down to validate if Karpenter add and remove nodes.
So that's all about it.
Hope it helps. Let us know your feedback or queries on comments.
Cheers
Sarav AK

Follow me on Linkedin My Profile Follow DevopsJunction onFacebook orTwitter For more practical videos and tutorials. Subscribe to our channel
Signup for Exclusive "Subscriber-only" Content